There are several ways to create new items in Strategic Roadmaps, depending on the view you’re using.
If you already have items that you want to import into your roadmap, you can use the Import from CSV feature to do so.
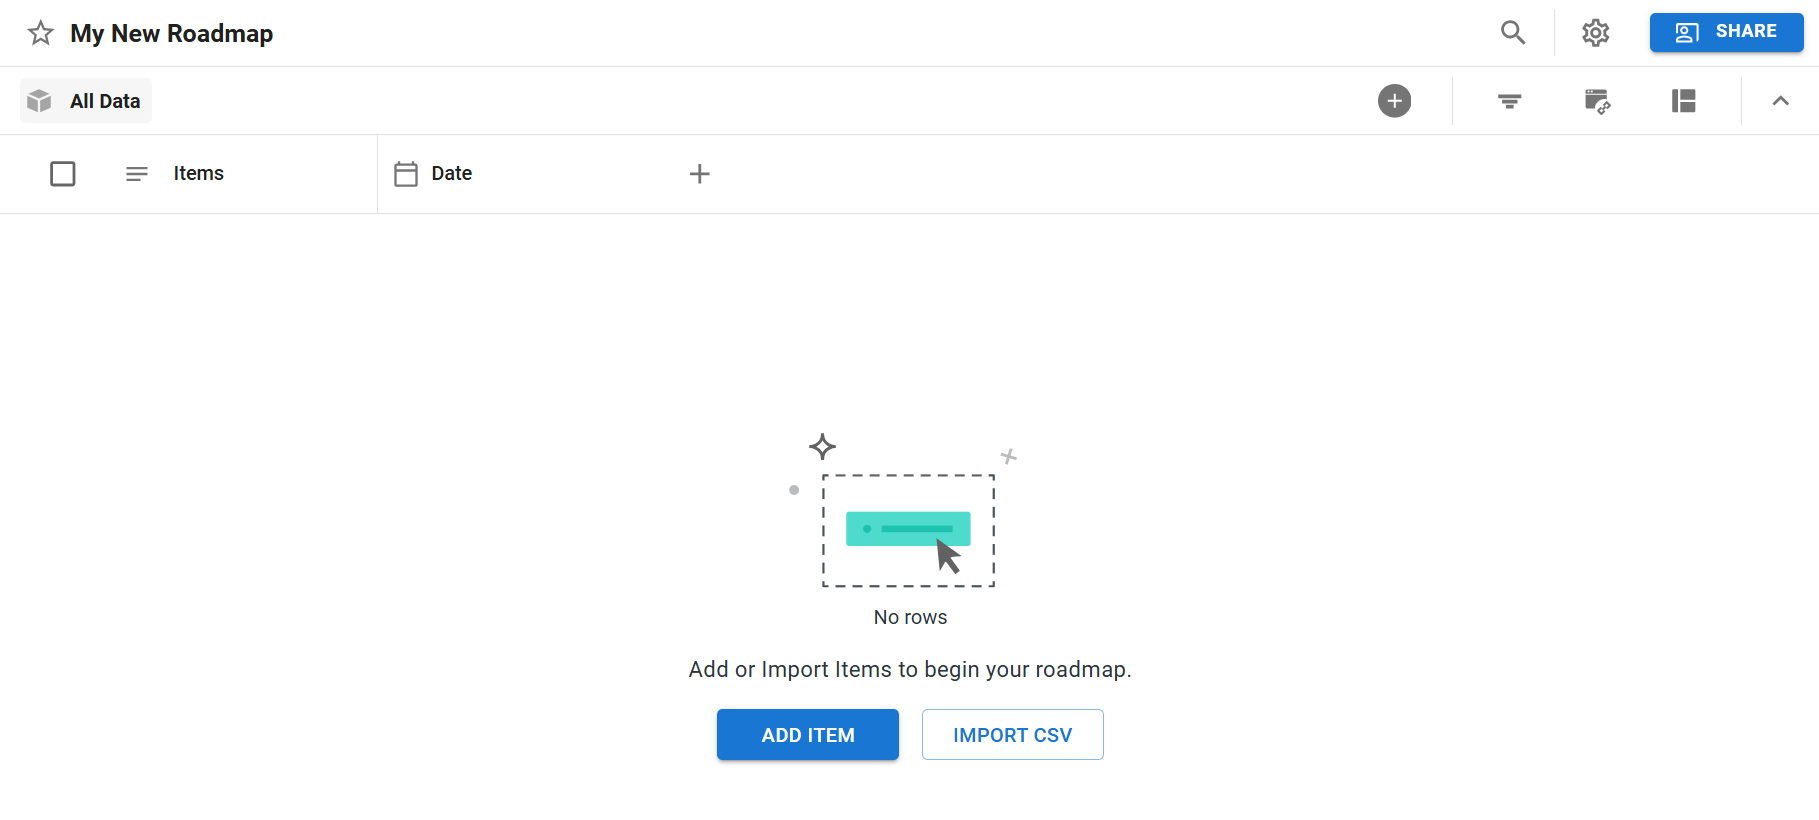
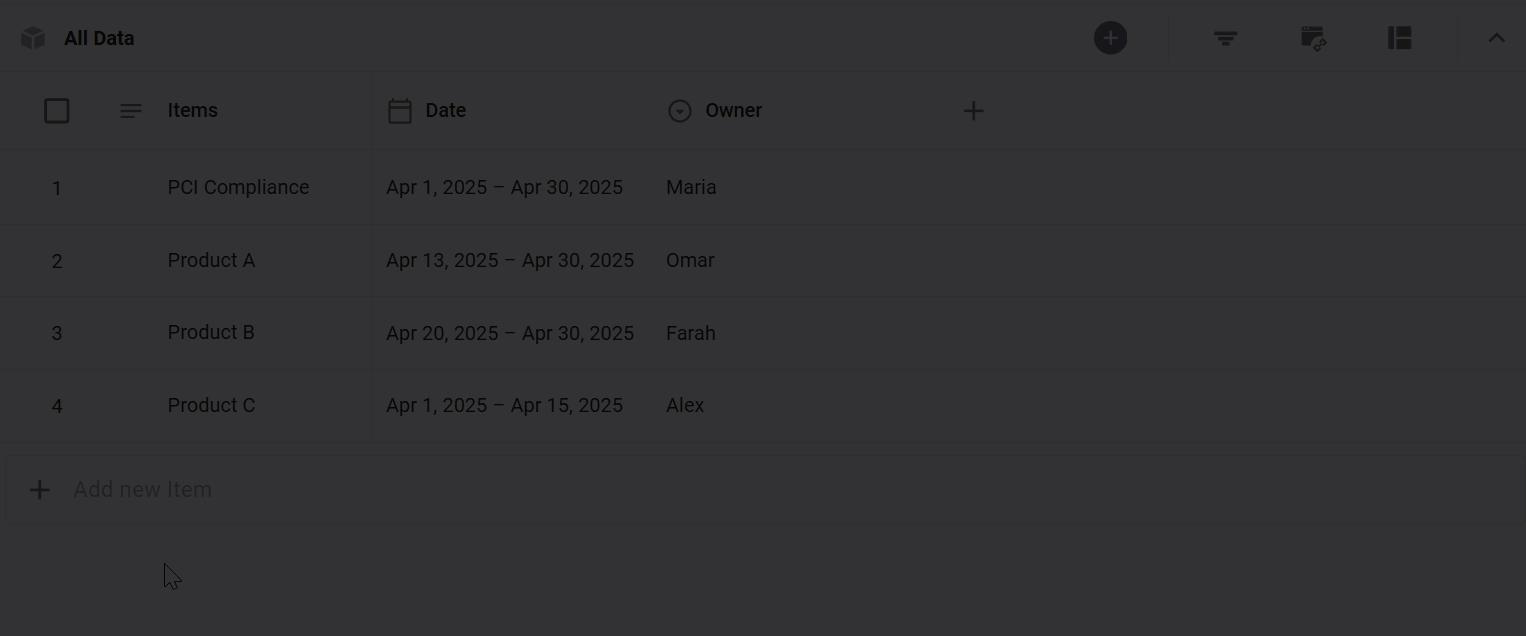
Adding New Items from the Items Table
If you don’t have any items in your roadmap yet, you’ll see an Add Item option in the middle of the screen.
-
Click the Add Item button.
-
Enter a name for the new item.
-
Either click out of the table or press the Enter key to save your changes.
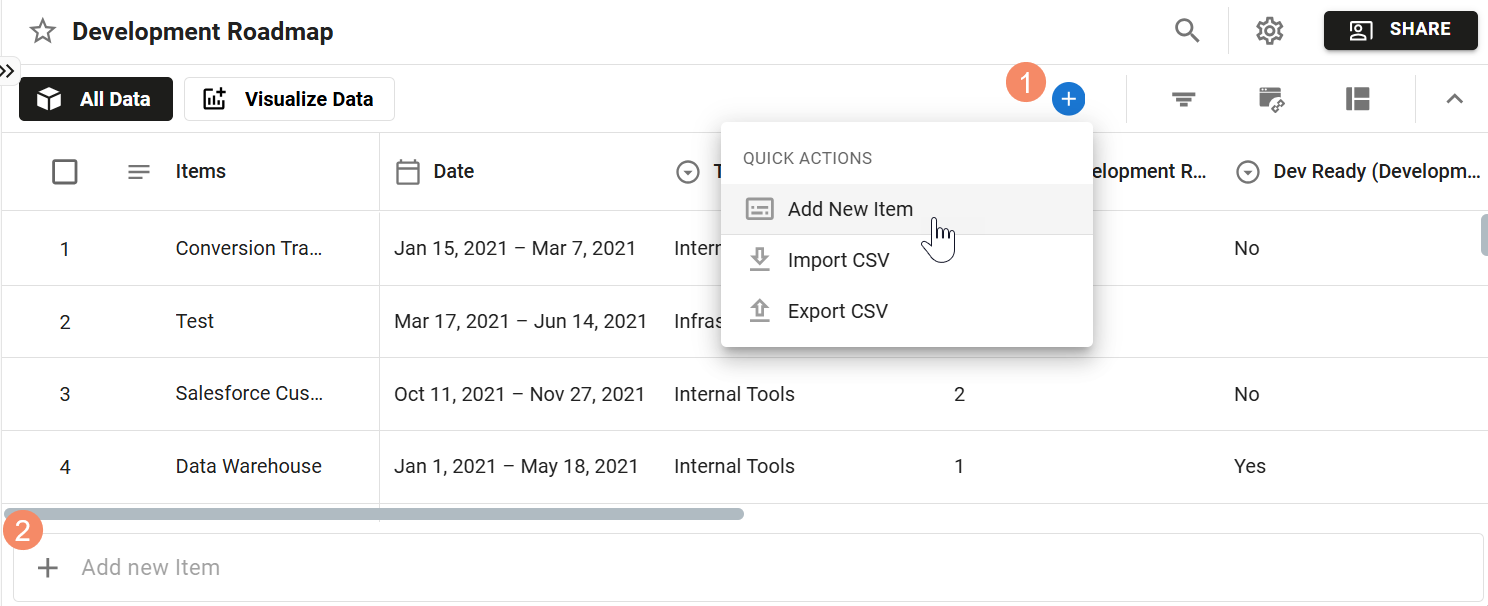
If you already have items in the roadmap, there are two ways to add new items from the items table:
-
Click the + button and select Add New Item
-
Start typing the items name into the + Add new Item bar at the bottom of the table
Every roadmap created from scratch starts out with two default fields: Items and Date. Although you can create a new item just by filling in the Items field with the item's name, you won't get much out of your roadmap if you don't complete the other fields.
Adding New Items from the Item Card
Alternatively, you can also click the (+) button in the roadmap toolbar and select Add New Item to create a new roadmap item. This will bring you to the Item Card, where you can provide additional details about the new item.
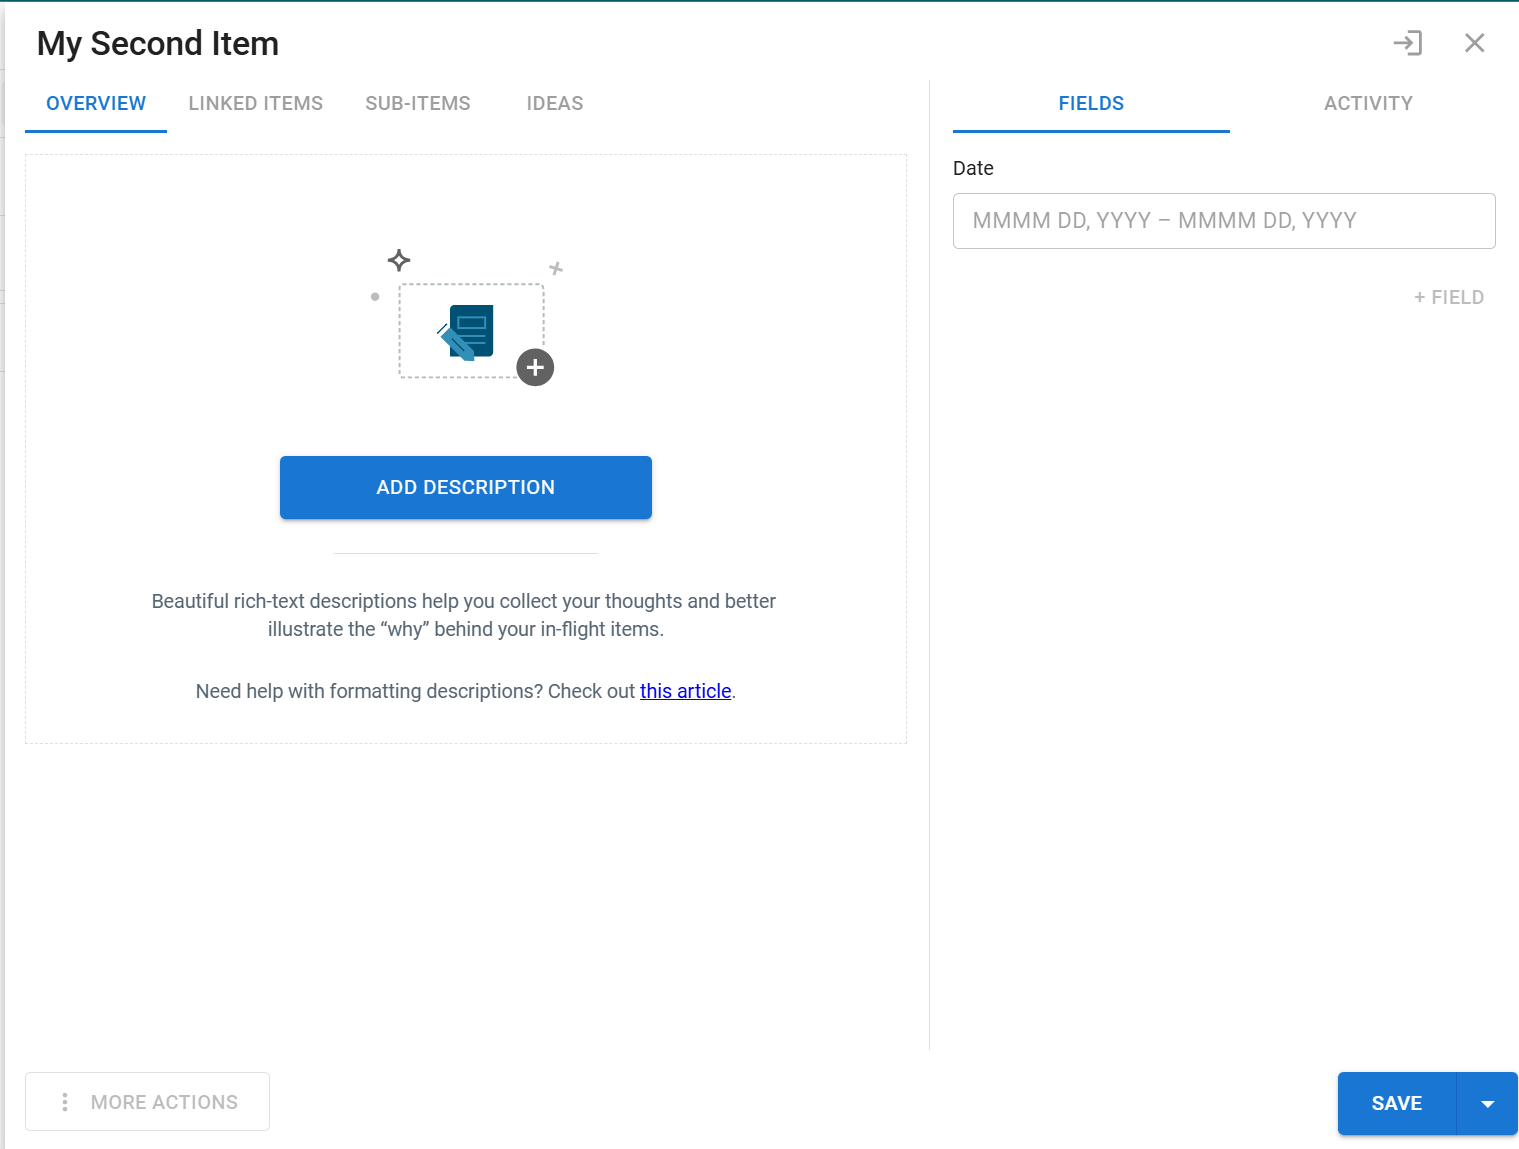
Once the item has been created, the item card can be accessed by clicking into the item name on your All Data view and will also show a summary of any active Linked Items, Sub-items, and Linked Ideas for that respective item.
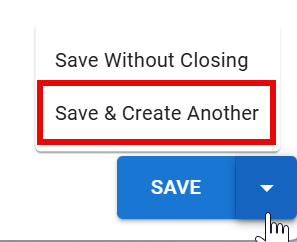
When creating multiple items that share the same fields, you can also create another item by opening the Save menu and selecting Save & Create Another. This will replicate all the same fields as the previous item created except for the item's description.
Inline Item Creation
The item table also supports inline item creation, letting you quickly add items to your roadmap.
-
Navigate to the All Data view.
-
Go to the + line at the bottom of the table.
-
Input your item name and press Enter. You can add consecutive items without interruption.
-
You can drag and drop items to any location in the list, and update fields inline.
Setting an Item's Date
An item's Date can be a range of dates or a specific date.

-
Click inside the item's Date field to open the date picker.
-
To set a date range, select the Start Date and the End Date. To set a specific date, select it as the Start Date. The End Date is automatically set to the same date.
-
Click anywhere off the date picker to close it.
You can also set the date(s) in the item card.
Fixed Date or Bucket?
If you don't have fixed dates for an item yet, you can add the item to a time bucket, such as Soon or Future. Buckets let you be more flexible with scheduling, so you can start roadmapping your strategy before you have all the pieces.
To add an item to a bucket, click the Bucket icon in the date picker instead and select the bucket from the drop-down menu.
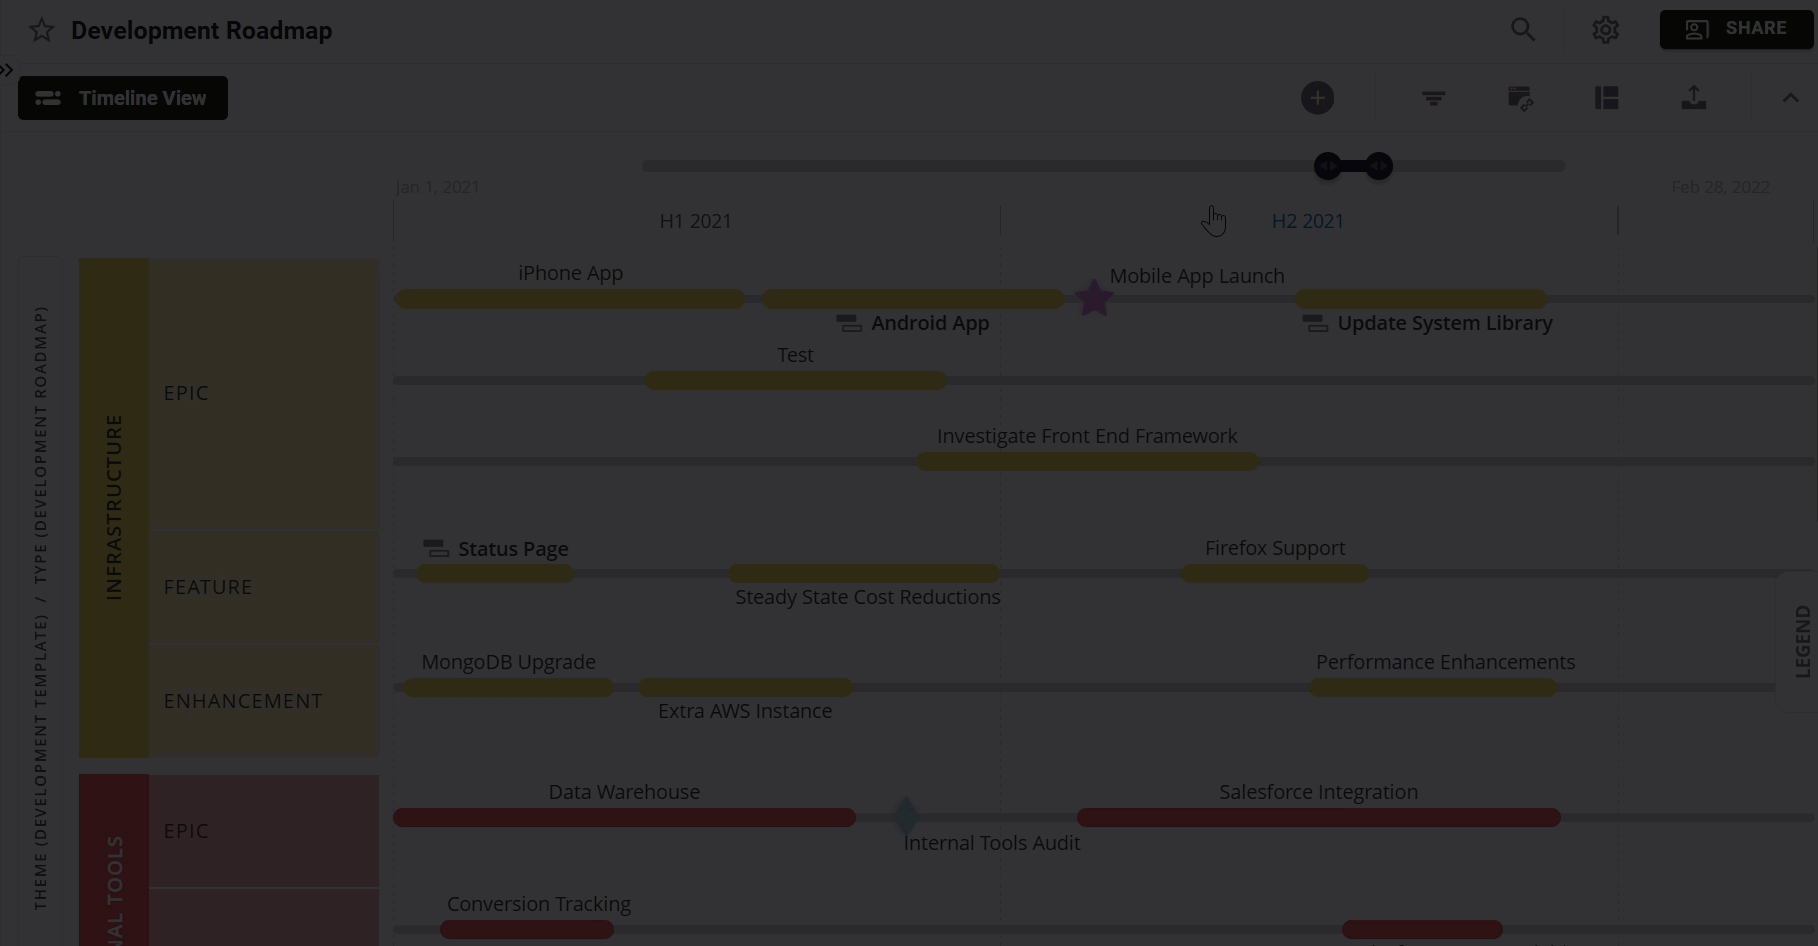
Adding New Items in the Timeline View
To add a new item in the Timeline view:
-
Click the + button
-
Select Add New Item
-
Name the item
-
Drag the item to the appropriate location on the timeline
Adding New Items in the Swimlane View
To add a new item in the Swimlane view:
-
Click the + button
-
Select Add New Item
-
On the Item Card, fill in as much information as you can at this point (you can always fill in the rest later)
-
Click Save
