NOTE: you need to be a system admin to perform the steps below.
If you are not a system admin but have TABLEAU ADMIN or TABLEAU EDITOR roles assigned, you can migrate created data sources manually. Please refer to the following part of the guide.
To migrate already created data sources between different instances of ServiceNow, e.g. from development to production, please do the following:
-
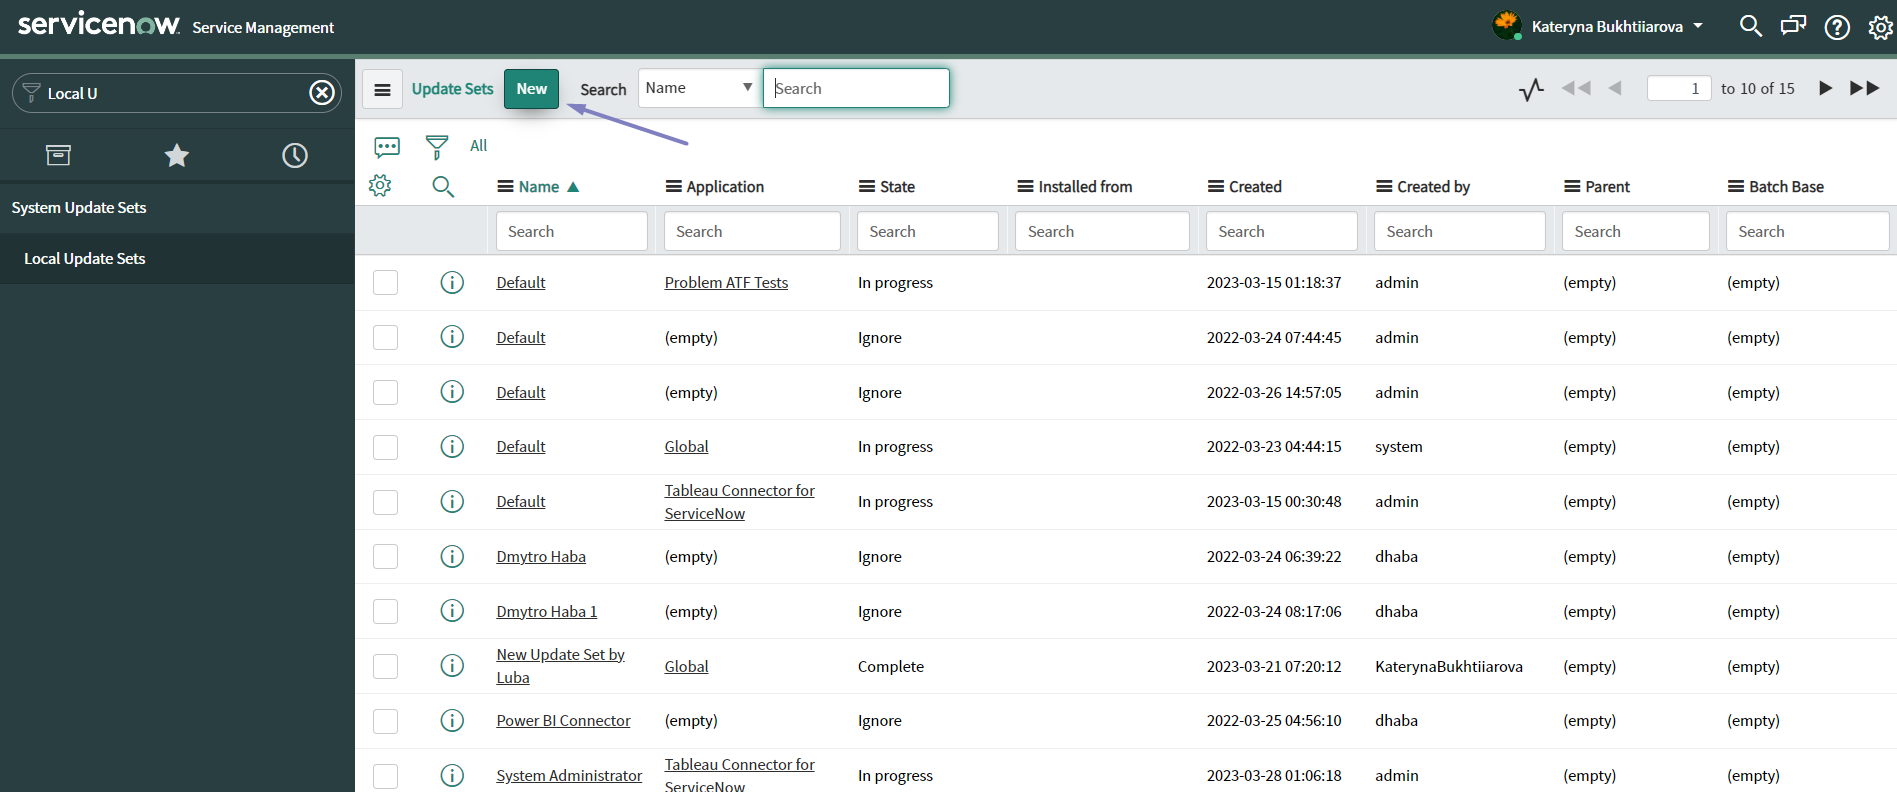
In Filter Navigator find Local Update Sets

-
In Local Update Sets click New
-
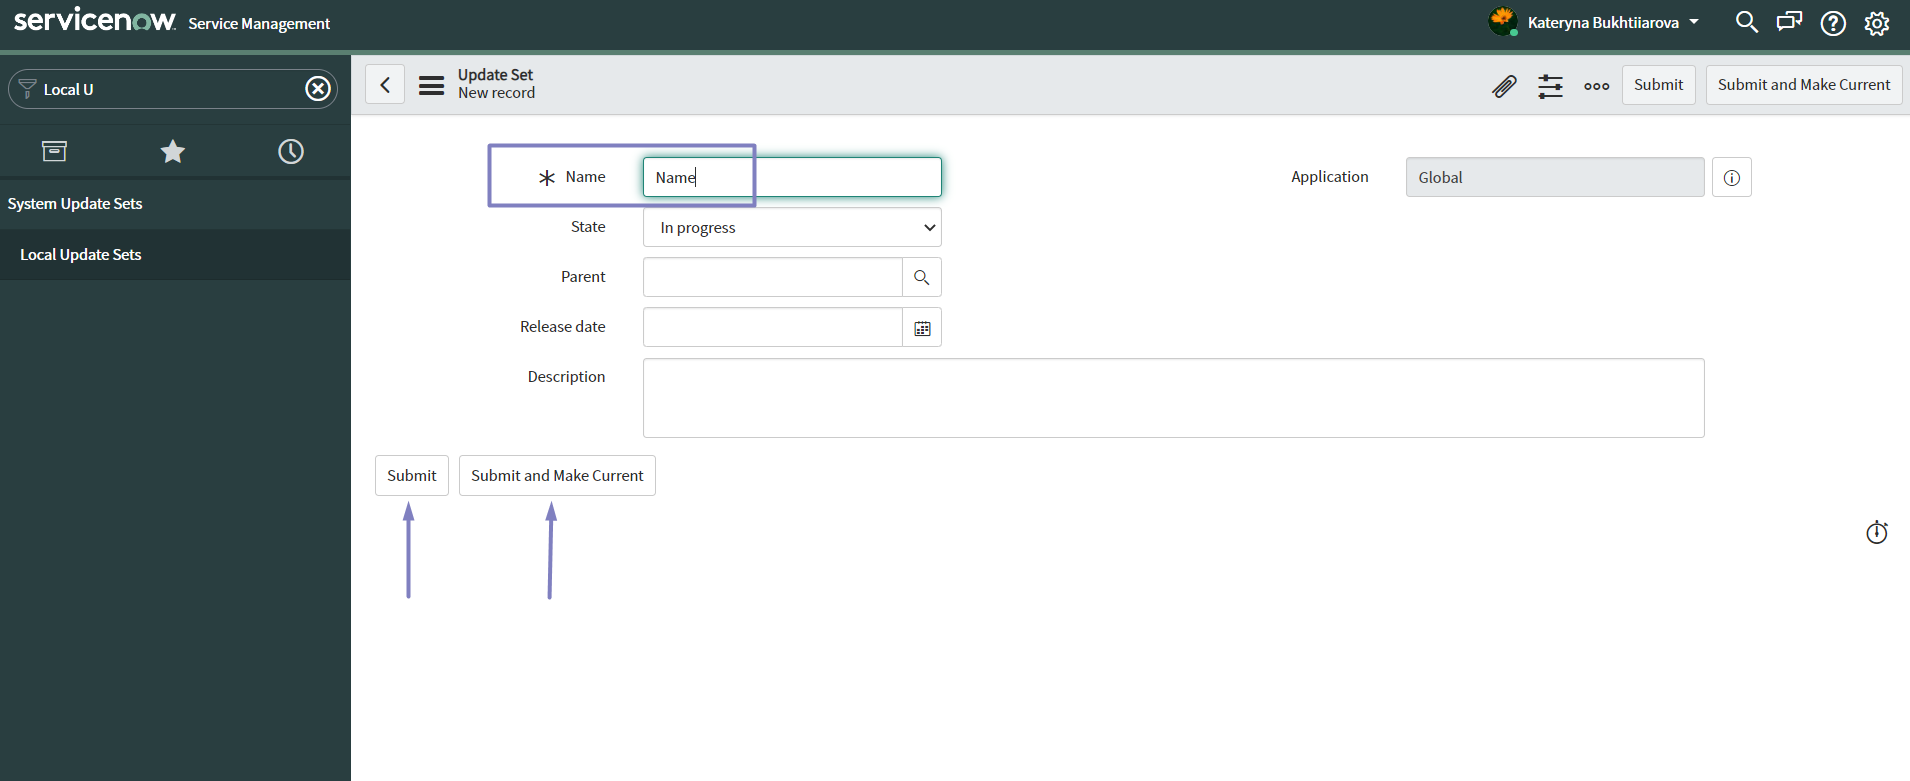
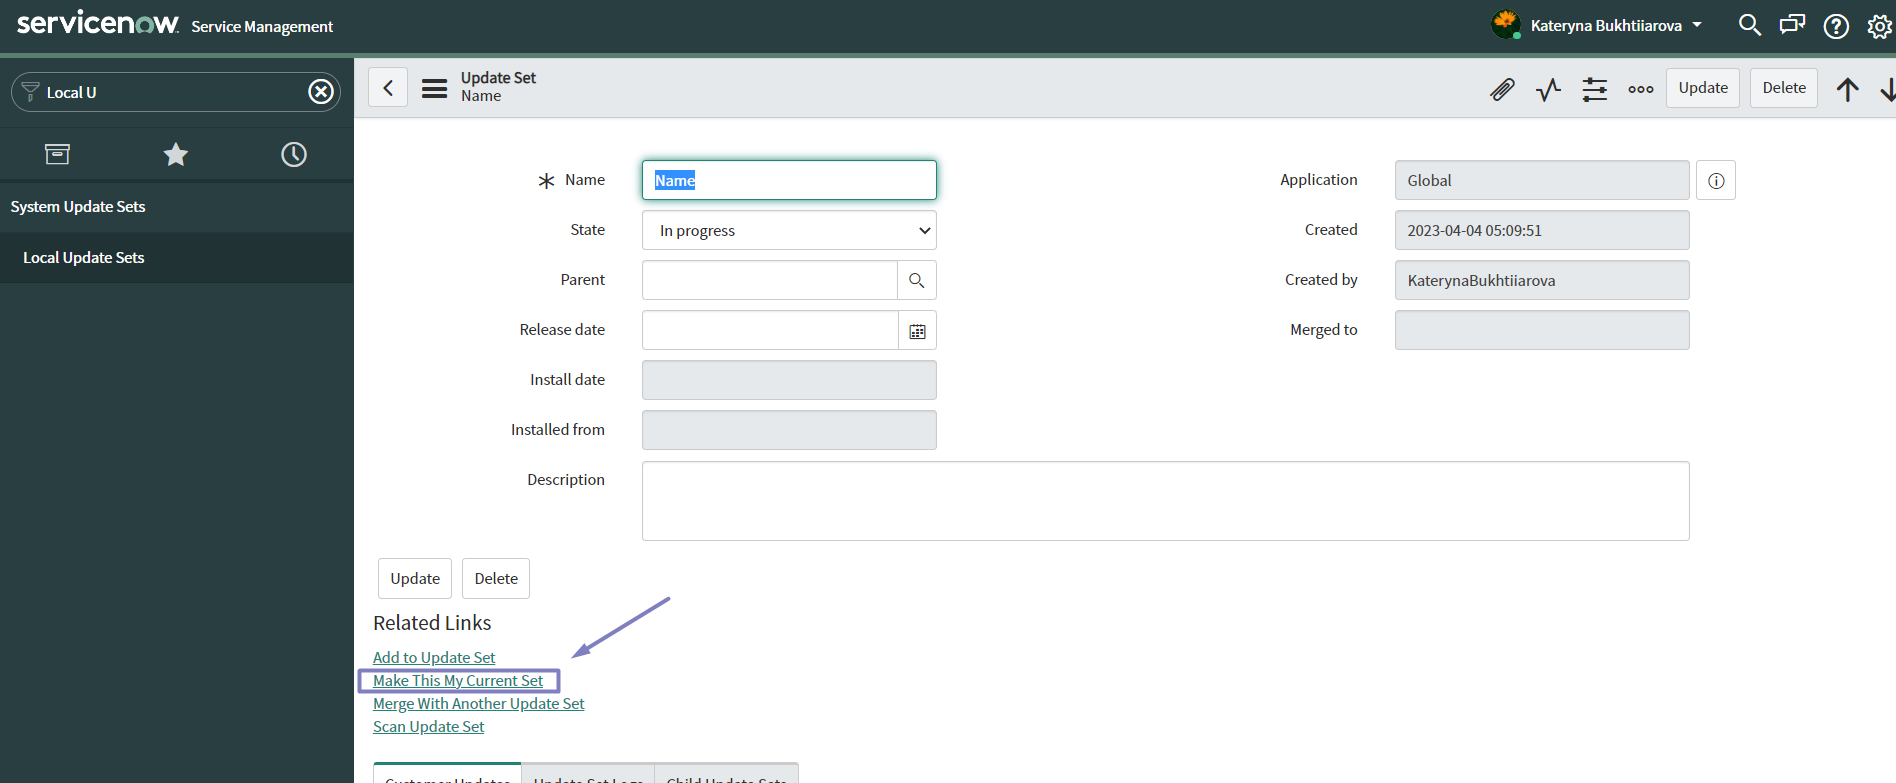
Write a Name and click Submit and Make Current. Or Submit, then open the record in the Local Update Sets list and under the Related Links click Make This My Current Set
-
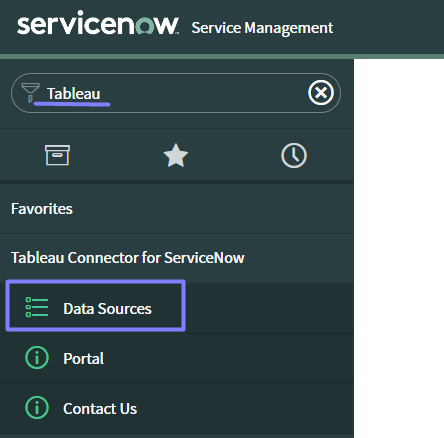
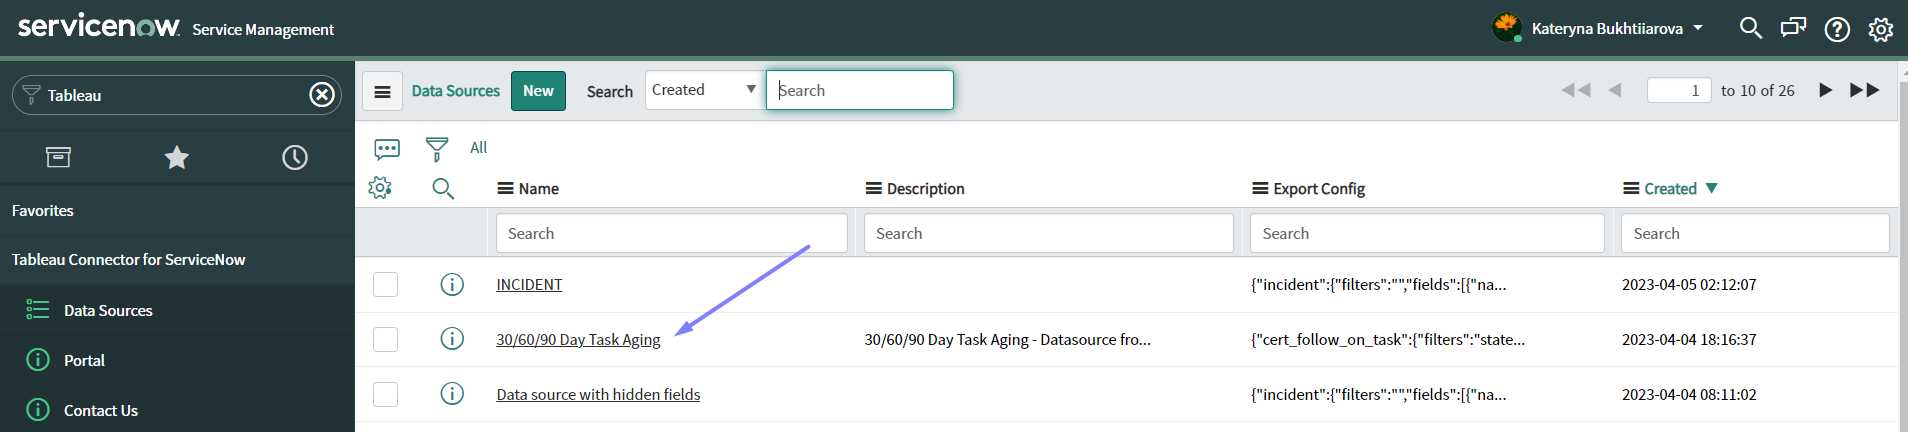
In Filter Navigator find Tableau Connector and navigate to Data Sources
-
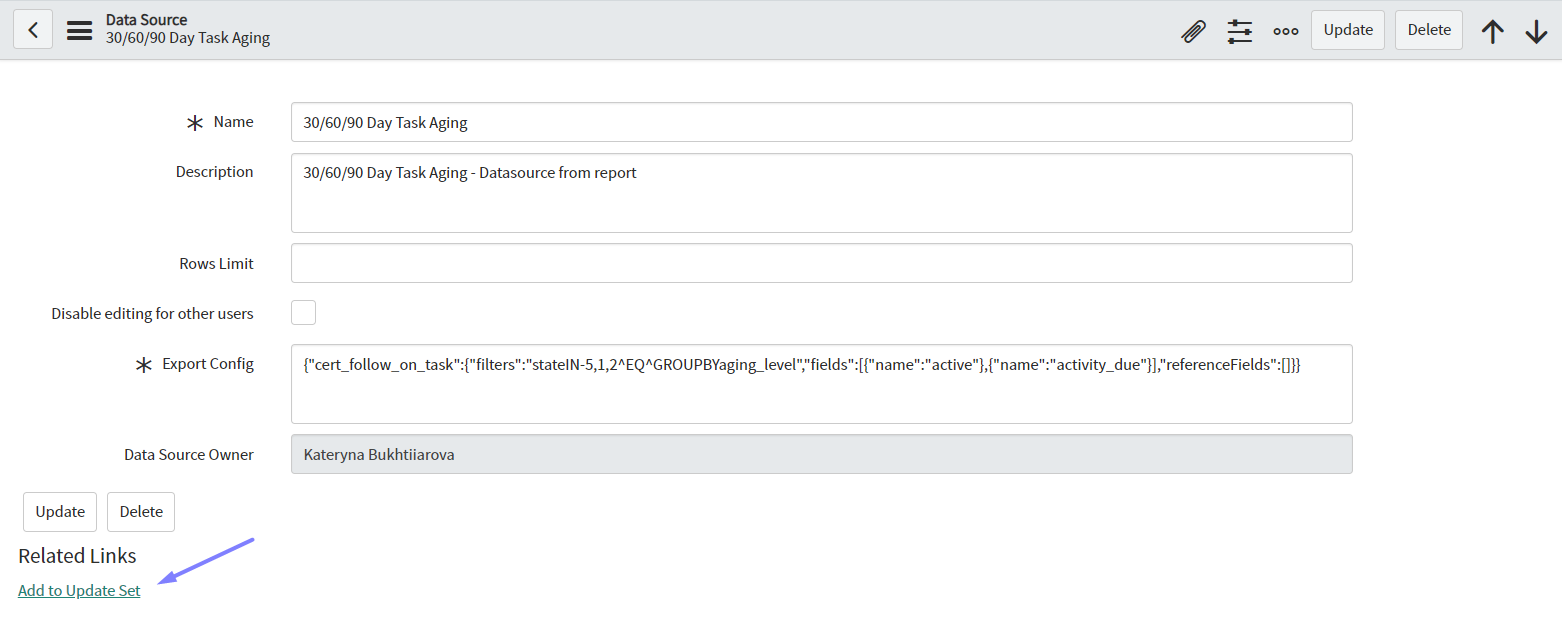
Open the data source you’d like to migrate and under the Related Links click Add to Update Set. Do the same for all the data sources that should be migrated
-
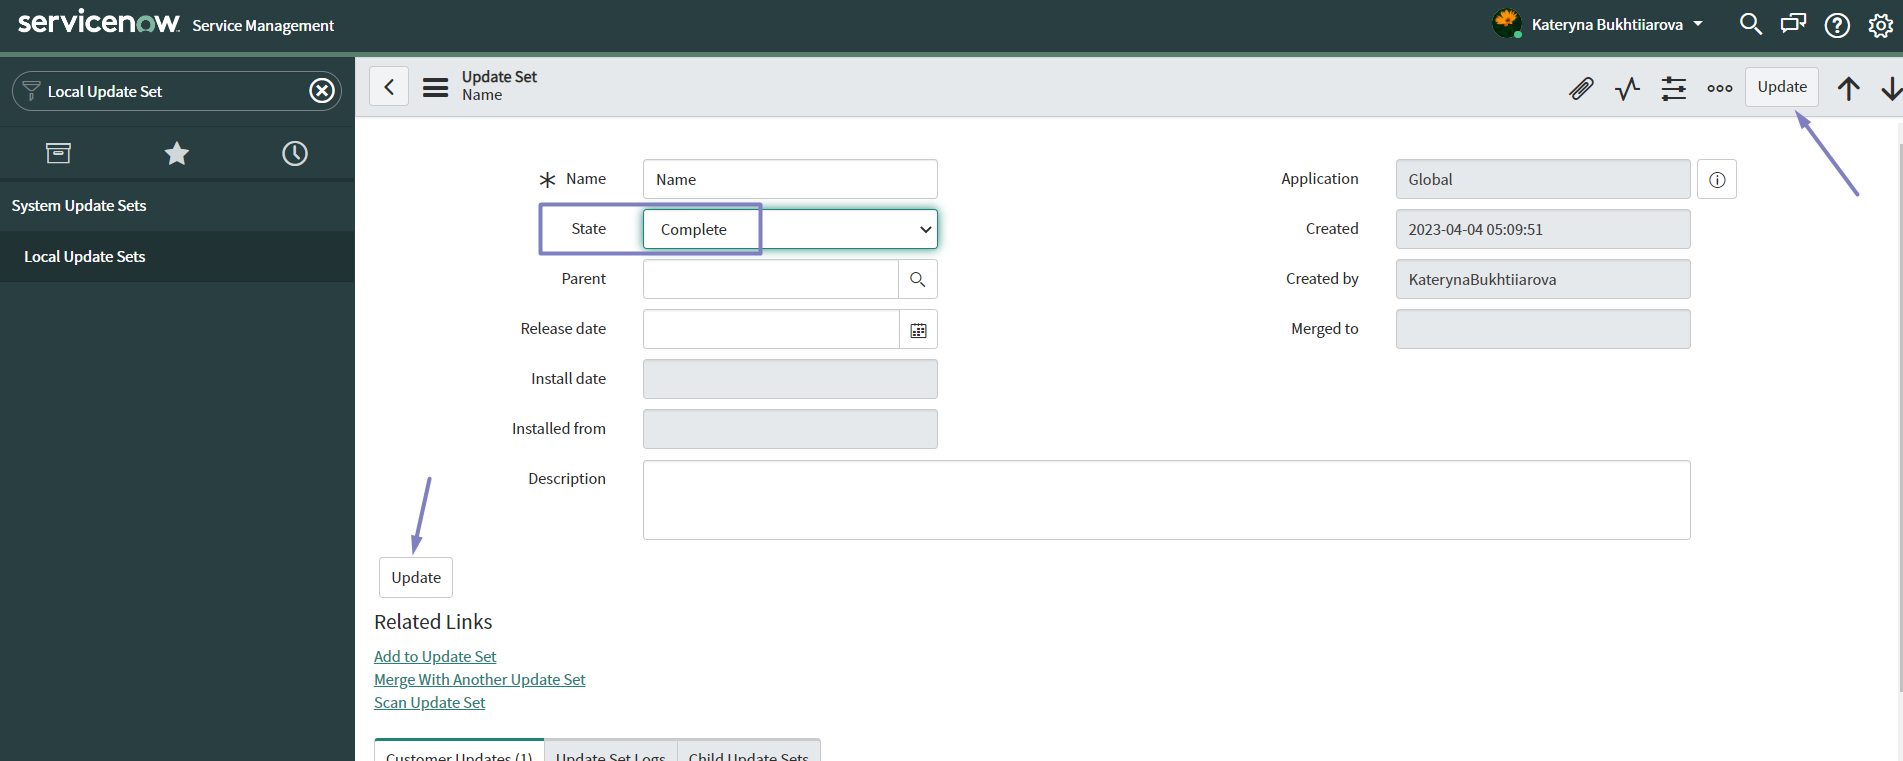
Get back to the Local Update Set created at the 3d step and change Update Set State to Complete. Click Update
-
Under the Related Links select EXPORT to XML

-
Switch to the different instance where migration should be done
-
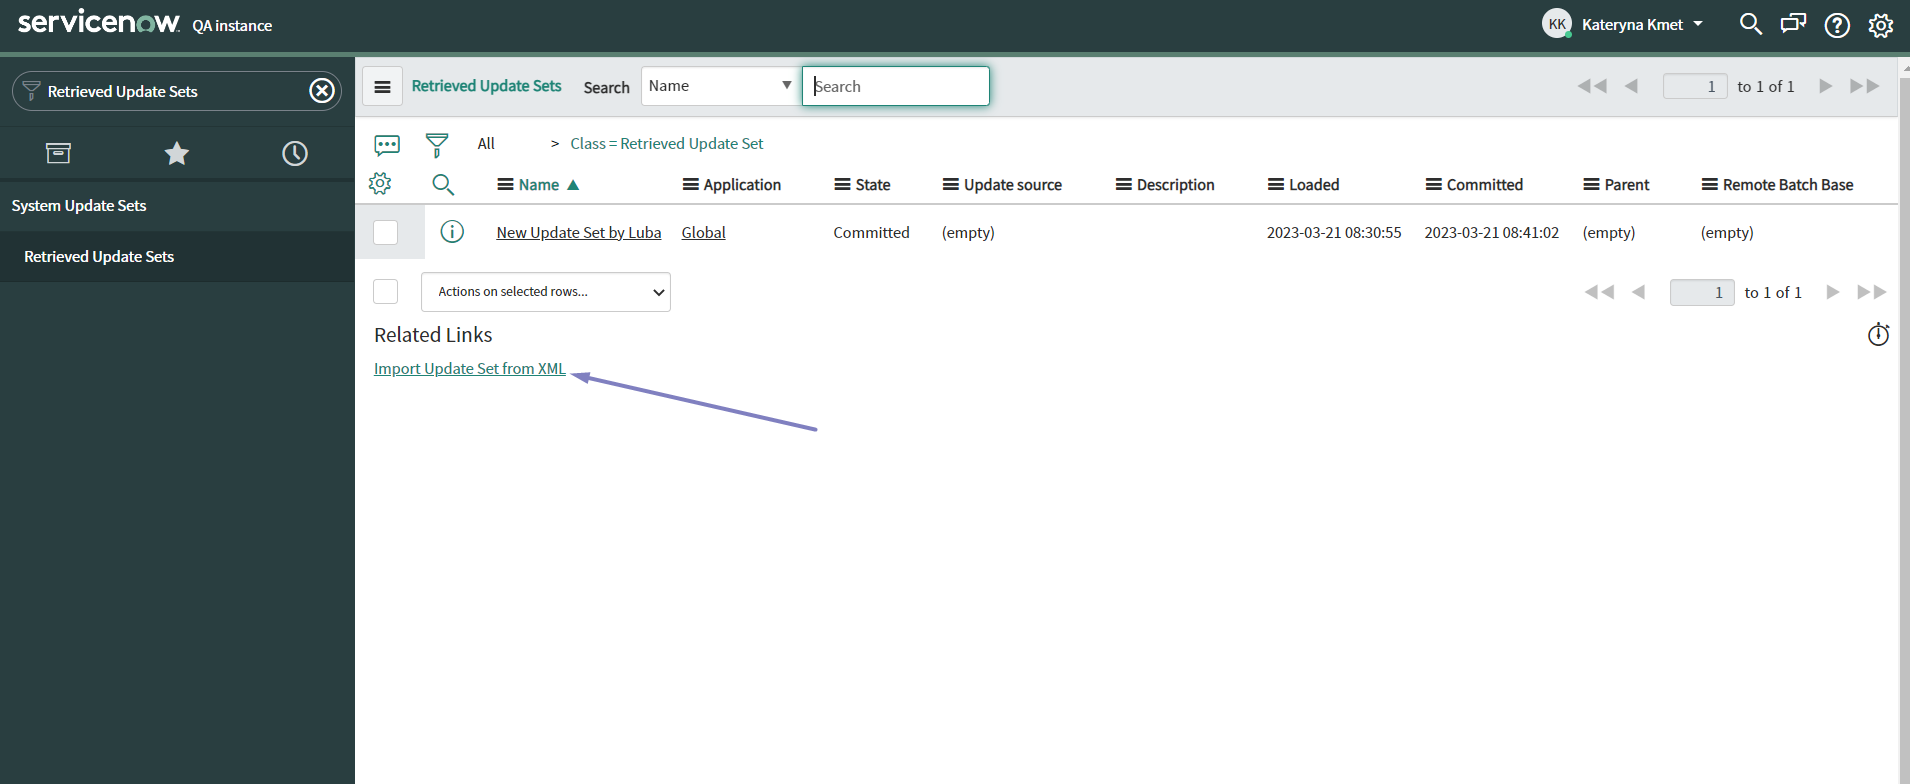
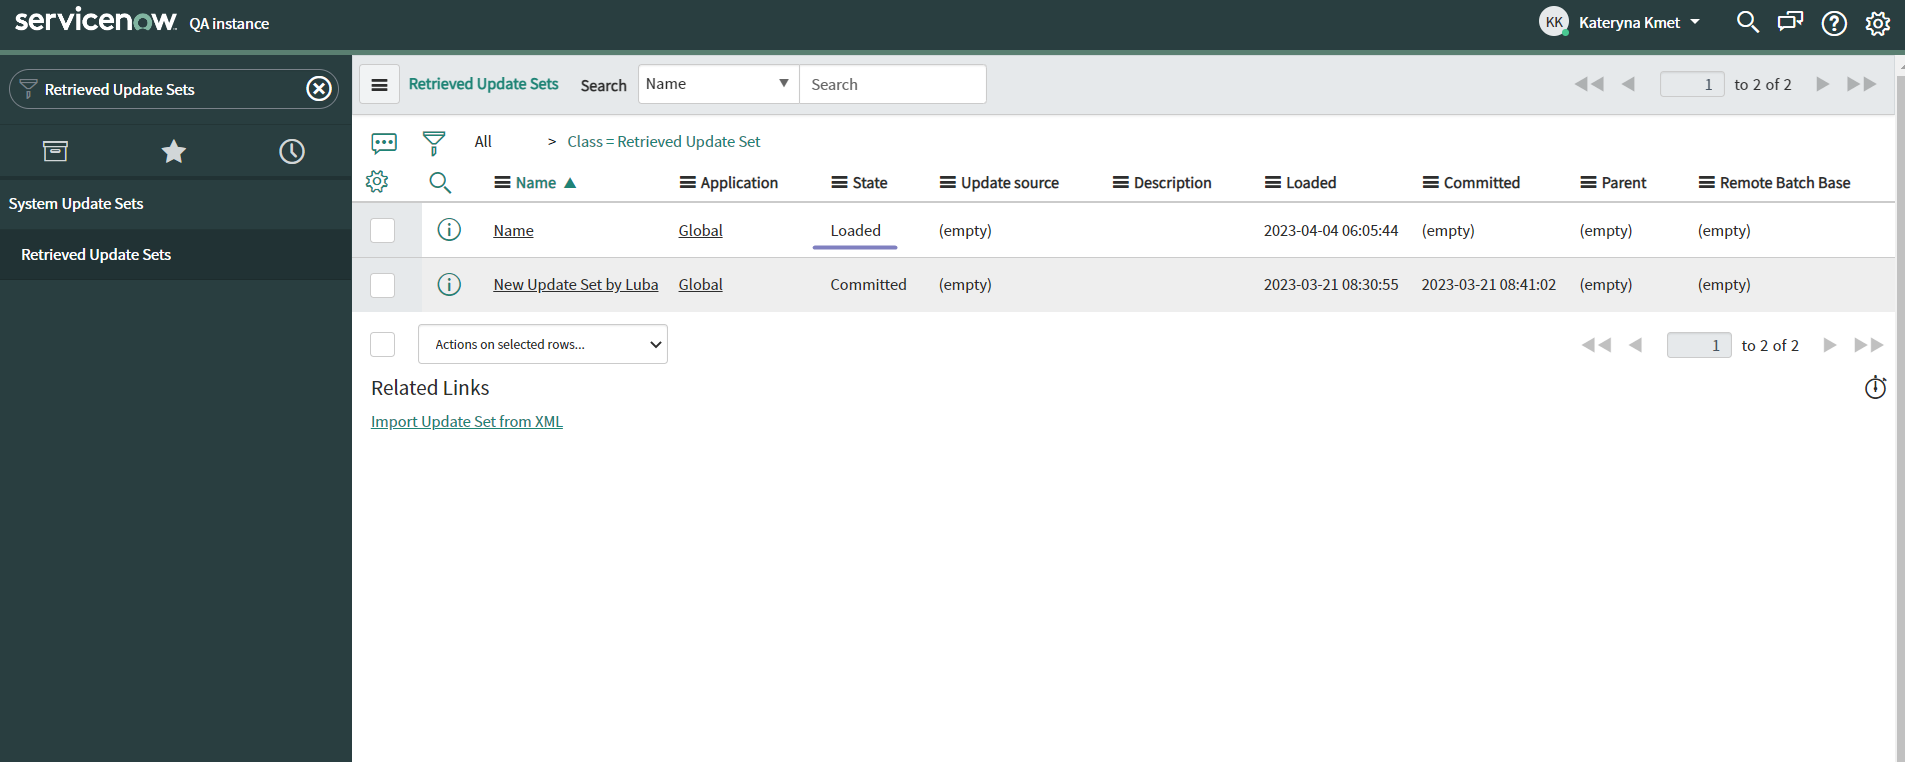
In Filter Navigator find Retrieved Update Sets

10. At the very end find Related Links and click Import Update Set from XML
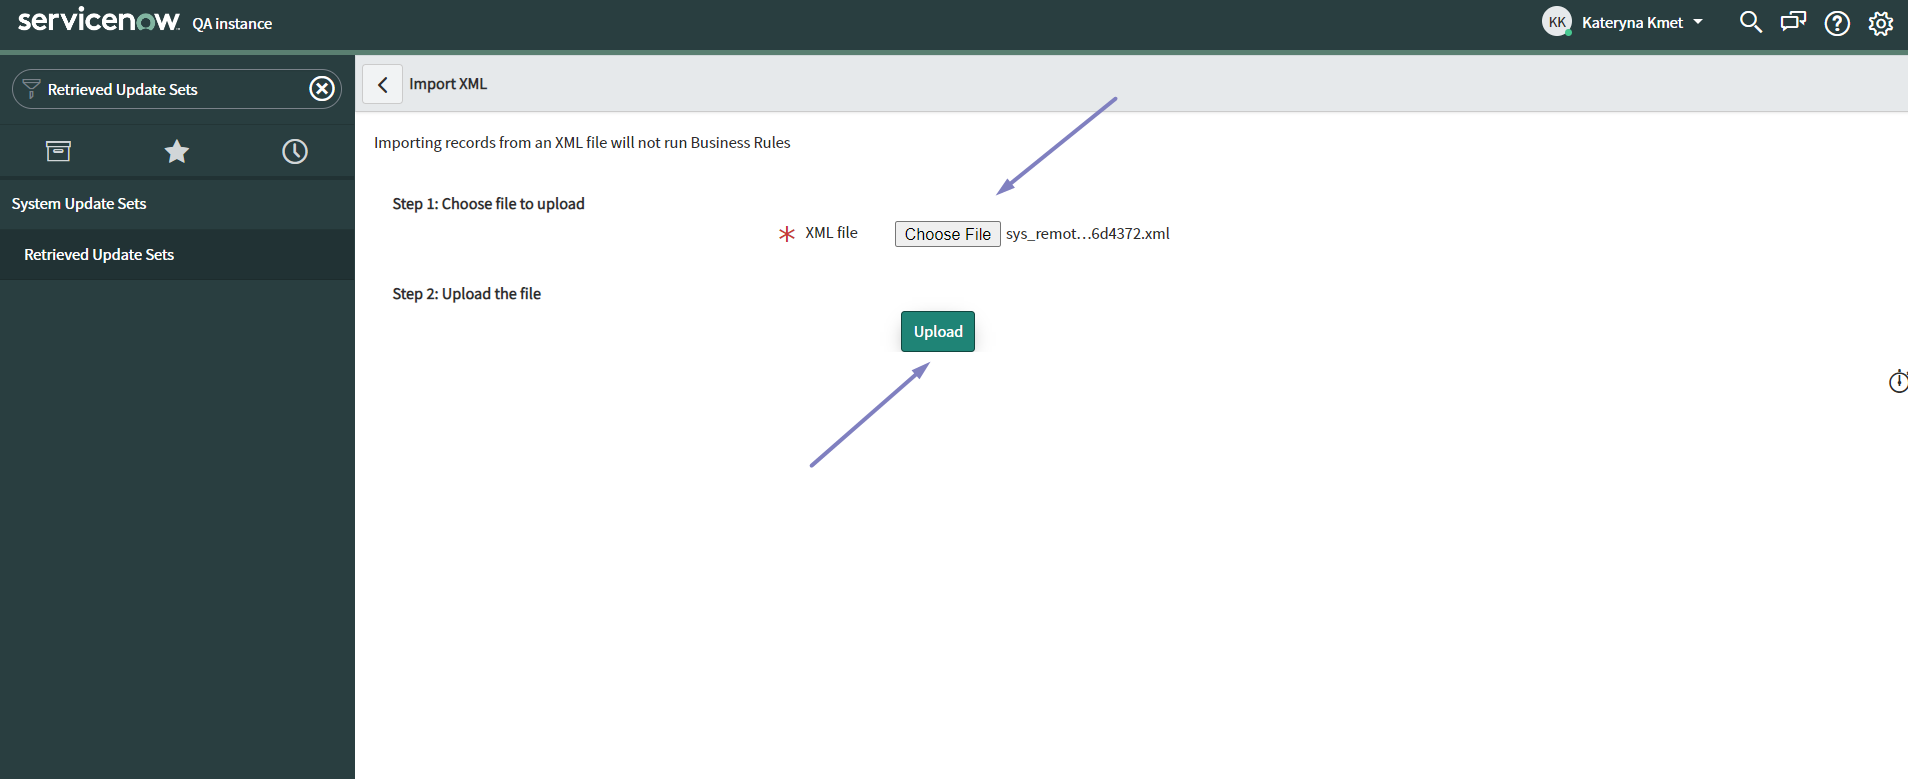
-
Chose the downloaded xml file and click Upload
-
Click on the uploaded Update Set (it should be in Loaded State)
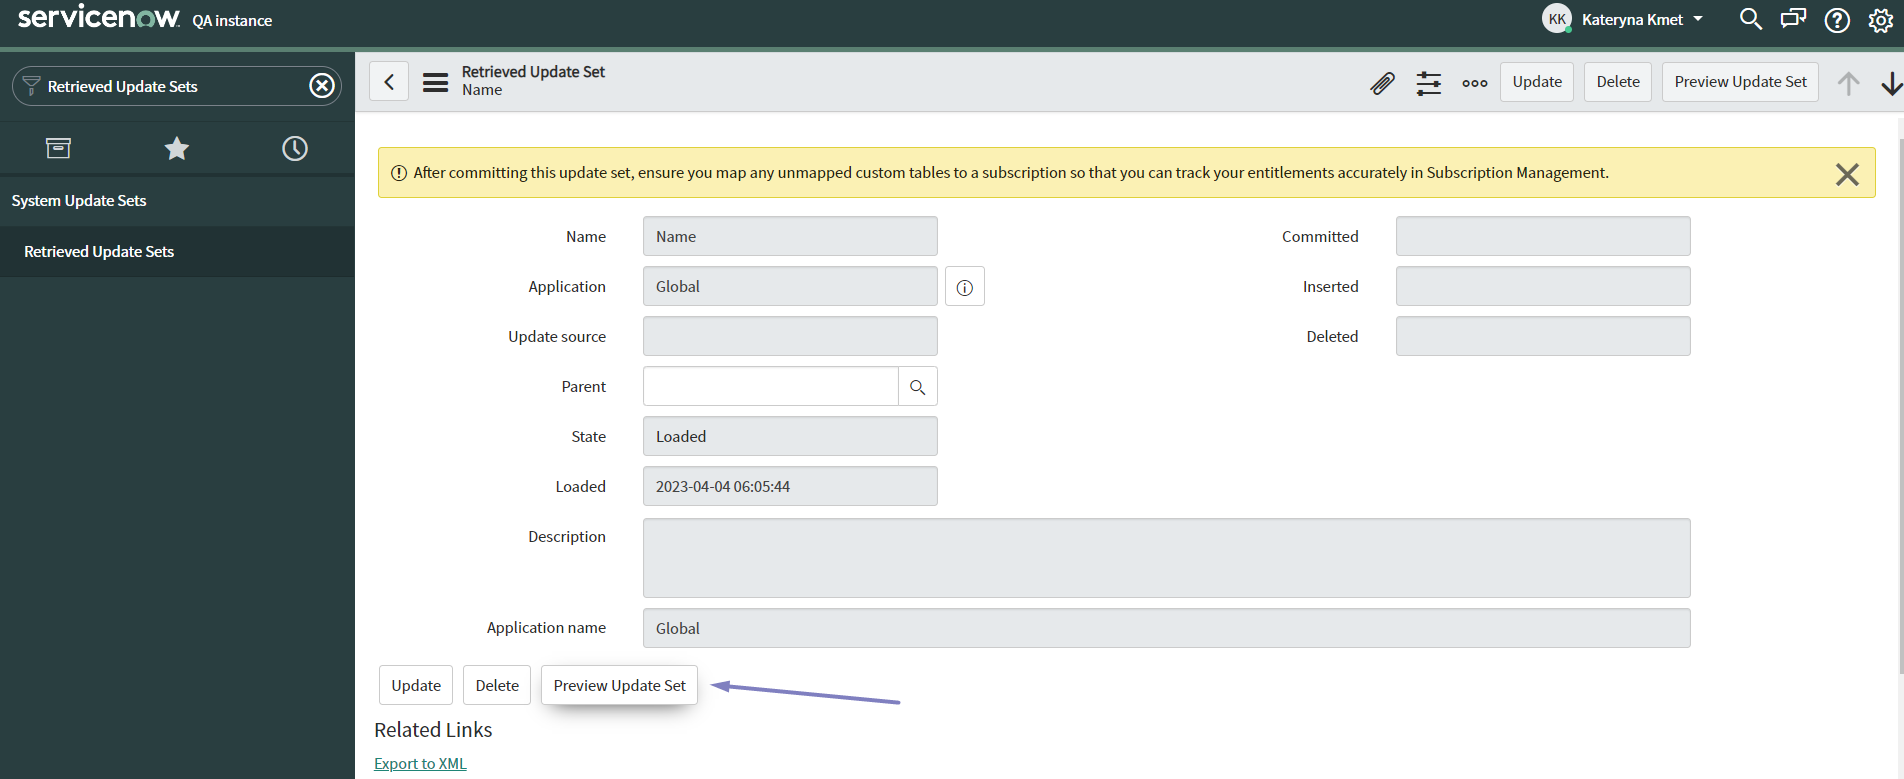
-
Click the Preview Update Set button
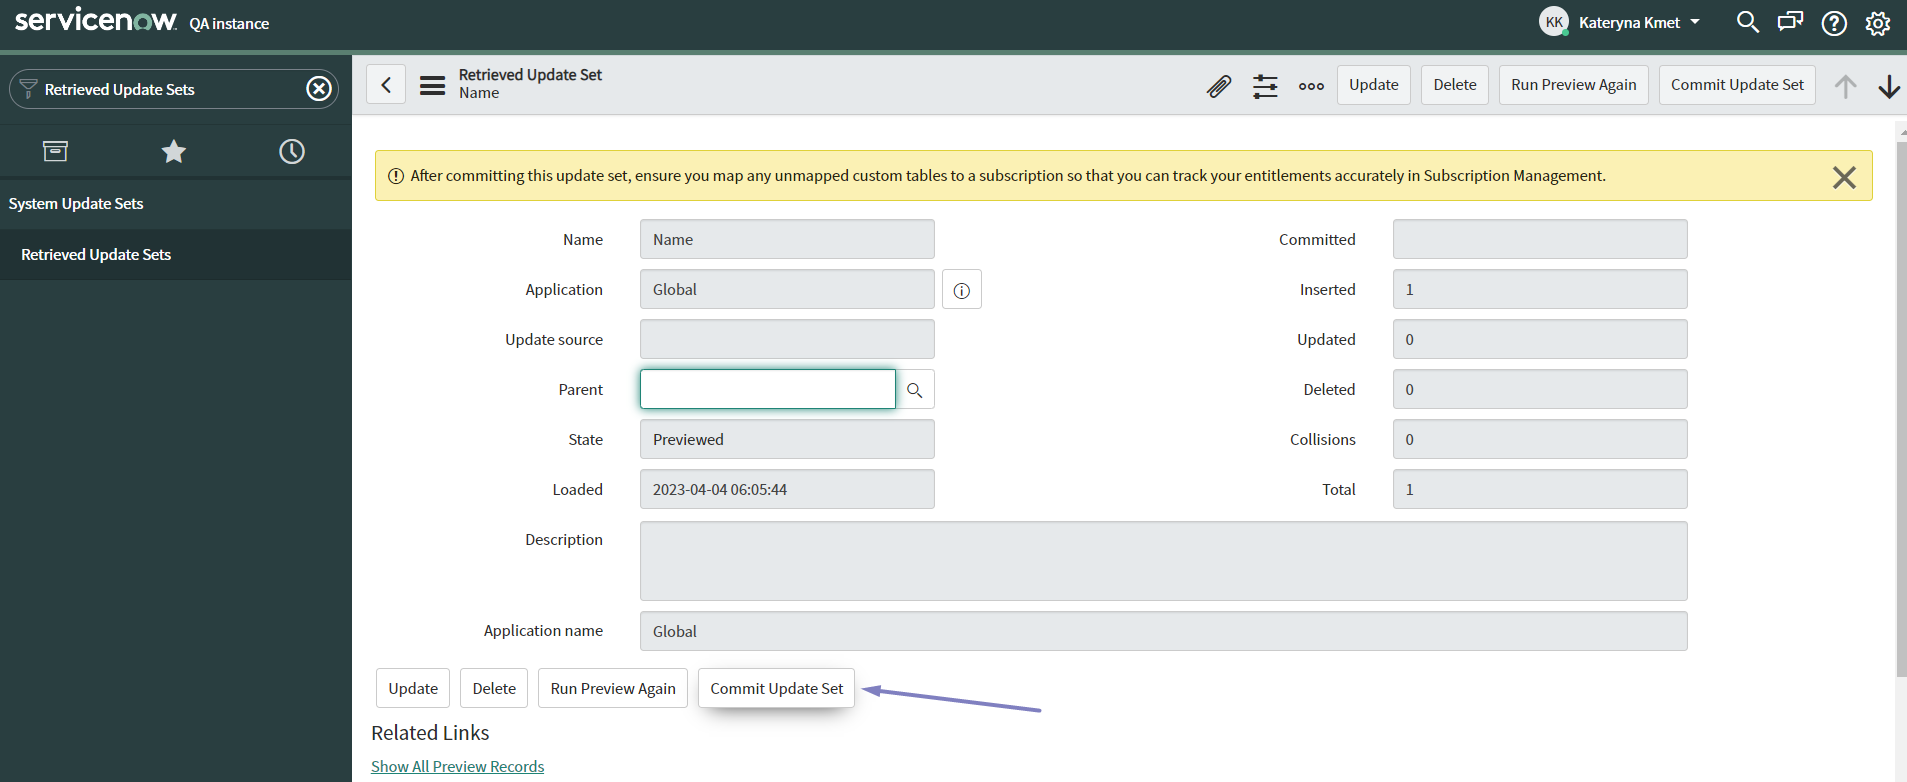
-
If the preview is done successfully Commit Update Set should appear. Click it
Done! All the data sources should be migrated to a new instance!
How to migrate data sources manually
NOTE: you need to have TABLEAU ADMIN or TABLEAU EDITOR roles assigned
-
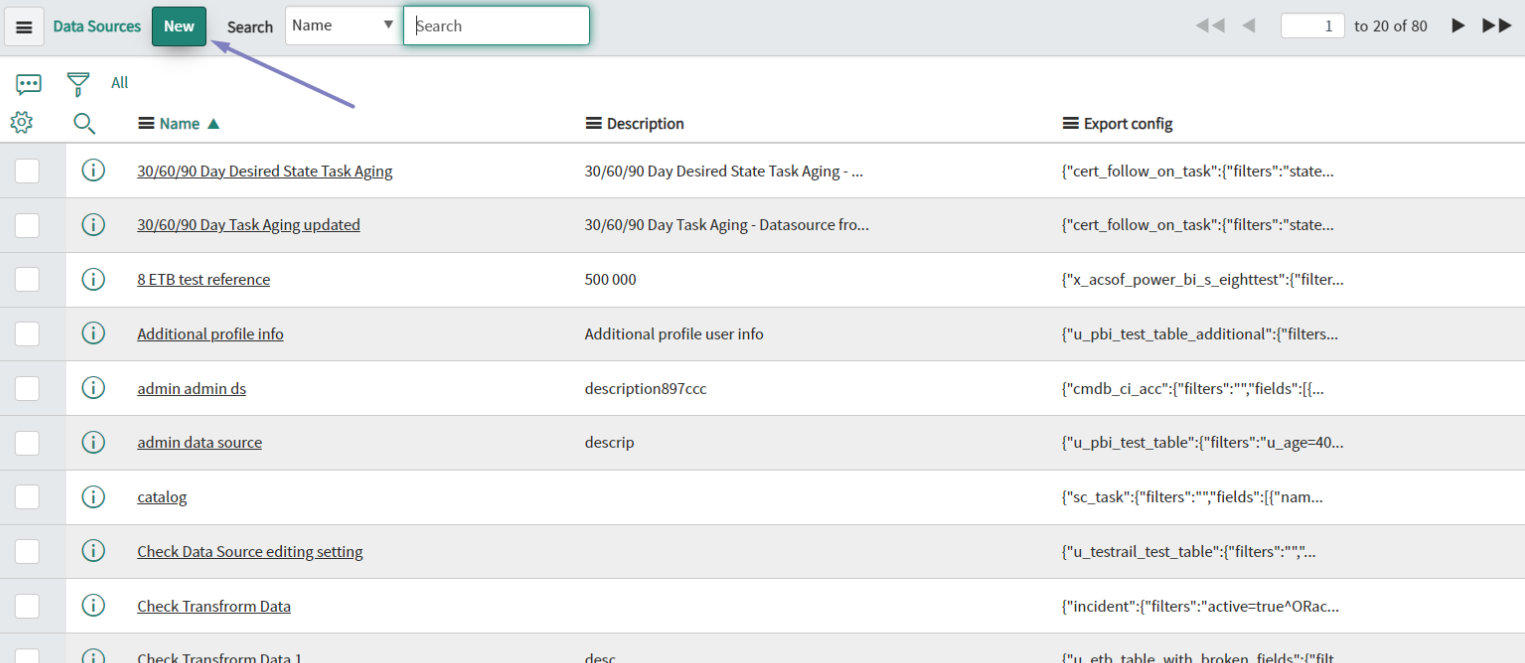
In Filter Navigator find Tableau Connector and navigate to Data Sources

-
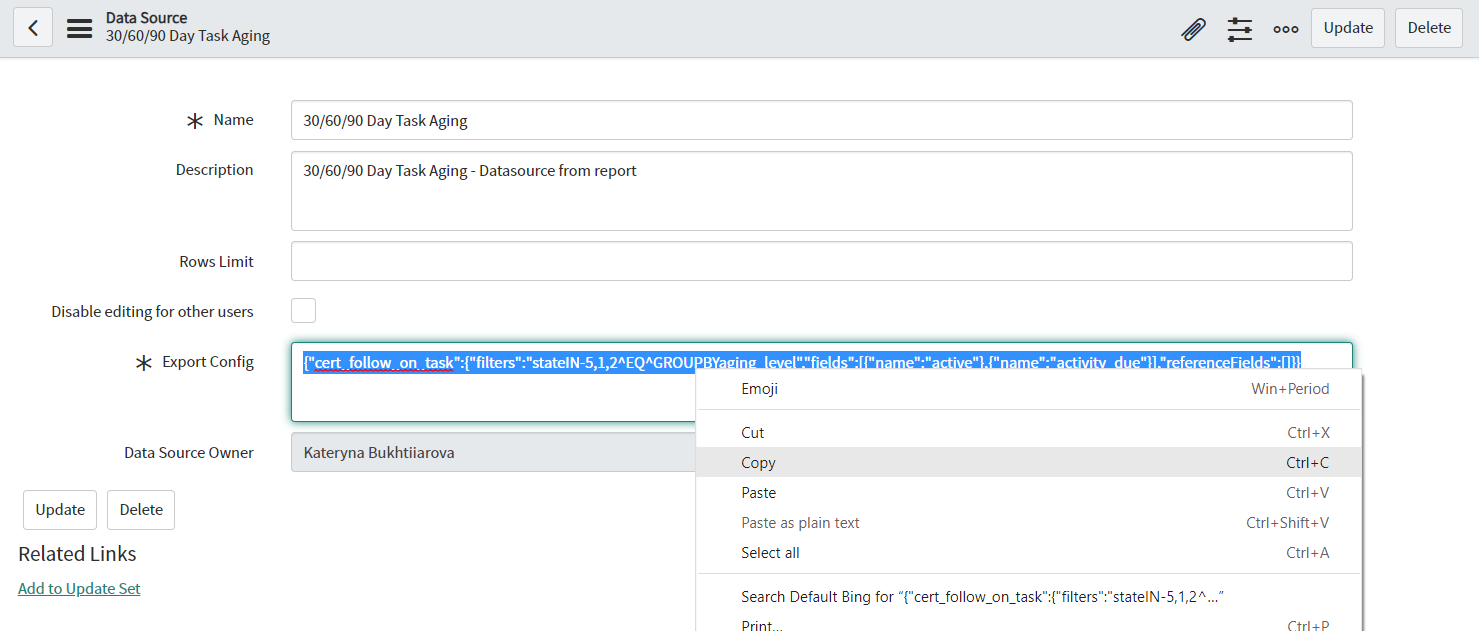
Click on Data Source that should be migrated
-
Copy the Export config from the Export config field. Other fields like Name, Description, etc should be also copied one by one
-
Switch to the different instance where migration should be done
-
In Filter Navigator find Tableau Connector and navigate to Data Sources
-
Click New
-
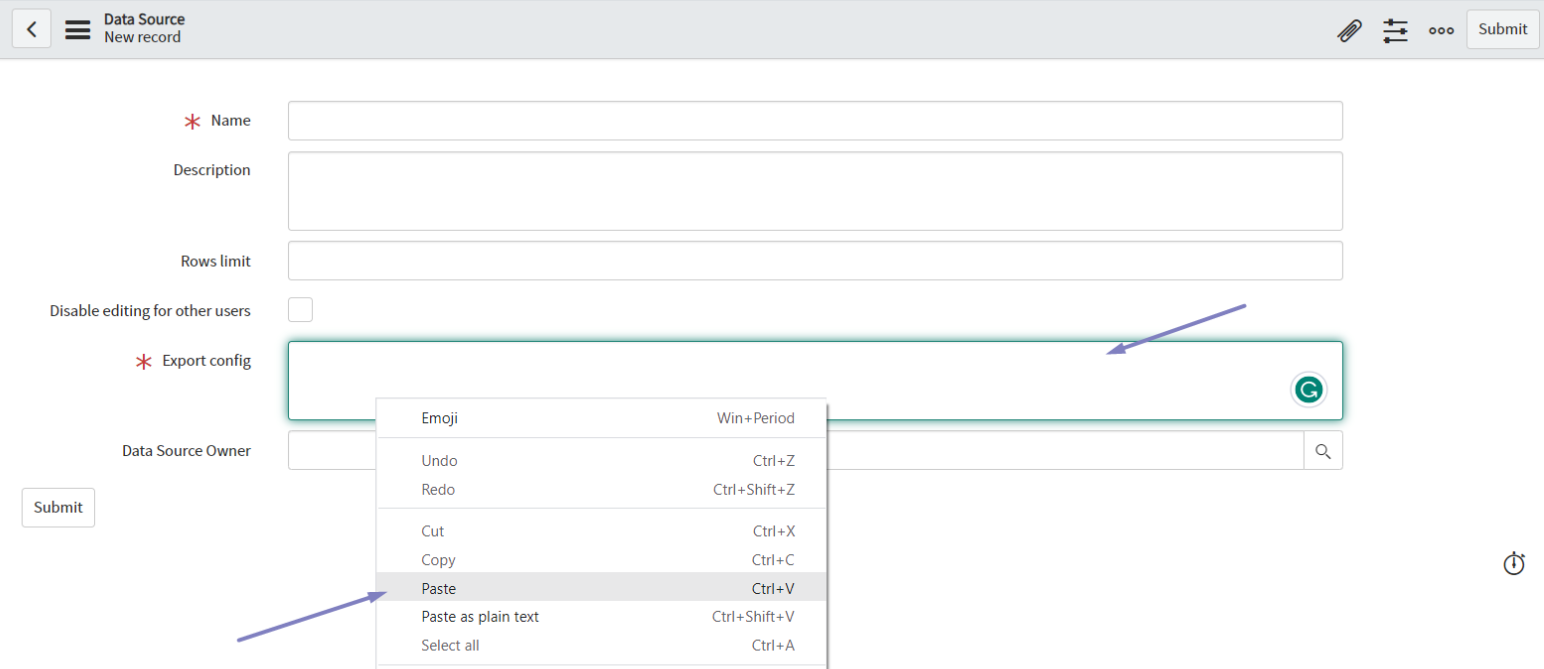
Paste the copied data and Submit
Done! All the data are copied into a new instance!