This article will show you how to add a temporary, local filter to a structure. To permanently filter a structure, consider using a Filter Generator.
Filters allow you to apply commonly used filters with the click of a button. This way, you can quickly focus on a specific subset of work items within the structure. For example, you could filter for:
-
work items in a specific status
-
unresolved work items
-
work items assigned to you
-
work items related to a specific person, project, sprint, release, etc.

When you apply a filter to a structure, it makes a temporary, local adjustment, without changing the structure for everyone else. If someone opens the same structure while you have a filter applied, they will still see the original structure.
To add a permanent, global filter, try a Filter Generator.
Adding a Filter
To apply a new filter, select the Filter / Group button and:
-
Choose a saved filter, or
-
Create a new filter
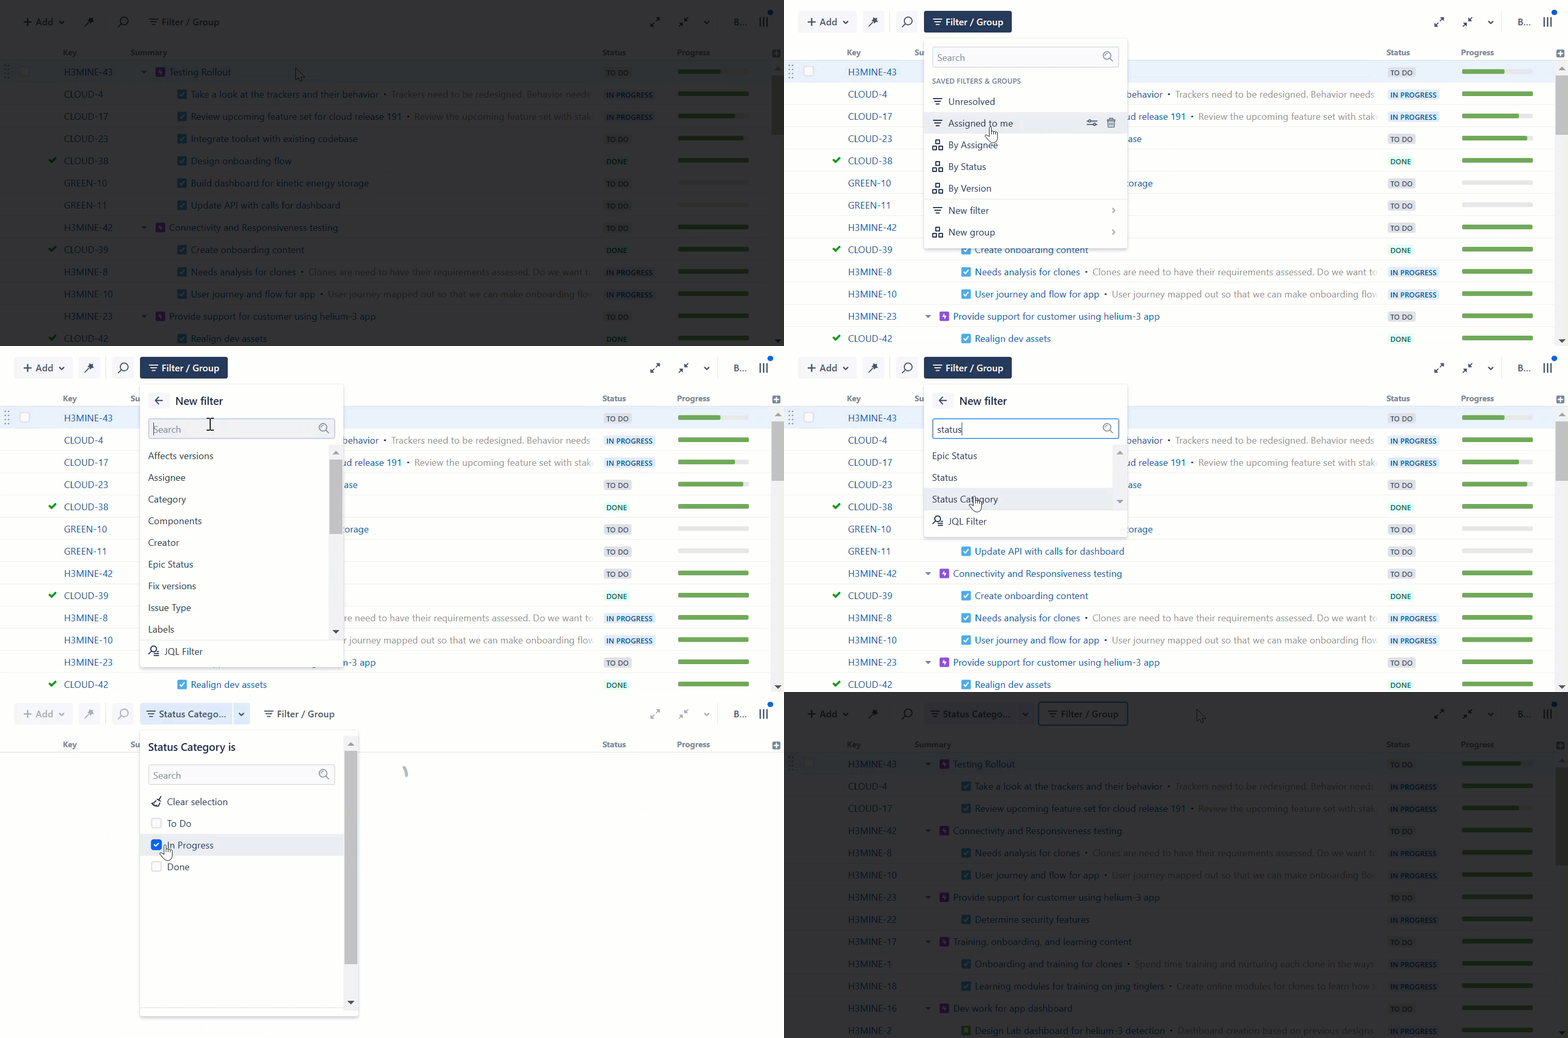
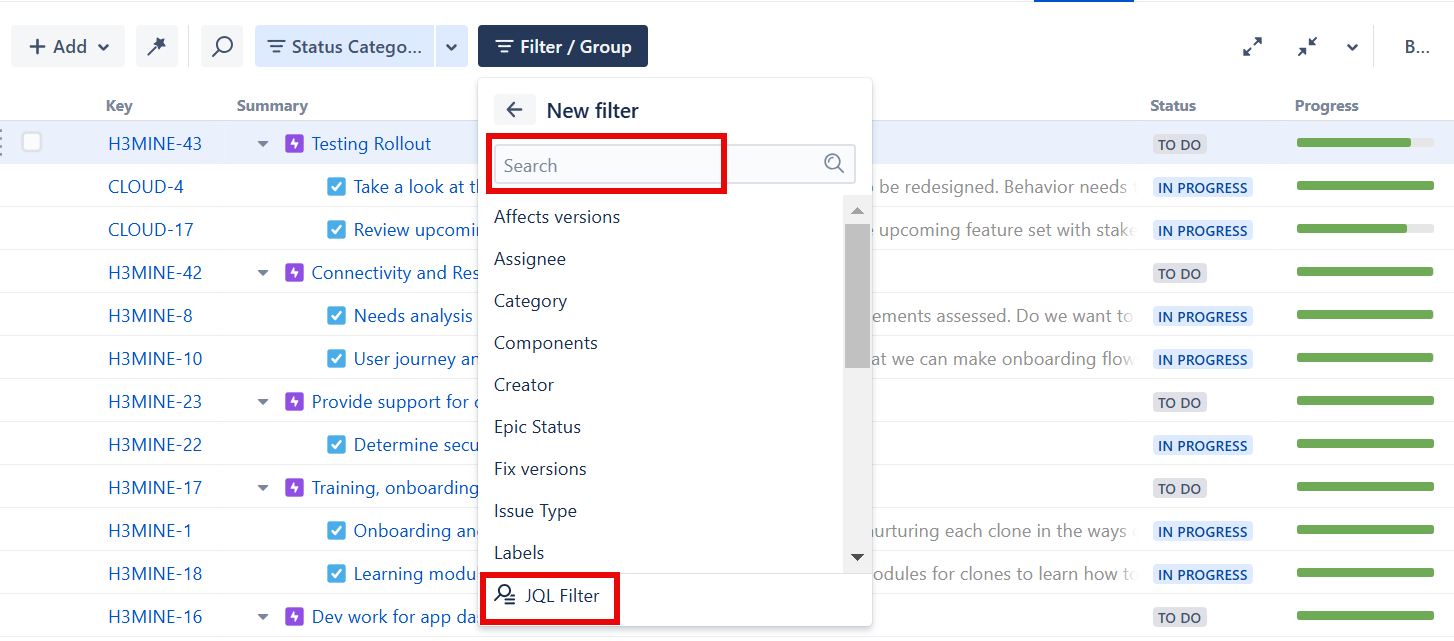
When you create a new filter, you can search for a specific field you want to filter by, or choose JQL Filter at the bottom to filter using a JQL query.
Creating a Field-based Filter
When you filter based on a field, you need to select the field values that should be shown in the structure.
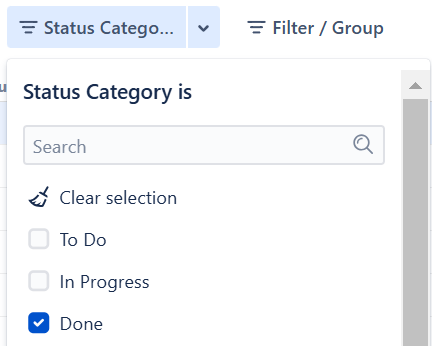
Only work items that contain these values for the field and their ancestor work items will remain in the structure.
Creating a JQL Filter
When you create a new JQL filter, you need to provide the following information:
-
Name - This is the name that will be displayed on the Filters and Groups panel.
-
JQL query - Enter the query that will be used to filter items. Items that match the query will remain in the structure.
-
Keep non-work items - If selected, non-work item items, such as flex items, will remain in the structure, even if they do not match the query.
-
Show all sub-items of matching items - If selected, sub-items of any item that matches the query will remain in the structure.
-
Filter on level - Select which level within the hierarchy the filter should be applied to. To apply the filter to all levels, select All levels.
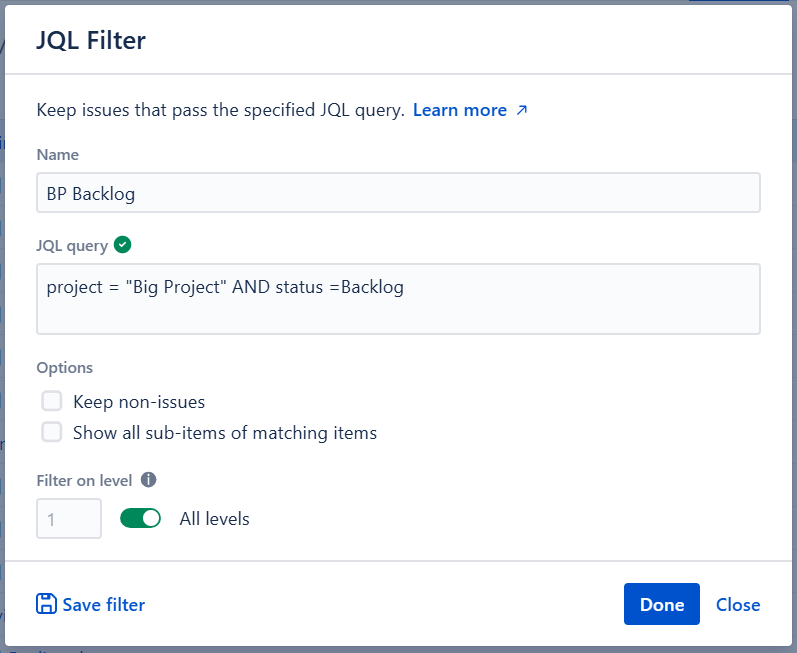
Once you've configured the JQL filter, click Done. If you have Control permission for the structure, you can also add the filter to the saved list by selecting Save filter.
Saved vs Unsaved
When you create a new filter, it is temporary, only available to you, and will disappear the moment it's closed.
If you have Control permission for the structure, you can also save Filters for later use and to share with others. See Saving a Filter below.
Deactivating or Reactivating a Filter
Once a filter has been added to the Filters and Groups panel, you can deactivate or reactivate the filter simply by clicking its name.

Removing a Filter from the Panel
To remove a filter from the Filters and Groups panel, select the down arrow next to the filter’s name and choose Remove from panel.
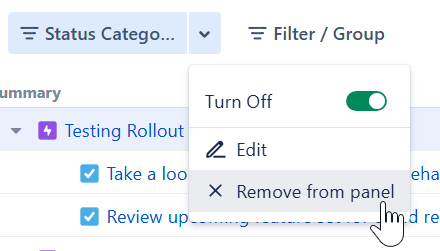
Unless the filter has been saved, this will permanently delete the filter.
Saving a Filter
You can save filters to use again later and share with other users. Once saved:
-
You can remove a filter from the Filters and Groups panel and find it later in the Saved list
-
Anyone with access to the structure can access the filter in the Saved list
You must have Control access for a structure to save a filter or edit a saved filter.
To add a new filter to the Saved list:
-
Select the down arrow next to the filter’s name
-
Select Save filter
-
Name the filter and select Save

Once saved, the filter will appear in the Saved Filters and Groups list.
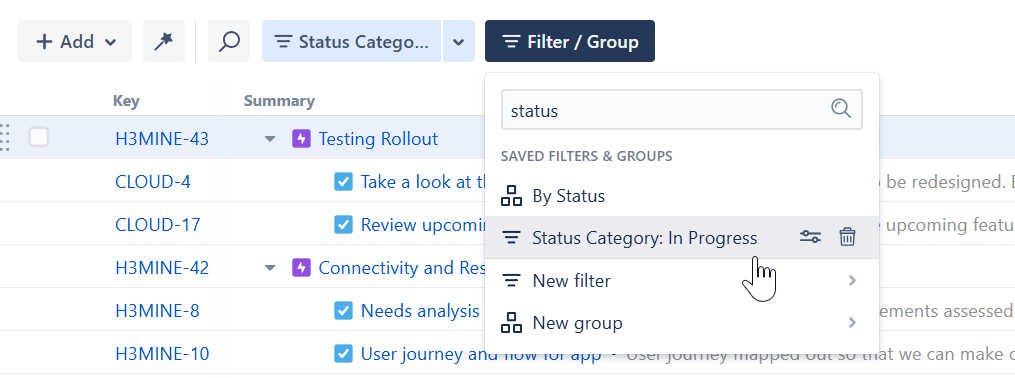
Editing a Filter
Changes to a saved filter affect all users with access to the structure.
To make changes to an existing filter:
From the Panel
If the filter is currently applied in the Filters and Groups panel, select the downward arrow next to its name and choose Edit.
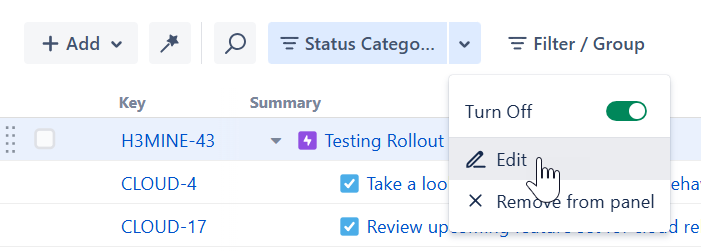
From the Saved List
Select the Filters / Groups button, locate the filter you want to edit, and select the Advanced Settings icon next to that filter.
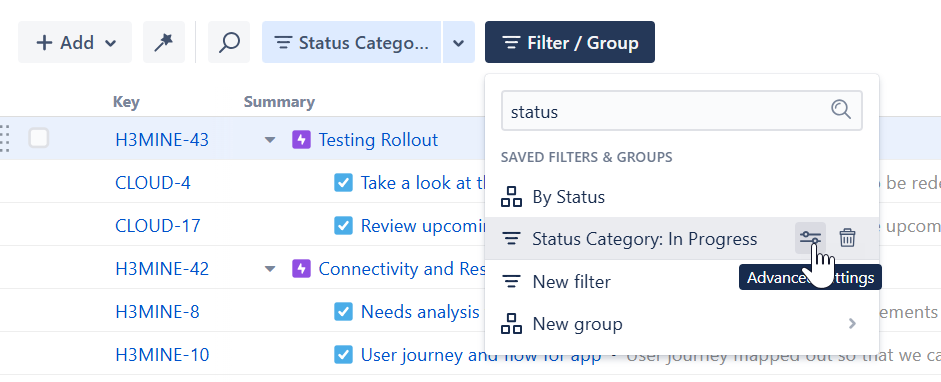
Reordering Filters and Groups
To change the order filters and groups are displayed in the Filters and Groups panel, simply drag a filter or group from one location to another.

Deleting a Filter
To delete a filter that hasn’t been saved, simply remove it from the Filters and Groups panel.
To delete a saved filter:
-
Select the Filter / Group button
-
Locate the filter you want to delete
-
Select the trashcan icon next to that filter
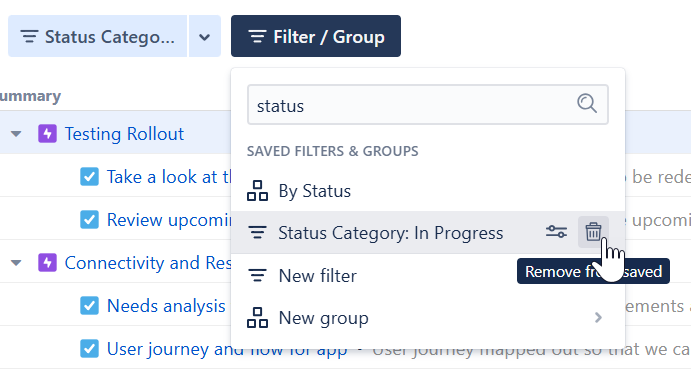
Deleting a saved filter removes it for all users.
