Skip table of contents

Building a Structure Manually

Building a structure manually allows you complete freedom in terms of choosing only the issues you want to include within your structure and arranging (or rearranging) them to your exact needs. When you add items to a structure manually, their position is stored within the Structure app itself – so you're free to move things anywhere you like, without affecting the issues in Jira.

Changes to issue properties from within Structure are reflected in Jira, regardless of how your structure is built.

Step 1: Open the Secondary Panel

To manually add issues to your structure, use the  Add | Search & Add  toolbar button in the top left corner of the Structure Menu. Or you can get the same results by clicking the Layout control in the top right corner and choosing Double Grid.

Either of these methods will open a second panel to the right of your structure. In this panel, you can enter a JQL query to search for issues you may want to add to your structure.

Step 2: Search for Issues

To find issues, enter a JQL query into the search box. (You can also search by plain text or add items from existing structures, but those are outside the scope of this tutorial – for more information, see Adding Existing Issues).

Let's enter a simple query to find all of the Stories across your various projects. In the JQL entry field, enter issuetype = Story.

Step 3: Add Issues to Your Structure

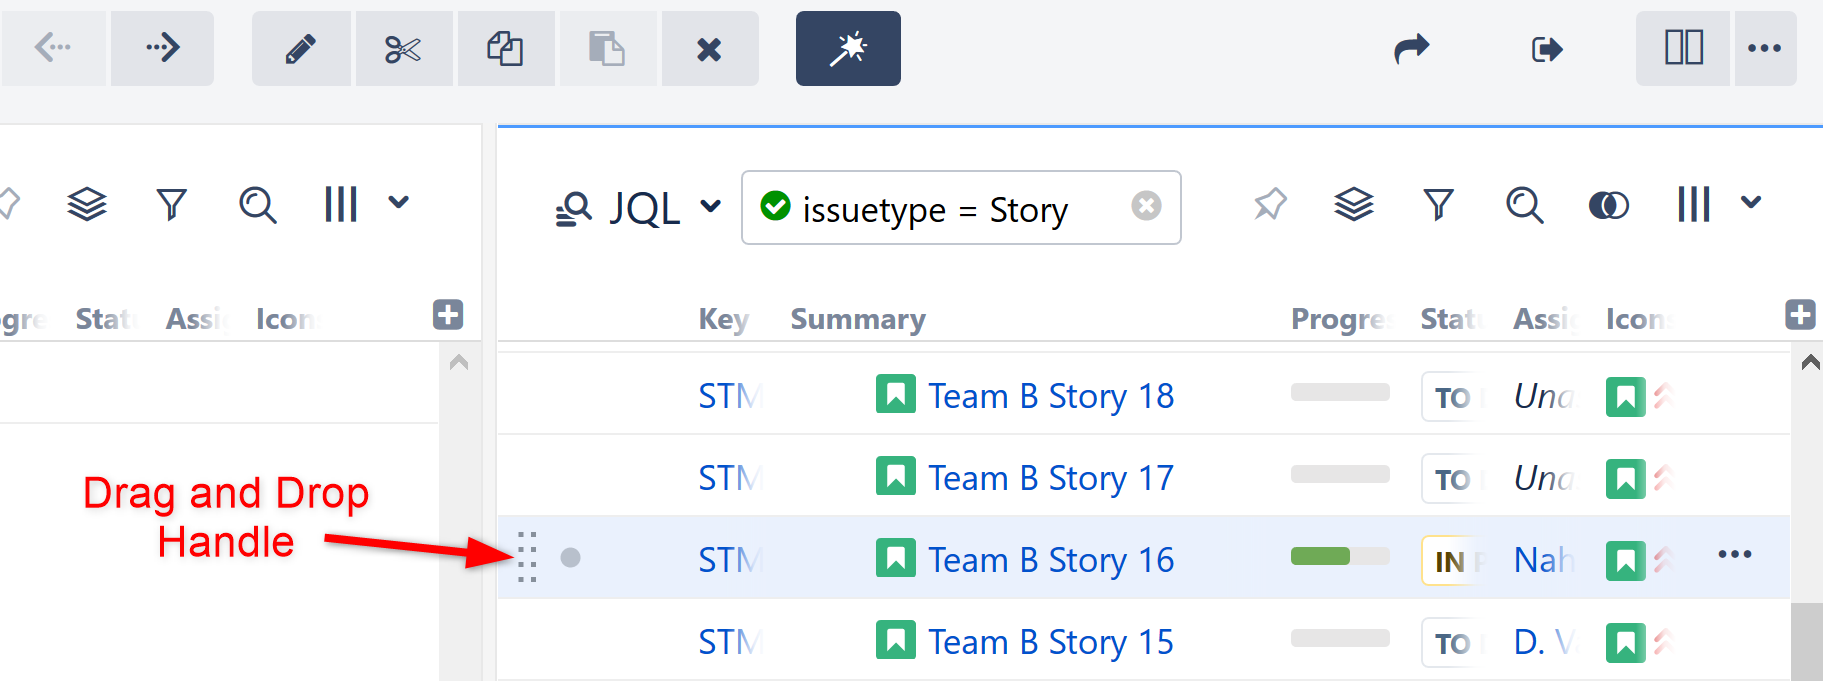
To add a single issue to your structure, use the drag and drop handle to the left of the issue (it only appears when you select or mouse-over an item), and drag the issue into your structure.


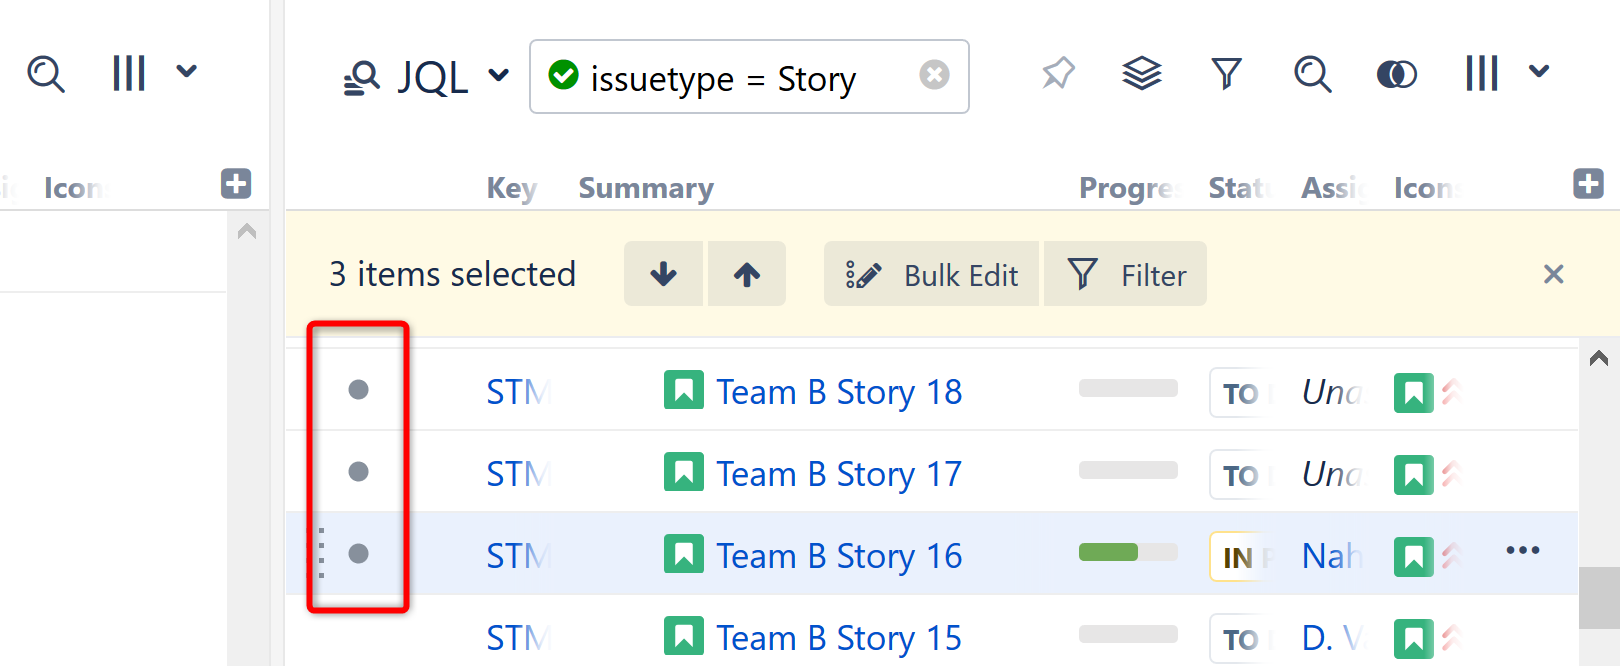
To add more than one issue at a time, click the small circle next to the drag and drop handle for each issue you want to add. Once you have selected all of the issues you want, use the drag and drop handle for any of your selected issues – this will allow you to drag all of them into your structure.

Adding the Same Issue Multiple Times

Issues can appear more than once within a structure. For example, a single task might be a requirement for multiple stories - so you may want to include it beneath all of those stories.

To add an issue to multiple locations in a structure, simply drag the issue from the Secondary Panel again (or even several times). You can also copy an issue from within a structure, using drag and copy – just hold the CTRL key while you move the issue ( Option  key on Macs).

Step 4: Organize Your Issues

Once issues have been added to your structure, you can move them around or arrange them into a hierarchy using drag-and-drop or the control buttons in the toolbar above the structure board.

We'll discuss more about moving issues in Working with Structure.

Congratulations! You've created your first structure. Now let's learn how to make dynamic structures that will unleash the full power of your newest productivity tool.

Next Steps

Now that you've learned three different ways to create new structures, let's take a look at what you can do with those structures.

Working with Structure


JavaScript errors detected

Please note, these errors can depend on your browser setup.

If this problem persists, please contact our support.