Migrating Structure data using the Jira Cloud Migration Assistant requires Structure 9.10.1 or later. We recommend upgrading to the latest version of Structure before migrating your data.
The easiest way to migrate Structure data from Jira Server or Data Center to Jira Cloud is by using the Jira Cloud Migration Assistant (JCMA). When you run JCMA, the structures you select will be recreated in Structure Cloud, based on:
-
Manually added issues and folders
-
Items added and organized through Automation
-
Structure views - including the default view and associated views for each structure
Before you begin the migration process, we highly recommend reviewing our Migration Notes.
In order to perform a migration, you must have Admin access for Jira Server/Data Center and Jira Cloud.
Include Structure in the JCMA Migration
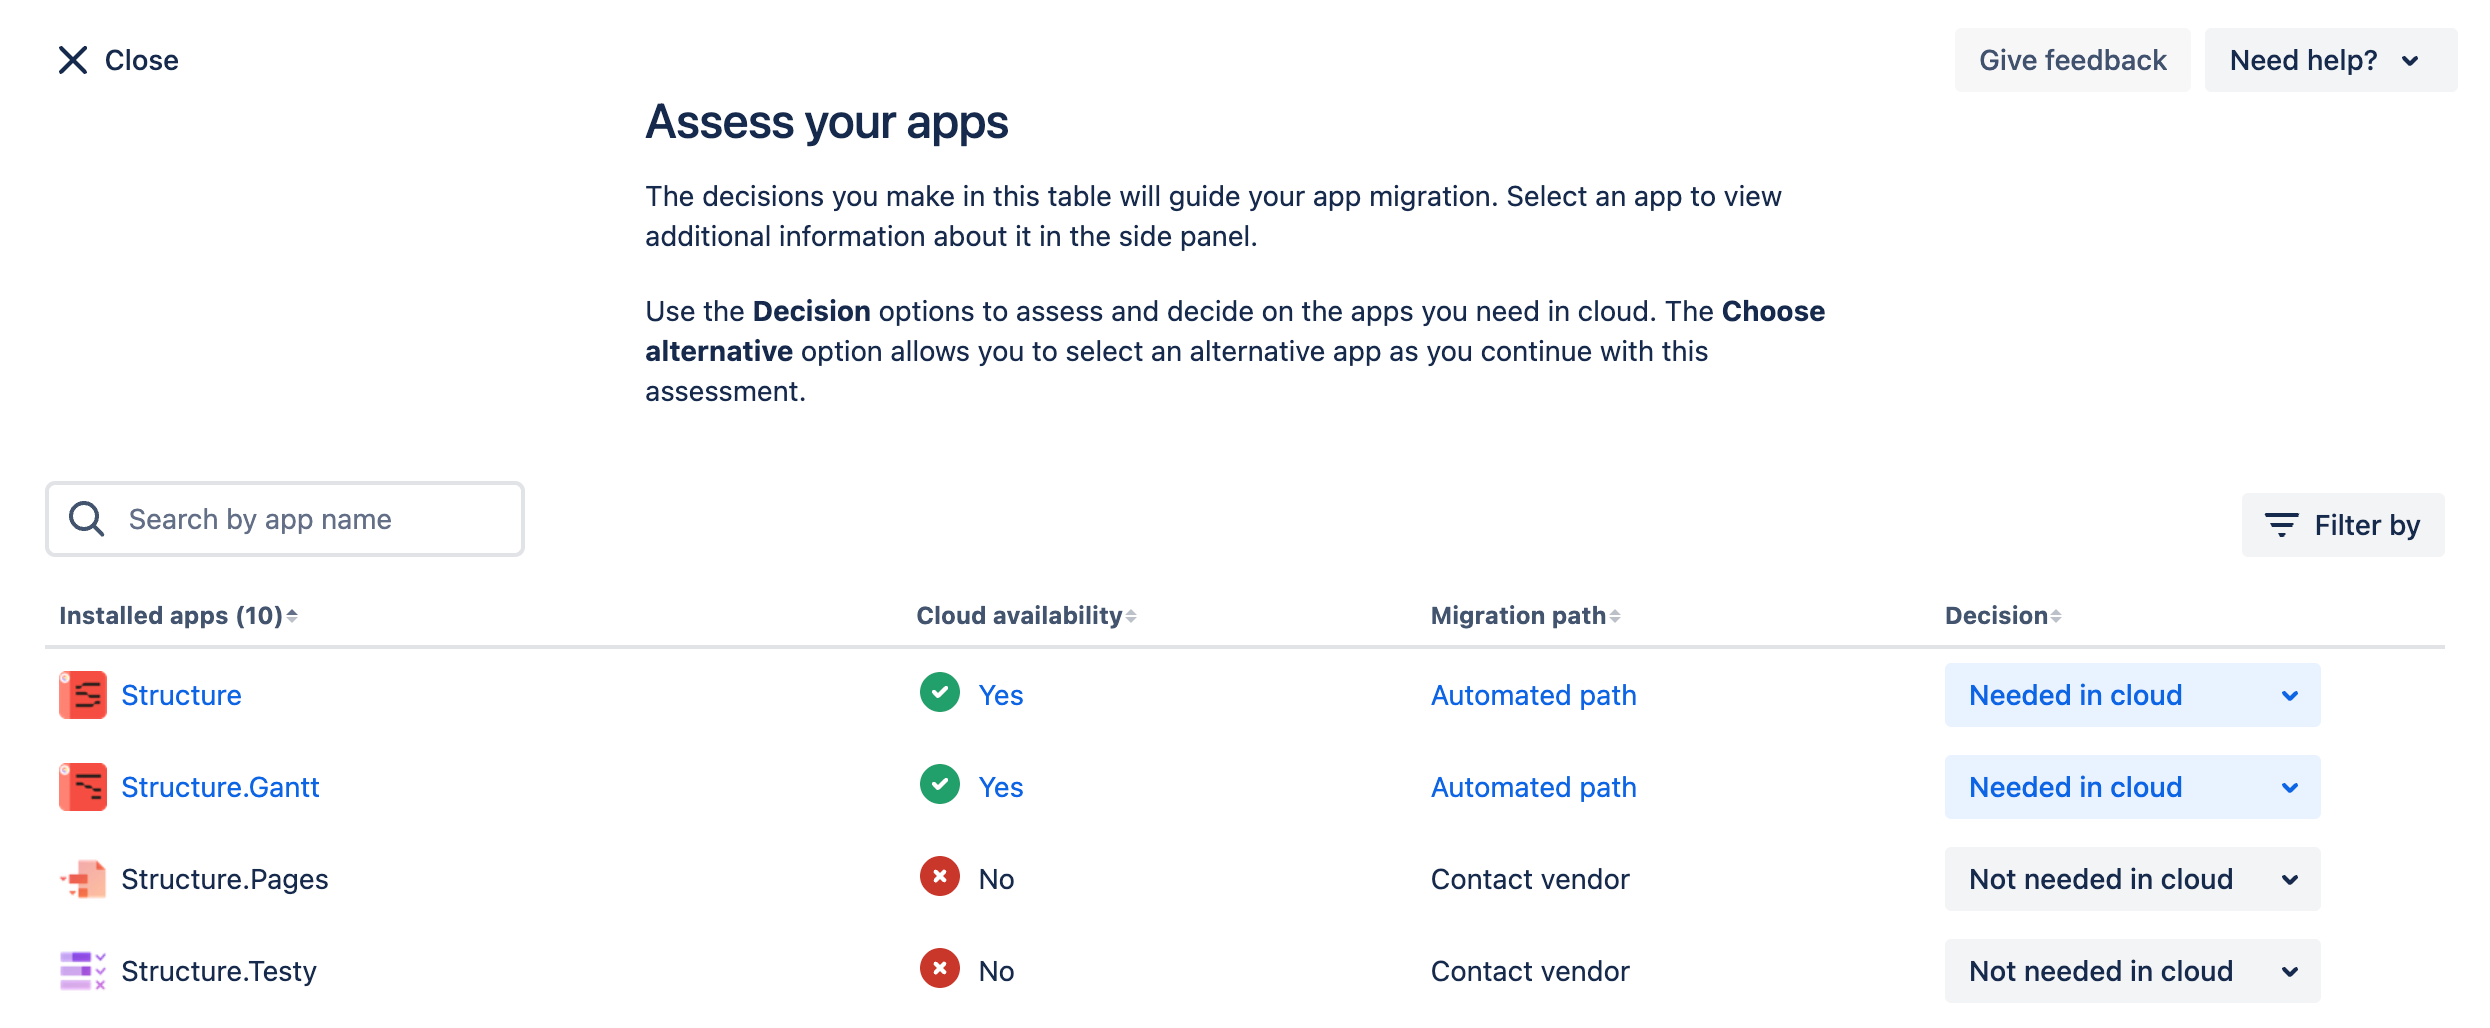
One of the preparation steps during the JCMA migration process is the Marketplace app assessment. In this step, Structure (and Structure Gantt, if required) must be marked as “Needed in Cloud” to be included in migration plans.
Choose Your Path
Migrate Everything
The easiest and most reliable way to move all your structures to a Cloud instance is to migrate them along with all your Jira data. This can be done by selecting the “All data” JCMA migration option. This will transfer all data from Jira and selected applications in a single bulk move. You need to make sure that Structure (and Structure Gantt, if required) were marked as “Needed in Cloud” during the “Assess your apps” step, included in a current migration plan, and successfully passed the JCMA pre-migration check.
Migrate Jira Data First
You can migrate all your Jira data first using JCMA and then run the Structure migration afterwards. This can be done using the “Select what to migrate” JCMA migration option. During the initial Jira data migration, make sure the Structure app is not enabled among transferred items in your migration plan; otherwise, it will move all structures with each migration attempt, creating duplicate structures in the Cloud instance.
After all required Jira data has been transferred, a new migration that includes Structure data only can be launched. Keep in mind that migrated structures would only be able to see issues from spaces that have been migrated to cloud using the JCMA tool - if you did not migrate all relevant Jira spaces or used other means of transferring Jira data, this would cause errors for some of your migrated structures.
If you've already conducted a bulk Jira migration using JCMA and you marked Structure as “Needed in Cloud”, all of your structures should have been migrated. Running a separate structure migration on top of the bulk Jira migration will result in duplicate structures.
Migrating Specific Structures
It is possible to migrate some selected structures only. In this case, only manually chosen structures will be included in the migration. The guide below shows you how to transfer specific structures to your new Jira Cloud instance.
Migration Steps in Jira Server or Data Center
Step One: Make sure you have the appropriate software installed
The following programs must be installed on Jira Server/Data Center:
-
Structure for Jira
Learn more: Use the Jira Cloud Migration Assistant to Migrate
Step Two: Create a new Jira migration
Go to Administration > System > Migrate to cloud and create a new migration. For step-by-step instructions, see Use the Jira Cloud Migration Assistant to migrate from server to cloud.
Save the migration set. DO NOT RUN THE MIGRATION SET! Before running the migration set, you need to add your structures.
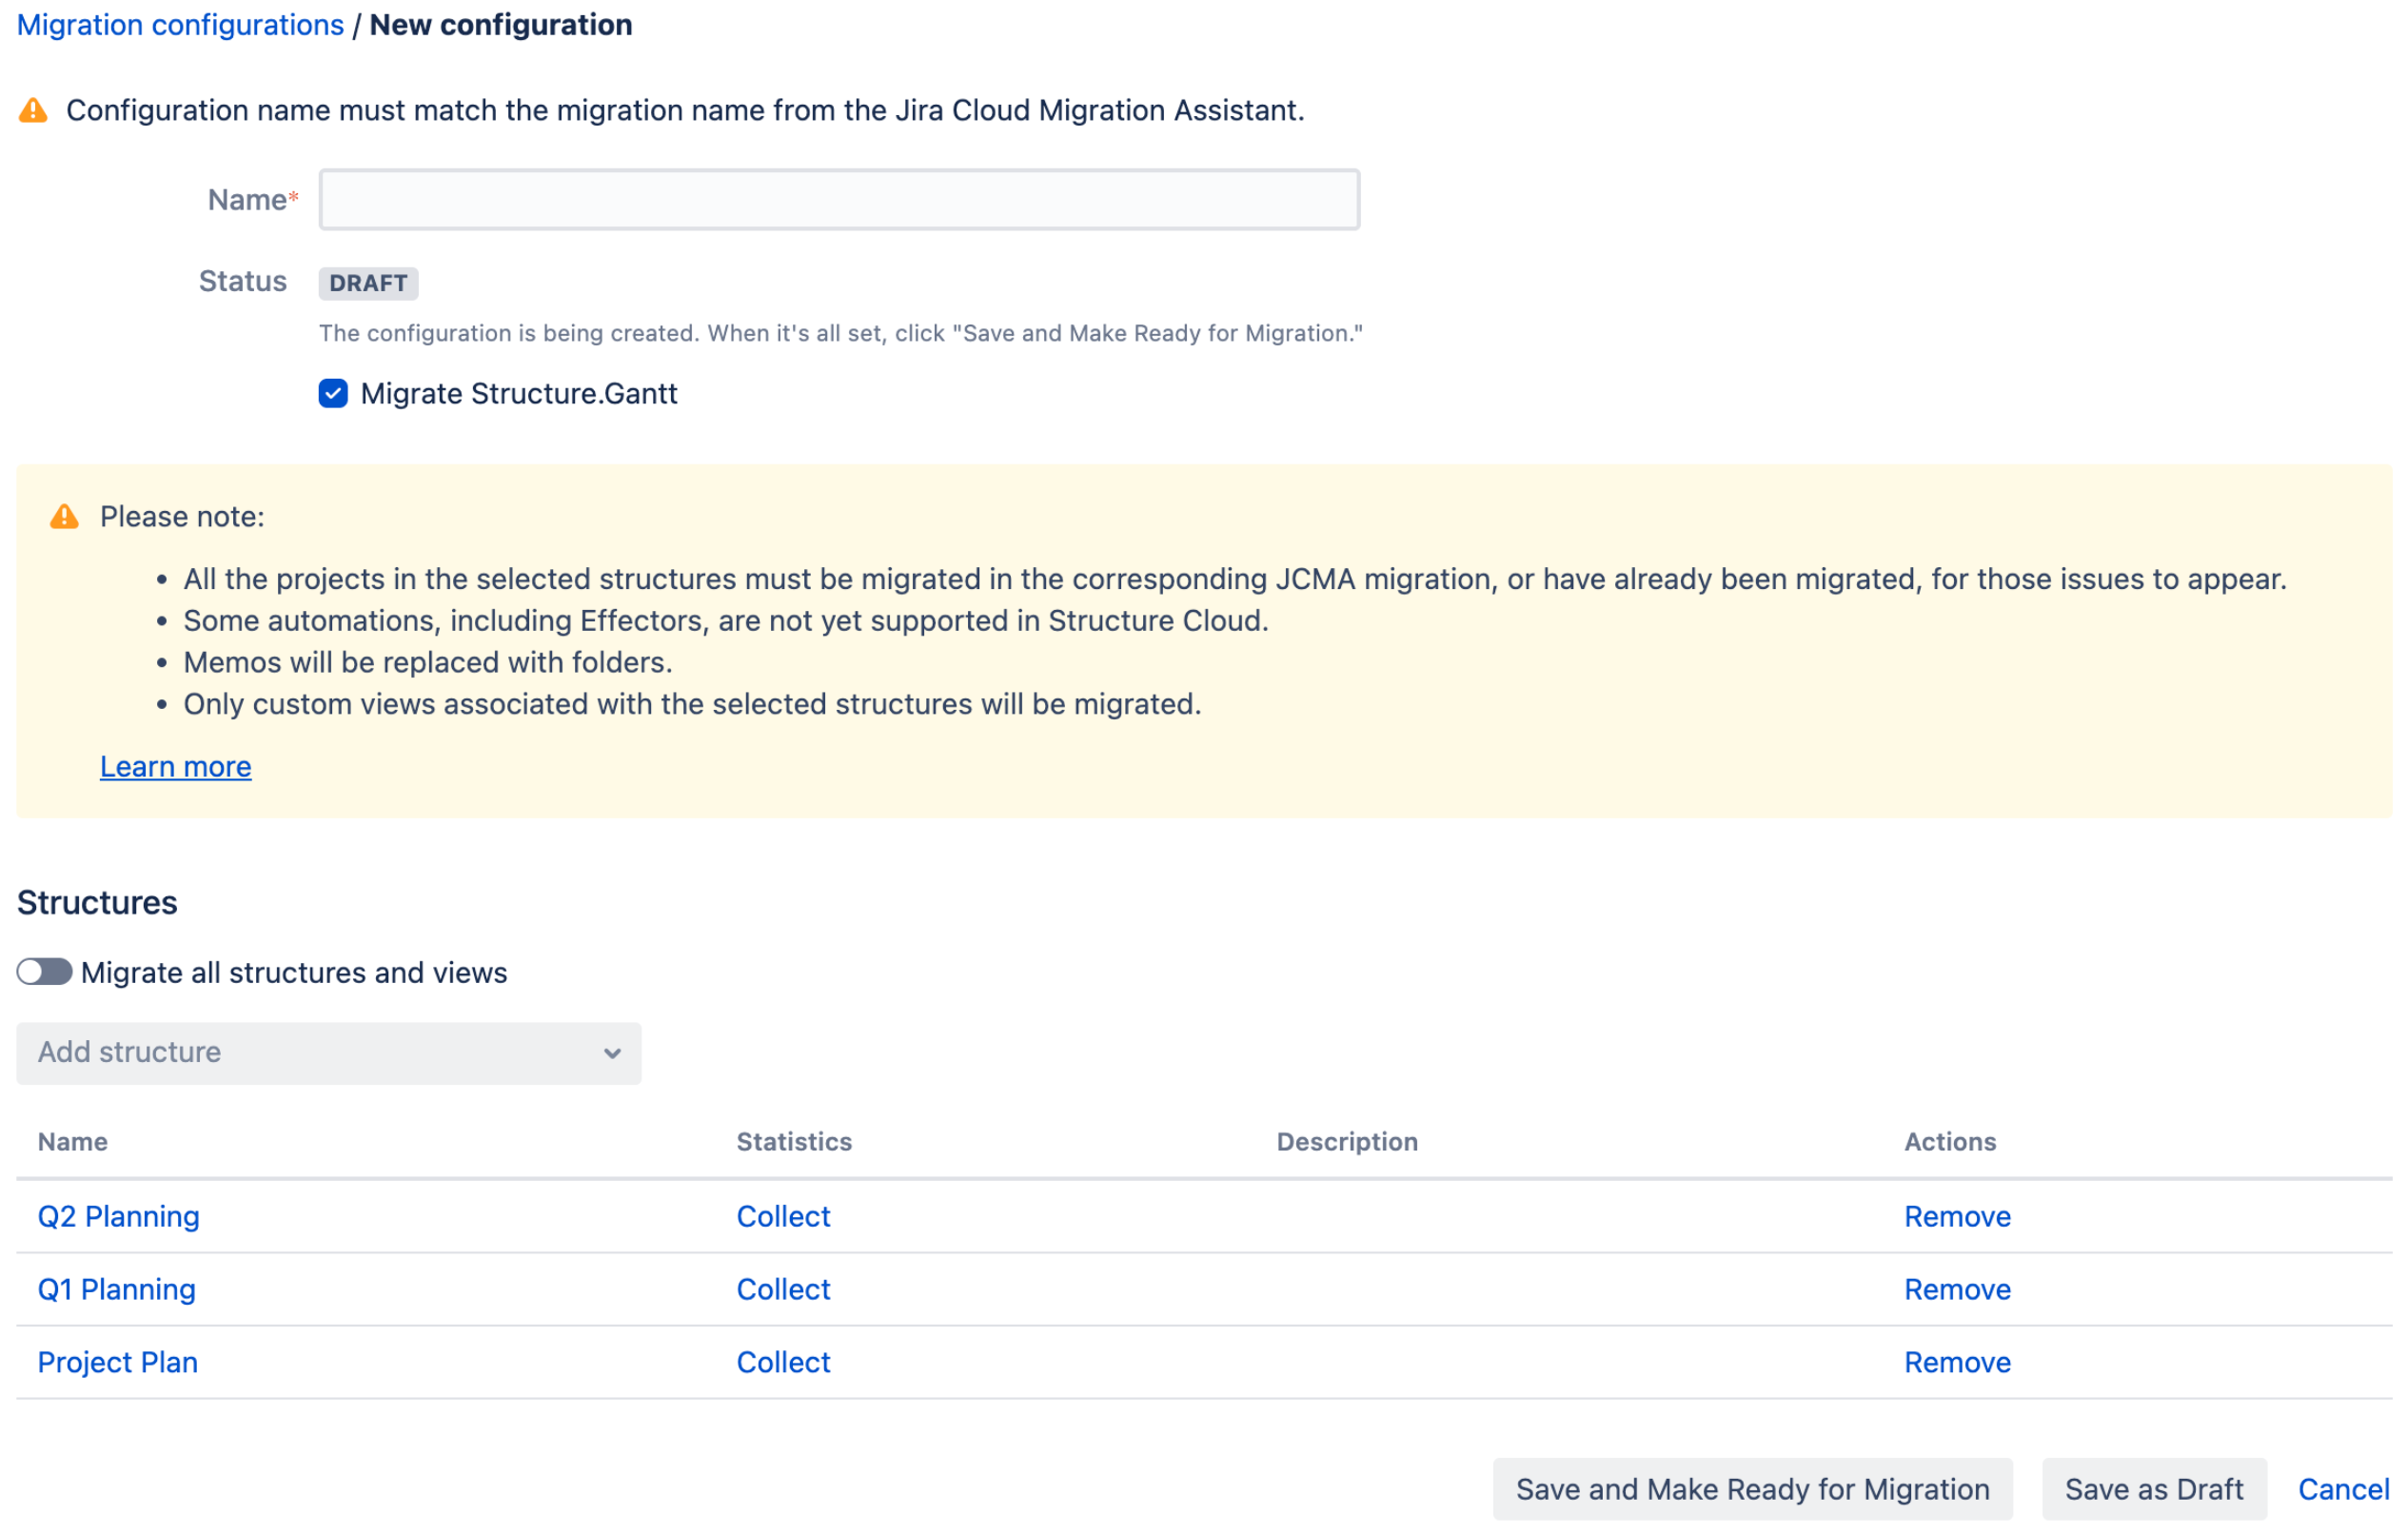
Step Three: Create a Structure migration configuration
Go to Administration > Structure > Migrate to Cloud and create a new configuration. Give it the exact same name you used for the Jira migration in Step 2.
If the names do not match exactly, all structures in your instance will be migrated.
In the configuration, select structures that need to be migrated in the current plan. If migrated structures have Gantt charts associated with them, and they also need to be migrated, select Migrate Structure.Gantt.
You can only add issues to Structure from spaces that have been migrated to cloud using the JCMA. We recommend only adding structures to a configuration if the associated spaces are also being migrated in that set, or those spaces have been migrated previously using the JCMA.
Step Four: Run the Jira migration
Return to Administration > System > Migrate to cloud and run the JCMA migration.
Migration Steps in Jira Cloud
Once the migration has been run, the following steps should be taken in Jira Cloud.
Step One: Review the Jira migration
Check that all the users, groups, and spaces were migrated successfully. See Use the Jira Cloud Migration Assistant to migrate from server to cloud for more details.
Step Two: Check Structure migration status
Go to Settings > Apps. In the left panel, locate the Structure Cloud section, and click Migration. This will bring up a list of migrations with the status of each.
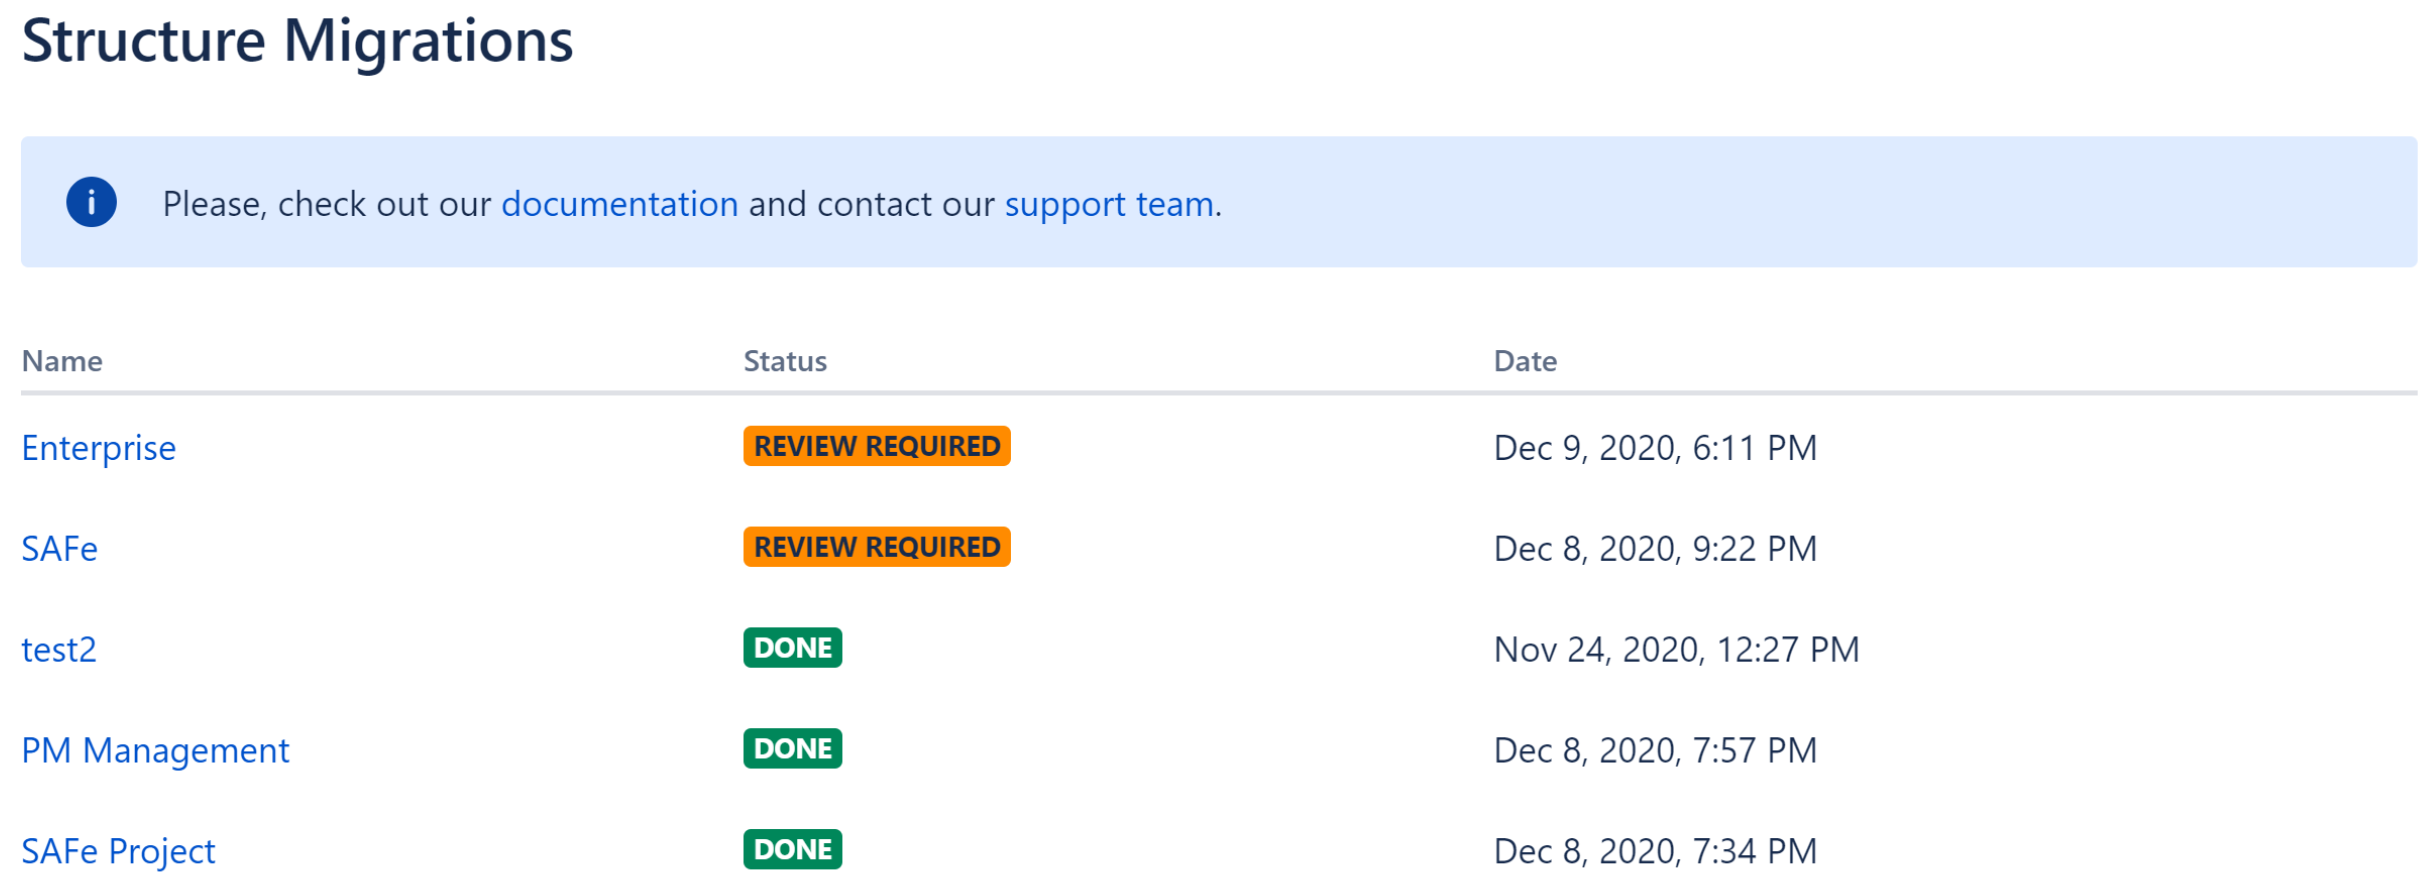
You may receive the following statuses:
-
Review required - the migration has completed, but some structures need to be reviewed
-
Done - the migration has completed, and the structures are ready to be used
-
In progress
-
Failed
To review the structures in each migration, click the migration name.
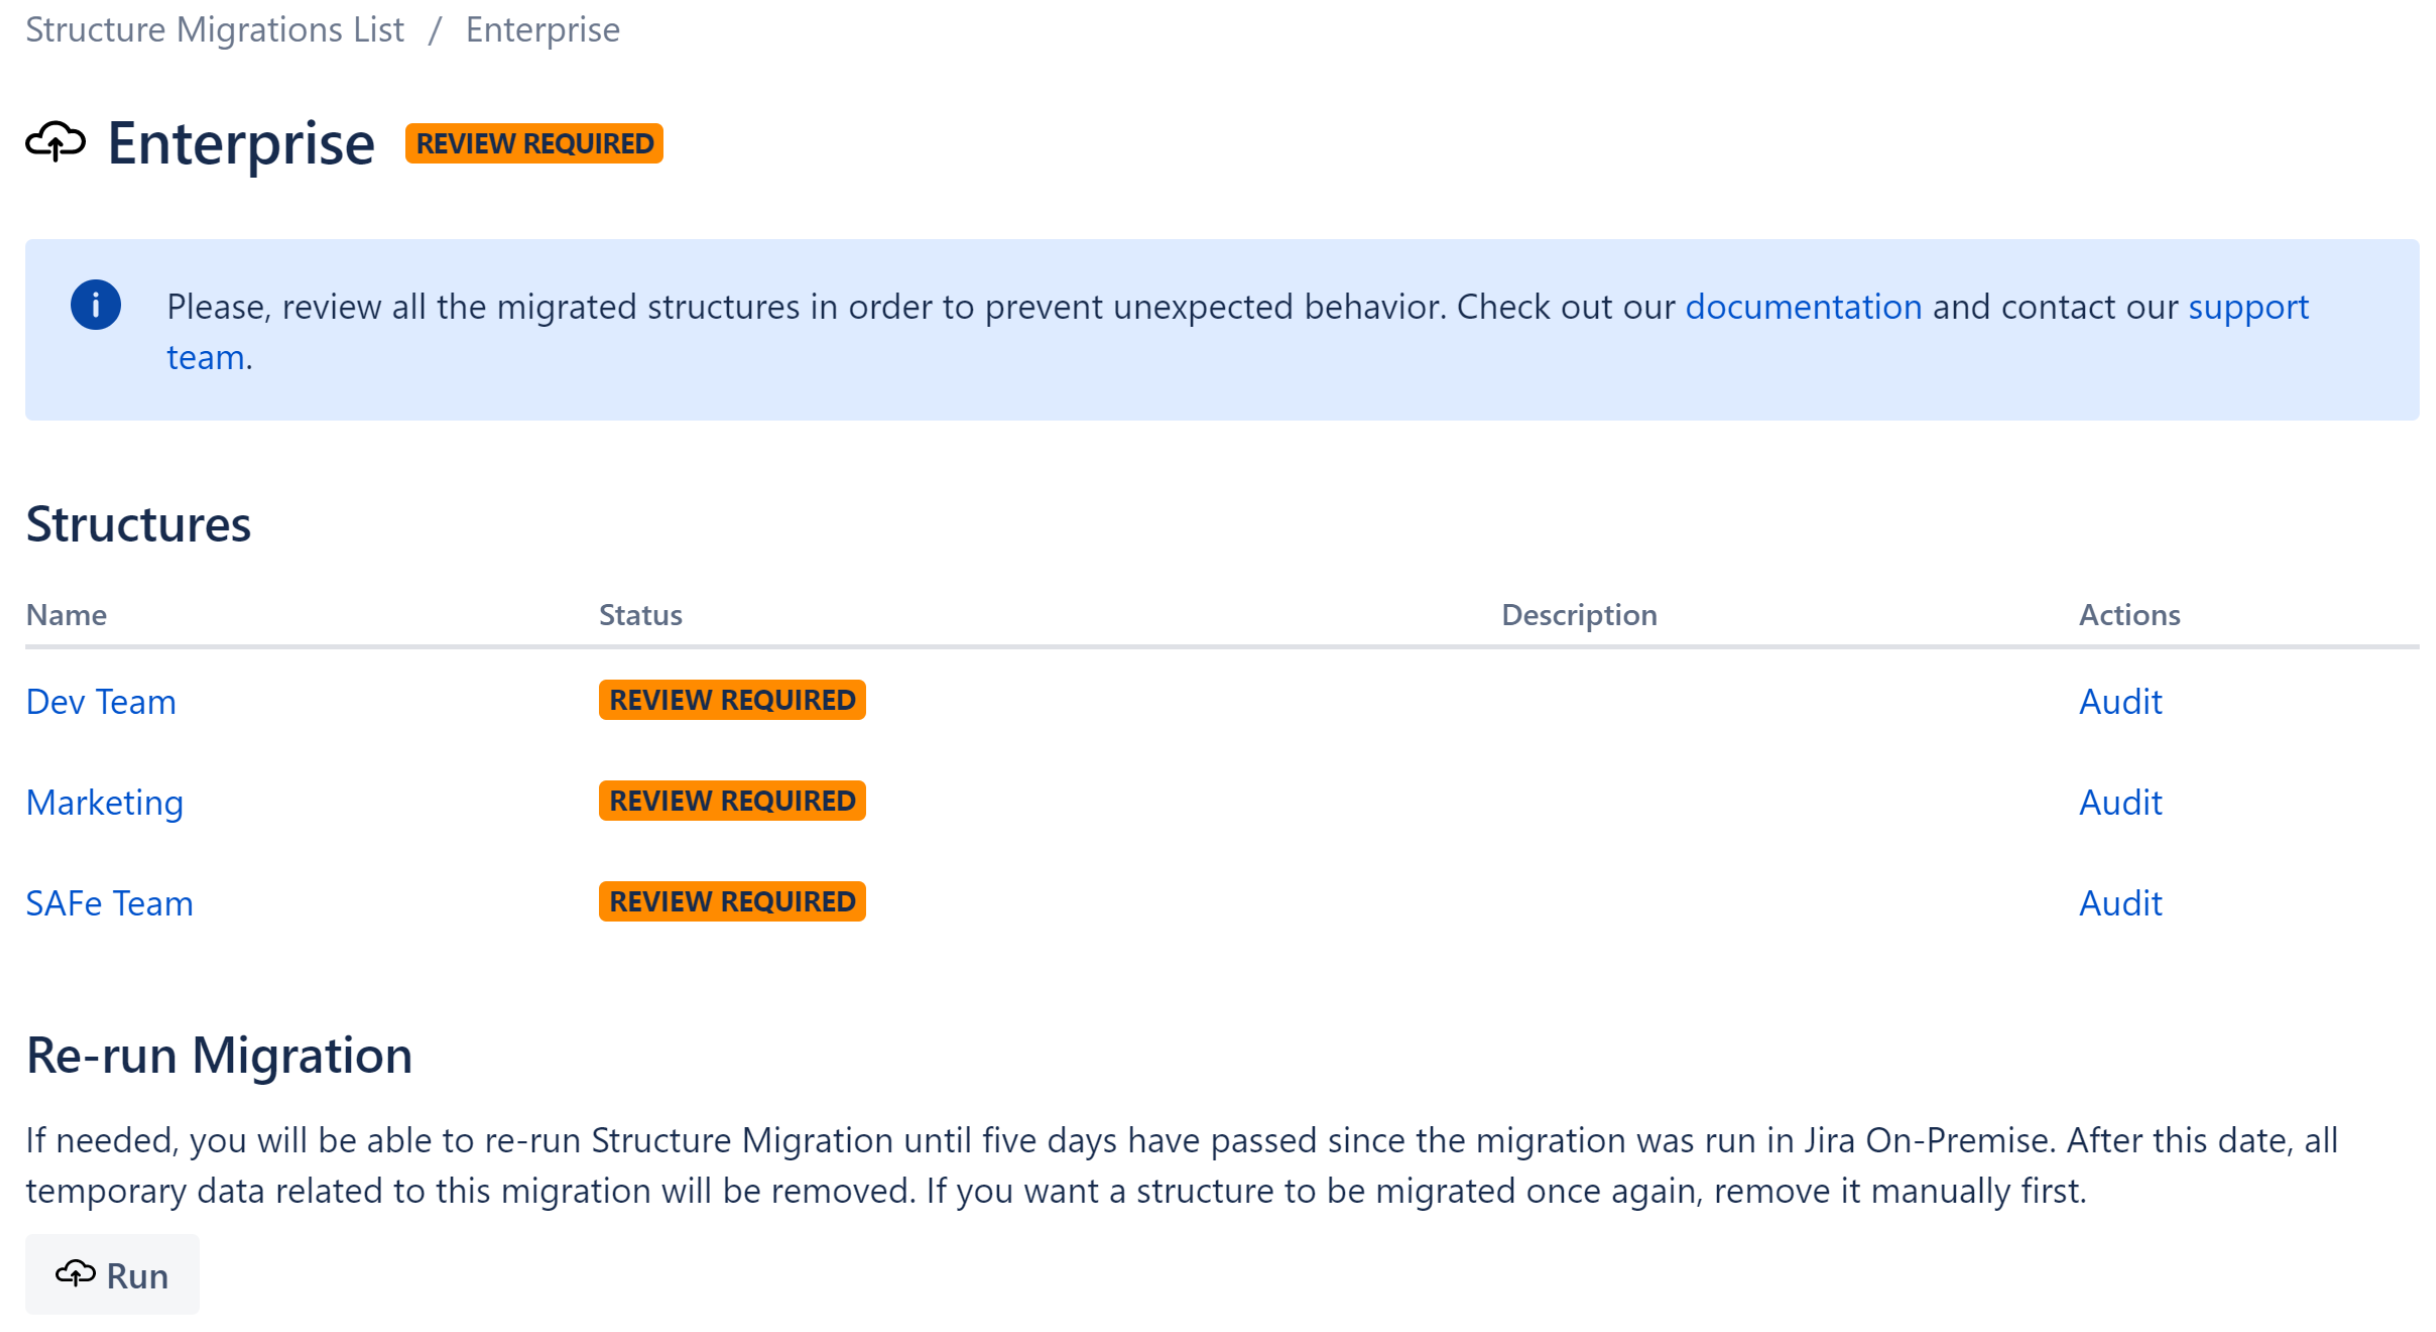
Each structure will have one of the following statuses:
-
Review required - the structure has been migrated, but needs to be reviewed
-
Done - the structure has been migrated and is ready to be used
-
Failed
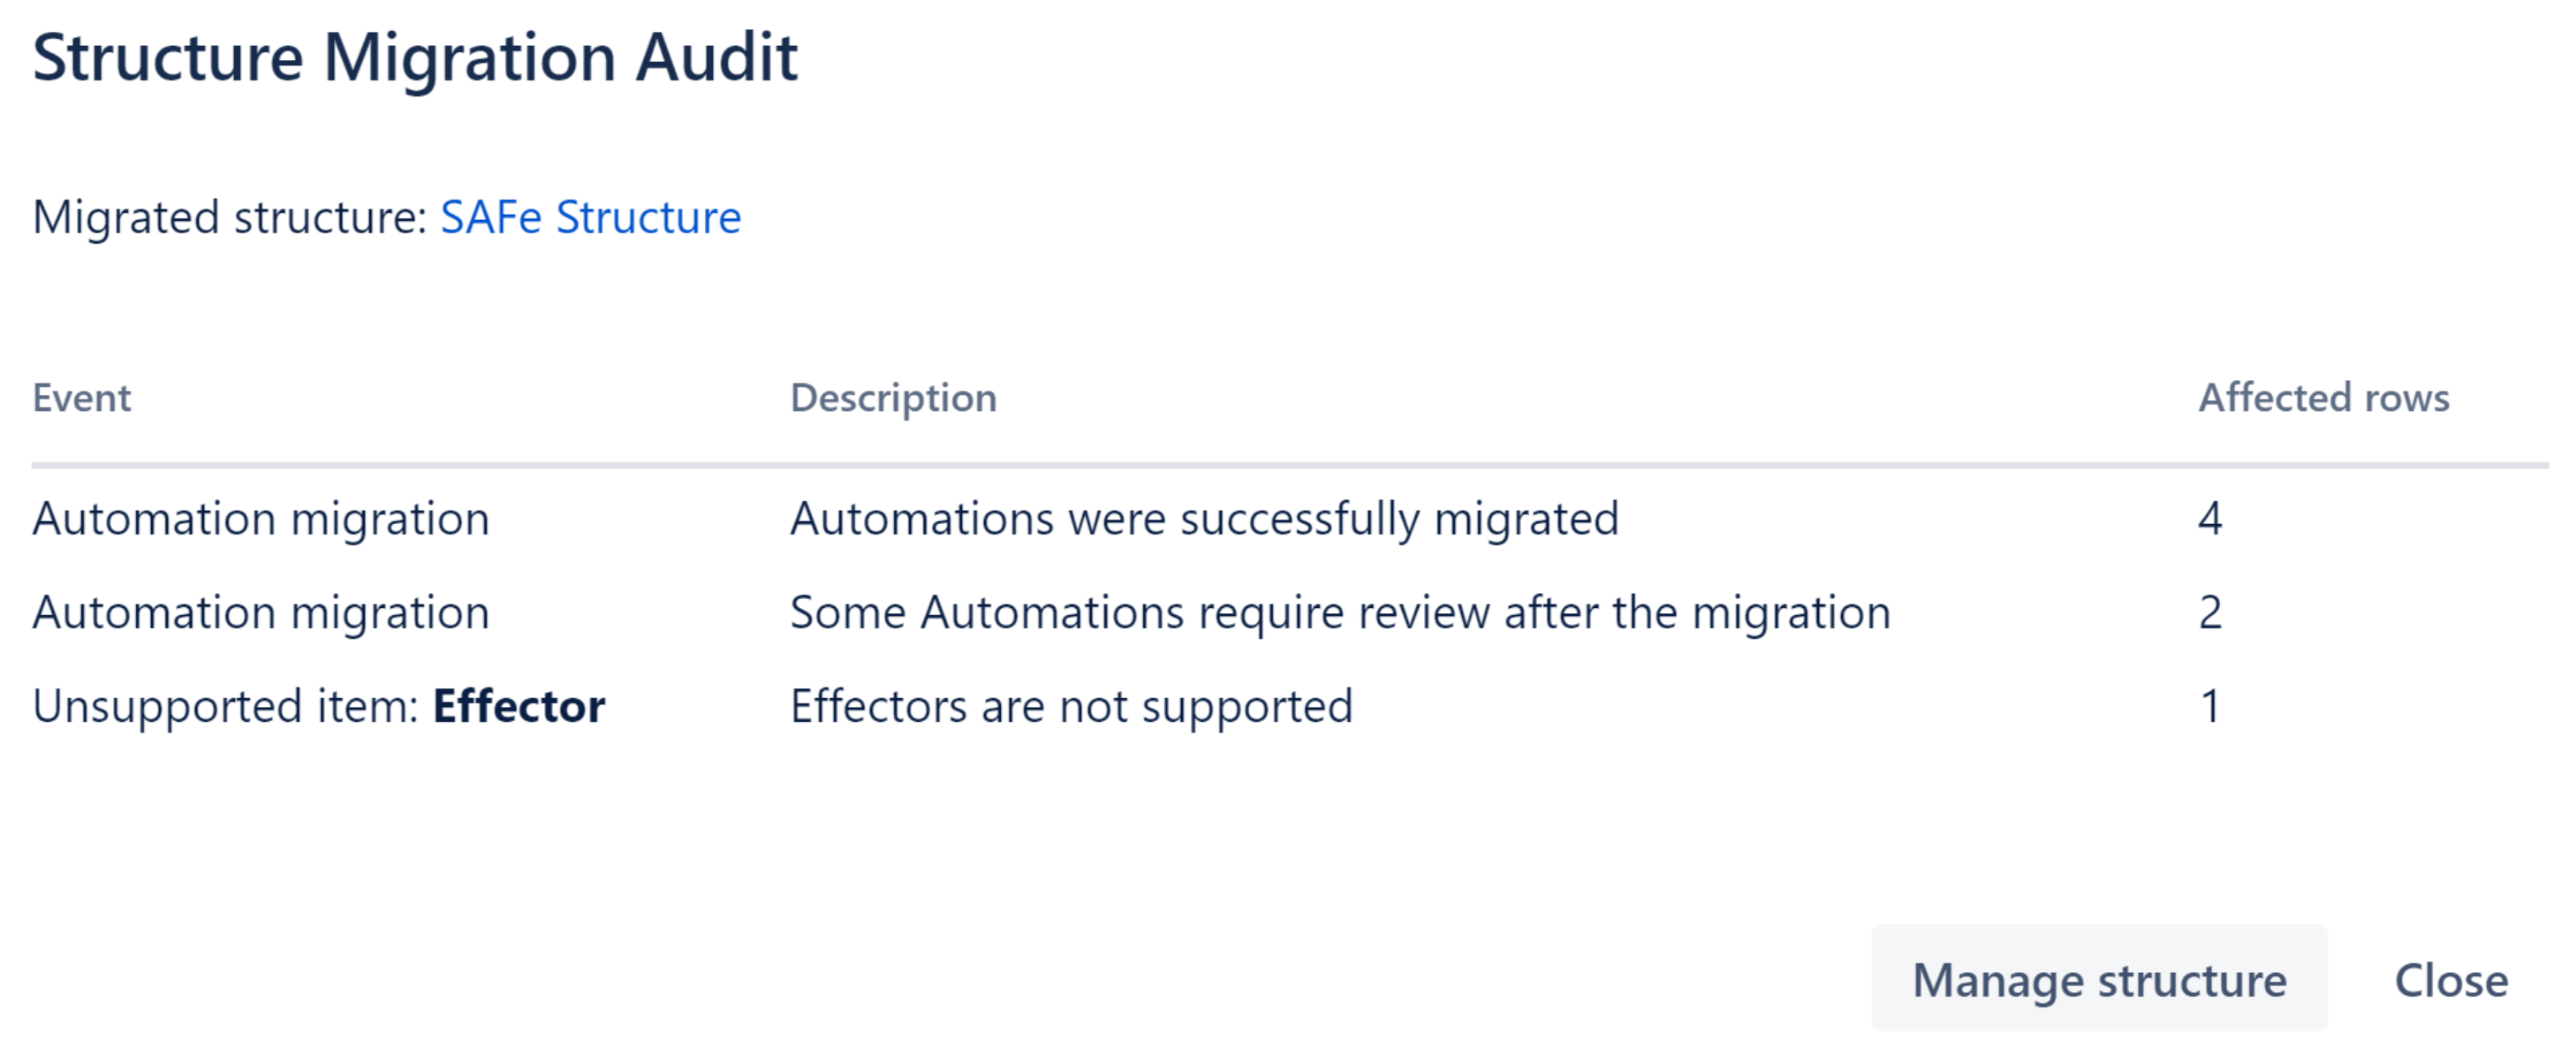
For additional details about the migration, including which items require review, click Audit.
If you need to re-run the migration for any reason, you can do so within 14 days of the original migration.
Select the Run icon at the bottom of the Migration screen to re-run the migration. This will not duplicate existing structures; it will migrate structures removed since the prior migration.
Step Three: Review each structure
To review each structure, click the Manage structure link on the Audit screen or the structure's name on the Migration screen.
Before you can open a structure, you may need to update its Owner and Permissions settings via Manage Structures.
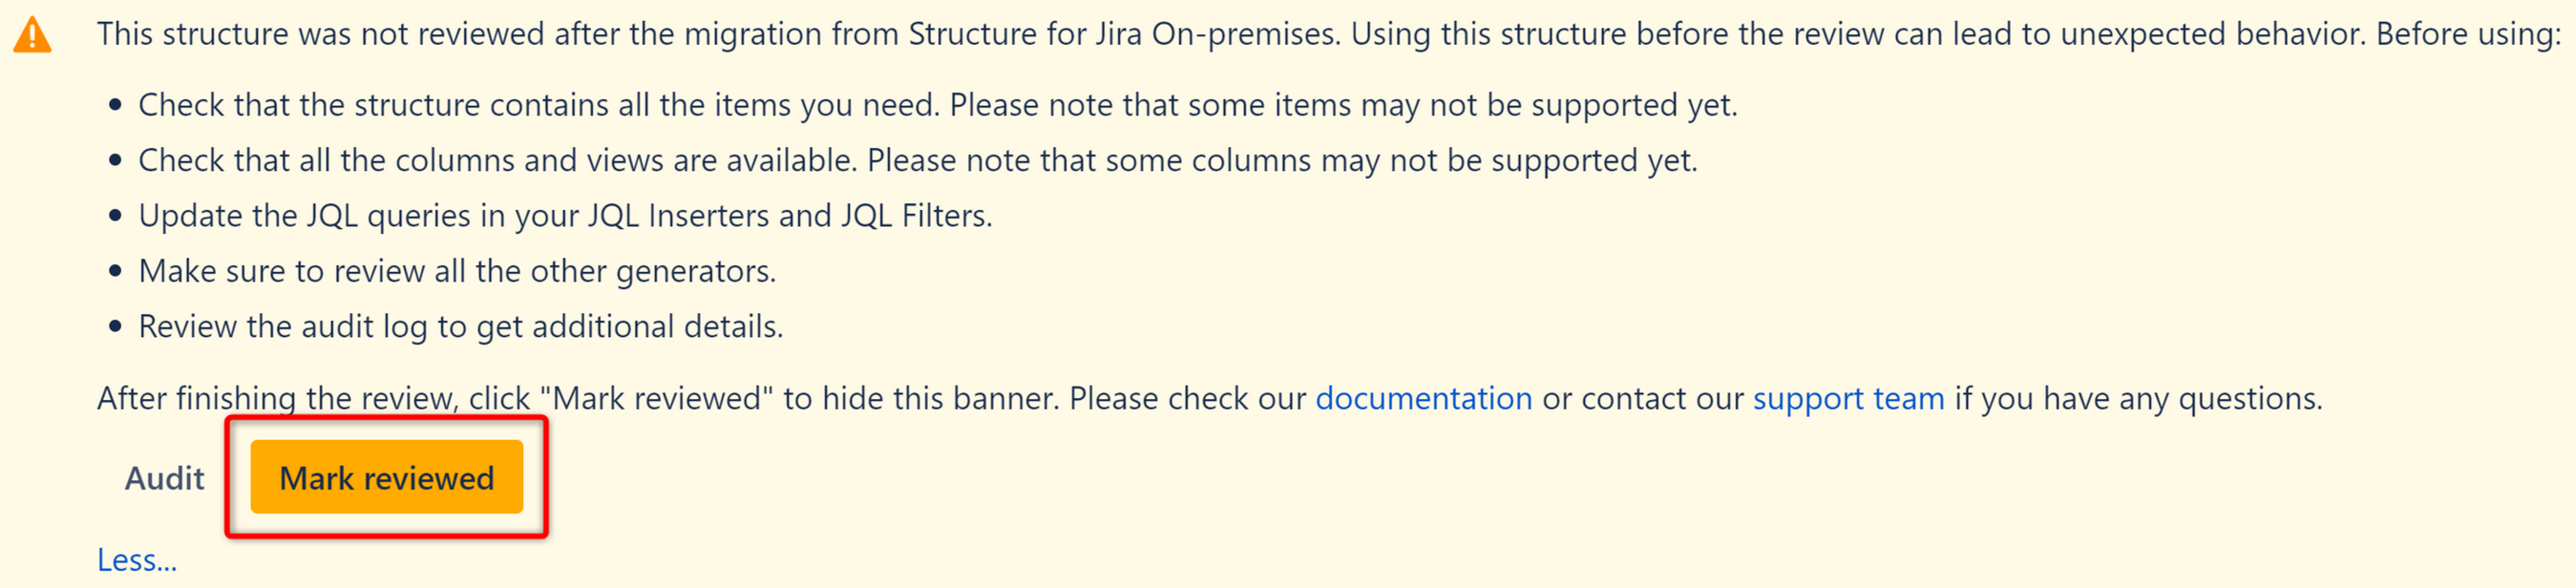
If there are any items that need review, you will see a message at the top of the structure with steps that should be completed before using the structure.

You should check:
-
Manually-added items - make sure they were added correctly to the structure. Note that Memos are not yet supported in Structure Cloud and will be replaced by flex items.
-
Automations - make sure they were migrated correctly and return the expected results.
-
Automations labeled “not migrated” - this indicates structure was unable to reproduce the automation in Cloud, most likely because it could not locate a space, board, or issue. Double-click the automation and check it settings. Adjust as necessary.
-
Agile Inserter - structure built using the Agile Inserter will need to be recreated in the new cloud instance.
-
JQL Inserters, JQL Filters, and JQL Quick Filters – doublecheck the JQL and results, as some attributes may be different in Cloud. Adjust as necessary.
-
Columns - make sure columns were migrated as expected.
-
Views - only custom views associated with the selected structures will be migrated.
-
Anything labeled "Unsupported" - this indicates that the item or automation is not yet supported in Structure Cloud and could not be migrated.
Test Run columns are not yet supported with the migration assistant.
Step Four: Mark the structure reviewed
Once you have reviewed the structure and updated it as necessary, return to the banner at the top and click Mark reviewed. The banner will not appear for this structure again.
Additional Resources