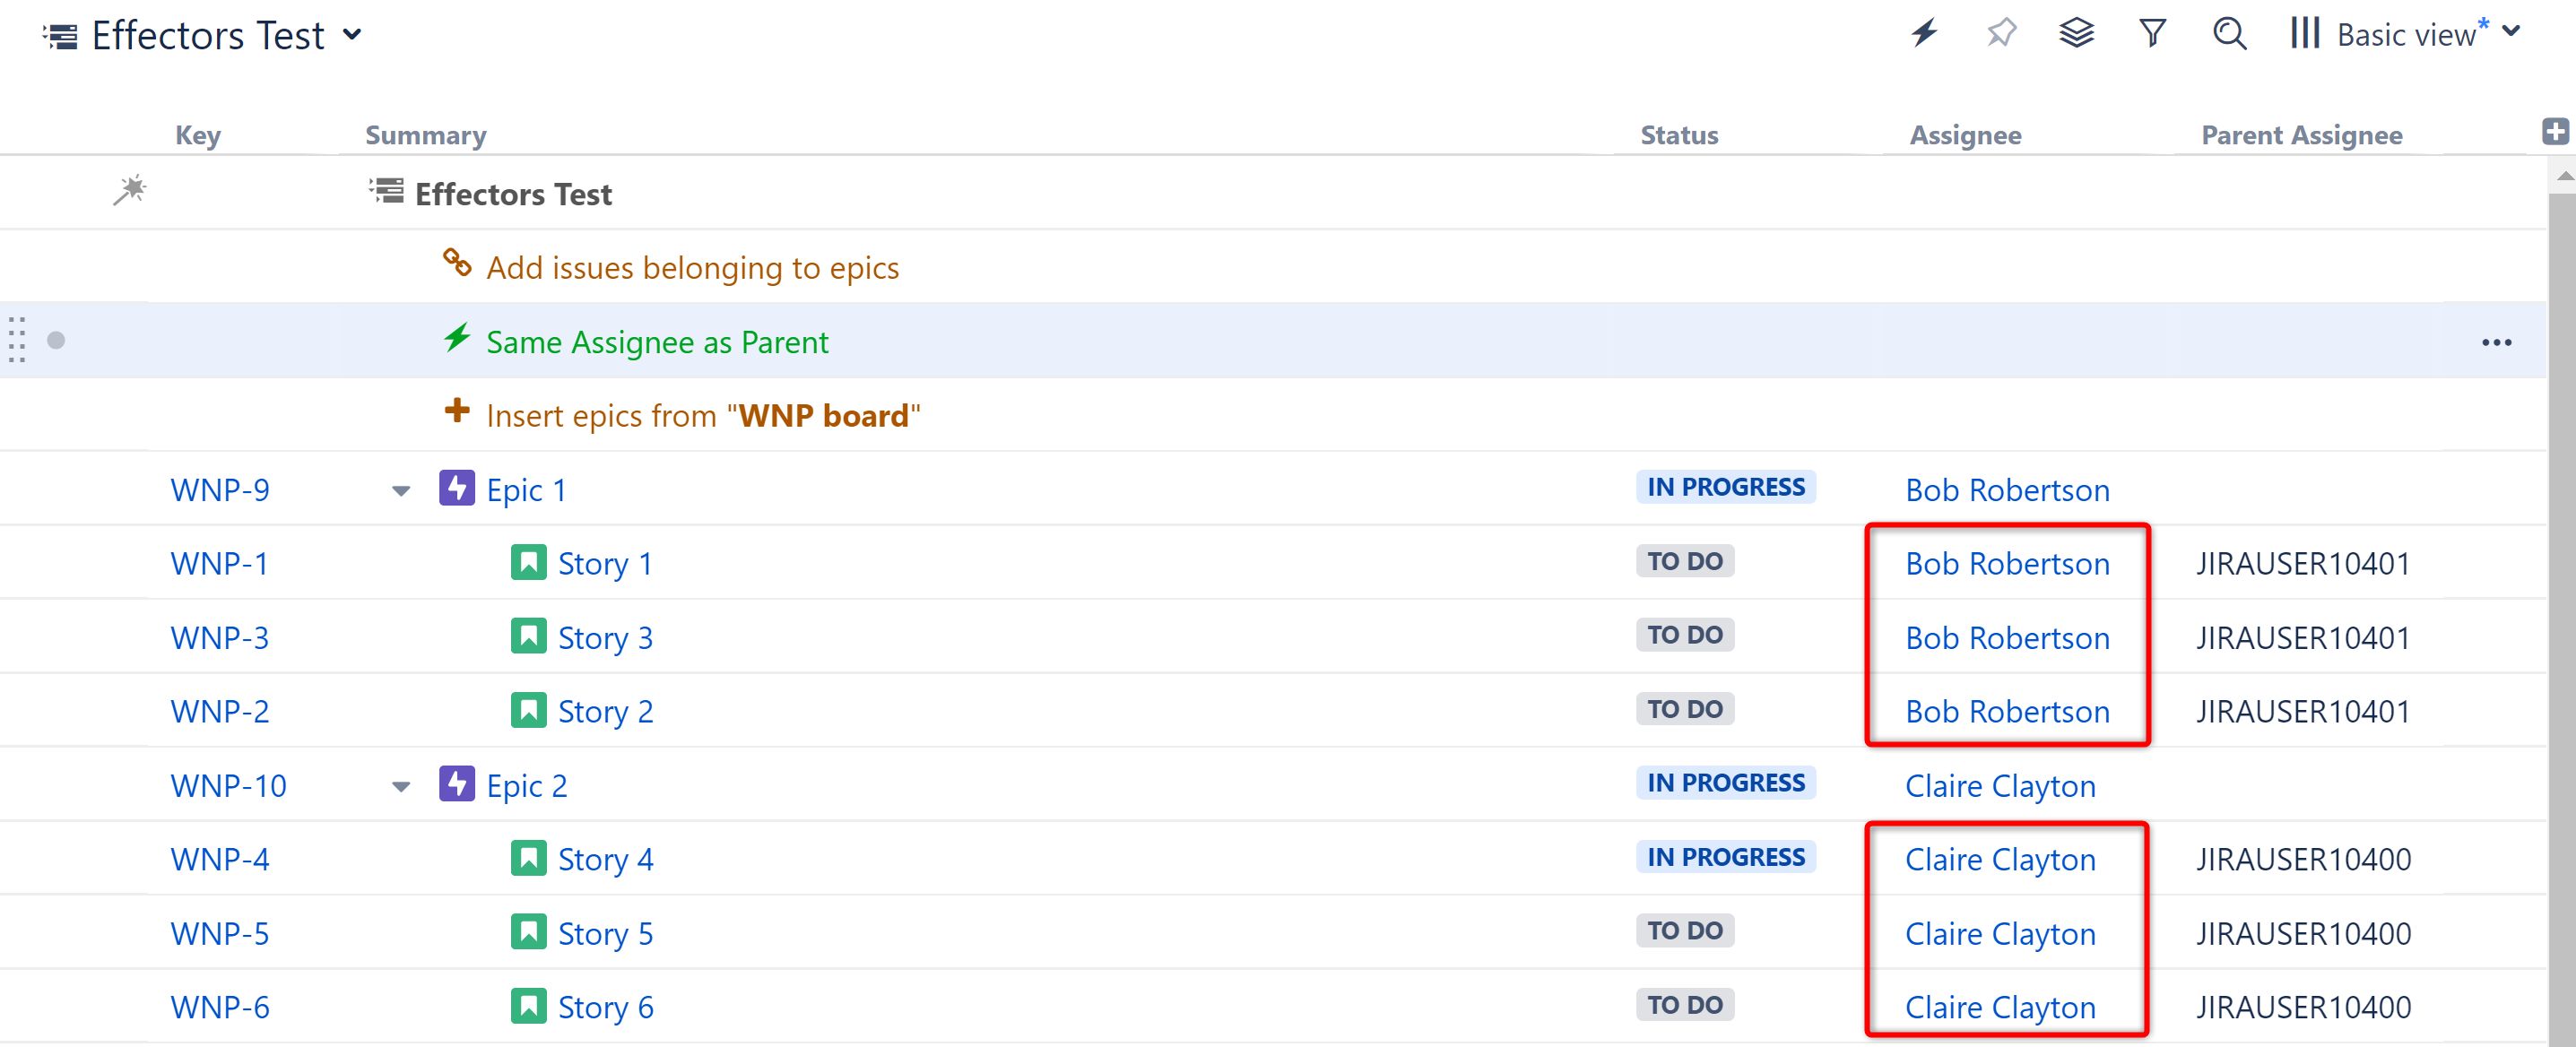
Use Structure to automatically reassign issues based on a parent item - for example, update the assignee for each story to match the assignee of its parent epic.
Step 1: Create the Hierarchy
Use Automation to organize issues into a hierarchy so that the issues you want to update are placed directly beneath the issues you want to match. For this example, we're going to place our stories beneath our epics:
-
Add epics: Automation | Insert | JQL QueryEnter the following JQL query: issuetype = EpicTo limit the epics to specific projects or other variables, add additional specifications (Example: AND project = "My Epics")
-
Add stories: Automation | Extend | Stories under Epics...
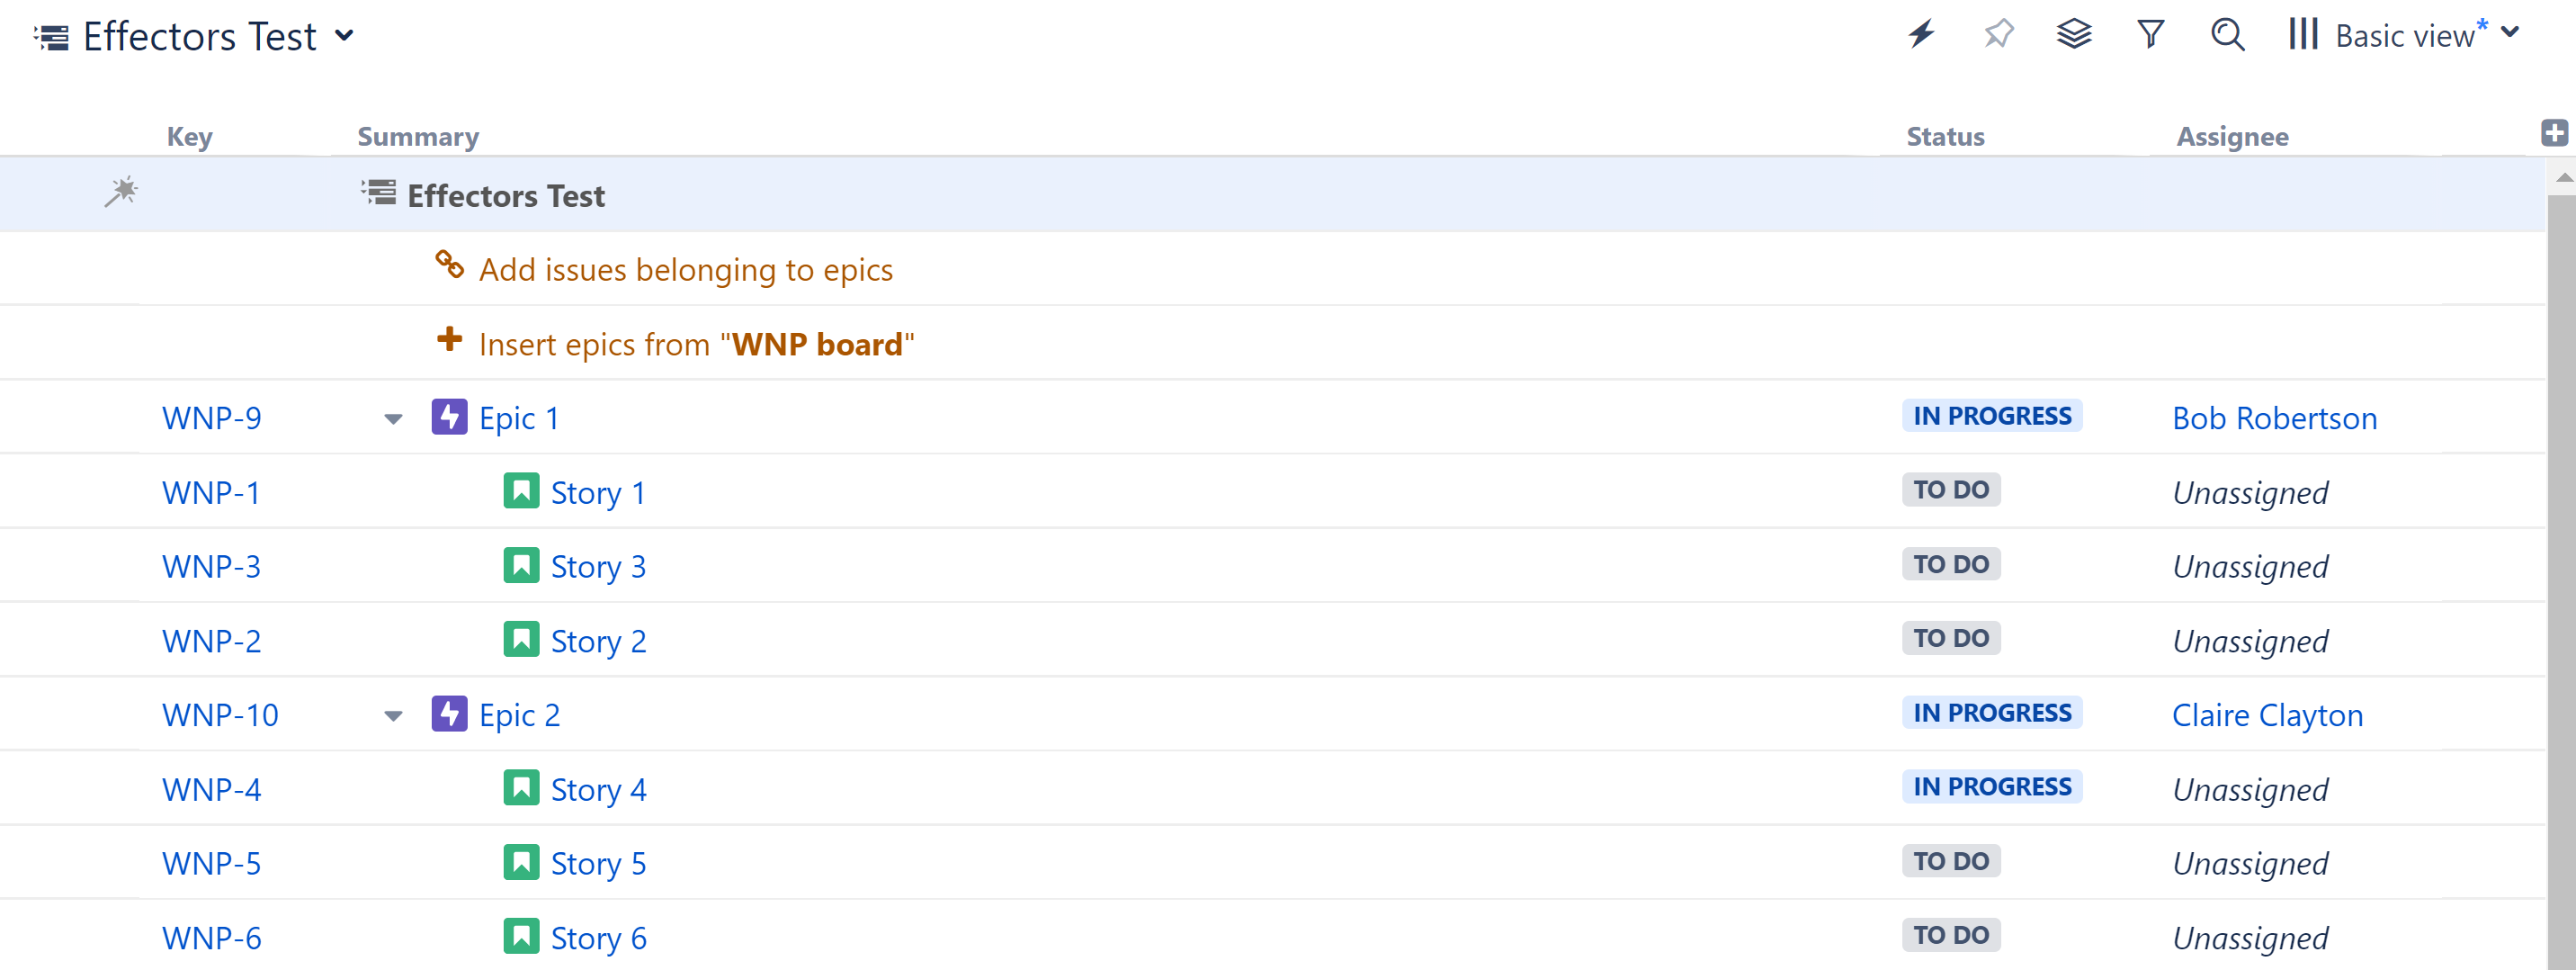
Step 2: Add a Formula Column to Capture the Parent's Assignee
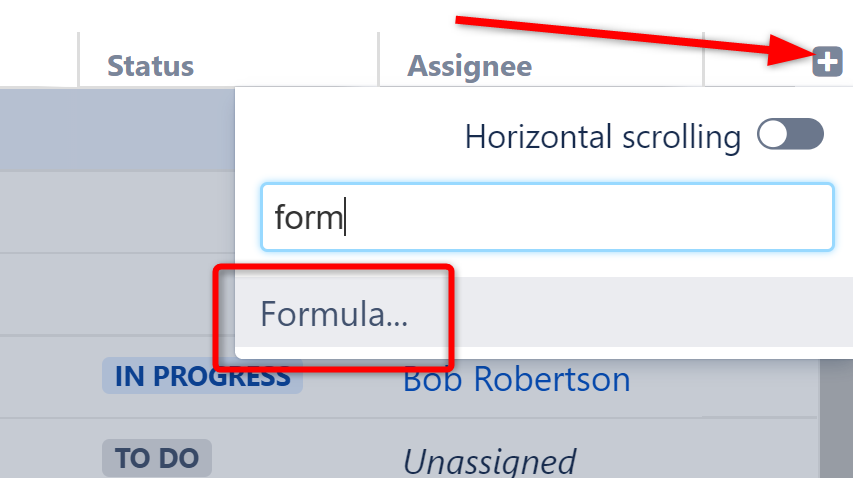
Click the + icon to the right of the column headers, and select Formula...
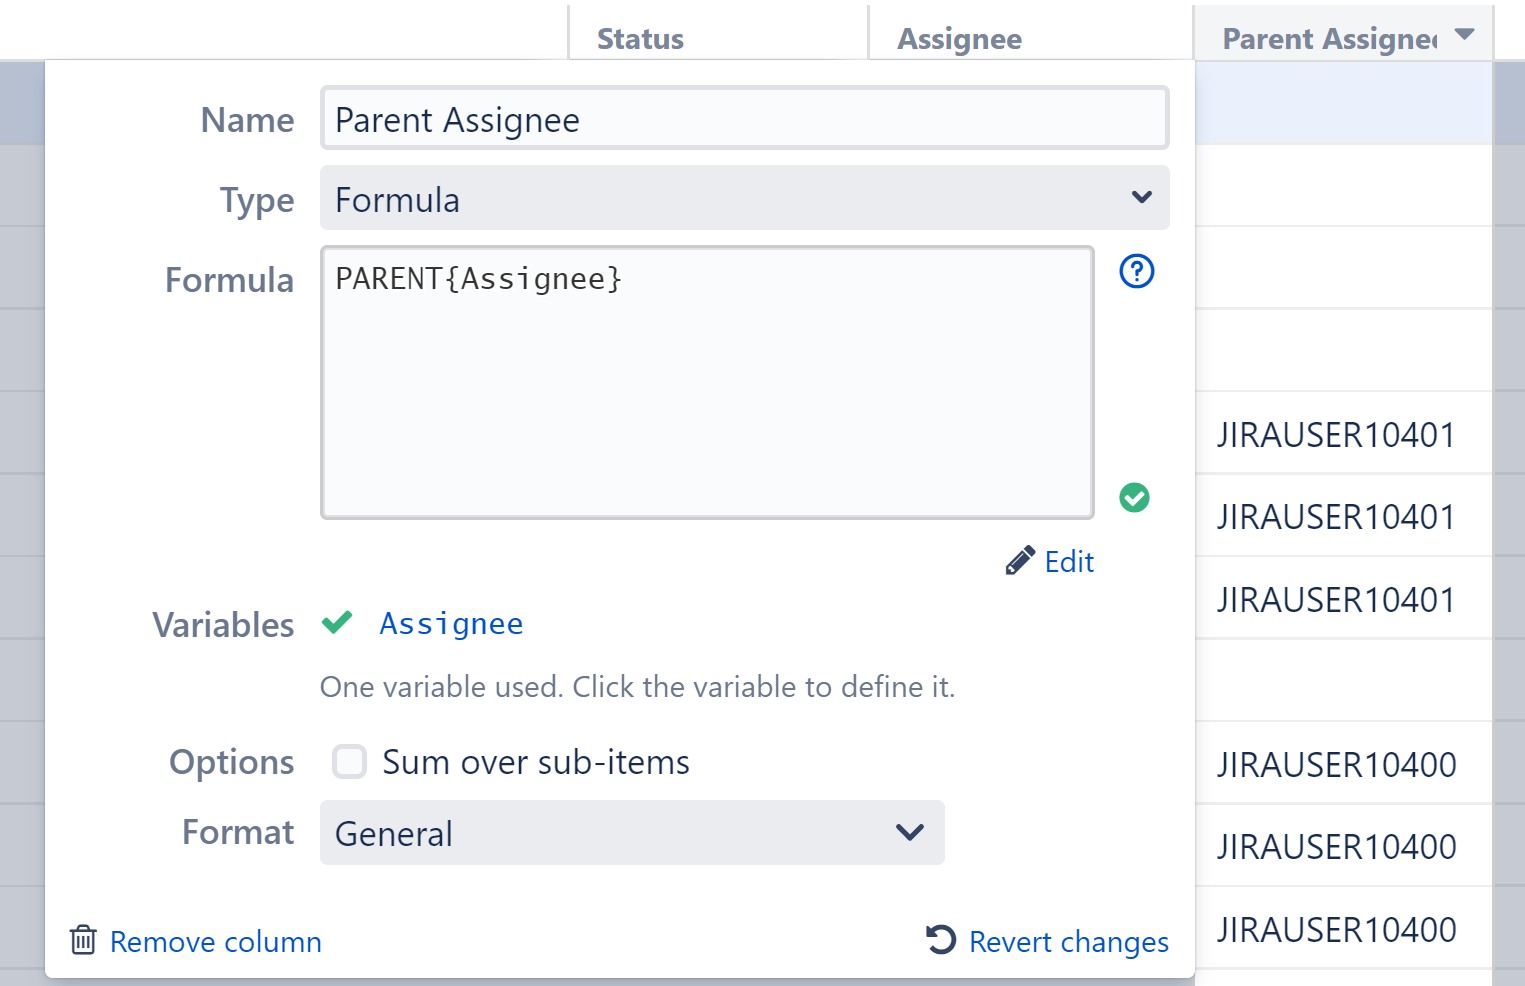
Give the column an appropriate name, and enter the following formula: PARENT{Assignee}
Step 3: Add an Effector
Now we need to take the information from our formula (which is only available in Structure) and write it to the Assignee field (so it is available anywhere in Jira).
Open the Automation menu and select Effectors.

Choose Attribute to issue field...

On the Effector settings screen:
-
The name field is updated automatically as you select the Effector properties. If you prefer, you can also click the edit button to enter a custom name.
-
Get Value From: Select the formula column we created in Step 1
-
Set Value To: Assignee
-
Limit To: Since we're getting our Assignee value from Epics, we want to make sure their Assignee value isn't changed - so we've added the following JQL Filter:
Issuetype != Epic -
Select whether email notifications should be sent when the Effector writes values to Jira
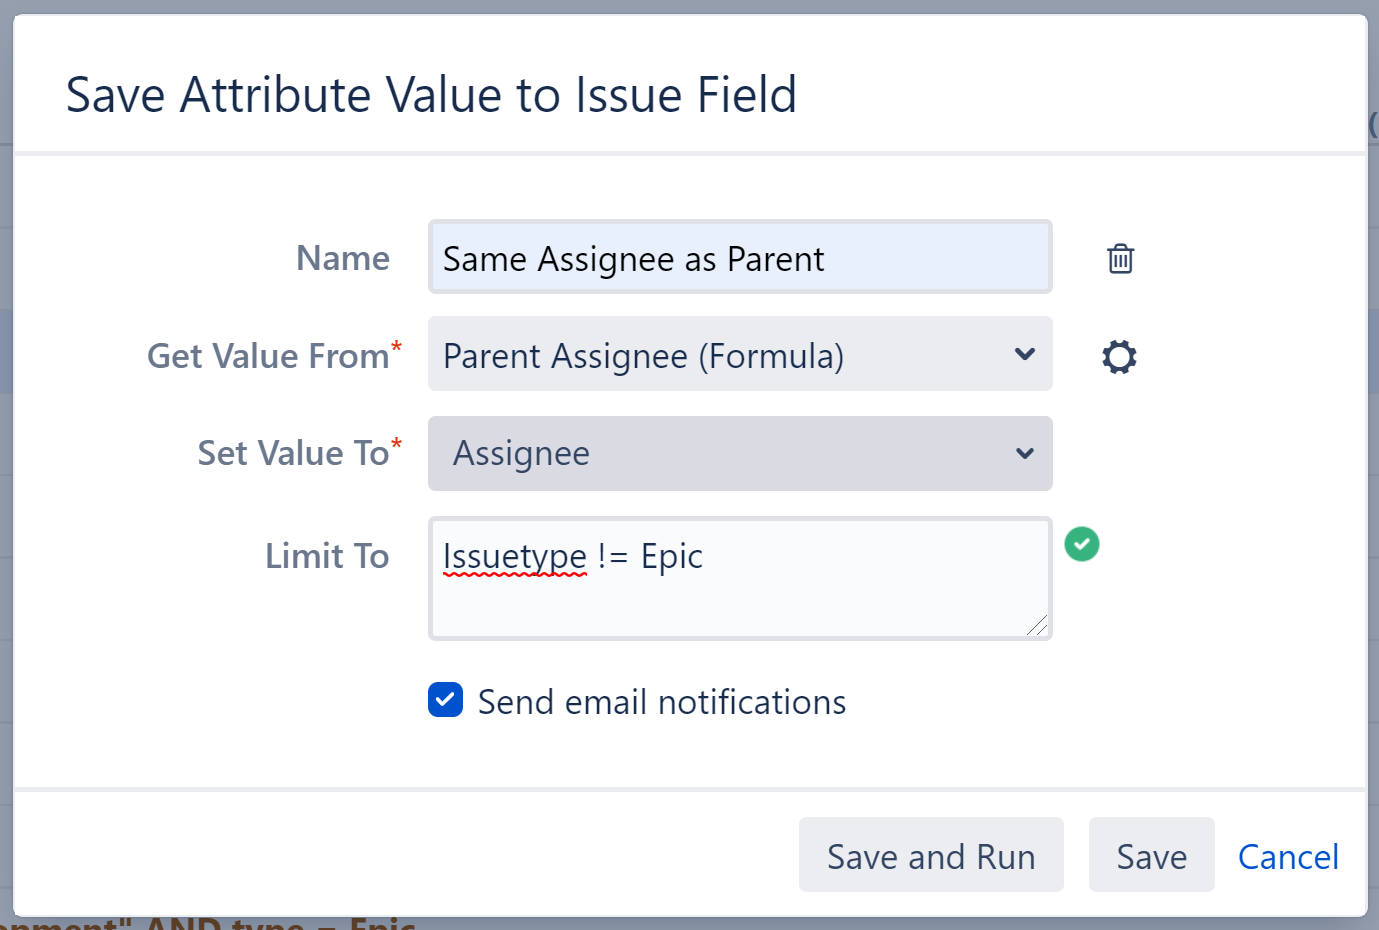
When you're finished, click Save and Run to run the Effector immediately, or click Save to simply add the Effector to the structure but not run it yet.
Step 4: Run the Effector
You can run an Effector directly from its settings screen (see above), or you can locate the Effector at the top of the structure, click the Action button (the three dots to the right of its row) and select Run.

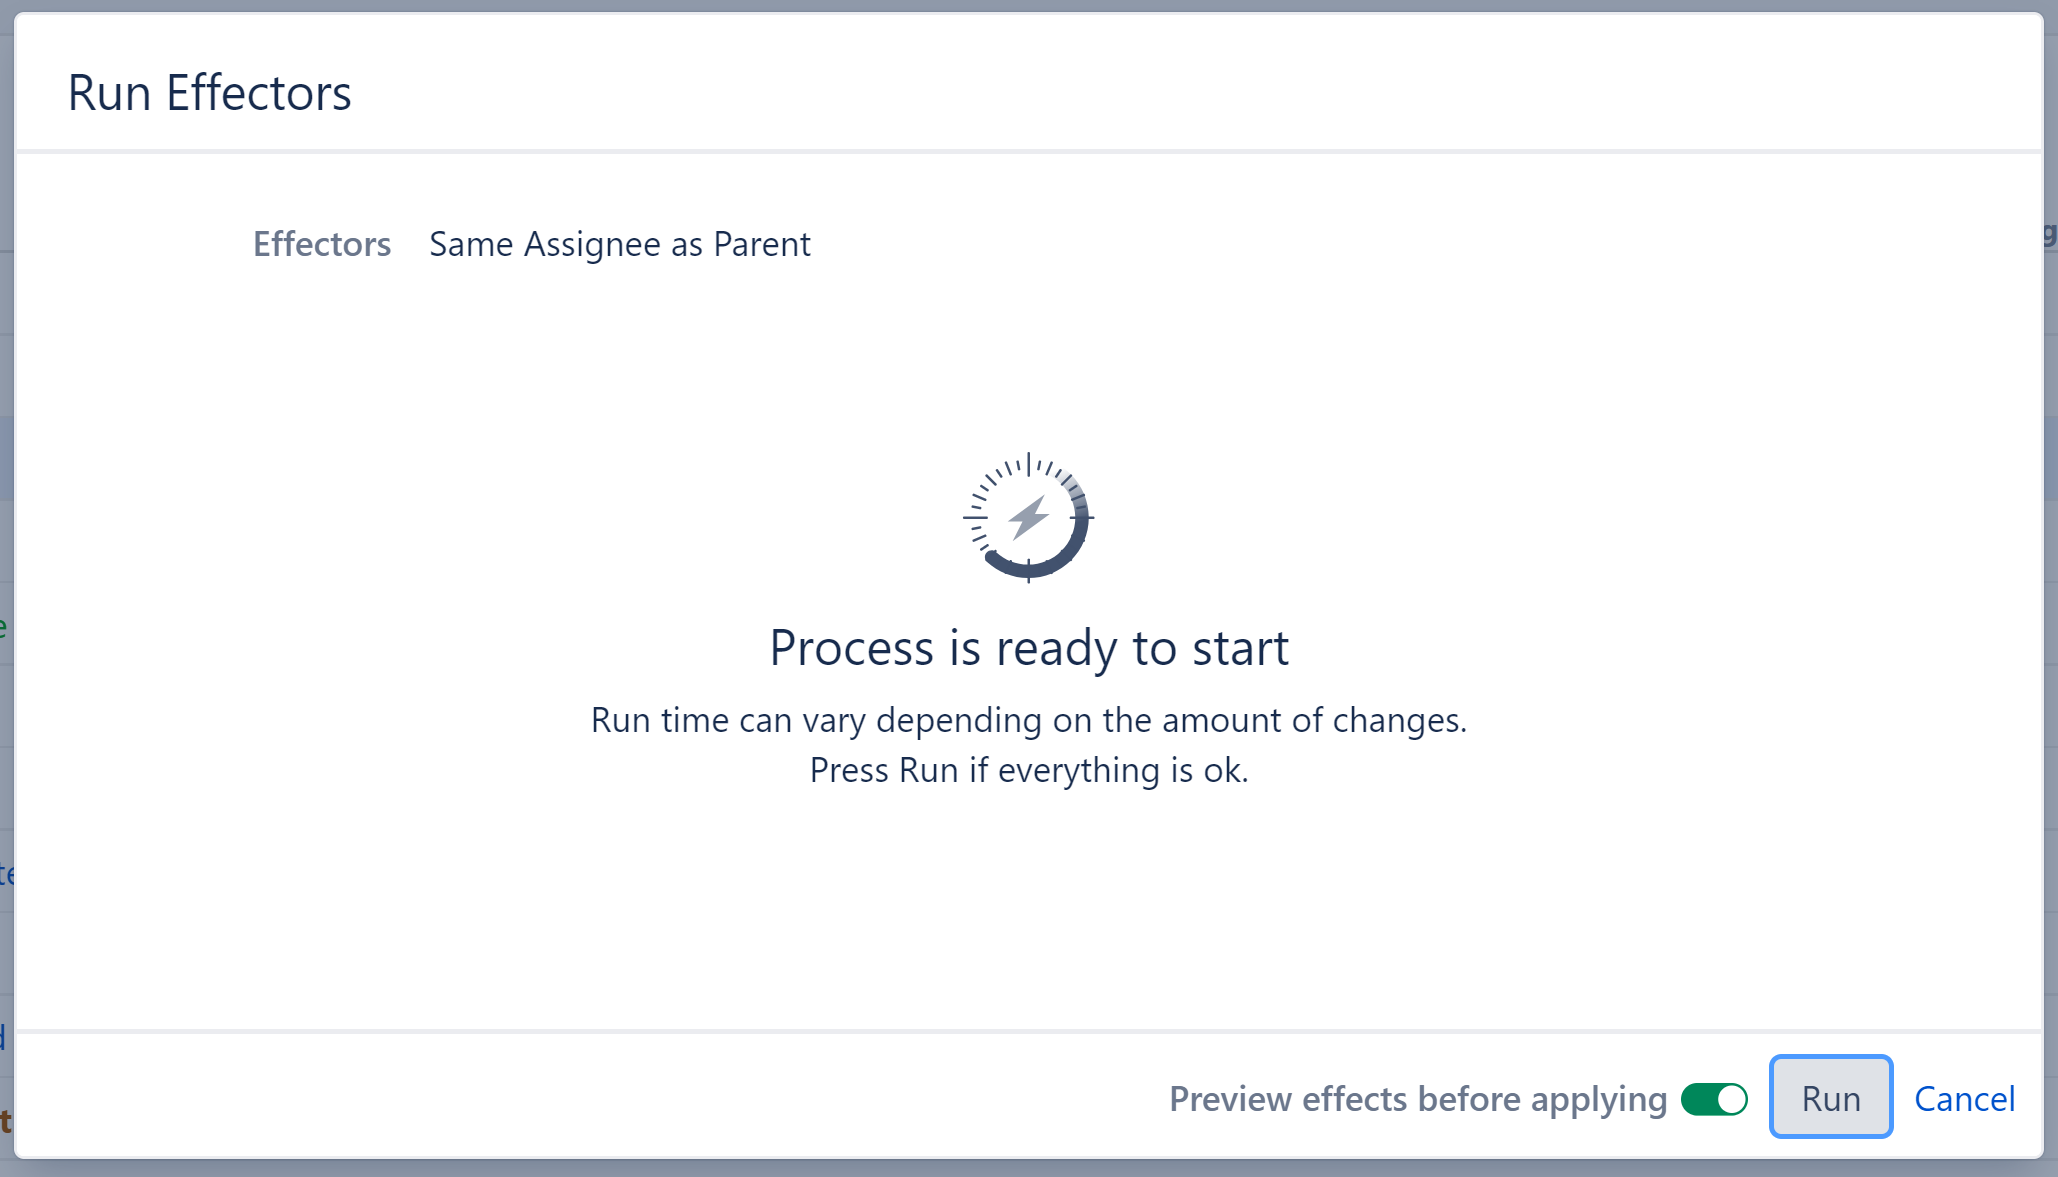
You have the option to Preview effects before applying. This allows you to view and approve every change that will be made by the Effector. Effectors update live Jira data, so we highly recommend using the preview option. Click Run to begin.
Once the preview is finished, you will see a list of changes that will be made by the Effector. You can select which changes you want made, or click Apply All to apply all changes.
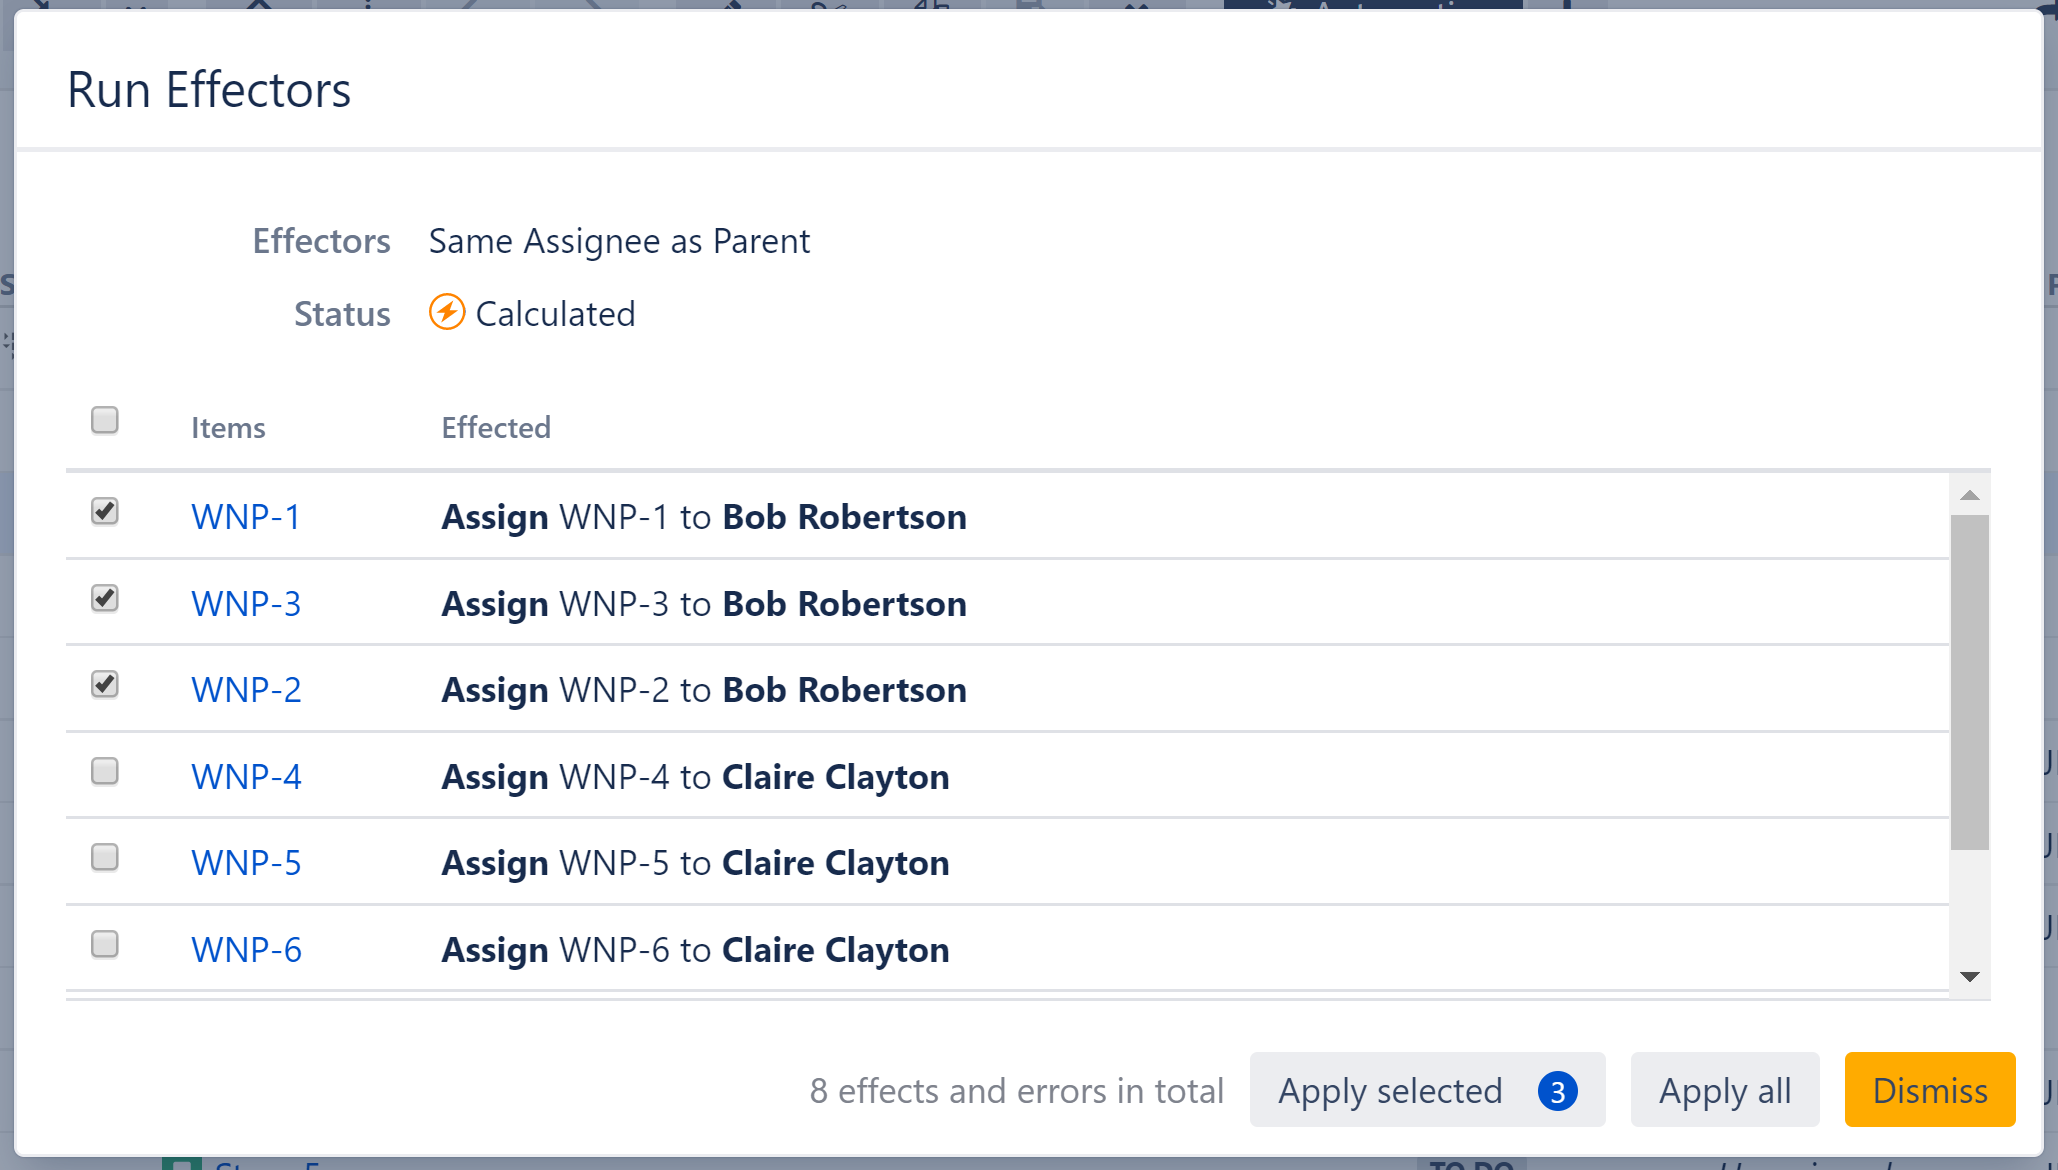
Once you've applied the selected changes, the Assignee field for each child issue should be updated to match its parent's Assignee:
