This page shows you how to use the Group generator to view work assigned to specific teams or team members. In the Top Down Automation article, you started with Epics and built a hierarchy down to Sub-tasks. Now you’re going to build a hierarchy starting with Stories.
Using the Insert generator
This first part of the guide will set up an Automation to populate your structure with Stories.
-
While in your newly created structure, select Automation from the Structure toolbar to open Automation Editing Mode.

-
With Automation enabled, select Insert from the (+) menu.
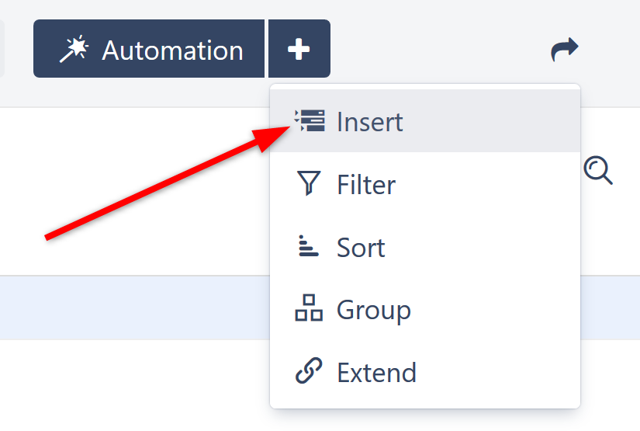
-
When you import items, you can select an Agile board or an existing structure as the source; or you can use a JQL query or text search. For this example, you’ll use a simple JQL Query:
issuetype = Story. You can also specify projects in this query if you want to include them.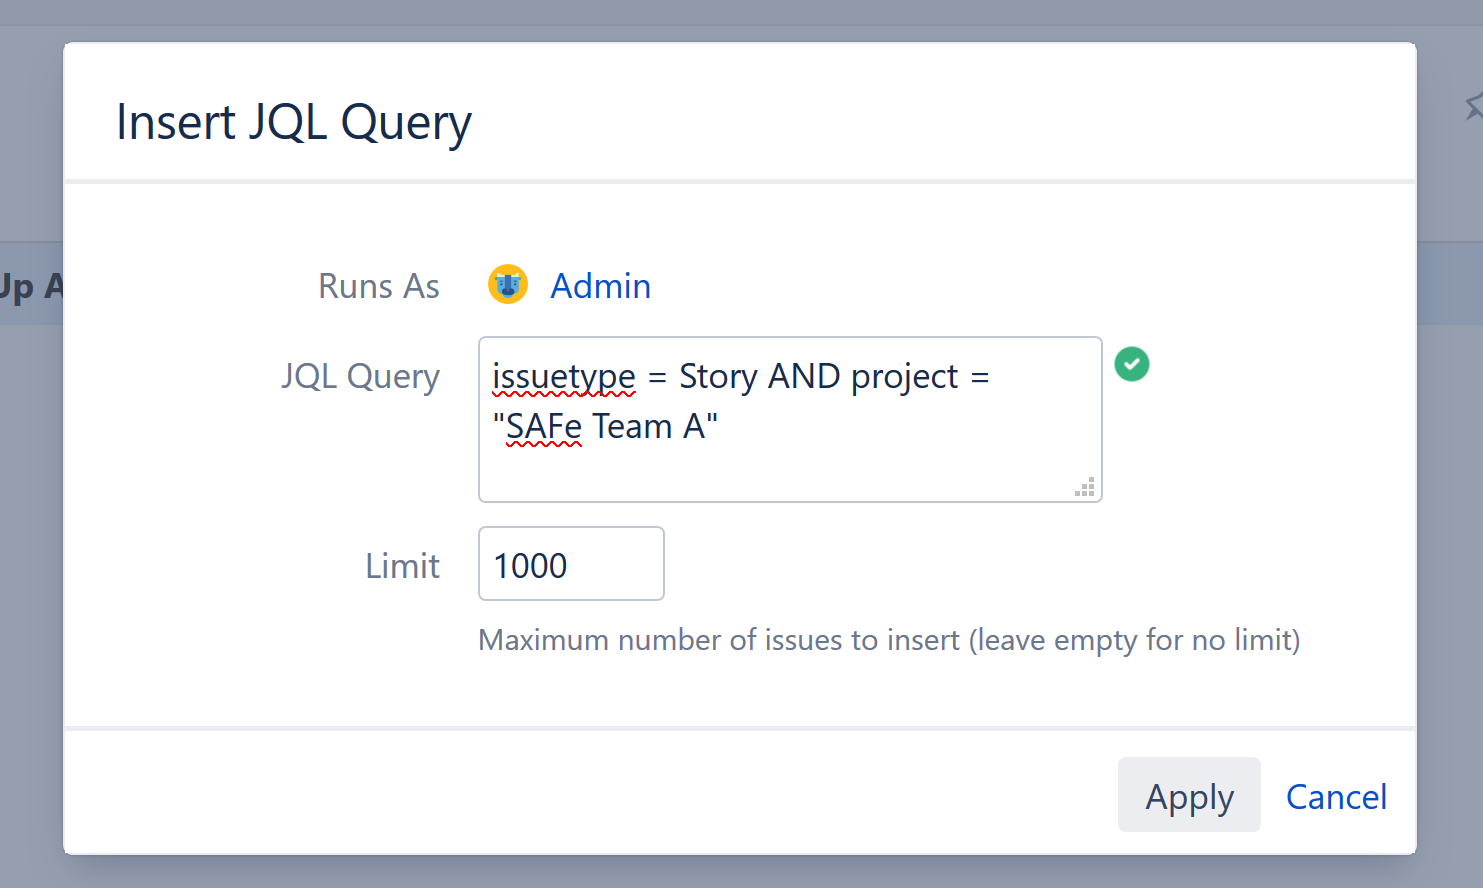
-
Select Apply and the Insert generator will pull Stories into your structure.

Using a Group generator
Now that you have the bottom-level of your hierarchy built with Stories, you can add a Group generator to sort them into categories.
Grouping by Assignee
-
Select the top line of your structure to apply the generator to the entire structure, and select Group from the (+) menu.
-
Select Assignee from the Group by… list. You can enter text in the Search field to filter the list if you have trouble finding the right category.
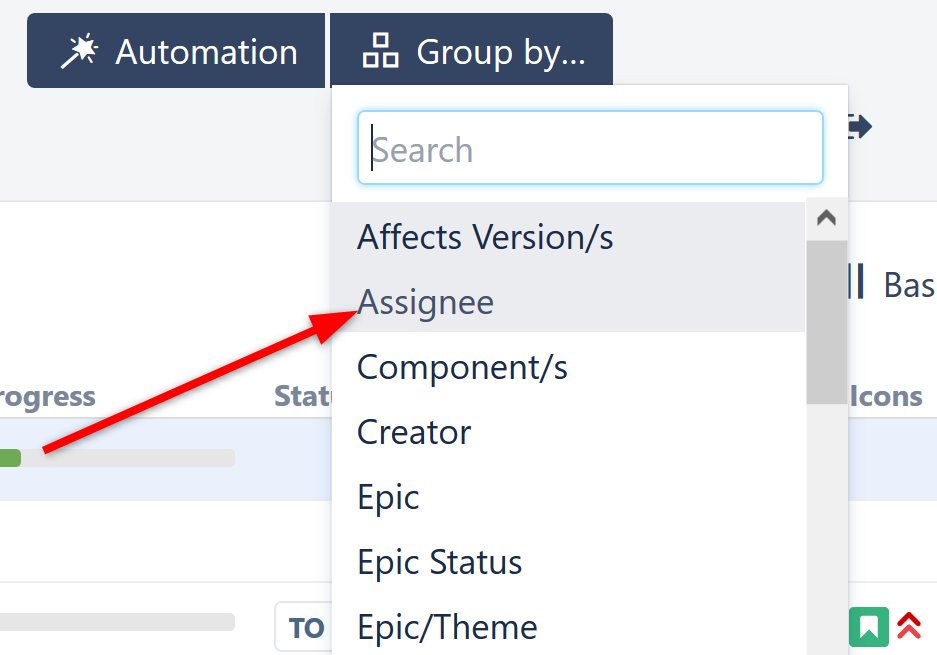
After you set the group category, Automation will move your stories into groups based on who is assigned to each story.

Now we'll add another level to our hierarchy, so we can view the work being done for each sprint.
Grouping by Sprint
-
Select the top line of your structure to apply the generator to the entire structure, and select Group from the (+) menu.
-
Select Sprint name from the Group by… list. You can enter text in the Search field to filter the list if you have trouble finding the right category.
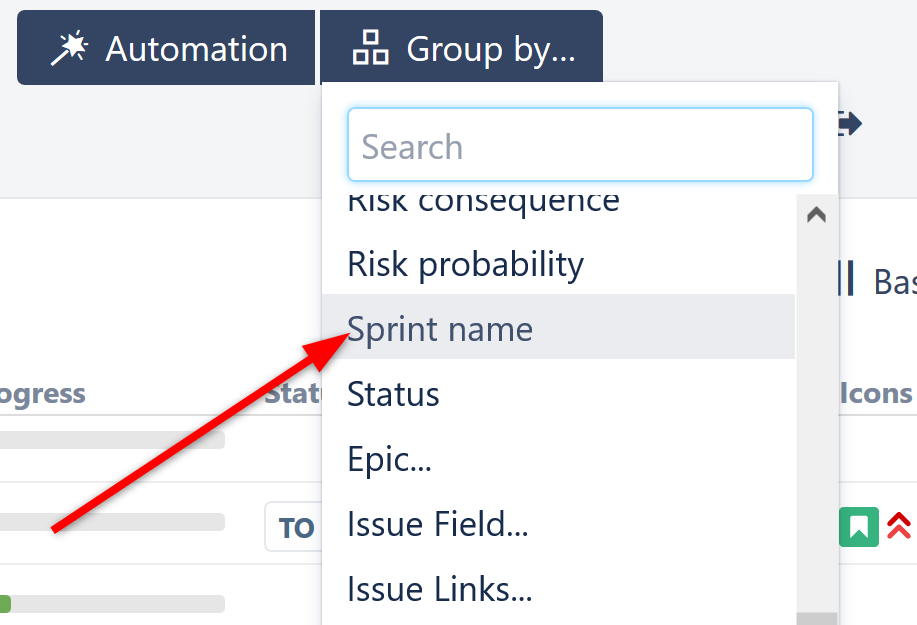
After you set this category, Automation will add your assignee groups and their stories into new groups based on your project’s sprints.
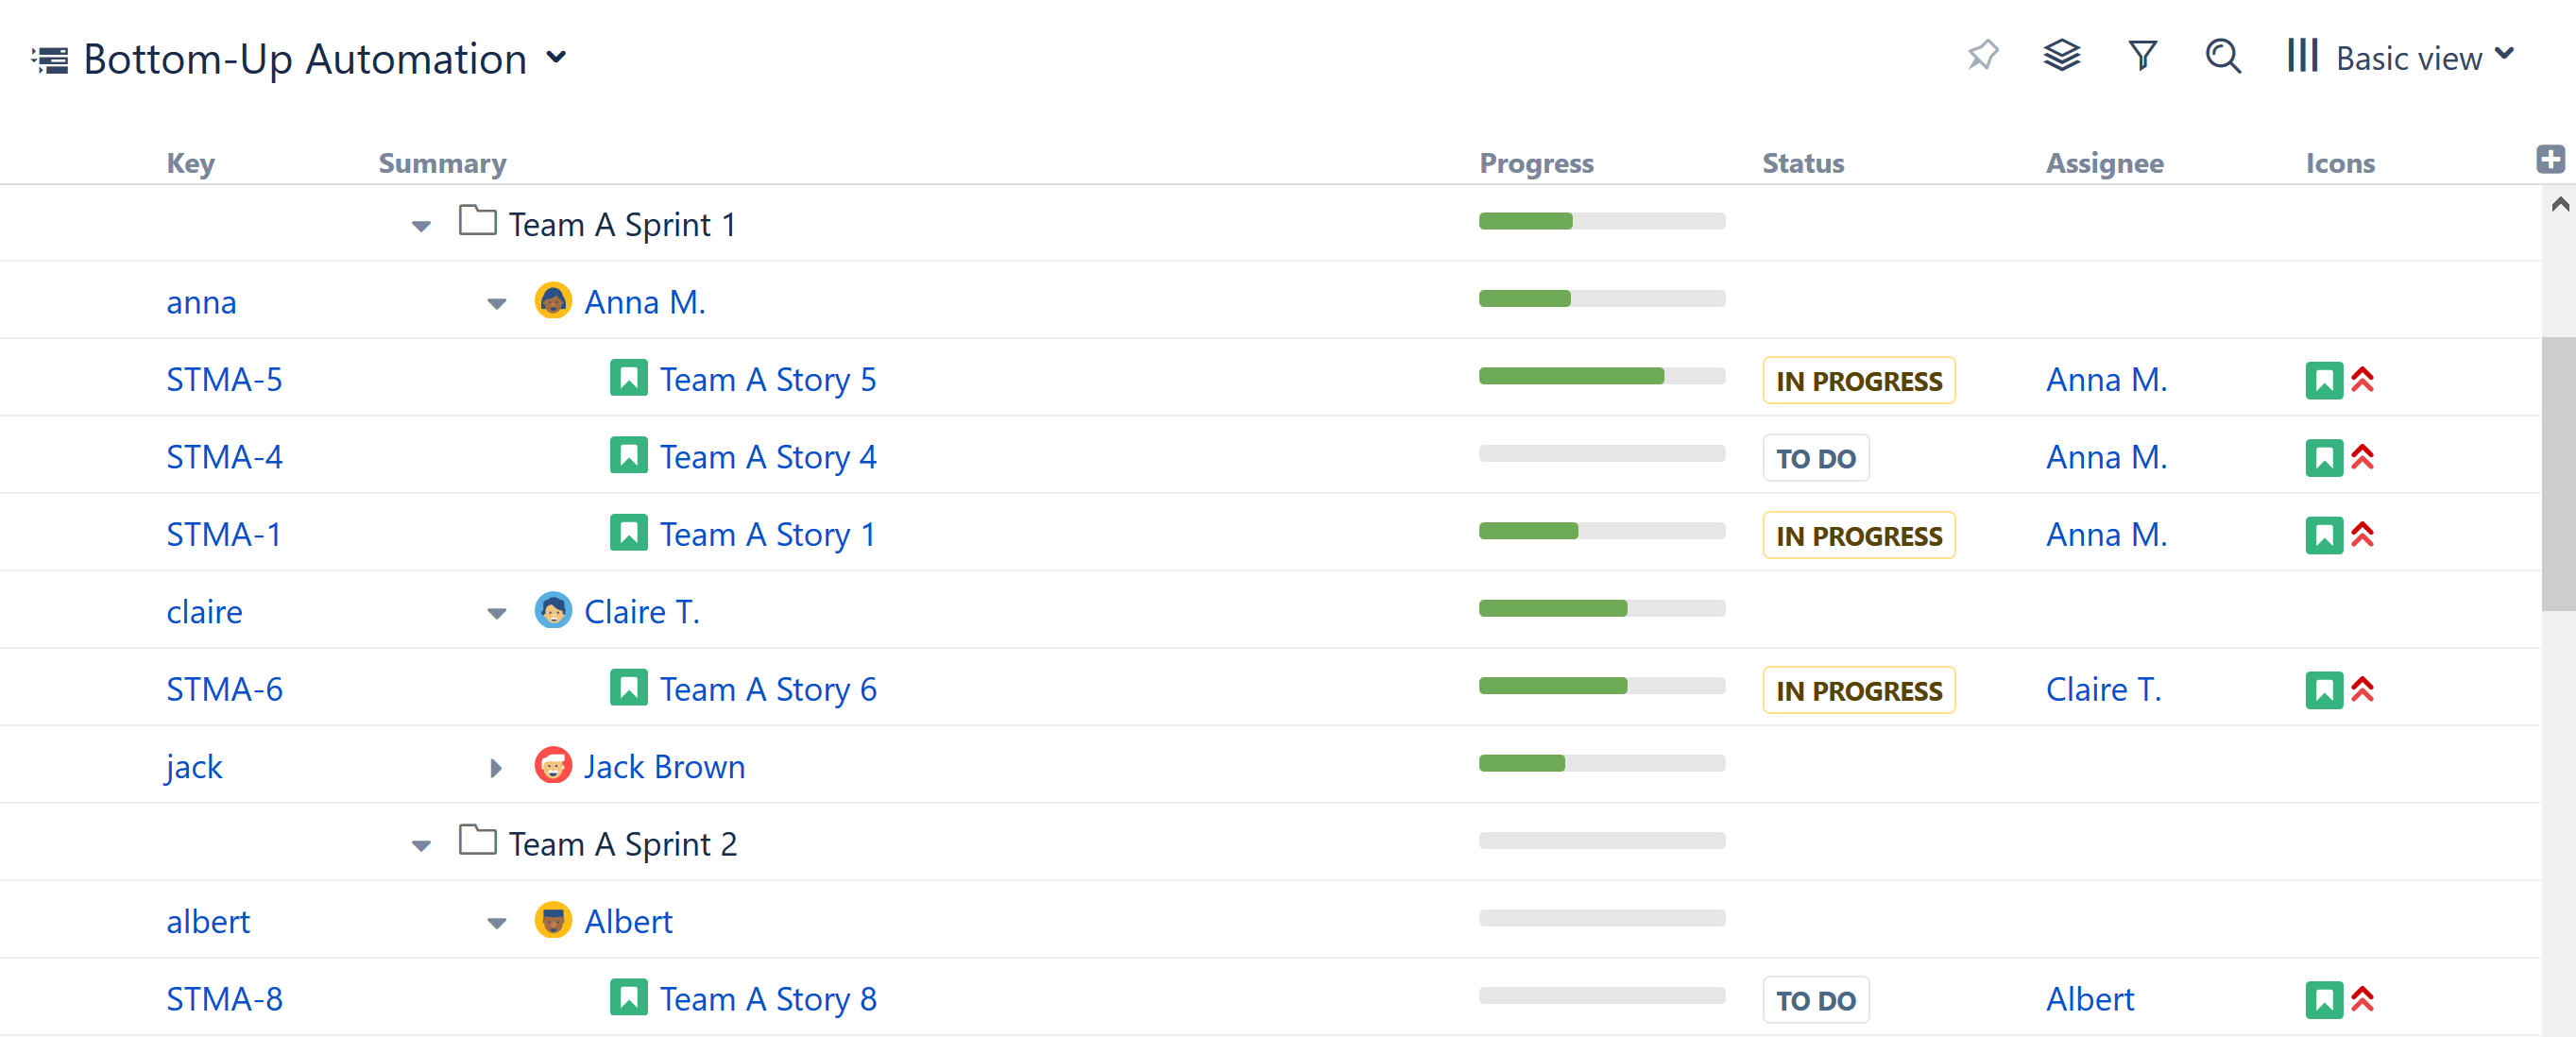
Stories without an assignee are moved to an Unassigned folder. You can assign, or reassign, issues by dragging them into a different assignee group.
Further learning
While this page only showed a few types of groups, you can group issues by most Jira attributes.
For example:
-
You can select Fix Version to group by who worked on which issues for a fix version.
-
You can group your issues based on their current Priority.
Explore the many options available under the Group extender and keep in mind that you don't have to choose just one configuration. You can create as many structures as you need to accomplish your organizational goals. Since generators update every time you open the structure, you'll always have the most up-to-date information for your needs.
Next steps
After creating your structures, continue to Working with Structure to learn how to organize and manage your structure.
If you want to explore a more advanced method of building a structure, you can view the section on Building a Structure Manually
