-
Team Timeline is a Classic Team Planning feature that was made "Legacy" Feature in Tempo Capacity Planner 7.13.0. Classic Team Planning features are disabled by default for version 7.13.0 and later.
-
Enabling the Classic Team Planning features requires the Tempo Administrator permission.
-
Creating and editing plans in the Team Planning Timeline requires the View Team Plans and the Manage Team Plans permissions for the team for which you are planning.
In the Team Timeline you can create a plan for a team member or for the whole team to work on an issue, project, version, or component.
To access the Team Planning Timeline:
-
Select Planning :planner_dc: in the Tempo sidebar. Click … at the top-right, and then select Timeline.
Creating Plans
-
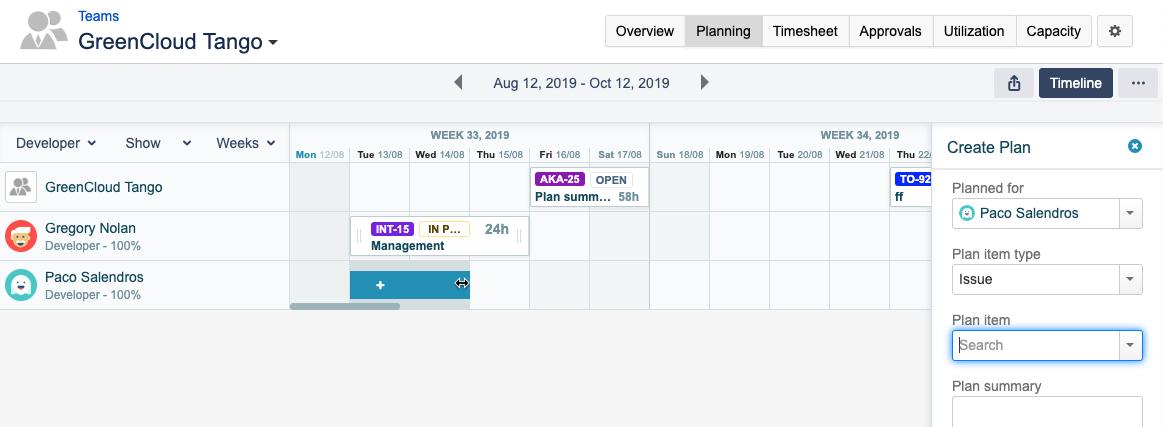
To create a plan for a single day, point to the date box for the relevant team member, and click the plus that appears. You can click and drag the pointer across days to plan for longer periods. The Create Plan side panel opens to the right of the timeline.
-
You can create a plan for the whole team by clicking and dragging the pointer on the top row of the timeline.
-
If you create a team plan while the timeline is filtered by role, the team plan is still applied to the whole team.
-
Note that it is recommended to plan at the member level in Team Timeline. Plans at the team level in Team Timeline are not visible in the Resource Planning View.
-
-
Fill in the requested information in the Create Plan side panel.
-
The Planned for field is automatically filled with the name of the team member whose row you clicked, or the name of the team if you clicked the top row. Planning time for a team member to work on an issue is not the same as assigning the issue to the team member. Only one person can be assigned to an issue at any time whereas you can plan time for more than one team member to work on the same issue simultaneously.
-
Plan item type. You can plan time on an issue, project, version, or component.
-
Planned item. To search for a plan item, start typing in the field. The available items are those of the type that you selected in the Plan item type field.
-
Start and end dates. These fields define the period that the plan covers and are automatically filled with the dates that you selected on the timeline.
Planning time for weekends and public holidays
Weekend days and public holidays that are covered by a plan do not normally contribute to the number of planned hours. You can make weekend days and public days count as work days by both starting and ending a plan on a weekend day or public holiday. In that case the number of working hours for all weekend days and public holidays that are covered by the plan is defined by the Jira Time Tracking setting Number of working hours per day.
If a plan starts on a weekend day or public holiday but does not end on a weekend day or public holiday, or the other way around, only normal work days contribute to the number of planned hours.
-
Planned time. Even if the availability of team members to work on the team is less than 100% of their time, planned time can still be for 100%.
Example: Erica works 8 hours a day. She is in two teams, with 50% availability for each team. You see that no work is planned for Erica in her other team so you create a plan for 100% availability instead of 50%. All of Erica's 8 hours go into the plan.
-
-
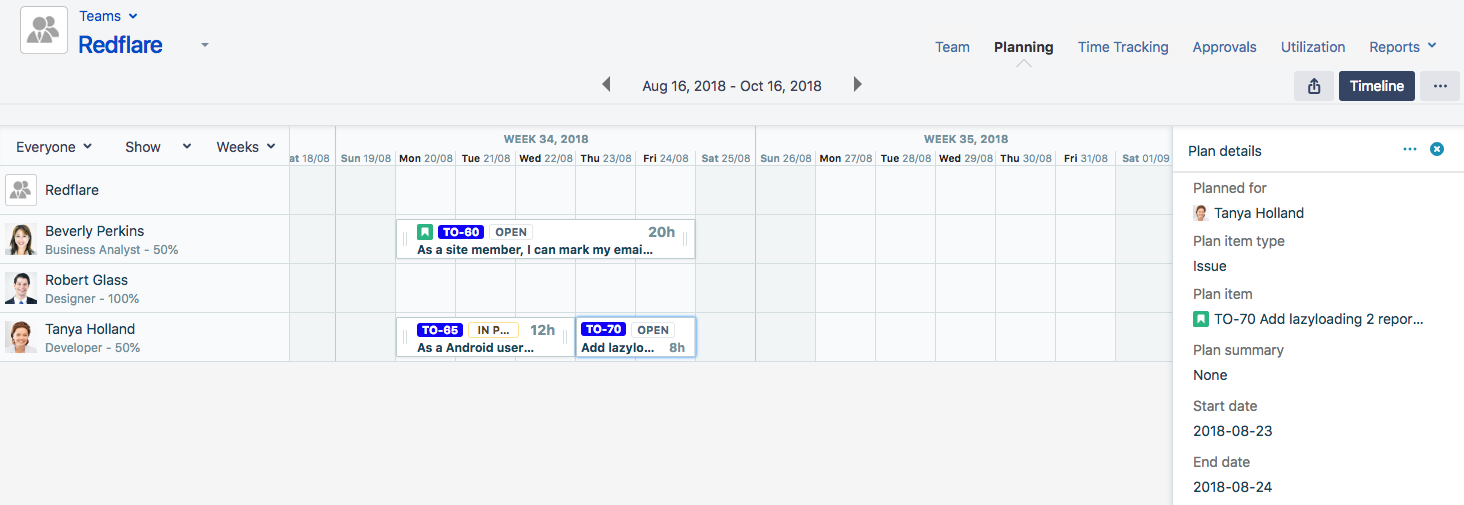
When you are finished, click Save. The plane is created on the timeline, and the Plan details side panel is displayed. The Plan details side panel shows information about the plan and the associated plan item.
Creating Plans by Dragging Issues to the Timeline
Alternatively, you can create a plan for work on an issue by dragging Jira issues from the Issue Suggestions side panel onto the Team Timeline.
-
If not already displayed, do one of the following to access the Issue Suggestions side panel:
-
If the Create plan or Plan details side panel is displayed, close that panel.
-OR- -
If no side panel is displayed, click :side_panel: on the right.
-
-
The lists of unresolved issues are displayed in a side panel. Click the various tabs to view the different groups of issues. You can click … to see more categories. You can also view issues tied to a specific Jira filter.
-
Compare the remaining time that is estimated for resolving an issue with the remaining time that is already planned for work on the issue.
-
Drag an issue from the side panel and drop it onto a team member's row or to the team row on the timeline. The amount of time in the Remaining estimate is used to calculate the amount of time scheduled for the plan.
-
To edit the amount of time scheduled, click on the issue in the timeline. The Plan details sidebar will show all of the information from the planned task. Scroll down to Planned time and click the estimate to change it.
Repeated Plans
You can select to repeat plans. The repeat frequency can be:
|
You can set how often you want the plan to repeat in the Create Plan side panel when you create the plan, or when editing a plan in the Plan details side panel.
Please note that if a plan's repetition occurs on a weekend, it will not be visible in the timeline. For example, if a plan is created on the 1st of January 2020 and is set to repeat monthly ending on the 31st of March 2020, the plans will not be visible because the 1st of both February and March occur on a weekend.
Also, if a plan is for a period of 31 days and is set to repeat monthly, the planning parameter is set to 31 days. This means that if the original full 31-day plan is for January, February's plan will start as scheduled on the 1st of February. The next recurrence will not start until the 3rd of March, as that is the 31st day since the 1st of February.
Related Topics