-
Team Timeline is a Classic Team Planning feature that was made "Legacy" Feature in Tempo Capacity Planner 7.13.0. Classic Team Planning features are disabled by default for version 7.13.0 and later.
-
Enabling the Classic Team Planning features requires the Tempo Administrator permission.
When enabled, Plan Approval allows team leads to approve plans created by their team members.
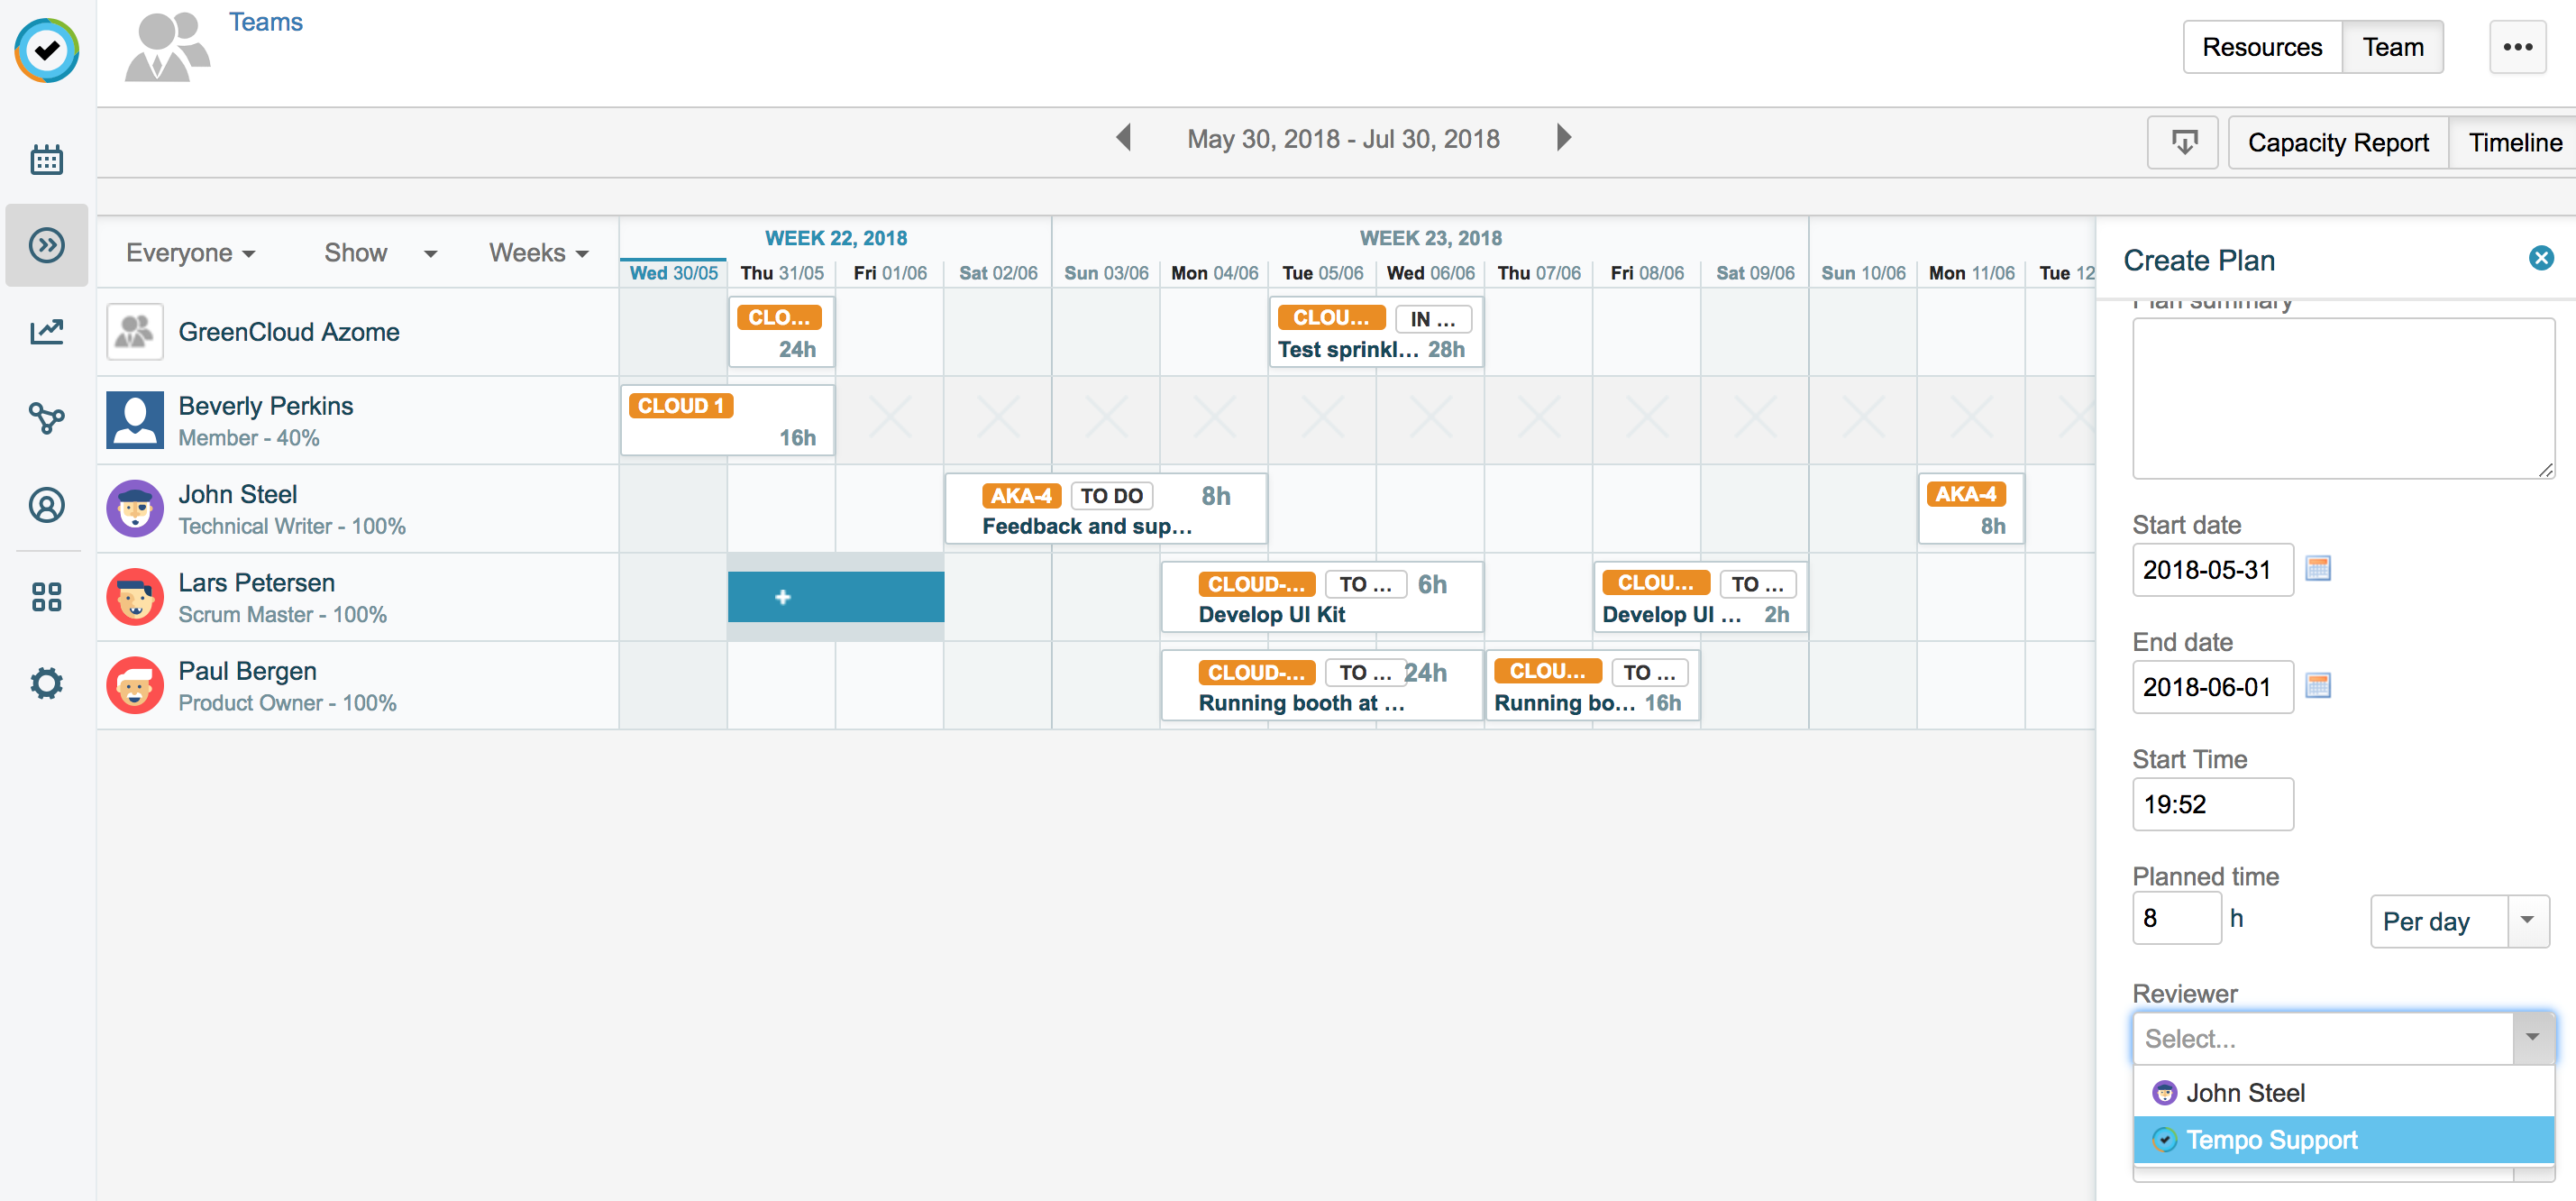
To access the Team Planning Timeline, select Planning :planner_dc: in the Tempo sidebar. Click … at the top right, and then select Timeline.
Enabling Plan Approval
To use Plan Approval, your Tempo Administrator must enable the feature. Once the Plan Approval option is enabled, users can select a reviewer for their plans and reviewers can approve or reject plans. To enable plan approvals, you need Tempo Administrator permissions:
-
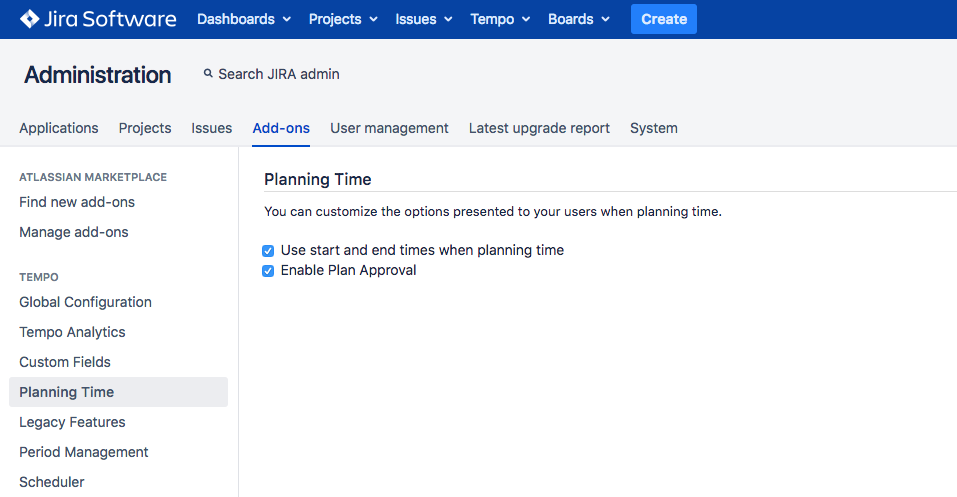
Click Jira Administration at the top right, and then select Add-ons.
-
Under Tempo in the sidebar, select Planning Time.
-
Select the Enable Plan Approval checkbox to include approvals in your planning process. When enabled, users can select a reviewer for their plans and reviewers can approve or reject plans.
Submitting a Plan for Approval
If you are a team member, you can request your plans to be approved or rejected by your Team Lead or another user with the Approve Plans permission. The plan will have a pending status until approved or rejected. Selecting a reviewer for a plan will automatically send an email to the reviewer asking them to approve or reject the plan. You do not need any additional permissions to submit a plan for approval.
-
Create a plan or edit an existing plan.
-
In the Create Plan/Plan detail side panel, select a Reviewer to review your plan. You can select a reviewer from any of your team leads. If you have the Approve Plans permission, you can approve your own plans.
Approving and Rejecting Plans
If you are a team lead, you can approve the plans submitted for approval by your team members. To approve a plan you need the Approve Plans permission and the View Team Plans permission. You also need to be selected as a reviewer for the plan.
-
In the Team Timeline, click the pending plan.
-
In the Plan detail side panel, you can edit the plan.
-
In the Status drop-down list, select between Pending, Approve, and Reject to defer the plan approval, approve the plan, or reject the plan.
-
The team member who submitted the plan for approval receives an email notification when the plan has been accepted or rejected.
Note
If a plan is moved after it has been approved or rejected, it becomes pending again and a new email notification is sent to the reviewer.
Related Topics