The instructions below describe how to create cascading dynamic work attributes. Tempo Timesheets offers the option to create dynamic work attributes in which the values populated for this field are retrieved based on the selection of another Tempo work attribute field (in the worklog) or a supported Jira field (such as a Jira custom field).
Creating Cascading Dynamic Work Attributes
-
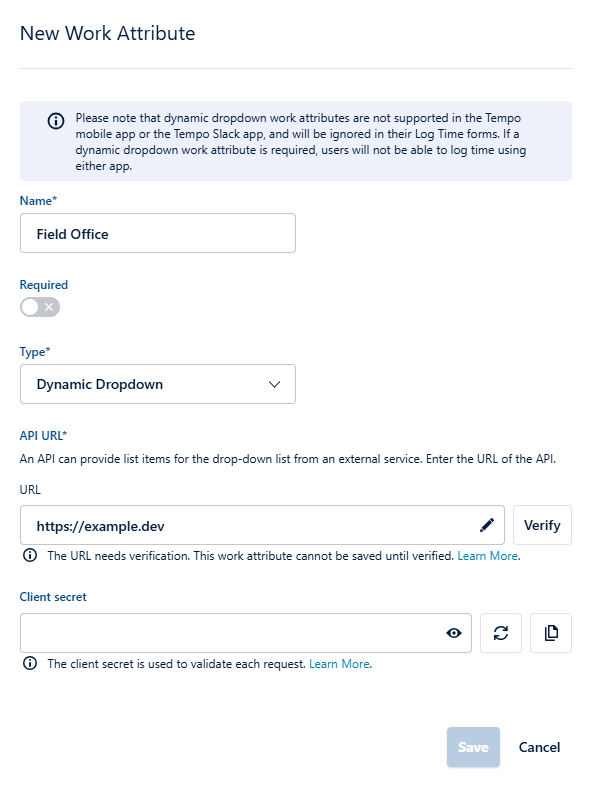
Create a new work attribute and select Dynamic Dropdown as the Type. This work attribute will serve as the base level (Level 1) for the cascading dropdowns that follow. In our example below, we have named this work attribute Field Office.
-
In the URL for the dynamic dropdown, specify the API URL of your external service that is handling the output values to your dynamic work attribute. For our above example, we used:
https://example.dev/
Complete the setup for the dynamic dropdown work attribute and click Save.
-
Now create a second (Level 2) dynamic drop-down work attribute (for our example, we named the second work attribute “Department”). For this work attribute, the displayed values will be dependent on which value is selected for the Level 1 work attribute. To configure this behavior for the new work attribute, enter the URL according to your external service configuration so that the values for the Level 1 work attribute are retrieved. For our example, the configuration is:
https://example.dev/?firstAttr=
At the end of the URL, add the key for the Level 1 work attribute. The key of a work attribute is always the name of the work attribute preceded by and followed with an underscore. Note that all white spaces are also erased for keys. So in our example, the work attribute name is Field Office, but the work attribute key is _FieldOffice_. For our example, the URL we used is:
https://example.dev/?firstAttr={_FieldOffice_}
If you later change the name for any work attribute, the work attribute key will always remain as-is. For example, if your work attribute is named Field Office, with _FieldOffice_ as the work attribute name, but you later change the name to Office Location, the work attribute will remain as _FieldOffice_.
-
Click Save to add the Level 2 work attribute to the Work Attributes list.
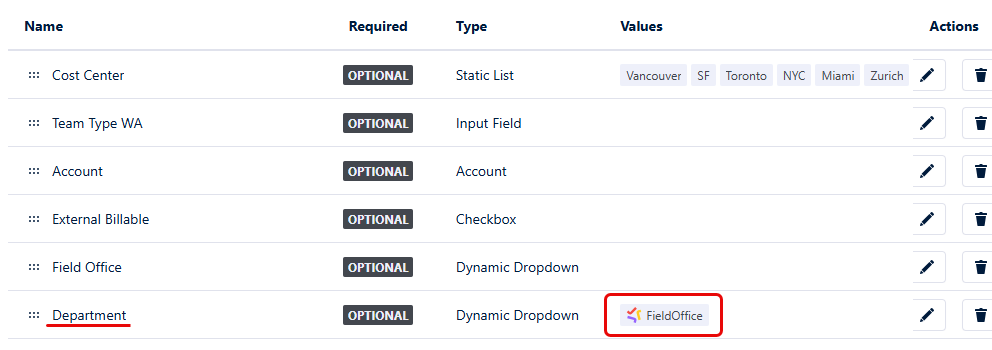
Our example above shows that the Level 2 “Department” work attribute is now dependent on the selected value of the Level 1 “Field Office” work attribute, as denoted by the _FieldOffice_ key displayed in the Values column.
-
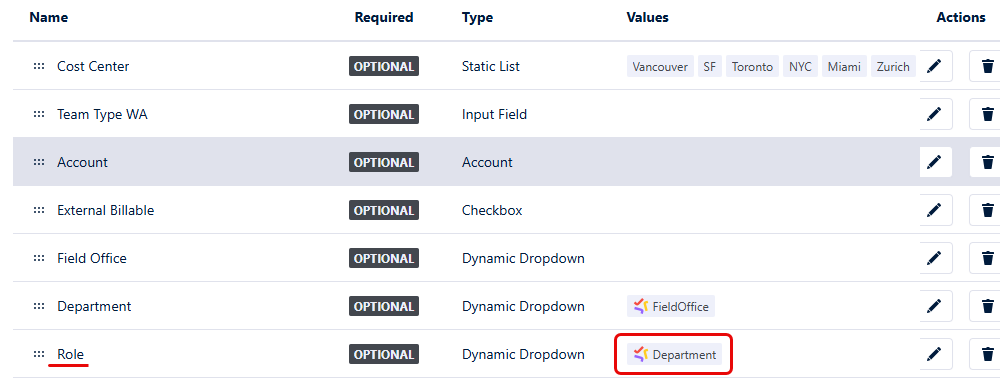
To create a Level 3 Dynamic Dropdown work attribute, repeat step 3 above, substitute Level 2 configuration parameters with the appropriate parameters of your Level 3 work attribute, and click Save to add the Level 3 work attribute to the Work Attributes list.
For our example, we named our Level 3 work attribute “Role” and added the Level 2 key “Department” to complete our URL configuration:
https://example.dev/?secondAttr={_Department_}
Our example below shows that the Level 3 “Role” work attribute is now dependent on the selected value of the Level 2 “Department” work attribute.
-
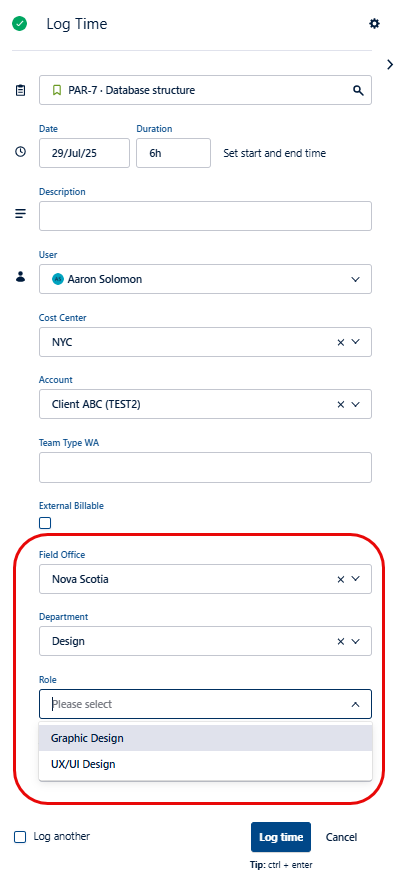
From the Work Attributes page, open the Log Time form (press W key) to confirm that your cascading drop-downs display the configured values.
In our example, you can see that the selections for “Department” are different based on the selection for “Field Office,” and the selections for “Role” are different based on the selection for “Department.”
When editing worklogs, changing a primary cascading dynamic work attribute does not automatically reset the related downstream work attribute dropdowns. Please review and update any dependent dropdown fields as needed.

Cascading dynamic dropdowns are resource intensive and should not be used in Tempo reports when editing/displaying a large amount of worklogs. Limit the date period to reduce the amount of worklogs being displayed.