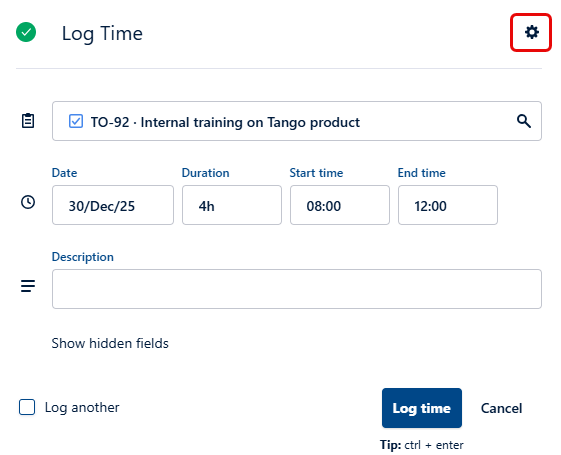
The Log Time form is where you record the time you spent working on Jira work items, calendar events, and plans. The Log Time form appears when you log time using any method, as described in Logging Your Time
Filling Out the Form
By default, Work Item, Date, and Duration are the only fields that you are required to fill in. If you open the Log Time form from the Calendar view in My Work, the Start time and End time fields are required.
Depending on how you're logging time, these fields may already be filled in for you. For example, if you log time from within a Jira work item view or drag a Jira work item from the side panel into My Work, the Work Item field is filled out.
Tempo administrators can make additional fields required in the Log Time form in accordance with your organization's needs. For example, entering a description of the work done can be made mandatory. Mandatory fields are highlighted so that you can easily identify where you are required to enter information.
Fields for logging time to specific things, such as Overtime or Accounts, can be created using work attributes.
Remaining estimate, Billable hours, and User fields are not visible until you have selected a work item where these fields apply.
User fields are only visible if you have the appropriate View Worklogs permission.
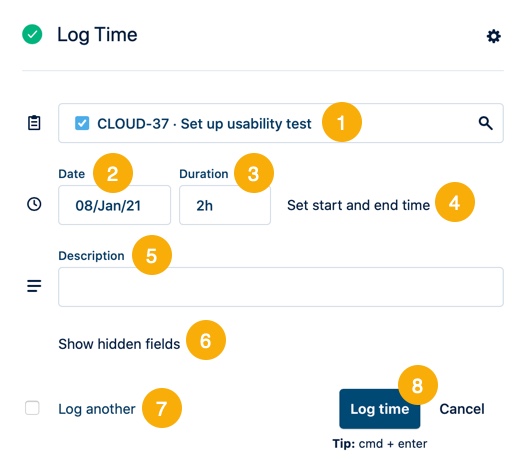
Enter the following fields to log your time:
-
Work Item: Mandatory. To find the work item you worked on, click inside the search box. A list of work items is displayed, with suggested work items based on your activities at the top. You can also use the filters to narrow down the search - see below for more information.
-
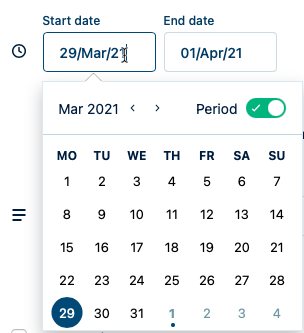
Date: Mandatory. To change the date, click the date box and select a new date.
To log time to this work item for multiple days, click in the Date field, turn on the Period switch in the calendar, then select or enter a Start date and End date.
-
Duration: Mandatory. Enter the time spent on the work item in hh/mm format (such as 2h 30m).
-
Set start and end time: Mandatory in the Calendar view in My Work. Click Set start and end time to display the fields, then enter the start and end times that you spent on this work item. You can click X to hide the boxes and create a record without a start and end time. Tempo remembers the current state and shows or hides the fields according to your last choice.

-
Description: Optional. Enter a description to add more information to the worklog.
-
Show hidden fields: Displays more fields. You can click :settings_dc: in the top-right and decide which fields you want to be always visible and which fields to hide.
-
Log another: Check this box to keep the Log Time form open to log time on the same or another work item.
-
Log time: Click to log time according to the information you've entered in the Log Time form. This creates a worklog for you on this work item. You can still edit a worklog after you have logged time.
If you’re logging time for someone else, the user field dropdown list will remain empty until you begin typing.
Choosing a Work Item
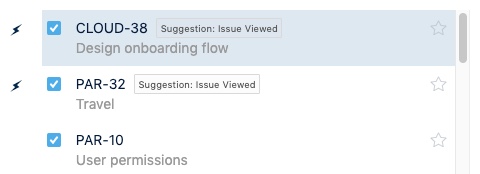
When searching for a work item to log time on, Tempo suggests work items based on your activities. The suggestions are displayed at the top, flagged with a lightning bolt and a label explaining why the work item is suggested.
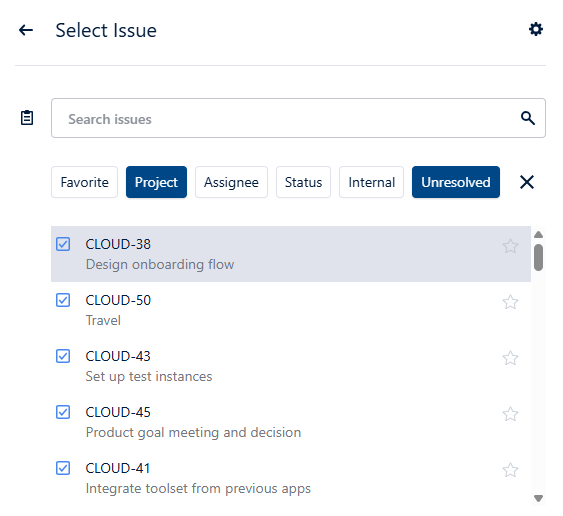
You can use filters to narrow down your search. For example, you can search for a work item in a specific space, or view only commonly used work items that you have marked as favorites. You can apply multiple filters and select which filters are available in the form.
Available filters:
-
Favorite
-
Space
-
Assignee
-
Status
-
Internal
-
Unresolved
-
Account
-
Team
-
Jira Filter
Select the filters you commonly use and in what order they are displayed. Tempo stores your preferences.
Apply a filter
-
In the Log Time form, click inside the Search box to start a search.
-
Select filter(s) to apply. Where necessary, specify values for the filter, such as space, assignee, etc.
-
Click a selected filter to disable it, or click the X to the right to clear all filters.
-
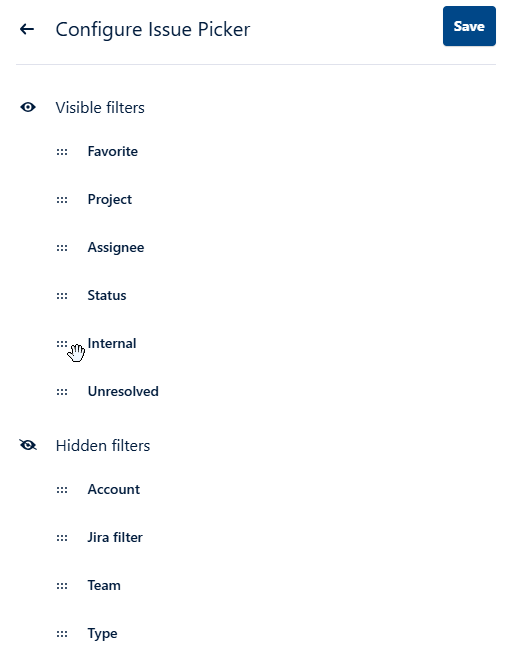
To configure which filters are available in the form, click the settings icon :settings_dc: at the upper right to reorder filters.
-
Drag the filters you want to be available into the Visible filters section.
-
Drag filters you don't need into the Hidden filters section.
-
Arrange the filters in the order you like.
-
-
When you are done arranging the filters, click Save. Clicking the arrow to the upper left closes the configuration mode without saving your changes.
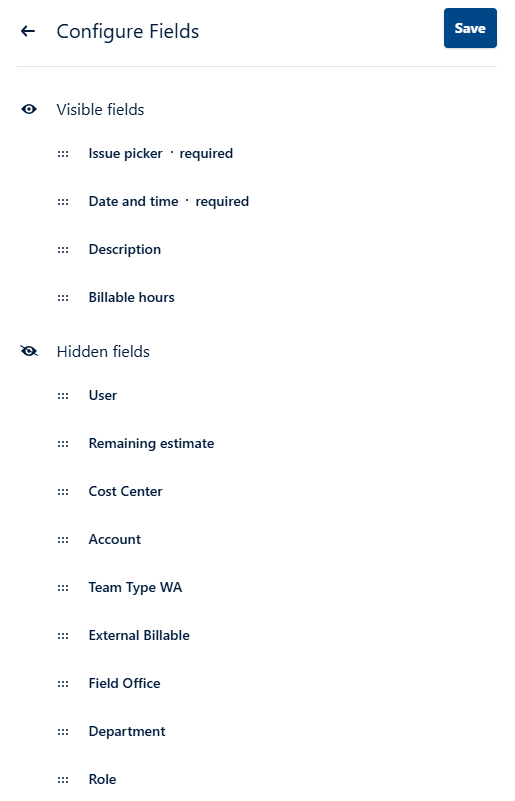
Customizing the Log Time Form
You can configure the Log Time form according to your preferences so that you can log time with minimum effort. Select which optional fields should be visible in the form and in what order.
-
Click the settings icon at the top-right in the Log Time form to reorder the fields. Note that you cannot hide the required fields.
-
Move fields to the desired location. You can arrange the order of both visible and hidden fields. For example, if you use the Billable Hours or Account fields frequently, drag them up into the Visible fields section.
-
The number of required fields depends on your organization's needs, and they are always visible in the Log Time form. You can rearrange their order as desired, for example, if you want date and time to be at the top of the form, but you cannot hide required fields.
-
When you are done arranging the fields, click Save. Clicking the arrow at the top-left closes the configuration mode without saving your changes.
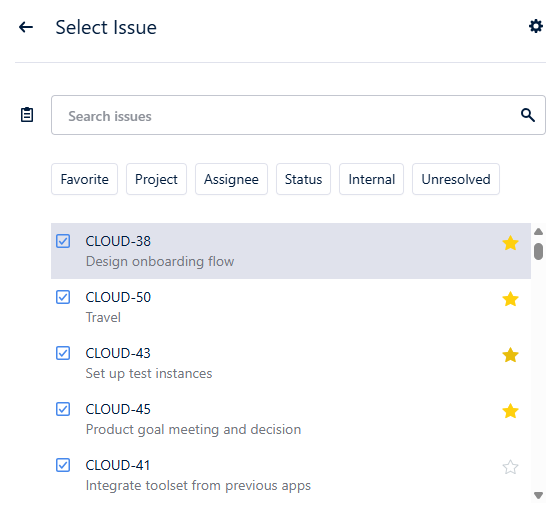
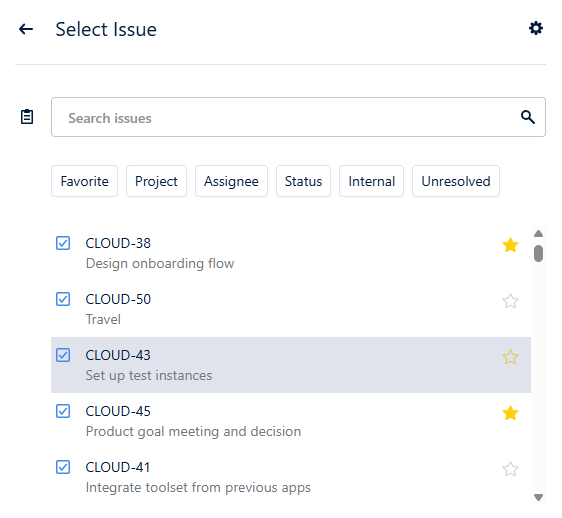
Marking Work Items as Favorites
If you are working on multiple work items simultaneously, it can be helpful to mark some of them as favorites, making them easier to access.
You can mark a work item as a favorite in the work item search by clicking the star next to it, which will turn it yellow. All your favorite work items are available in the Favorite filter.
Click the star again to remove it from your Favorite filter.