Configuring work attributes requires the Tempo Administrator permission.
When creating static or dynamic drop-down work attributes, we recommend limiting the number of selectable values per drop-down to maintain data retrieval performance. However, other factors may also impact data performance, including network speed, latency, and distance from Tempo servers.
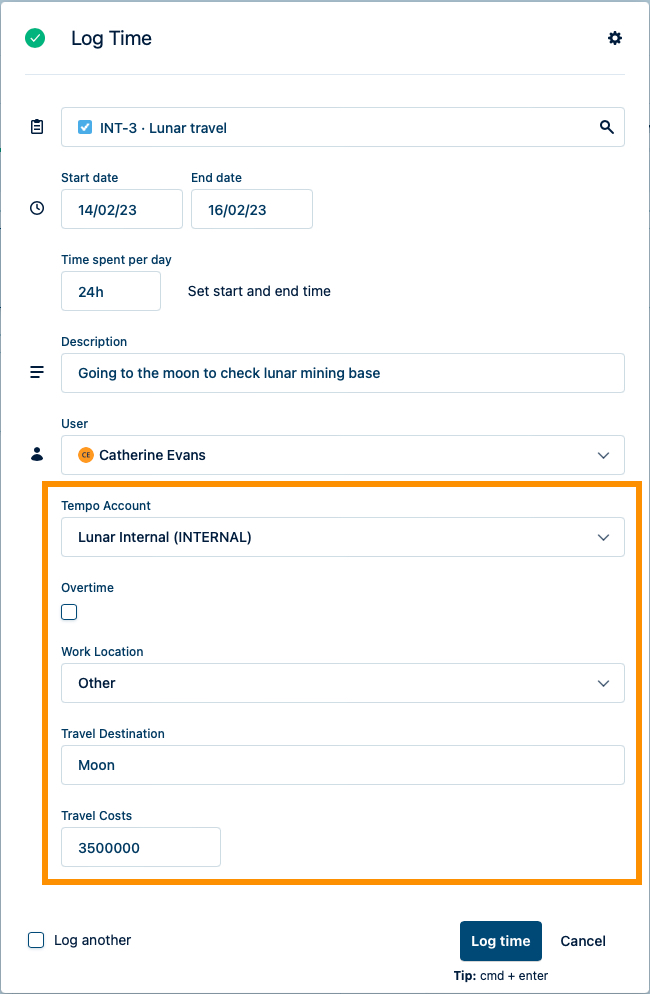
Work attributes are custom fields that you can add to worklogs so that users can record detailed information about logged time. For example, you can use work attributes for tracking hours to Accounts, "Overtime," or "Travel time.”
All work attributes are added to the Log Time form and are available for all Tempo users. Although work attributes are added as hidden fields by default, users can customize their Log Time form to have them always visible. They can also change the order in which the work attributes appear.
Create a Work Attribute
-
Select Settings in the Tempo sidebar.
-
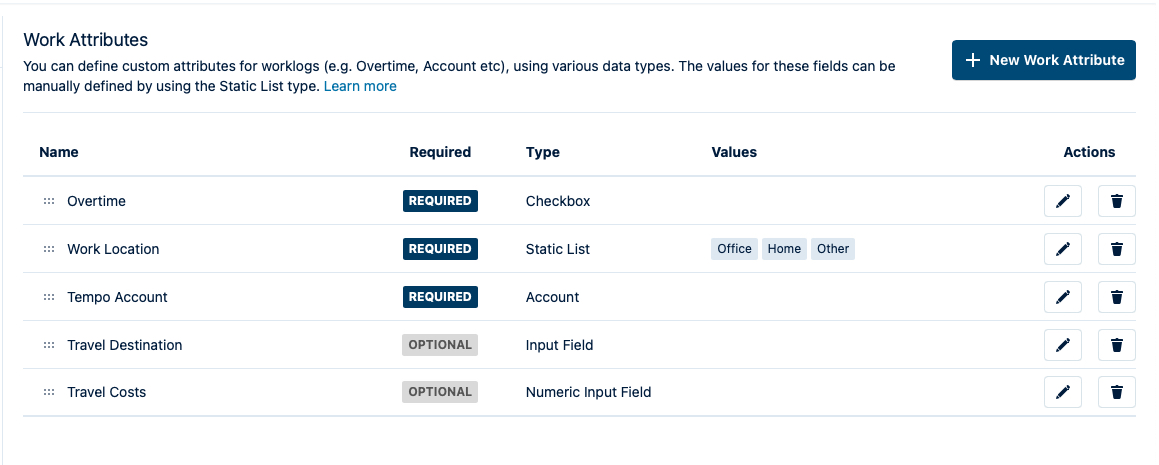
Under Configuration, select Work Attributes.
-
Click the + New Work Attribute button in the top right.
-
In the New Work Attribute form, enter the Name of the work attribute you want to create.
-
If the attribute should be a required option, turn on the Required toggle.
-
Select a Type from the dropdown. Available types include:
-
Account - Selecting Account as a Work Attribute type allows you to link accounts directly to worklogs. Only one work attribute can be defined as the Account type - see Creating an Account Work Attribute for more information.
-
Checkbox - Select this if you want to allow your users to select multiple options.
-
Dynamic Dropdown - Select this if option when you want users to select from a list of predefined options that can dynamically change based on values provided from an external source. See Add a Work Attribute as a Dynamic Dropdown for more information.
-
Input Field - Select this if you want users to be able to enter text.
-
Numeric Input Field - Select this if you want to sum the value of the work attribute in Tempo Reports. In the report, you must group by worklog to view work attributes.
-
Static List - Select this if you want to create a simple dropdown list. See Add a Work Attribute as a Static List (below).
-
-
Click Save to create the work attribute.
Add a Work Attribute as a Static List (Simple Dropdown List)
-
Select Static List as the Type when you create the work attribute.
-
In the Values field that appears in the form, add each item you want in the list and click the Add button.
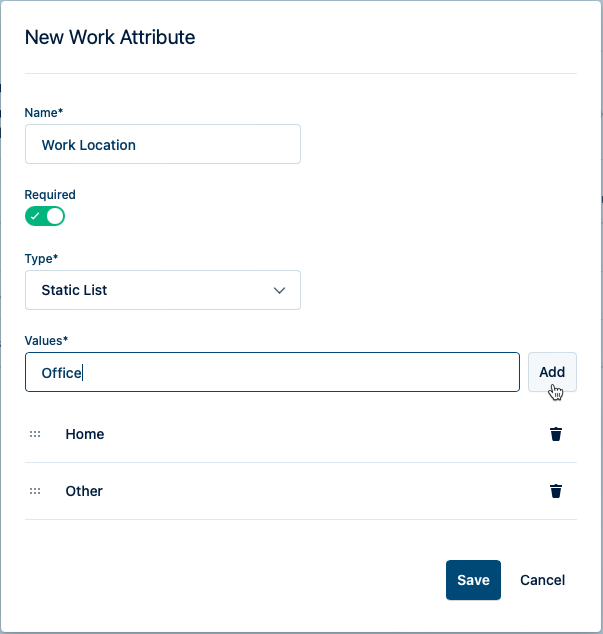
You can drag each item in the order you want, or click the trashcan icon to delete that item.
-
Click Save to create the work attribute.
Add a Work Attribute as a Dynamic Dropdown
If you want to add a dynamic dropdown, complete the steps described in Configuring External Drop-Down Lists for Worklogs.
When adding a dynamic drop-down, an externally sourced drop-down list, complete the following steps:
-
Select Dynamic Dropdown as a work attribute type. An API URL field displays below the attribute type.
-
In the URL field, enter the API URL for fetching drop-down list items from an external service. For example, you might want to create a custom field called Operations in the Log Time dialog box and have users choose an operation from a drop-down list. An example URL you could use to fetch the list of operations would be:
https://www.mysource.dev/operations
In the above example, www.mysource.dev is the external service that is configured to return the list of operations in a standard format. For further details on configuring the URL, see Configuring External Dropdown Lists for Worklogs.
-
Click the Verify button to the right of the URL field to confirm that the URL exists and is reachable. The goal is to verify that the customer owns the server (URL) being configured. Clicking the Verify button completes the following process:
-
Tempo sends a verification request, it includes a randomly generated
tempoVerificationTokenas a query parameter (refer to the example script below). -
The customer’s server must respond with that same token in the
x-tempo-verification-tokenresponse header. -
If the values match, Tempo confirms the customer controls the URL (i.e., they own "the other side").
The URL must be verified before you are allowed to save the work attribute.
-
You can optionally enter a Client secret to validate requests from Tempo servers. The client secret is a shared secret (like a password) between your server-side service (for the dynamic drop-down endpoint) and Tempo’s servers. It is sent with each request, acting like a secure handshake between Tempo and your system to verify that the request is legitimate. This provides an added layer of security protection if desired.
You can enter your own secret or generate a random secret using the ![]()
A Client secret is recommended in the following cases:
-
Your endpoint is publicly accessible or not fully protected by a firewall or VPN.
-
You want to limit access to only trusted services (e.g., Tempo servers).
-
Your service processes sensitive or secure data.
-
When you are finished, click Save.
-
Click Add to add the dynamic drop-down work attribute to the Log Time dialog box.
Change the Order of Work Attributes in the Log Time Form
The order of the work attributes in this table determines the default order in which they appear in the Log Time form. They are added to the table in the order in which you created them, but you can reorder them as you like.
-
Drag on the left of an item in the table to change its order in the list. This is how they will appear in the Log Time form.
Users can then customize how the work attributes appear in the Log Time form for themselves.
Edit a Work Attribute
-
Click the pencil icon on the right side of the attribute in the table.
-
In the form that appears, you can edit the Name of the work attribute and the state of the Required option but not the Type.
Delete a Work Attribute
-
Click the trashcan icon on the right side of the attribute in the table. The attribute will no longer be visible in the Log Time form for anyone.
If you delete a work attribute, it is removed from the Log Work form, and all existing recorded values for the attribute are permanently deleted. Worklogs are not affected in any other way if the work attribute is no longer connected to them.
Video
The following video demonstrates how to create work attributes for custom time tracking: