In this tutorial, you will learn how to use the Billable hours field to track billable hours on a space in a simple way, for the purpose of invoicing a customer. This method is easy to set up across your Tempo instance and you can control who can bill their time on a per-Jira space basis.
The reason to work on a per-Jira space basis is because the Billable hours field is controlled at the Jira space level with the Set Billable Hours permission: this permission is what makes the Billable hours field appear in the Log Time form. You'll see how to do this in the steps below.
Tracking billable work using the Billable hours field is one of two ways in which you can do this in Tempo Timesheets: the other is to use billable Tempo accounts (see Tracking Billable Work for Invoicing Using Tempo Accounts). And for more background on both of these methods, see Best Practices for Tracking Billable Hours.
The scenario
Taylor is a project manager in an environmental consulting company called the Apollo Consulting Group. She wants to track the billable work on the sustainability and environmental assessment that her team of consultants is doing for a customer called Lunar Industries. When the project is done, she will run a report on the billable hours logged and send that to her Accounting team. Then they can create an invoice for Lunar Industries based on this billable time data.
The setup
Related topics: Space Permissions, Best Practices for Tracking Billable Hours, and Creating and Deleting Teams
-
A Jira space called Lunar Sustain has been created.
-
A Jira Permission scheme called Billable Hours has been created and the Lunar Sustain space is using it. This permission scheme lets you grant the Set Billable Hours permission on all Jira spaces that use it. Creating a separate permission scheme is optional, but gives you more control than if you're using the Default permission scheme.
-
A Jira Space Role called Consultants has been created and add all consultants on Taylor's team have been added as members.
-
A Tempo team called Apollo Environment Management has been created, with Taylor as team lead and three other consultants as team members.
Step 1: Grant the Set Billable Hours permission to the consultants
Related topics: Jira Administrator Permissions and Space Permissions
The team of consultants all need to have the Set Billable Hours permission for the Lunar Sustain Jira space on which they're working. This permission displays the Billable hours field in the Log Time form for only those who have this permission.
The Jira Administrator Permissions is required to grant this Space permission.
-
From the Lunar Sustain space in Jira, Taylor opens Space Settings > Permissions, which opens the permission scheme that has been created for only those Jira spaces that need to use the Set Billable Hours permission.
-
She clicks Edit beside the Set Billable Hours permission in the list, and grants it to the Space Role called Consultants, of which the consultants in her team are members.
Step 2: Log the billable hours to the space
Related topics: Logging Your Time and The Log Time Form
Now Taylor and her team can log their billable time to work items in the Jira space. They can log time in My Work or log time from the Jira work items in which they're working.
-
In Tempo Timesheets, Taylor clicks Log Time on the current day in My Work to open the Log Time form, then selects a Jira work item from the Lunar Sustain space.
-
She enters 5 as the total number of hours worked in the Duration field.
-
To see the Billable hours field in the Log Time form, she clicks Show hidden fields.
By default, the same number of hours appears in the Billable hours field as in the Duration. However, she changes the billable hours to 3 hours since some of the work she did on this work item was correcting a mistake she made in her report, so she didn't want to charge that to Lunar Industries.

-
Taylor and her team continue to log their billable in this way for the length of the space.
To keep the Billable Hours field visible, you can customize the Log Time form: click :settings_dc: at the top-right and then drag the Billable Hours field into the Visible fields section of the Log Time form, and click Save.
Step 3: Check the team's timesheet for billable hours worked
Related topics: Viewing the Team Timesheet
As team lead of the Apollo Environment Management team, Taylor can check the number of hours logged to the space, especially the billable hours, at any point in the space - a good thing to do to make sure that things are on track.
-
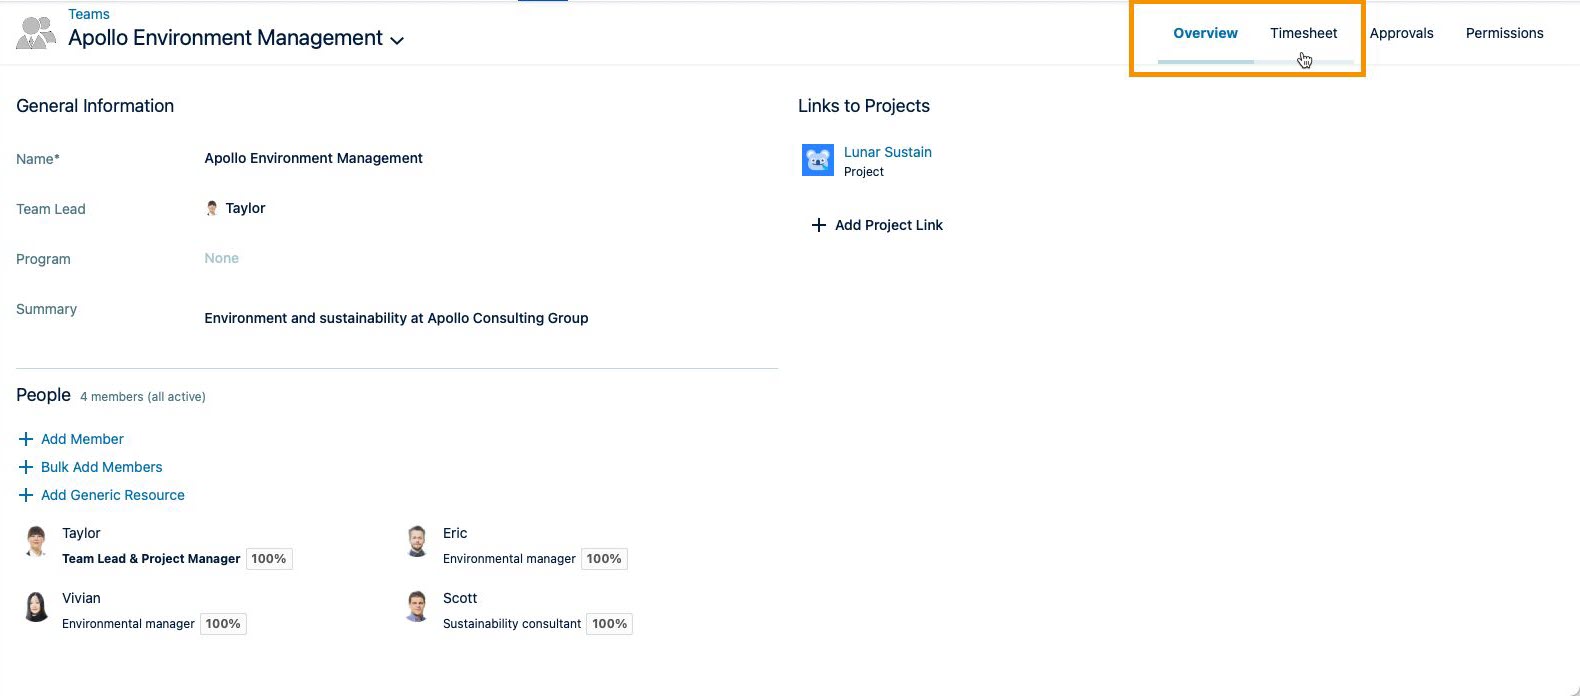
Taylor selects Teams in the Tempo sidebar, then clicks the name of her team to open its Overview.
-
In the top-right, she clicks Timesheet to open her team's timesheet.
-
In the Timesheet, all logged hours done by each team member are shown by default, so to see the billable hours as well, she opens the menu at the top-right and checks the Billable option.

Step 4: Create a report of billable hours for the space
Related topics: Creating Reports, Filtering the Data in Reports, Grouping and Sorting Data in Reports, and Selecting a Reporting Period
All the work for Lunar Industries has all been logged for last month and now Taylor can generate a report that shows the billable hours versus total hours logged for this time period. This report will be the base for the monthly invoice that the Accounting team sends to the customer.
Before you create a report, make sure that the team has submitted their timesheets for approval for the period, and that the team lead has reviewed and approved their timesheets. This is especially important for getting accurate billable hours for invoicing.
-
Taylor selects Reports in the Tempo sidebar, then clicks the Logged Time tile.
-
In the report wizard that opens, she selects SPACE from the Filter by field and checks Lunar Sustain.
-
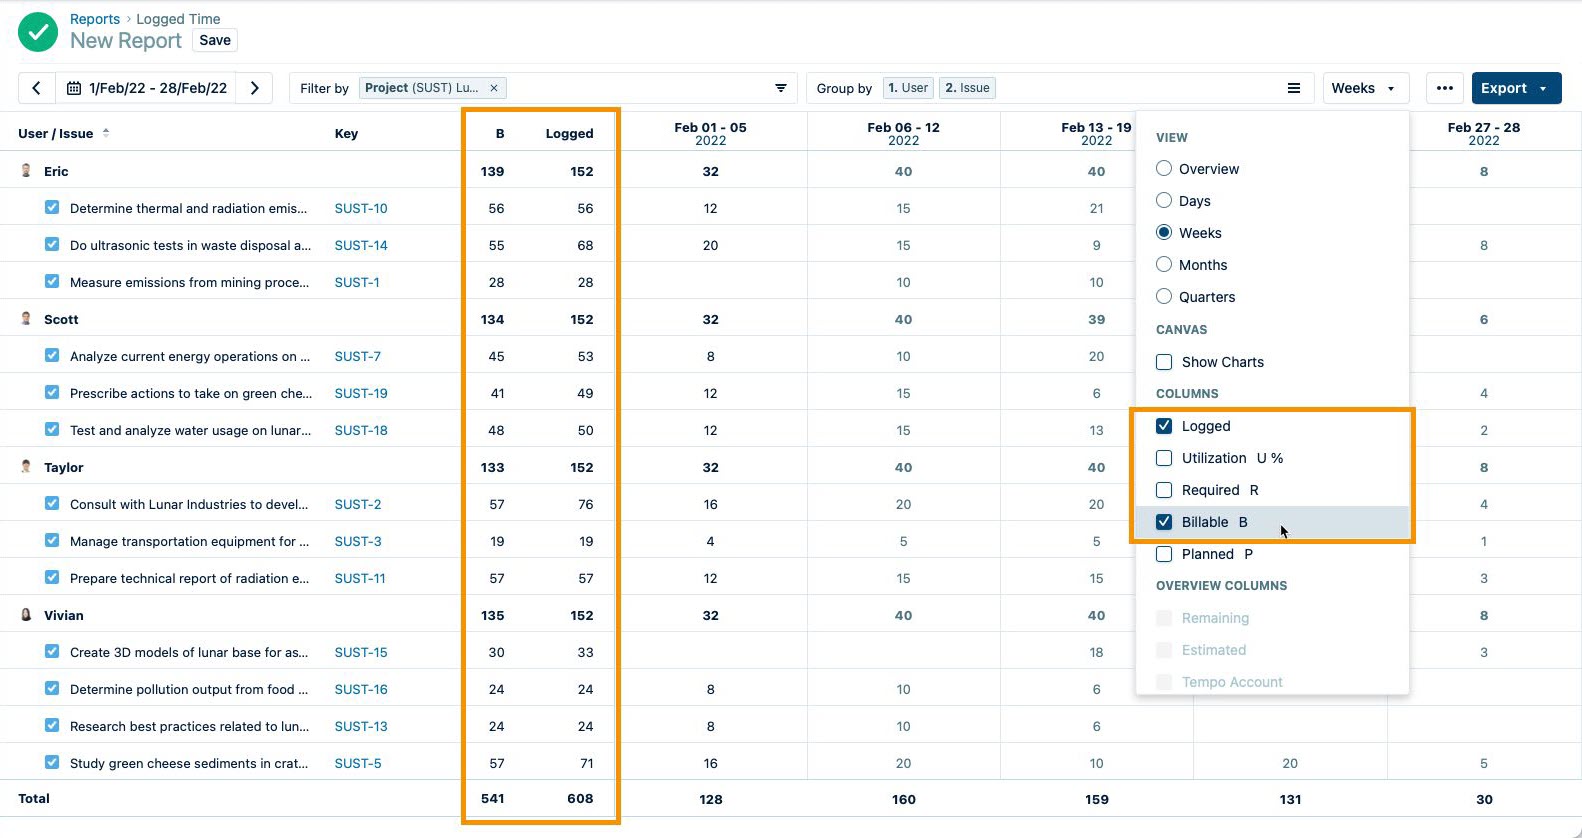
In the Group by field, she selects User and Work Item. This way, the time logged to each Jira work item is grouped under each consultant.

-
She clicks Create and the report is created, showing all the hours Logged by each consultant to each Jira work item in this space, for the current month.
-
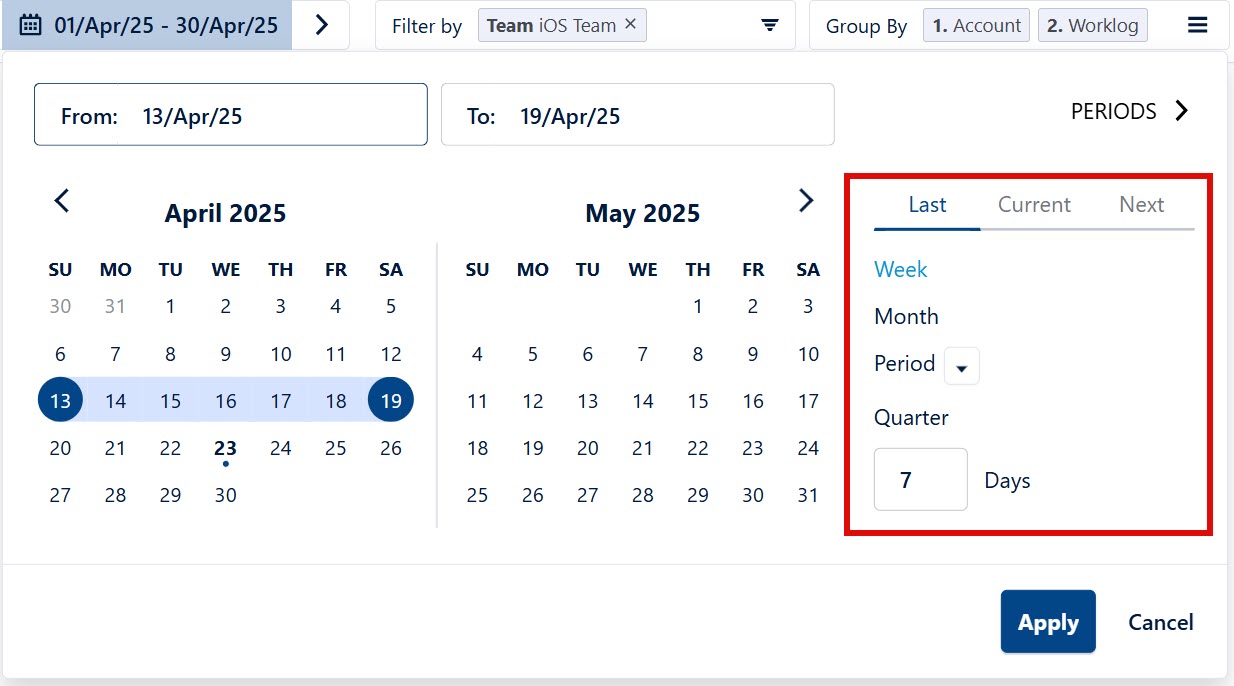
She changes the time period shown using the date picker in the top-left: she clicks Last and then Month to display only that month.
This creates a dynamic-period report where the data shown is always for the last month relative to the current date. Dynamic-period reports make it easy to create report templates for regularly-run reports.
-
To see the billable hours as well, she opens the menu at the top-right and checks the Billable option, as she did in the team's Timesheet. Only hours that were logged in the Billable hours field in the Log Time form appear in this Billable column.
-
She can easily compare Logged versus Billable hours per consultant and per work item, as well as the totals of each at the bottom of their columns.
-
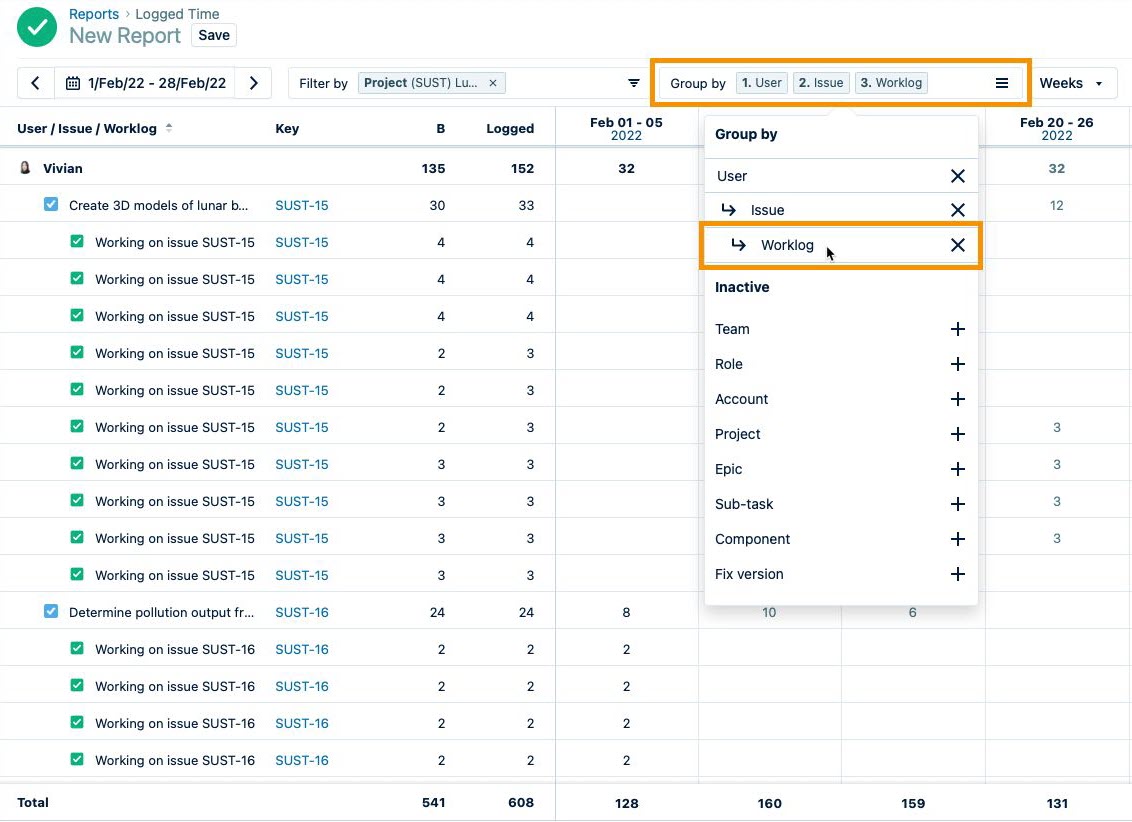
Taylor clicks in the Group by field, selects Worklog, and then clicks Apply to add the detail that the customer, Lunar Industries, will want to see in the invoice, which is the individual worklogs for each consultant on each work item.
Step 5: Save, share, and export the report for invoicing
Related topics: Saving and Editing Reports, Sharing Reports, and Exporting Reports
Taylor is done setting up the report of billable hours for last month, so she saves it, shares it with the Accounting team and her own team, and exports it as a spreadsheet. Then the Accounting team uses this spreadsheet as the base for creating an invoice that they end to Lunar Industries. And then the Apollo Consulting Group will get paid!
-
Taylor clicks the Save button at the top of the report and enters a name for this report, which she will run again next month for this space:
Billable Hours - Lunar Sustain Monthly
-
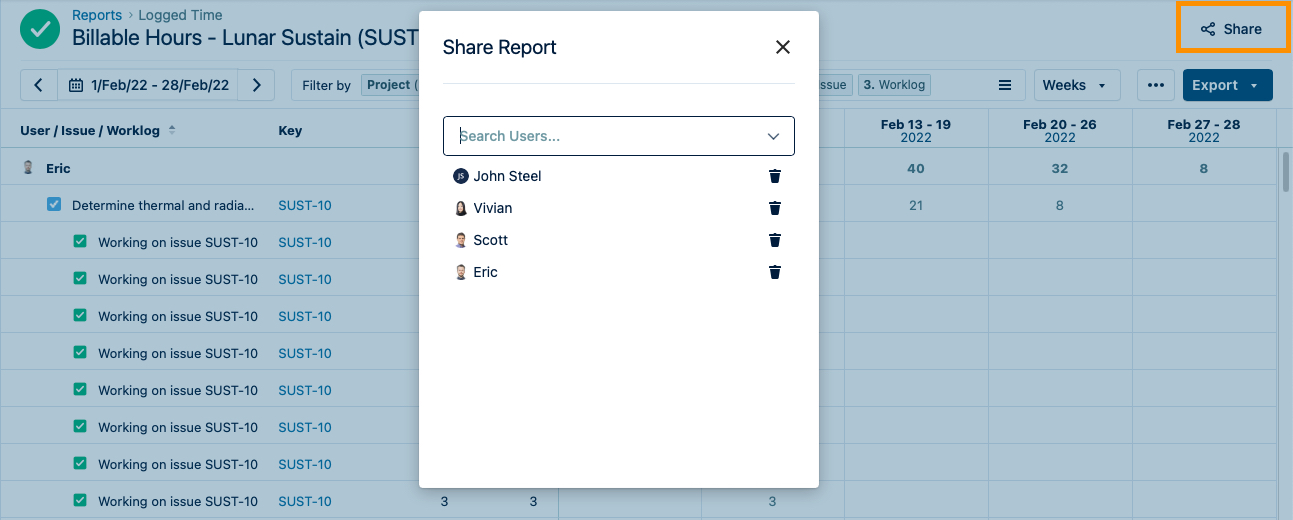
After the report is saved, she clicks Share in the top-right and selects those with whom she wants to share this report, such as the members of the Accounting team and her own team. They need to have the same permissions as she does to see the same data in this report.
-
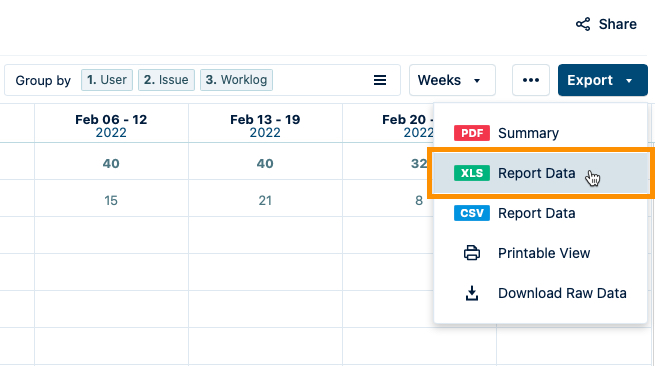
Finally, she selects Export > XLS Report Data in the top-right to export this report as an Excel spreadsheet, and then sends that file to the Accounting team.
-
Based on the billable hours data in the spreadsheet, the Accounting team will create an invoice for the customer, Lunar Industries, and send it to them. And then the Apollo Consulting Group will get paid for their hard work!