In order to get the most out of your Tempo reports, you can apply a range of tools to sort the data. This includes applying filters as well as organizing the information into groups, sorting the data by columns, and adding columns to show Jira fields and work attributes.
Tempo remembers all your view settings and preferences between sessions.
Select Reports in the Tempo sidebar to create a report or open a saved report.
-
Viewing worklogs for your team members in Tempo Reports requires the View Worklogs and Browse Projects permissions. To see worklogs for other users in a project, you need to have the View All Worklogs permission.
-
To report on planned time, you need to have Tempo Capacity Planner installed. Viewing plans requires the View Plans permission.
-
You can view the worklog data from inactive or deleted Jira users in a report - see Inactive or Deleted Jira Users and Tempo Timesheets for more information.
Filtering Data
Selecting filters for the reports allows you to see only the information you need. You can, for example, select to view time logged on a specific project or all planned work for your team. You can filter the data for a report before you create it or after it's created.
Filtering before creating a report will result in less data being loaded than if you don't filter before creating a report. This can save time and prevent performance issues when you have a lot of data to load.
For advanced filtering, create and save a JQL filter in Jira, and then use the JQL filter in your Tempo reports.
When using a JQL filter, only the first 30k issues returned will be considered. If you use a JQL filter that exceeds this limit, the resulting worklogs in your Tempo report will be less than expected.
To filter data before you create a report:
-
Click either the Logged Time tile or the Planned Time tile to create a report of that type.
-
Select the options you want in the Filter by list.
To filter data in a report:
The Filter by field at the top of the report shows which filters are applied.
-
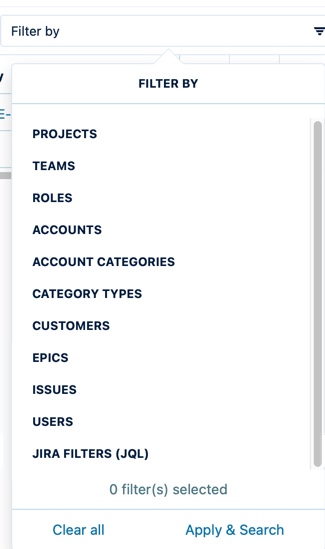
In a report, click the Filter by box to display a list of filter options.

If you want to select a Jira Filter (JQL), scroll down to the bottom of the list.
-
Select the data you want to include in the report.

-
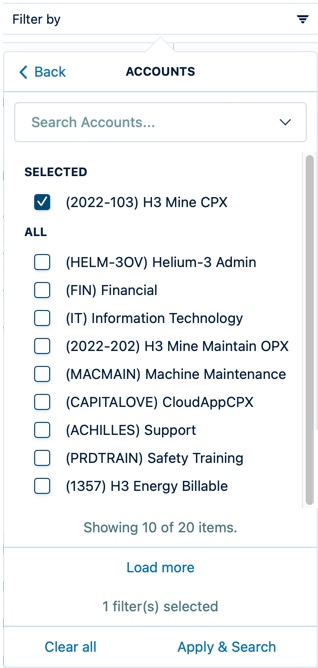
Use the search box to search for projects, teams, accounts, etc. To add a filter, select its checkbox and click Apply & Search. To remove a filter, clear the checkbox or click the x beside its name in the Filter by field.
-
If you filter by Issues, you can also choose to include sub-tasks.
-
When filtering by both Epics and Issues, you receive results that match either the Epic OR the Issue.
-
Click Back to return to the list of filters.
Below is an overview of the different fields that you can use to filter your reports:
|
Filter |
What it does |
|---|---|
|
Projects |
Filters by the selected Jira projects |
|
Teams |
Filters by Tempo teams |
|
Roles |
Filters by team role |
|
Accounts |
Filters by Tempo accounts |
|
Account categories |
Filters by Tempo account categories |
|
Category types |
Filters by Tempo account category Types, which are Billable, Capitalized, Internal, and Operational |
|
Customers |
Filters by customers for Tempo accounts |
|
Epics |
Filters by the selected Jira epics. Logged time will be applied to the Epic as well as any issues (stories, tasks, and sub-tasks) below it. |
|
Issues |
Filters by the selected Jira work items. Logged time will be applied to the Jira work item itself. Filtering by issue and including sub-tasks will display logged time to it and only one work item level below it. |
|
Users |
Filters by the selected Jira users |
|
Generic Resources |
(For Tempo Capacity Planner only) Filters by generic resources. Select the names of the generic resources you wish to see. You may need to scroll down to the bottom of the list to see this option. |
|
Jira filters (JQL) |
Filters by a predefined JQL filter. You may need to scroll down to the bottom of the list to see this option. If you share the report with others, they must have the same Jira project and Team permissions as you. Otherwise, they might not have the same data in the report. |
|
Skills |
(For Tempo Capacity Planner only) Filters by resource skills. |
|
Approval Status |
(For Tempo Capacity Planner only) When you generate a Planned Time or Planned vs Actual report, you can include rejected plans in your report using this filter. To do so, select the filter and then select the Include rejected plans check box. |
