This feature is only available to Collaborators, User Managers, and Account Administrators.
Terms to Know
-
Item - The initiatives, projects, tasks, releases, and general "things" that make up your roadmap.
-
Milestone - One-time important single-day events that occur, like a release, launch, board meeting, or trade show (these will only appear on the Timeline visualization).
-
Field - Categories or attributes that you can use to organize, group, filter, and pivot roadmap data in different ways. Simply put, Fields contain Item data.
-
Bucket - Specifies a time period for an Item that does not use exact dates ('soon' or 'future' or 'never').
Importing Items from CSV
To import Items from another application into Strategic Roadmaps:
-
Export your data to a CSV file
-
Import the CSV file into Strategic Roadmaps
Setting up the CSV
The CSV file needs to follow some simple formatting for the import to work. Your CSV file must have:
-
An Item field that maps to the roadmap's Items field
-
Field name headers
To make creating this file easy, we've created a CSV template you can download here.
The template has Items, Descriptions, and Start and End Date columns. It also has a Bucket column for items without fixed dates. If your data has other fields, just add them to the template, and they'll be automatically added to the roadmap.
IMPORTANT: The items in the CSV file should have either Start and End Dates OR a Bucket. If they have both, only the Buckets will be imported.
Strategic Roadmaps has a handful of application-specific Field names that cannot be used for Fields on your import. If any of these Field names exist on the CSV, they will not be imported. These Field names include: Error, Internal ID, External ID, Child Of, Source, Item, Milestone, Description, Start Date, End Date, and Date.
Starting the Import
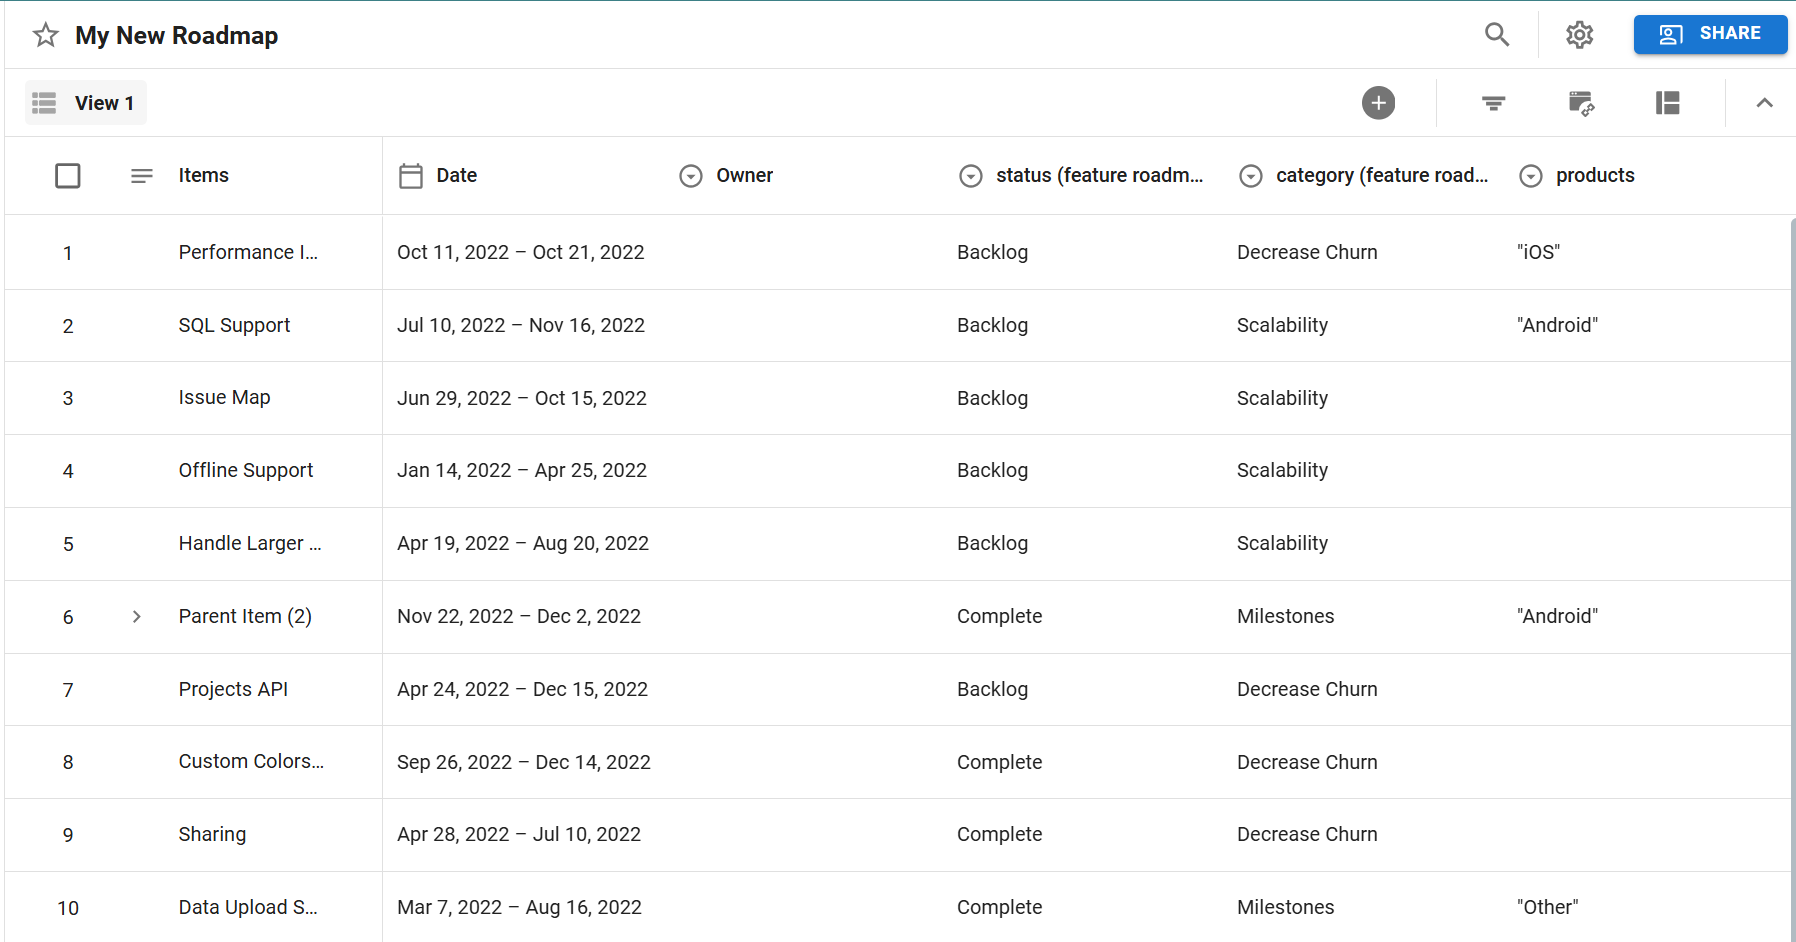
To import your CSV file, go to the items table. Then:
-
If the roadmap is empty, click the Import from CSV button.
-
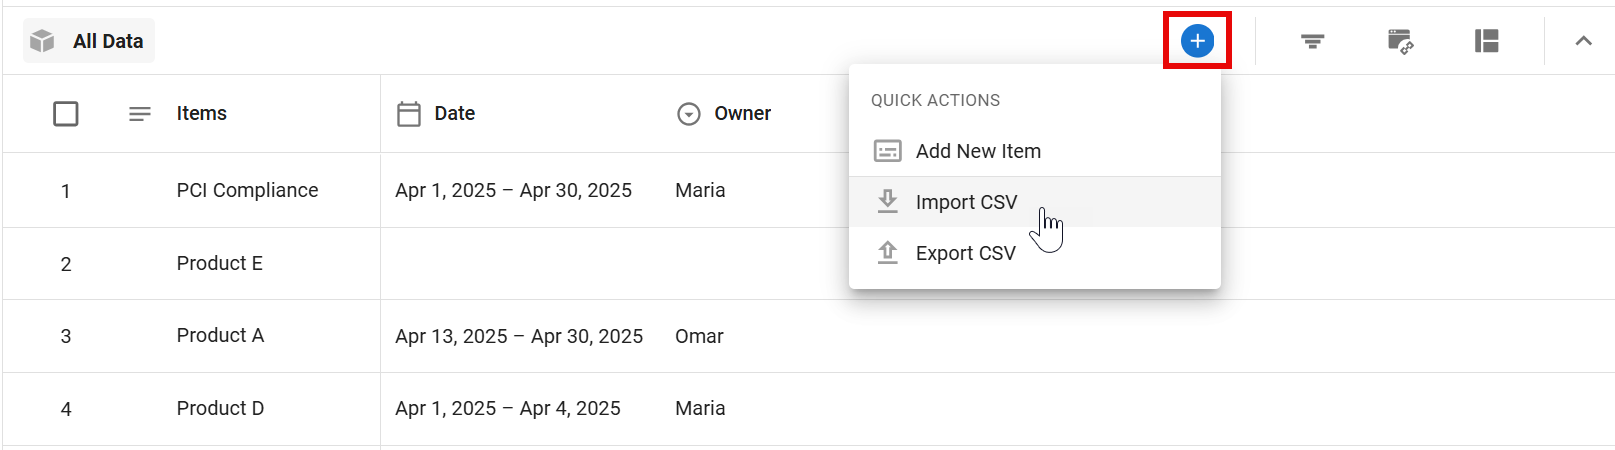
If the roadmap already has items in it, open the Quick Actions menu and select Import from CSV.
Uploading the CSV
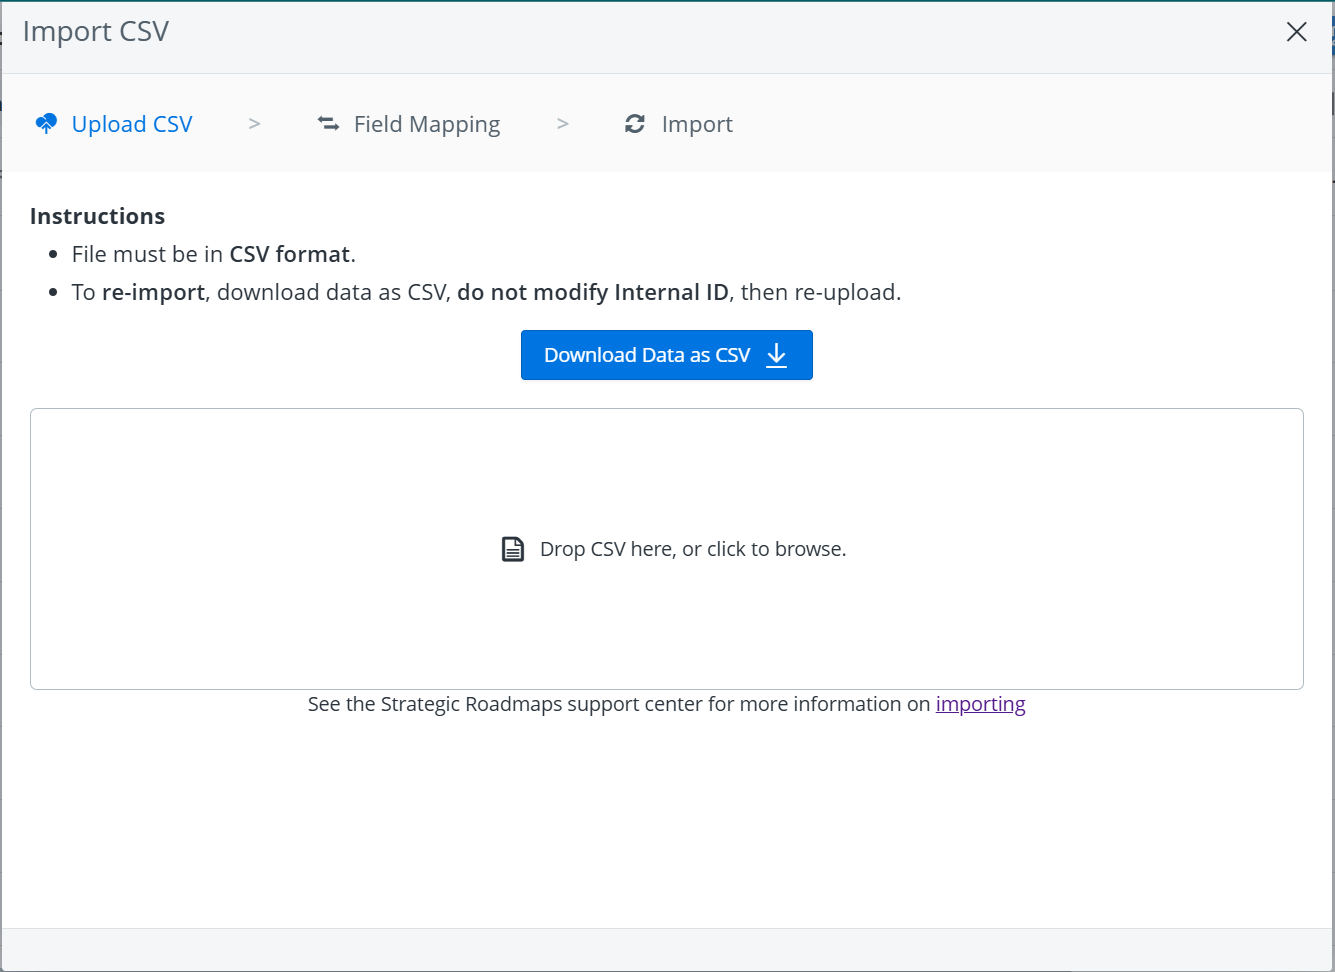
The Import CSV dialog walks you through the import, starting with uploading the CSV file.
To upload your file, drag it to the center rectangle, or click “Drop CSV here, or click to browse” to select the file from your computer.
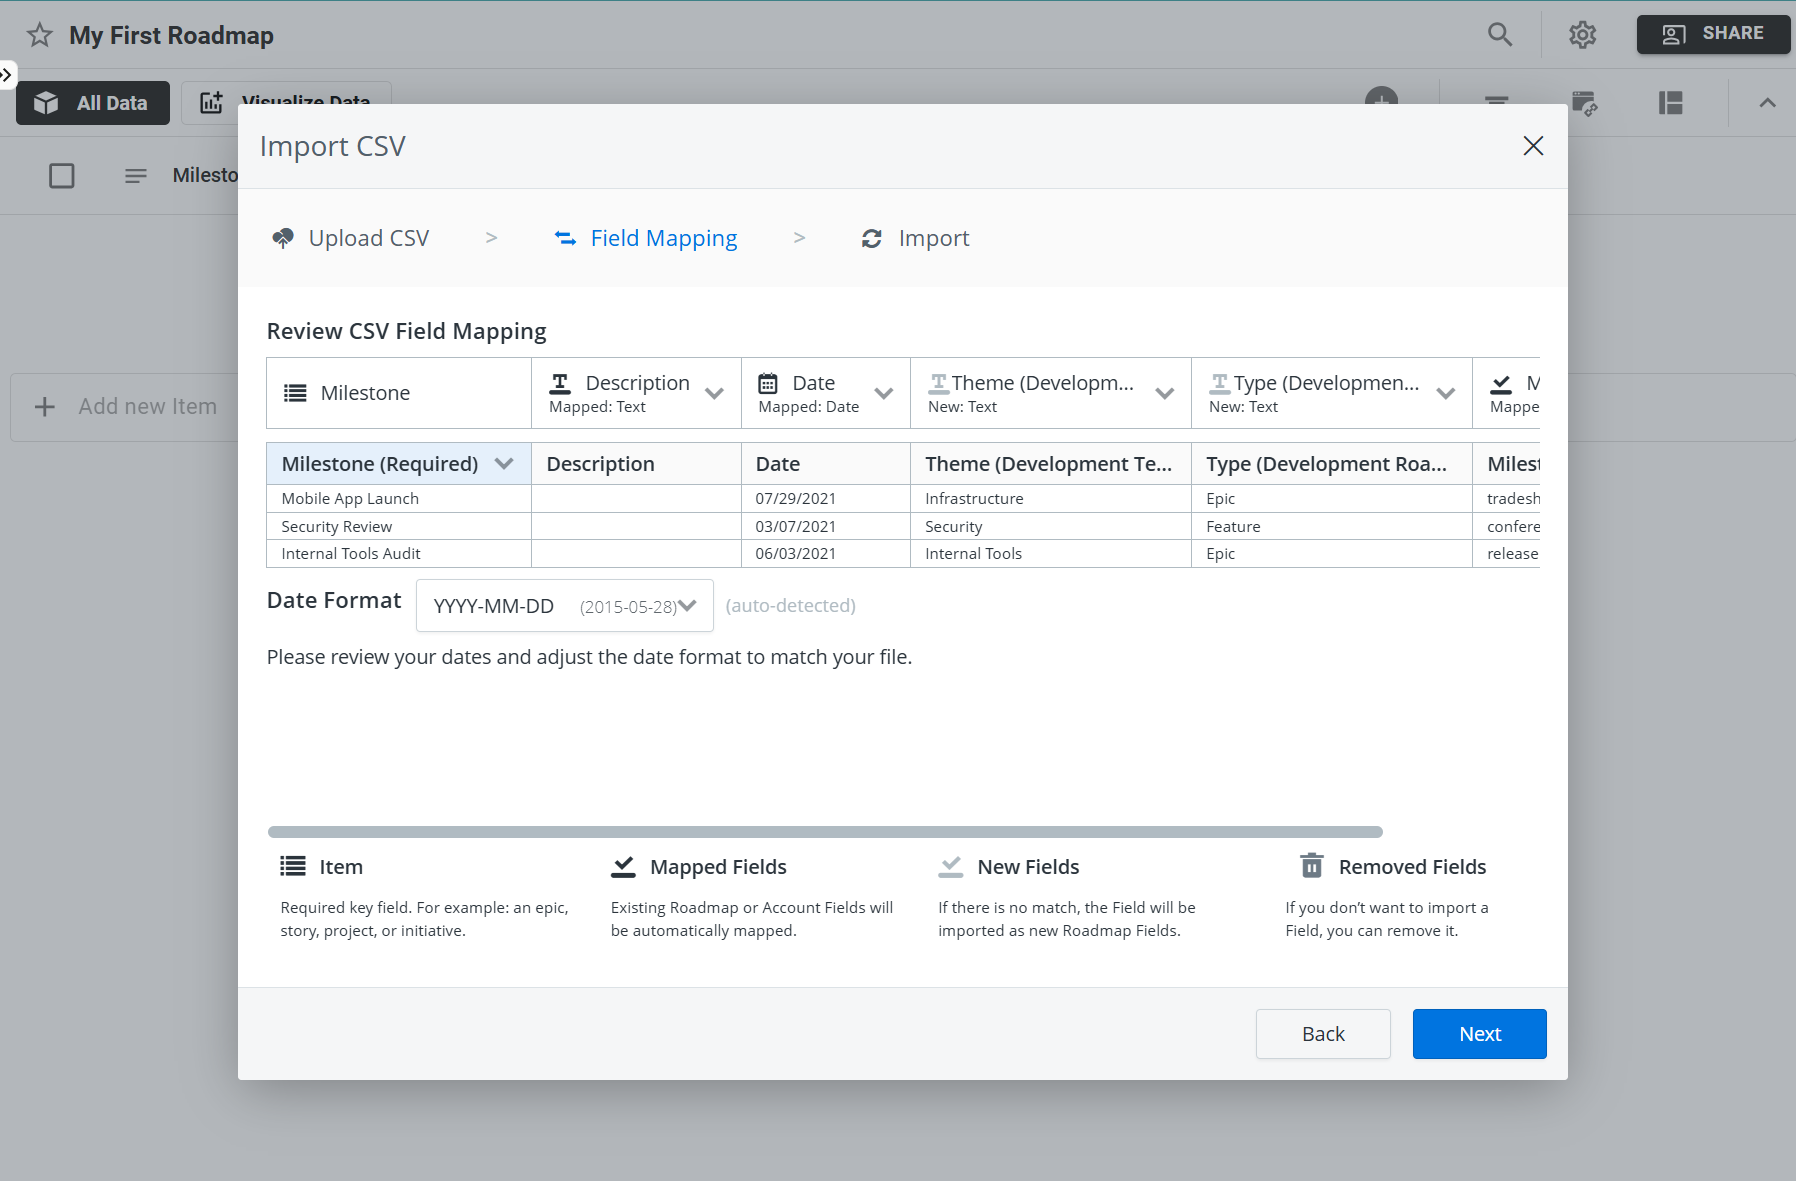
Checking field mappings
-
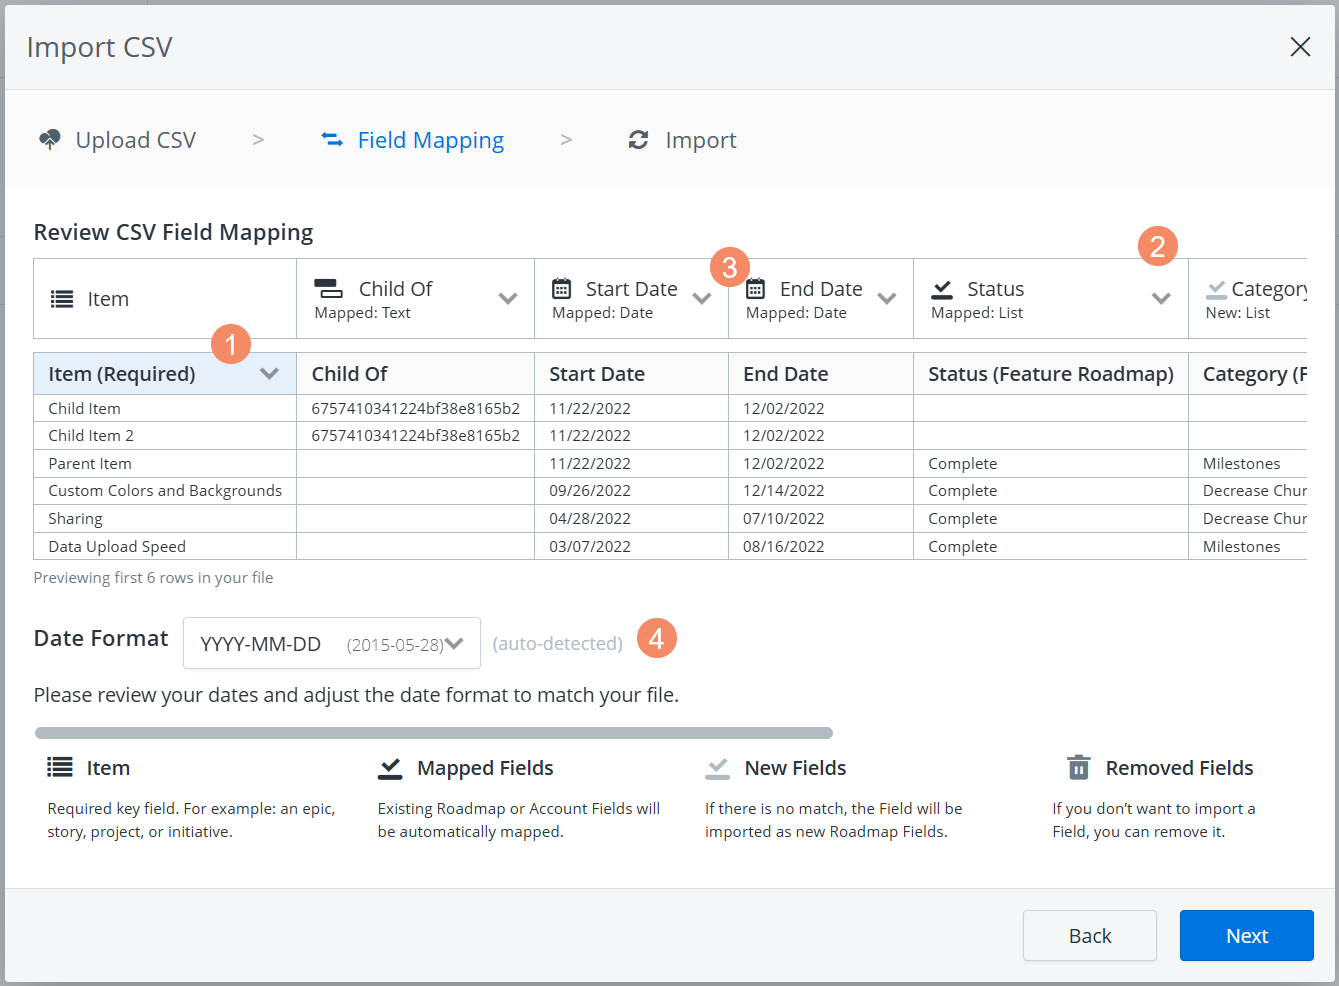
In the Field Mapping tab, you should see the Item field in the CSV mapped to the Item field in Strategic Roadmaps.
-
You should also see the remaining fields in the CSV mapped to the corresponding fields in Strategic Roadmaps:
-
If a field is not mapped correctly, click the field’s title and select a corresponding field.
-
If you decide not to import a field, click its title and select Do Not Import from the dropdown.
-
-
If the CSV file has both Start and End Date AND Bucket, choose the one you want to import and remove the other. If an item has both, only the Bucket will be imported.
-
Strategic Roadmaps auto-detects the date format in the CSV and sets the format in Strategic Roadmaps to match. If the formats don't match, select the right one in the Date Format dropdown.
-
If everything looks good, click Next.
Finishing the Import
-
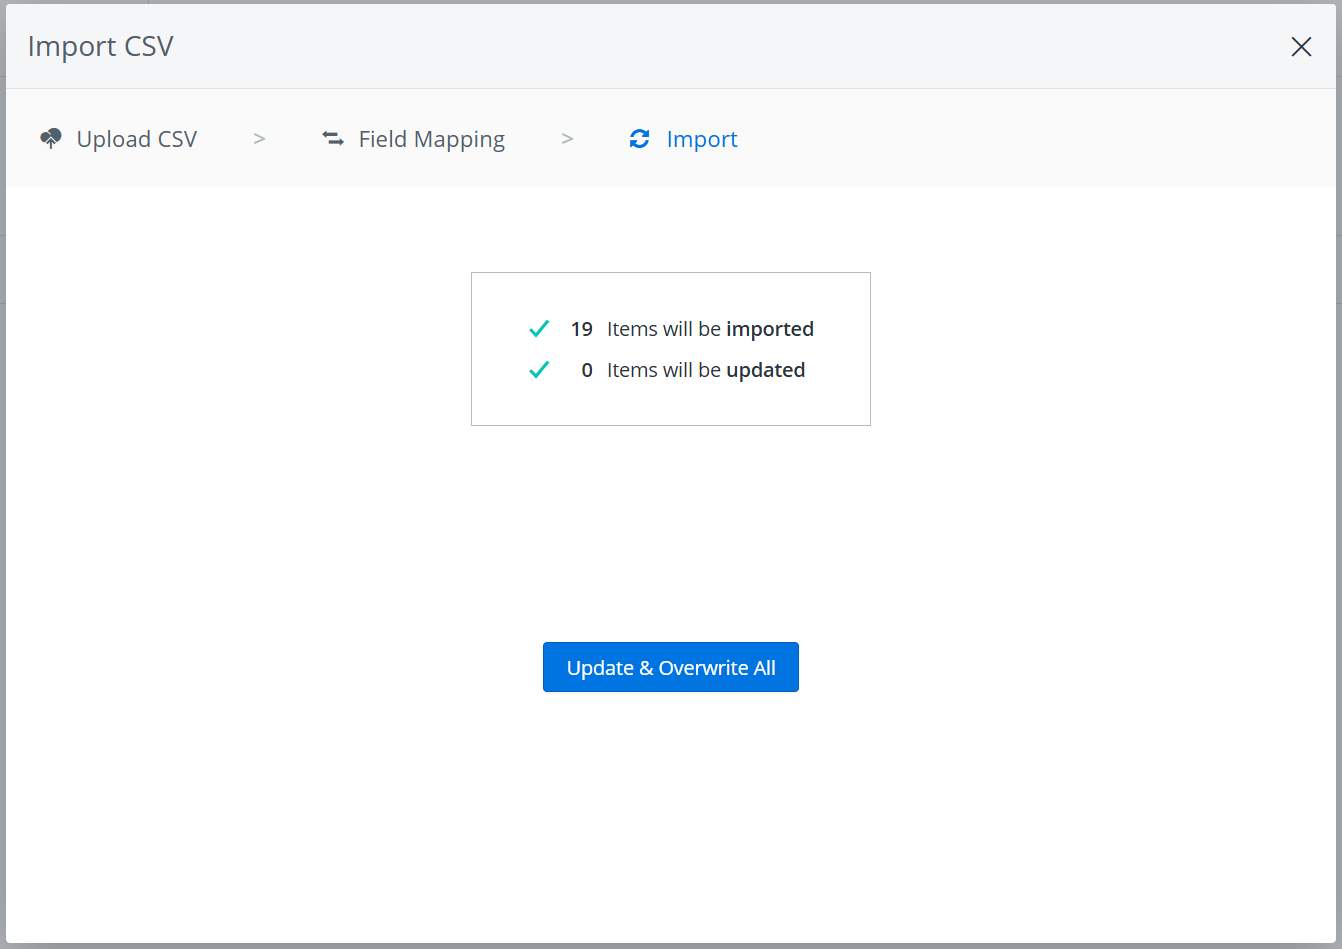
The Import tab shows a quick summary of how new items will be imported and existing items will be updated. Since we’re starting from a brand new roadmap, there are no existing items to be updated.
-
To finish the import, click Update & Overwrite All.
Importing Milestones from CSV
Set up the CSV
There's some simple formatting the CSV file needs to follow for the import to work.
The file must have:
-
a Milestone Free-form Text Field that can be mapped to the roadmap's Milestones Field in Strategic Roadmaps (this is the only required Field)
-
a first row with the Field names (header row)
-
only Date, Free-form Text, List, and Multi-select custom Fields (see Field types and Field mapping further on in the article)
The file should have (to make things easier):
-
a Description Free-form Text Field
-
a Date Field with a single date
-
a Milestone Type List Field (e.g., Tradeshow, Release, etc.)
Upload the Milestones CSV
To import milestones:
-
Open the Milestones Table
-
Follow the steps above for importing items, this time using your milestones CSV file
Field Types and Field Mapping
Field types in the CSV file must be mappable to the Field types currently supported by Strategic Roadmaps.
Date
Dates in the CSV file should be in two separate columns, one for the Start Date and one for the End Date. Dates must be a numerical value in one of these formats:
-
YYYY-M-D
-
M-D-YYYY
-
M-D-YY
-
D-M-YYYY
-
D-M-YY
-
YYYY-MMM-D
-
MMM-D-YYYY
-
MMM-D-YY
-
D-MMM-YYYY
-
D-MMM-YY
All dates must be in the same format, and only dates between 2010 and 2040 can be imported.
Buckets vs. Dates
The CSV file format also supports a Bucket Field for Items that are assigned to a time Bucket instead of having a Date. Bucket is a List Field (see below), so each Item in the file must contain a single value (for example, Soon or Future).
Free-Form Text
Free-form Text Fields can contain any alphanumeric value including URLs.
List
A List Field can contain a single value from a list of values.
Multi-select List
A Multi-select List Field is like a List Field except that it contain one or more values from a list. In the CSV file, each value selected from the list must be in quotation marks and multiple values must be separated by commas.
Numeric
A numeric Field allows you to enter numerical values including percentages, currencies, and numbers.
Team Members
The Team Members Field is like a Multi-select List Field except that it contains the all of the users in your account. In the CSV file, the values must be the the users specific email for them to match with the import and be automatically assigned to Items.
Who can import roadmap Items from a CSV?
Importing Items to a roadmap is the same as creating and adding roadmap Items. You must be the roadmap's Owner OR the roadmap must be shared with you as an Editor.
If a roadmap has been shared with you as Viewer, you have view-only access to the roadmap and can't import Items to it. You'll see a View Only icon on the Roadmap navbar, and the Import icon on the View navbar will be grayed-out and disabled.
CSV Separator Defaults in Strategic Roadmaps
Any CSV file exported from Strategic Roadmaps will default to the North American standard settings for separators; however, many of our users are setup on systems that don’t support this standard and may face issues when opening their CSV files in Excel, Numbers, or other spreadsheet software. The guides below will walk you through the process of setting up your system so that you can successfully import Strategic Roadmaps’s CSV files in both Windows and Mac OS.
Changing CSV Defaults on Windows
In order to change the CSV separator defaults in your system for Windows:
-
Click the Start button or press the Windows key, and then click/type Control Panel.
-
Open the dialog box for changing Regional and Language Settings.
-
In the List Separator box, type or select a standard comma ( , ).
-
Click Ok twice.
Changing CSV Defaults on Mac (Mojave & newer)
In order to change the CSV separator defaults in your system for Mac:
-
Navigate to your System Preferences and select the Language & Region option. Alternatively, press Command + Space and type in “Language”.
-
Click the Advanced button in the bottom-right corner.
-
In the Number separators options, change the decimal setting from a comma ( , ) to a period ( . )
-
Click OK in the bottom right corner
Note: After you change the list separator character for your Mac or PC, all programs will use the new character as a list separator. You can change the character back to the default character by following the same procedures listed above.