Working with Milestones
Introduction to Milestones
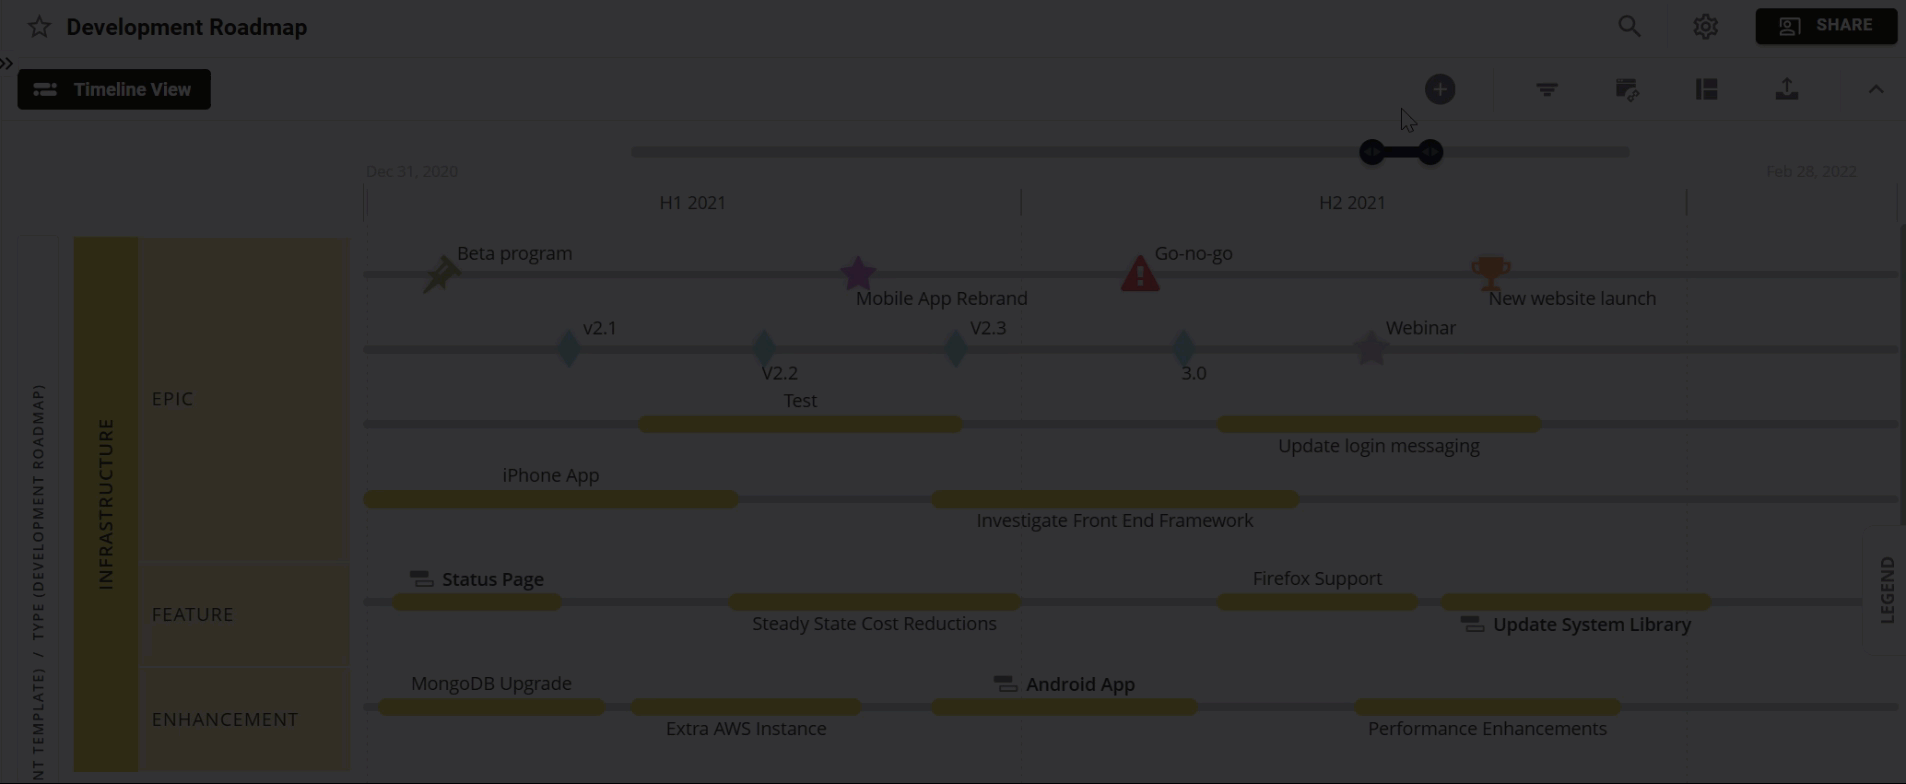
Milestones are fixed indicators that you can add to a roadmap and display on a roadmap Timeline together with your roadmap items.
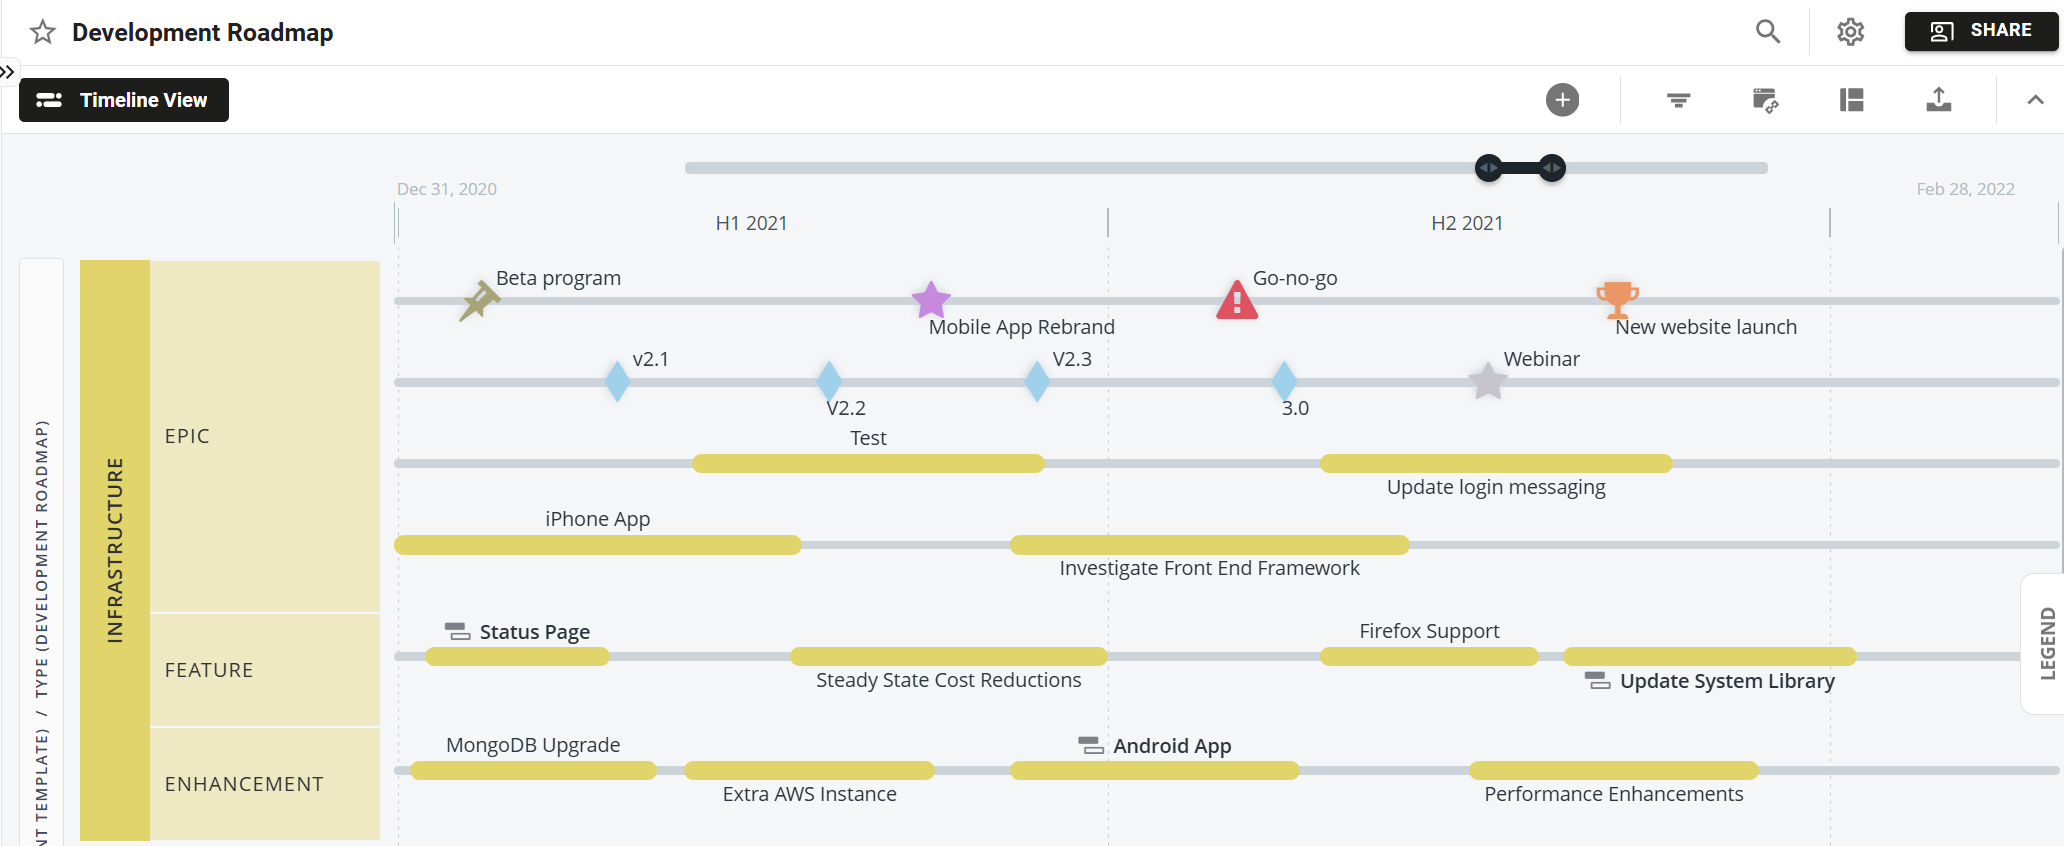
Milestones are a great way to spotlight your organization's goals, major releases, tradeshows, and achievements. By visualizing a goal or deadline on a roadmap, milestones help your team rally behind it and understand what it takes to get there.
Strategic Roadmaps comes ready with the most common milestone types (e.g., Tradeshow, Release, Product Launch), but you can add any number of custom ones to the list. The milestone icons you use on a Timeline are also customizable by shape and color.
Like items, milestones can be created from scratch or imported from a CSV file and can be viewed in tabular form in the Milestones Table.
Adding a Milestone in the Milestones Table
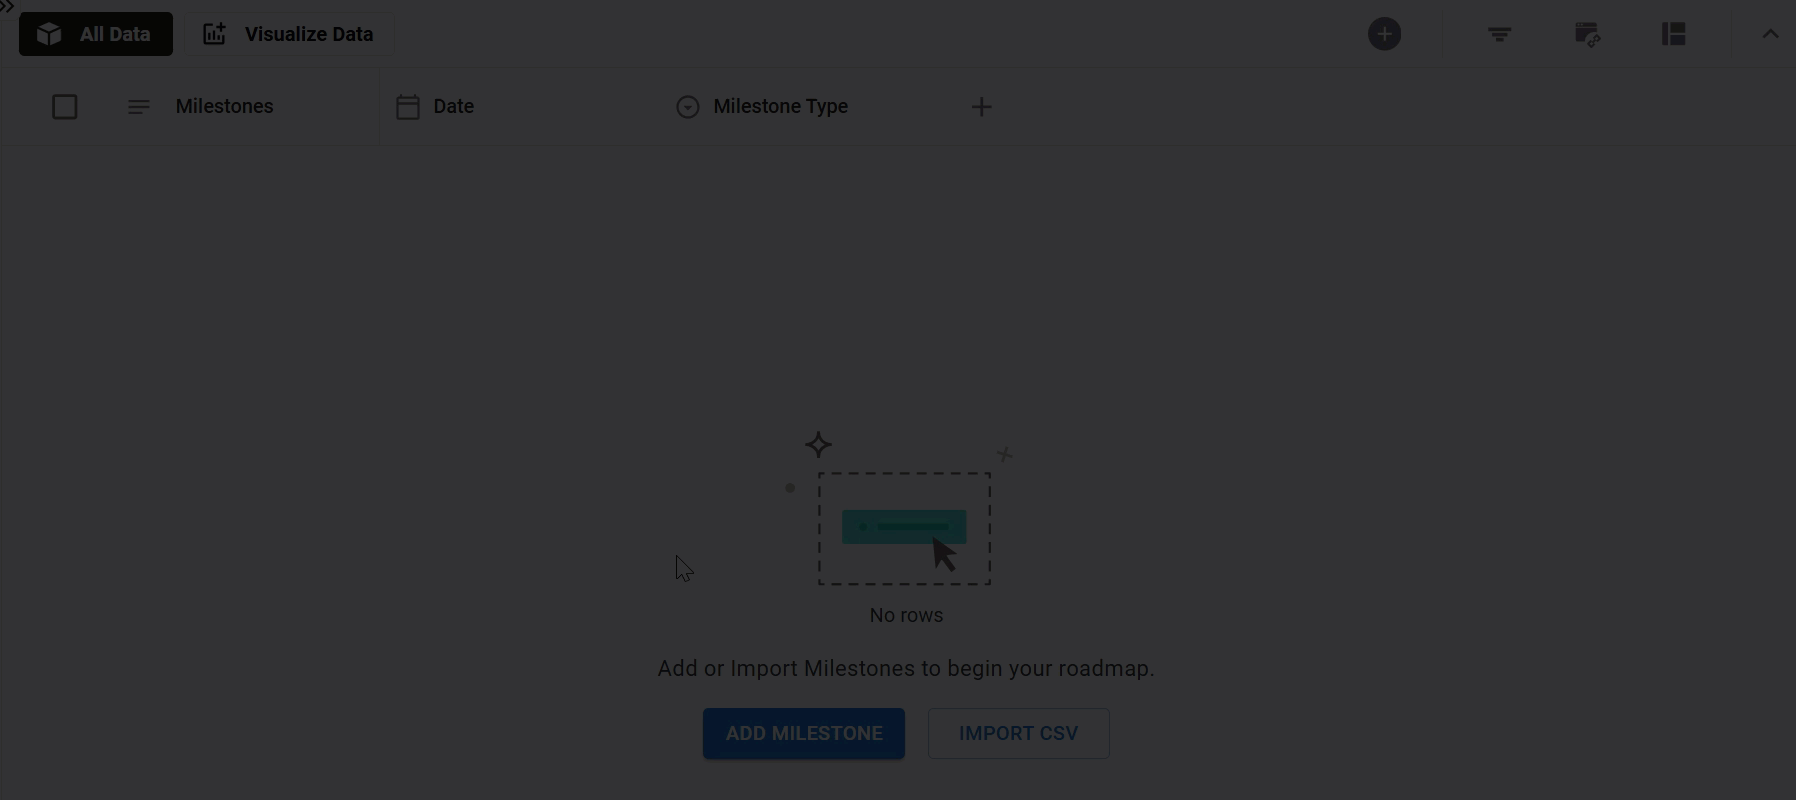
The milestones table looks and works almost exactly like an items table. Every roadmap created from scratch starts out with three default fields in the milestones table: Milestones, Date, and Milestone Type.
To create a milestone in the milestone table:
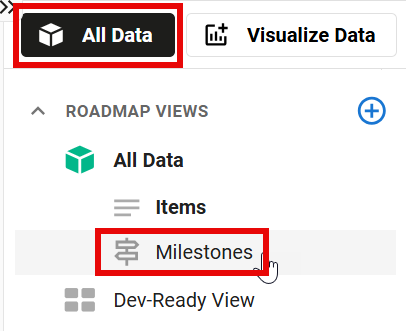
Open the milestone table: open the Views menu, and then select Milestones.
Milestones are not available on Swimlane views.
If your table is empty: select Add Milestone in the middle of the screen
If there are already items in the table, enter a name into the + field at the bottom of the table
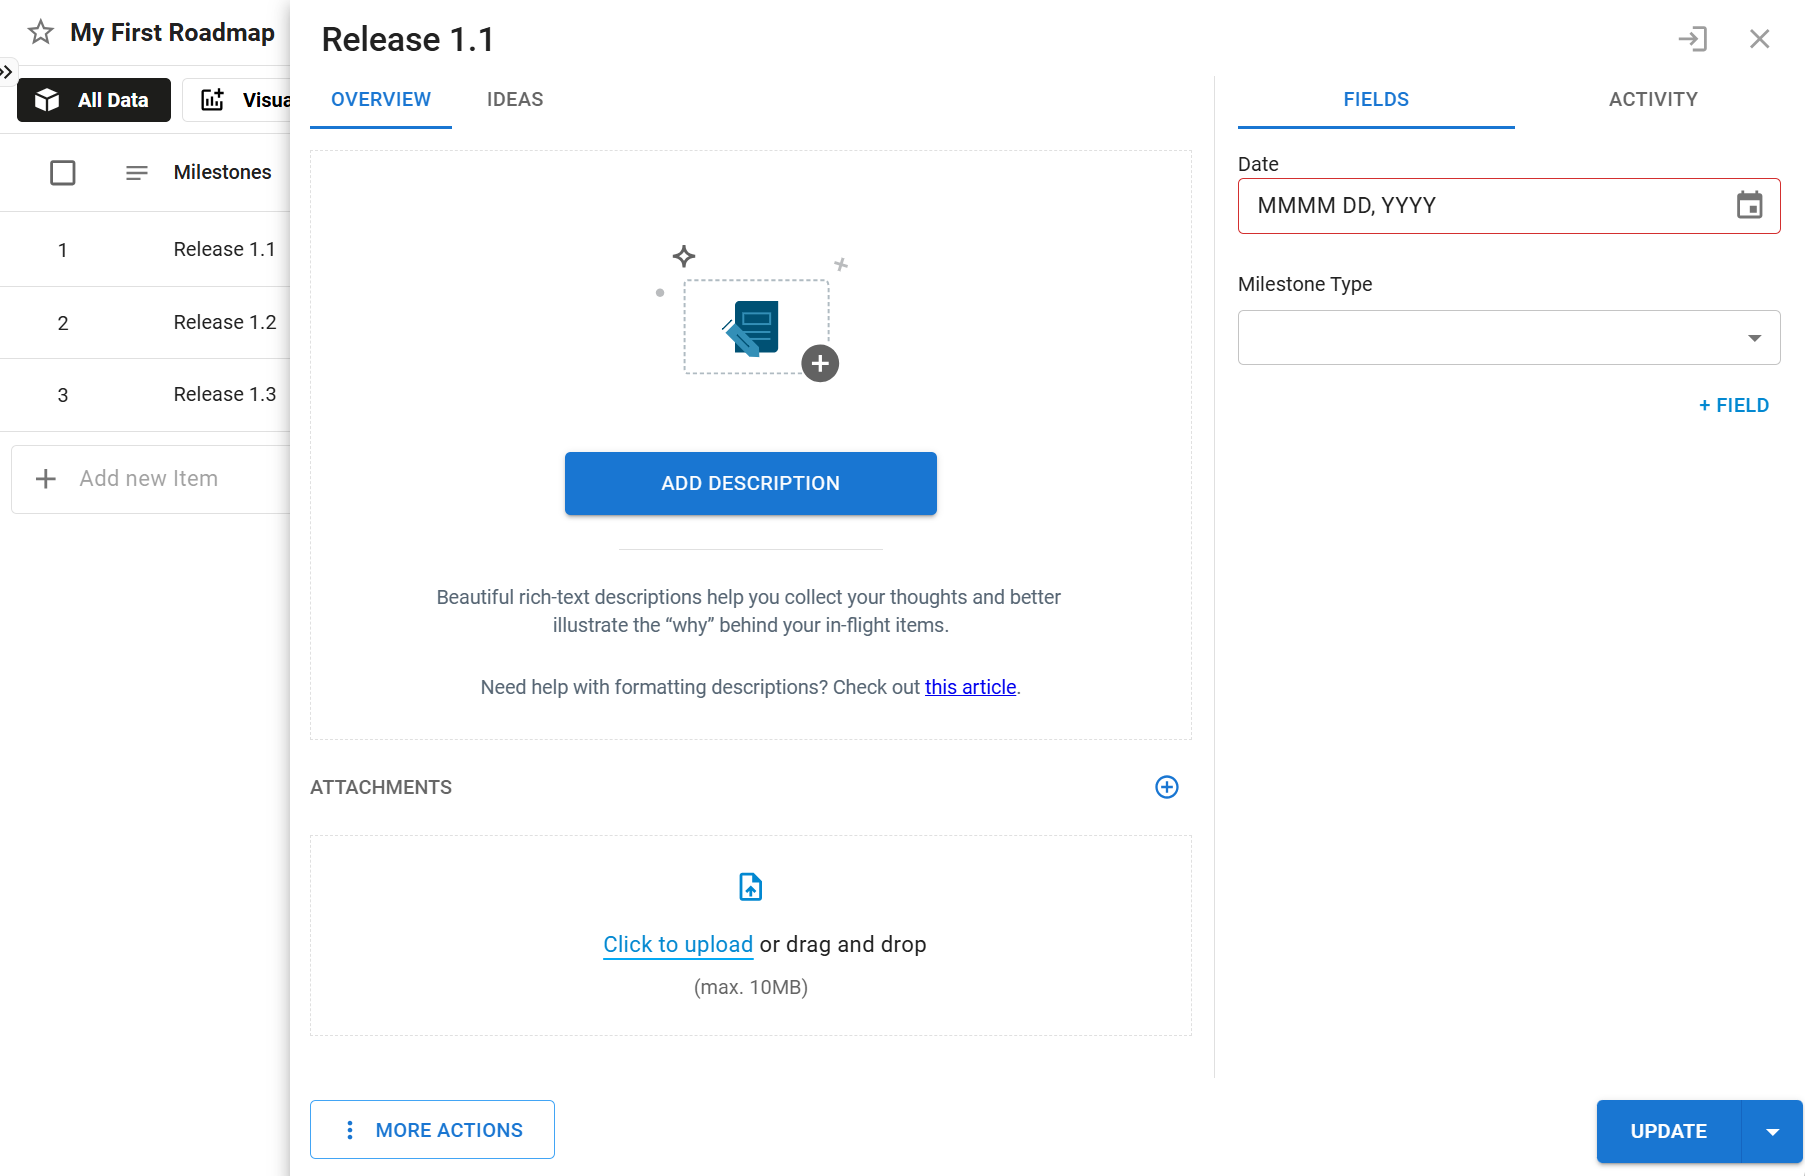
Entering Milestone Details
You can enter milestone details inline on the milestone tables, or click inside the milestone’s name to open the milestone card.
Adding Milestones in the Timeline View
You can also create a new milestone from the Timeline view, and then drag it to the right location.
Click the + button to open the Quick Actions menu.
Select Add New Item
In the pop-up, select Milestones
Name the milestone
Select the milestone type for the milestone - this will determine its shape and color
Drag the milestone to the correct location on your timeline
The milestone values for the Timeline's pivot fields will automatically be set to the header/sub-header that corresponds to the stream.
Showing/Hiding Labels and Dates
To select whether milestone labels and dates appear on the timeline:
Open the Format panel
On the Layout tab, scroll down until you see Show milestone labels and Show milestone dates

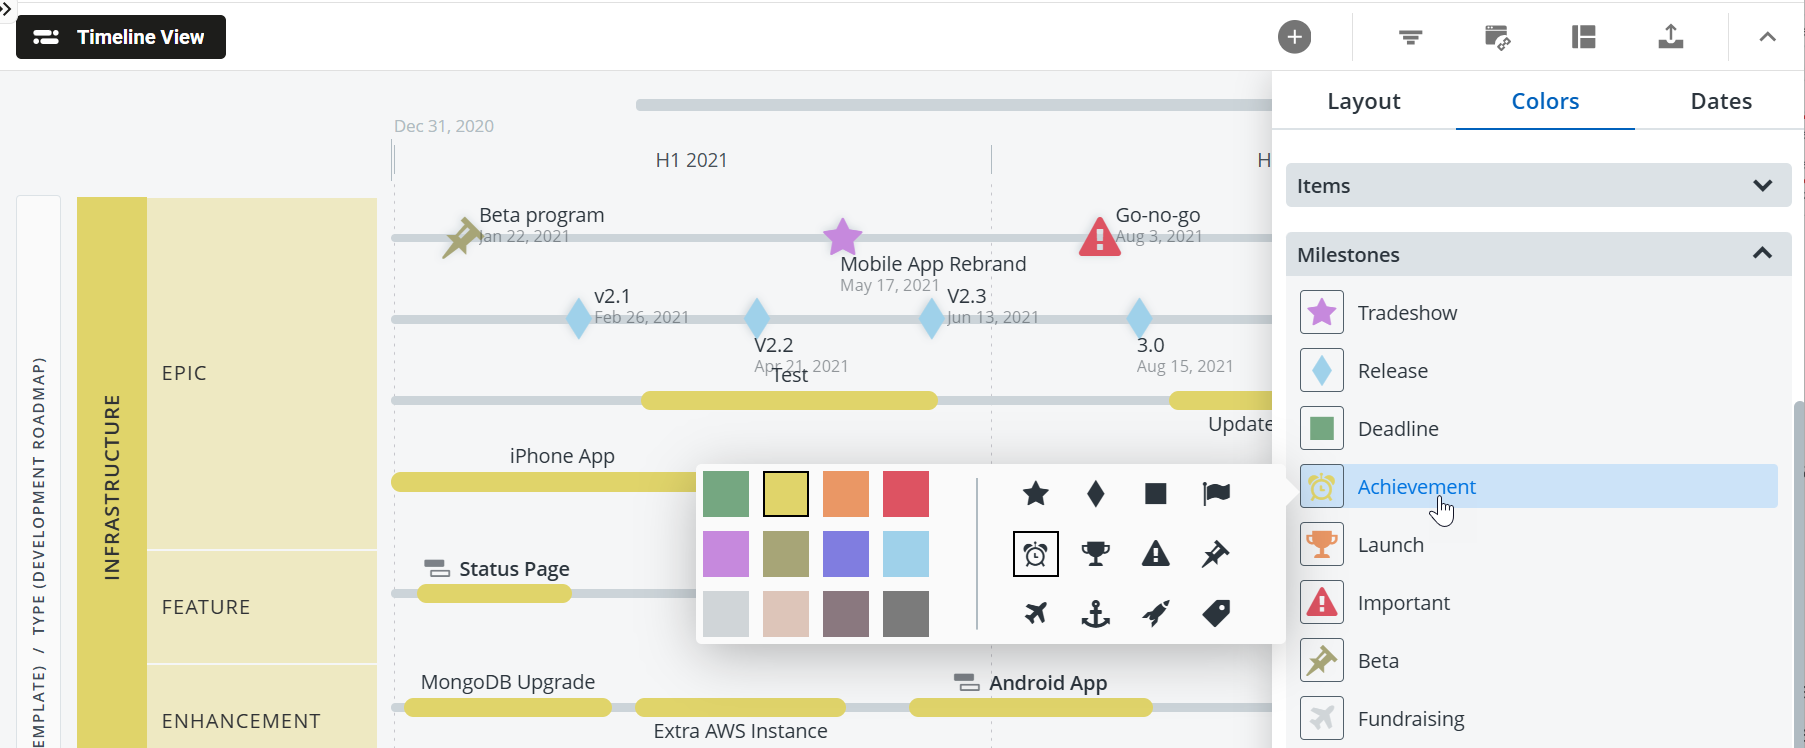
Changing a Milestone’s Shape and Color
You can also change the shape and color of any milestone type on the Timeline.
Open the Format panel
On the Colors tab, expand the Milestones section
Select the milestone type you want to edit, and choose a new shape and/or color
Filters and Milestones
A view's filter set affects the display of milestones exactly the same way it affects the display of items (see Filter items). Any milestones that don't match the view's filter set are excluded from the view. This explains why a roadmap's Milestones Table may be blank even though the roadmap has milestones.
To View all milestones, use the All Data view: open the Views menu and select All Data. Once you’re using the All Data view, reopen the Views menu and select Milestones.
Why you may not see the Milestones icon on the View navbar
If you don't see the Milestones icon on the View navbar, it's because the open view's visualization is a Swimlane. If you open a view with a Timeline visualization, the Milestones icon will appear.
Why you may not see some milestones
Like items, milestones are affected by filters so they will not be visible in the milestones table or on a timeline if they do not match the open view's filter set. In other words, if a milestone does not have matching values in the view's filter fields, it's not visible.
Make milestones visible on a Timeline
The easiest and most logical way to make a milestone visible on a timeline is to create the milestone directly from the timeline. Adding a milestone this way automatically populates the milestone's filter fields with matching values based on where in the Timeline the milestone is placed.
Who can add milestones to a roadmap?
To add a milestone to a roadmap, you must be the roadmap's Owner OR the roadmap must be shared with you as an Editor. If a roadmap has been shared with you as Viewer, you have view-only access to the roadmap and can't add milestones to it. As a Viewer, the + Item button on the View navbar will be grayed-out and you will see a View Only icon on the Roadmap navbar.