With Structure, you can track all the work items for upcoming releases – even if they're from different spaces – and visualize all the data you need to track on a single screen.
Step 1: Build a Release Management Structure
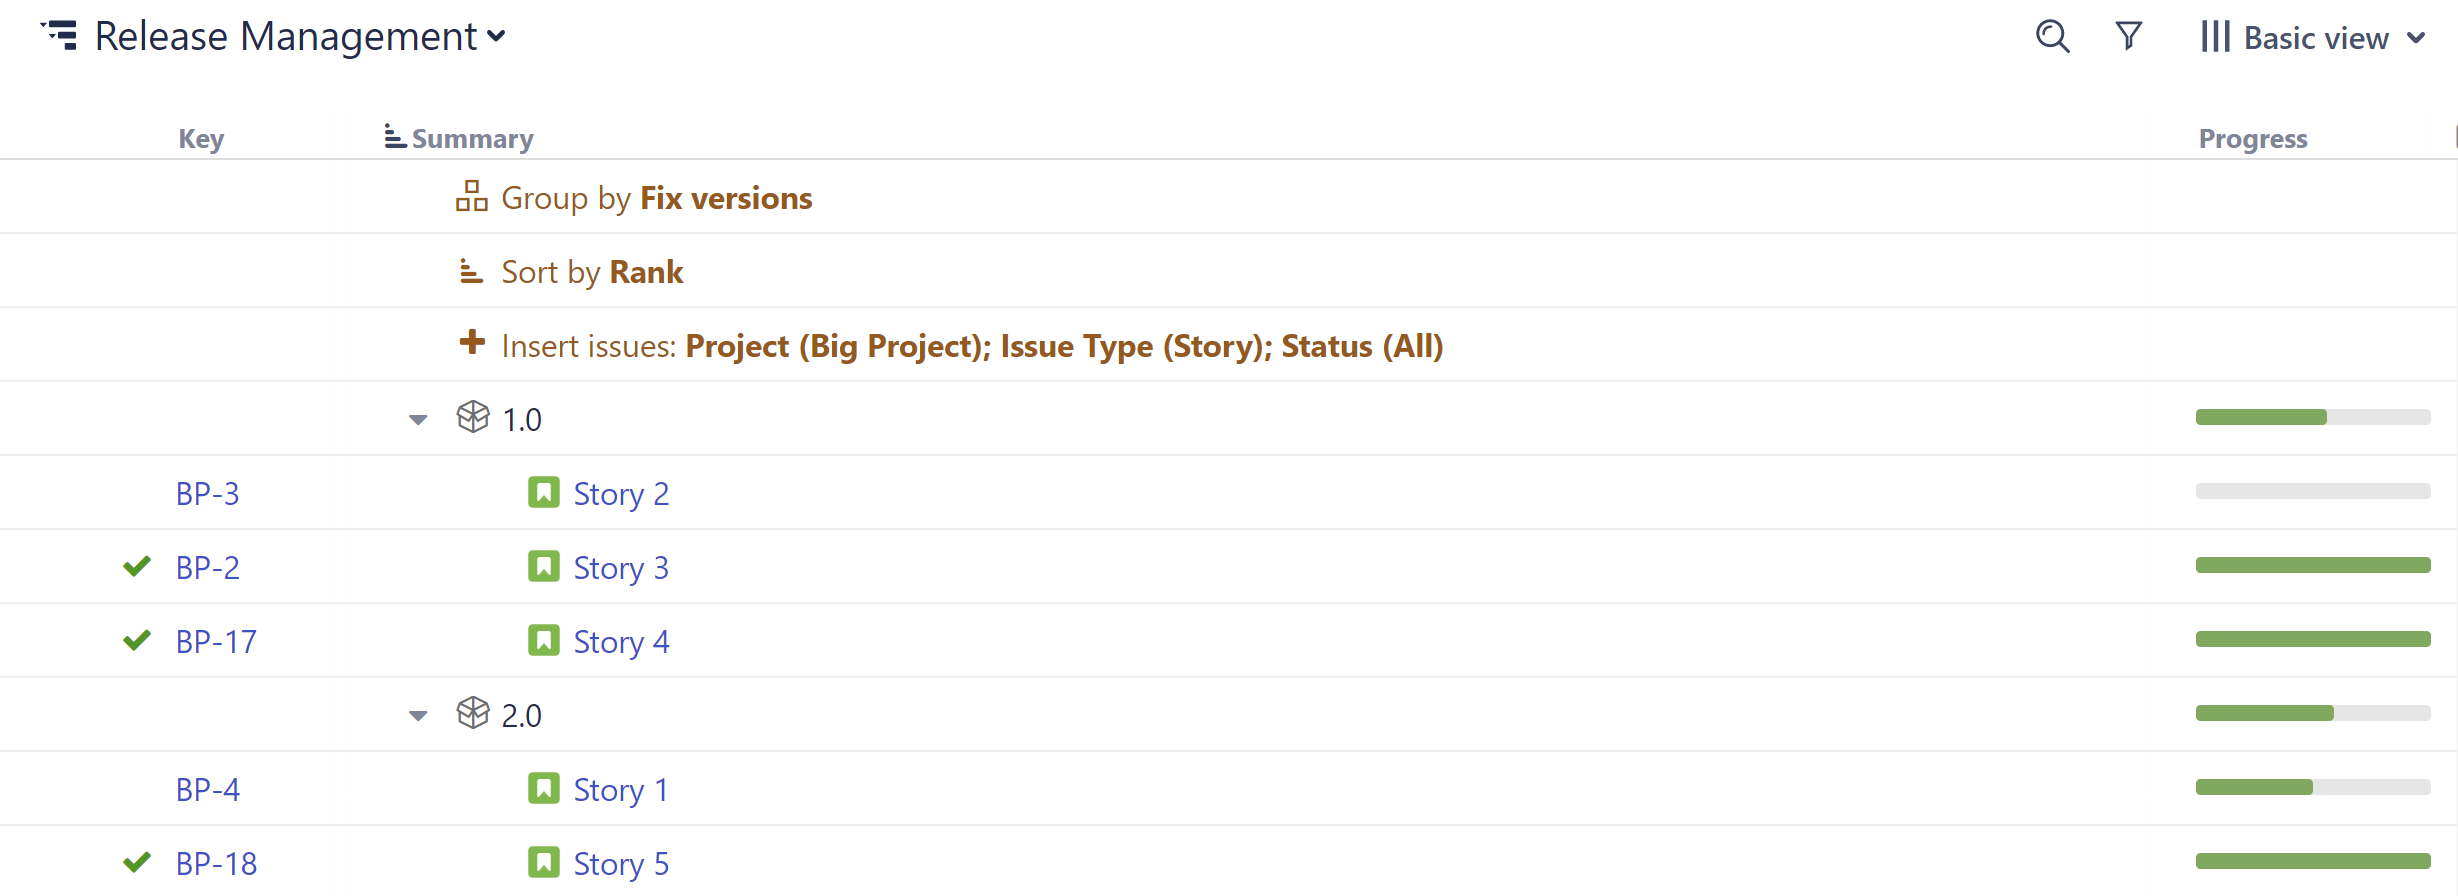
To create a structure for release management:
-
Open the Structure Selector menu and select Create New Structure
-
Add the work items you want to track – you can add them manually or automatically using +Add | Insert | Basic Insert
-
Group work items by fix version: +Add | Group | Field | select "Fix Version/s"
Want to include epics and stories?
-
When inserting work items, add epics: +Add | Insert | Basic Insert | open the Issue Types dropdown and select Epic
-
Add your stories: +Add | Insert | Child Work Items | under Add, select Work Items under epics and (optional) Sub-tasks.
Step 2: Add Data
Next, add the data you need to track by clicking the + button at the top-right corner of the structure. You can add as many columns as you need, including:
-
Jira Fields - For each Jira field, Structure offers a column that displays that field's value.
-
Progress - Display an aggregate work item progress, which is calculated based on values from the work item and its sub-work items.
-
Totals - Display aggregate values for work item progress, which include progress values from sub-work items.
-
Service Management - Jira Service Management customers can visualize and manage SLA fields within a structure.
-
Work Logged - View and manage Timesheets by Tempo work logged data alongside your project data.
-
Many more - To learn more about the available columns, see Adding Columns.
Once you've added your columns, you can aggregate the data up the structure. To do so, open the column you want to aggregate and select Sum over sub-items.
Looking to manage resources for your next project? Planner makes it easy to plan resources and capacity for your team.