On the Planning page, the Planning sidebar lists the issues that are in the scope of the folio. The folio owner, and other JIRA users that have folio administrator permission, can plan time for staff members to work on these issues by adding the issues to the timeline on the page.
Procedure
To plan work on an issue for a staff member, complete the following steps:
-
Open the Planning page.
-
Drag the issue from the sidebar to the timeline, and drop the issue in the row of the staff member.
After you drop the issue, the issue box on the timeline is called a plan. The plan is automatically resized so that it spans the estimated number of days necessary to resolve the issue. The issue also remains on the sidebar, so that you can, for example, drag it also to other staff members' rows.
-
If you want to plan a different number of days for the staff member to work on the issue, drag the sides of the plan to shrink or stretch it.
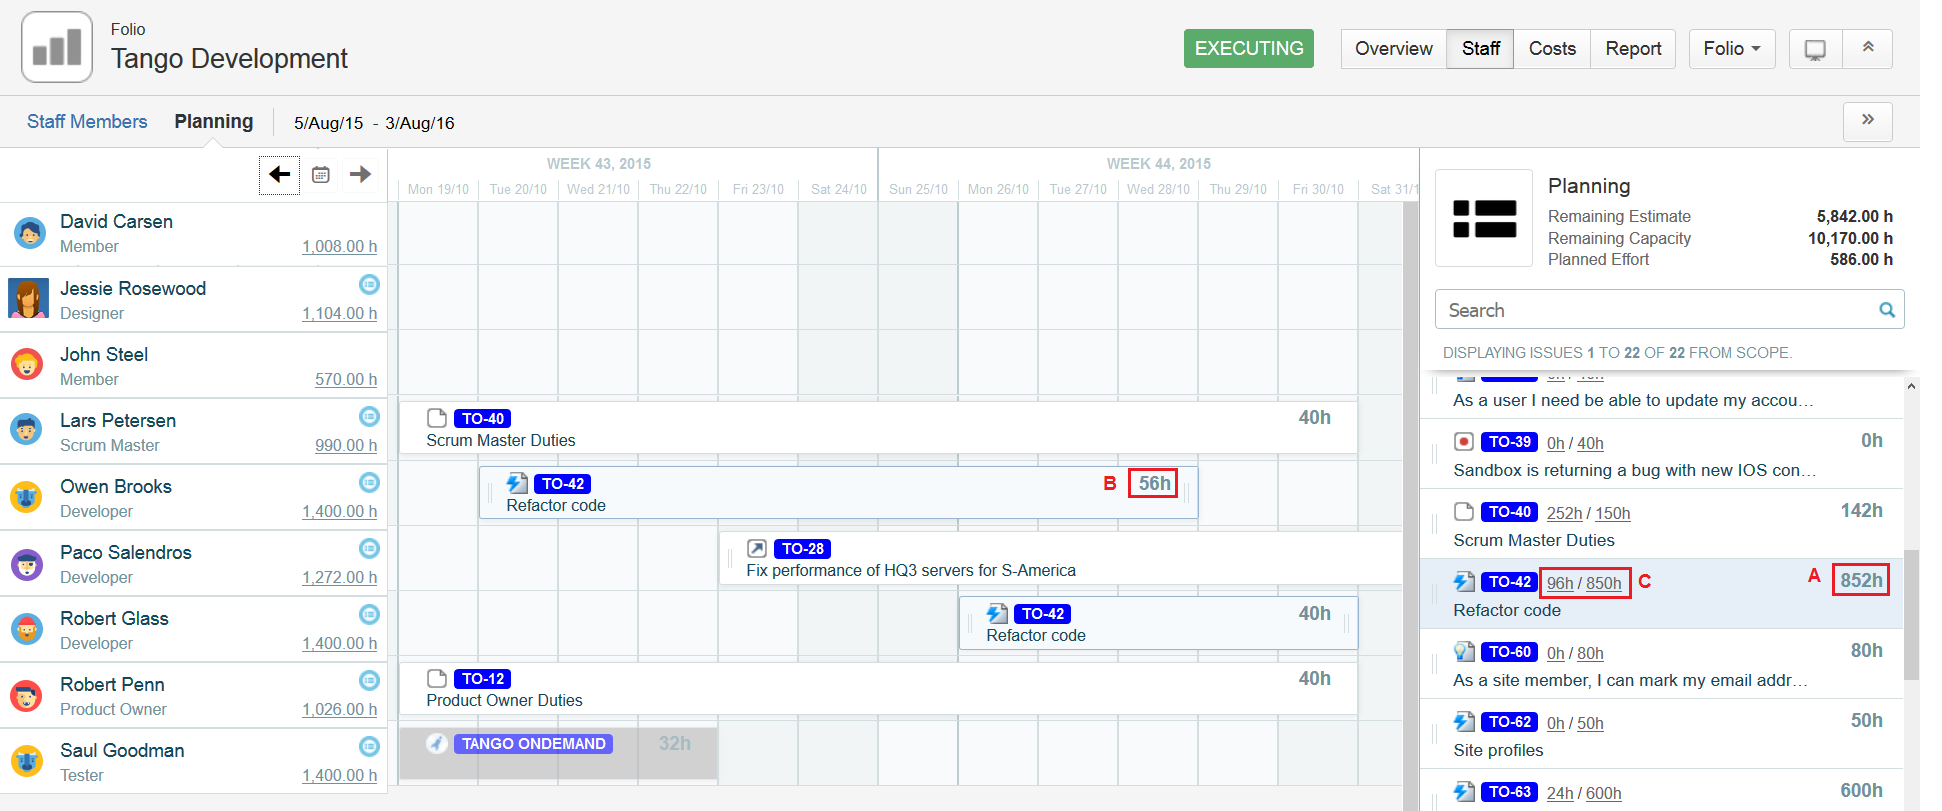
The numbers indicated by the letters A, B, and C in the screenshot have the following meanings:
-
On the sidebar, the number of hours (A) on the right side of an issue is the remaining estimated number of hours that are necessary to resolve the issue.
-
On the timeline, the number of hours (B) at the right end of a plan is the number of hours that are planned for the staff member on that plan.
-
On the sidebar, the numbers (C) after the issue key show the total number of planned hours, followed by the total original estimate for the issue.
-
Tip: An alternative method of creating a plan is to click a day in the staff member's row and complete the Create Plan form that is displayed. Note that the Assignee field on the Create Plan form refers to the staff member for whom you are planning work, not the JIRA user to whom the issue is assigned.