Configuring work attributes requires the Tempo Administrator permission.
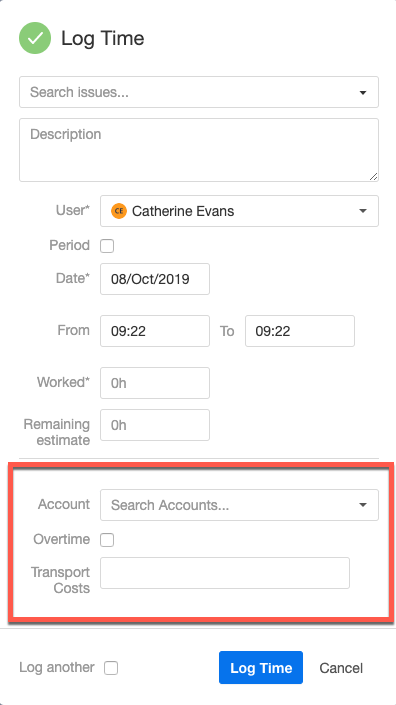
Work attributes are fields that you can add to worklogs to record detailed information about logged time. Examples of work attributes might be: "Overtime", "Non-Billable", or "Travel time". All work attributes are displayed in the Log Time dialog box.
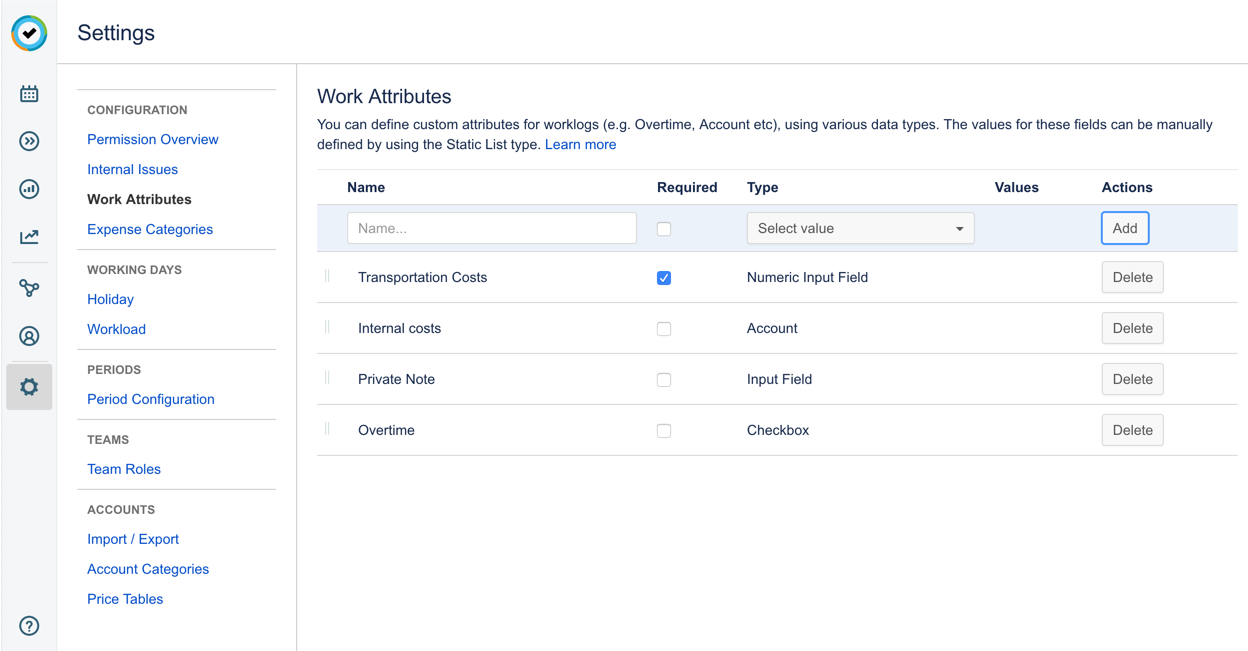
Work attributes are configured in Tempo settings. Select Settings :settings_dc: in the Tempo sidebar, and then select Work Attributes under Configuration.
Creating Work Attributes
You can add custom fields to the Log Time dialog box that is used for logging time on issues.
Before you begin
-
If you want to add a dynamic dropdown (a drop-down list for which list items are fetched from an external service), complete the steps described in Configuring external drop-down lists for worklogs.
-
If you want to add an account drop-down list, ensure that one or more accounts are linked to projects.
-
In the Name box, enter the name for the work attribute you want to create.
-
If the attribute should be a required field, select the Required check-box.
-
Select a Type from the drop-down menu. Available types include Checkbox, Dynamic Dropdown, Input Field, Numeric Input Field, and Static List. You can also select Account as a Work Attribute type, which allows you to link worklogs directly to accounts.
-
Click Add to save.
-
You can change the order of custom fields (work attributes) in the Log Time dialog box. Reorder the attributes by dragging and dropping rows in the table.
To delete a work attribute:
-
Click Delete on the left-hand side of the attribute to be deleted.
-
The attribute will no longer be visible in the Log Time dialog box.
Static List
When adding a simple drop-down list (Static List), you need to add items to the list by completing the following steps:
-
When you select Static List as a work attribute type, a Configure link is displayed in the Values column. Click the link.
-
Enter the items you want to display in the drop-down list, and click Add. Repeat this step as many times as needed. You can drag-and-drop the items to reorder the list.
-
When you are finished, click Save.
-
Click Add to add the list to the Log Time dialog box.
Dynamic Dropdown
When adding a Dynamic Dropdown, an externally sourced drop-down list, complete the following steps:
-
When you select Dynamic Dropdown as a work attribute type, a Configure link is displayed in the Values column. Click the link.
-
In the API URL field, enter the URL for fetching drop-down list items from an external service. For example, you might want to create a custom field called Operations in the Log Time dialog box and have users choose an operation from a drop-down list. The URL is used to fetch the list of operations.
URL Example:
http(s)://www.acme.com/jsonp/operationswhere you have configured the external service (at www.acme.com) to recognize the URL and return a list of operations in a standard format (see the Before you begin note above).
-
Do not add
?callback=?to the URL. Tempo Timesheets automatically appends?callback=?to the URL when the request is sent to the external service.
-
You can set up the external service to return different items for the drop-down list depending on the following parameters:
-
The Jira user_key of the user for whom time is logged. In this case, add
/{author}to the end of the URL. For example:
http(s)://www.acme.com/jsonp/operations/{author} -
The issue that users log time to. In this case, add
/{IssueKey}to the end of the URL. For example:
http(s)://www.acme.com/jsonp/operations/{IssueKey} -
The item that is selected in a custom field on the issue. For example, if you linked a default account to an issue and you want to display it as a field in the Jira issue view. In this case, add the name of the custom field between curly brackets to the end of the URL. For example, for the Account custom field, add
/{Account}to the end of the URL. For example:http(s)://www.acme.com/jsonp/operations/{Account}
-
The name of the custom field can contain spaces; for example
{Epic Name}. -
The name of the custom field is case sensitive. You must type the name of the custom field with the same capitalization that the custom field has on issues.
-
-
The account that the user selects in the Account work attribute on the Log Time dialog box. In this case, add
/{_Account_}to the end of the URL. There is one underscore on either side of the word Account. For example:http(s)://www.acme.com/jsonp/operations/{_Account_}
-
You have to use the name of the field itself, not the type. For example, if you add an Account work attribute that you named "Example", you have to put {_Example_}
-
'IssueKey' and 'author' are the only parameters that you can send that aren't reliant on custom fields or work attributes. The only information we're passing down, other than custom fields on issue view or work attributes, is the 'IssueKey' and the 'author'.
-
-
-
-
When you are finished, click Save.
-
Click Add to add the drop-down to the Log Time dialog box.