Account Administrator permission is required to connect Strategic Roadmaps and Jira.
Connecting Strategic Roadmaps to Jira
Connecting Jira in Strategic Roadmaps is a quick and painless process thanks to our one-time Jira setup wizard. In a few short steps, you will learn how to setup Jira with Strategic Roadmaps and be one step closer to bringing your backlog, epics, and stories to life with beautiful roadmap visualizations!
To set up your Jira Server, follow these steps:
-
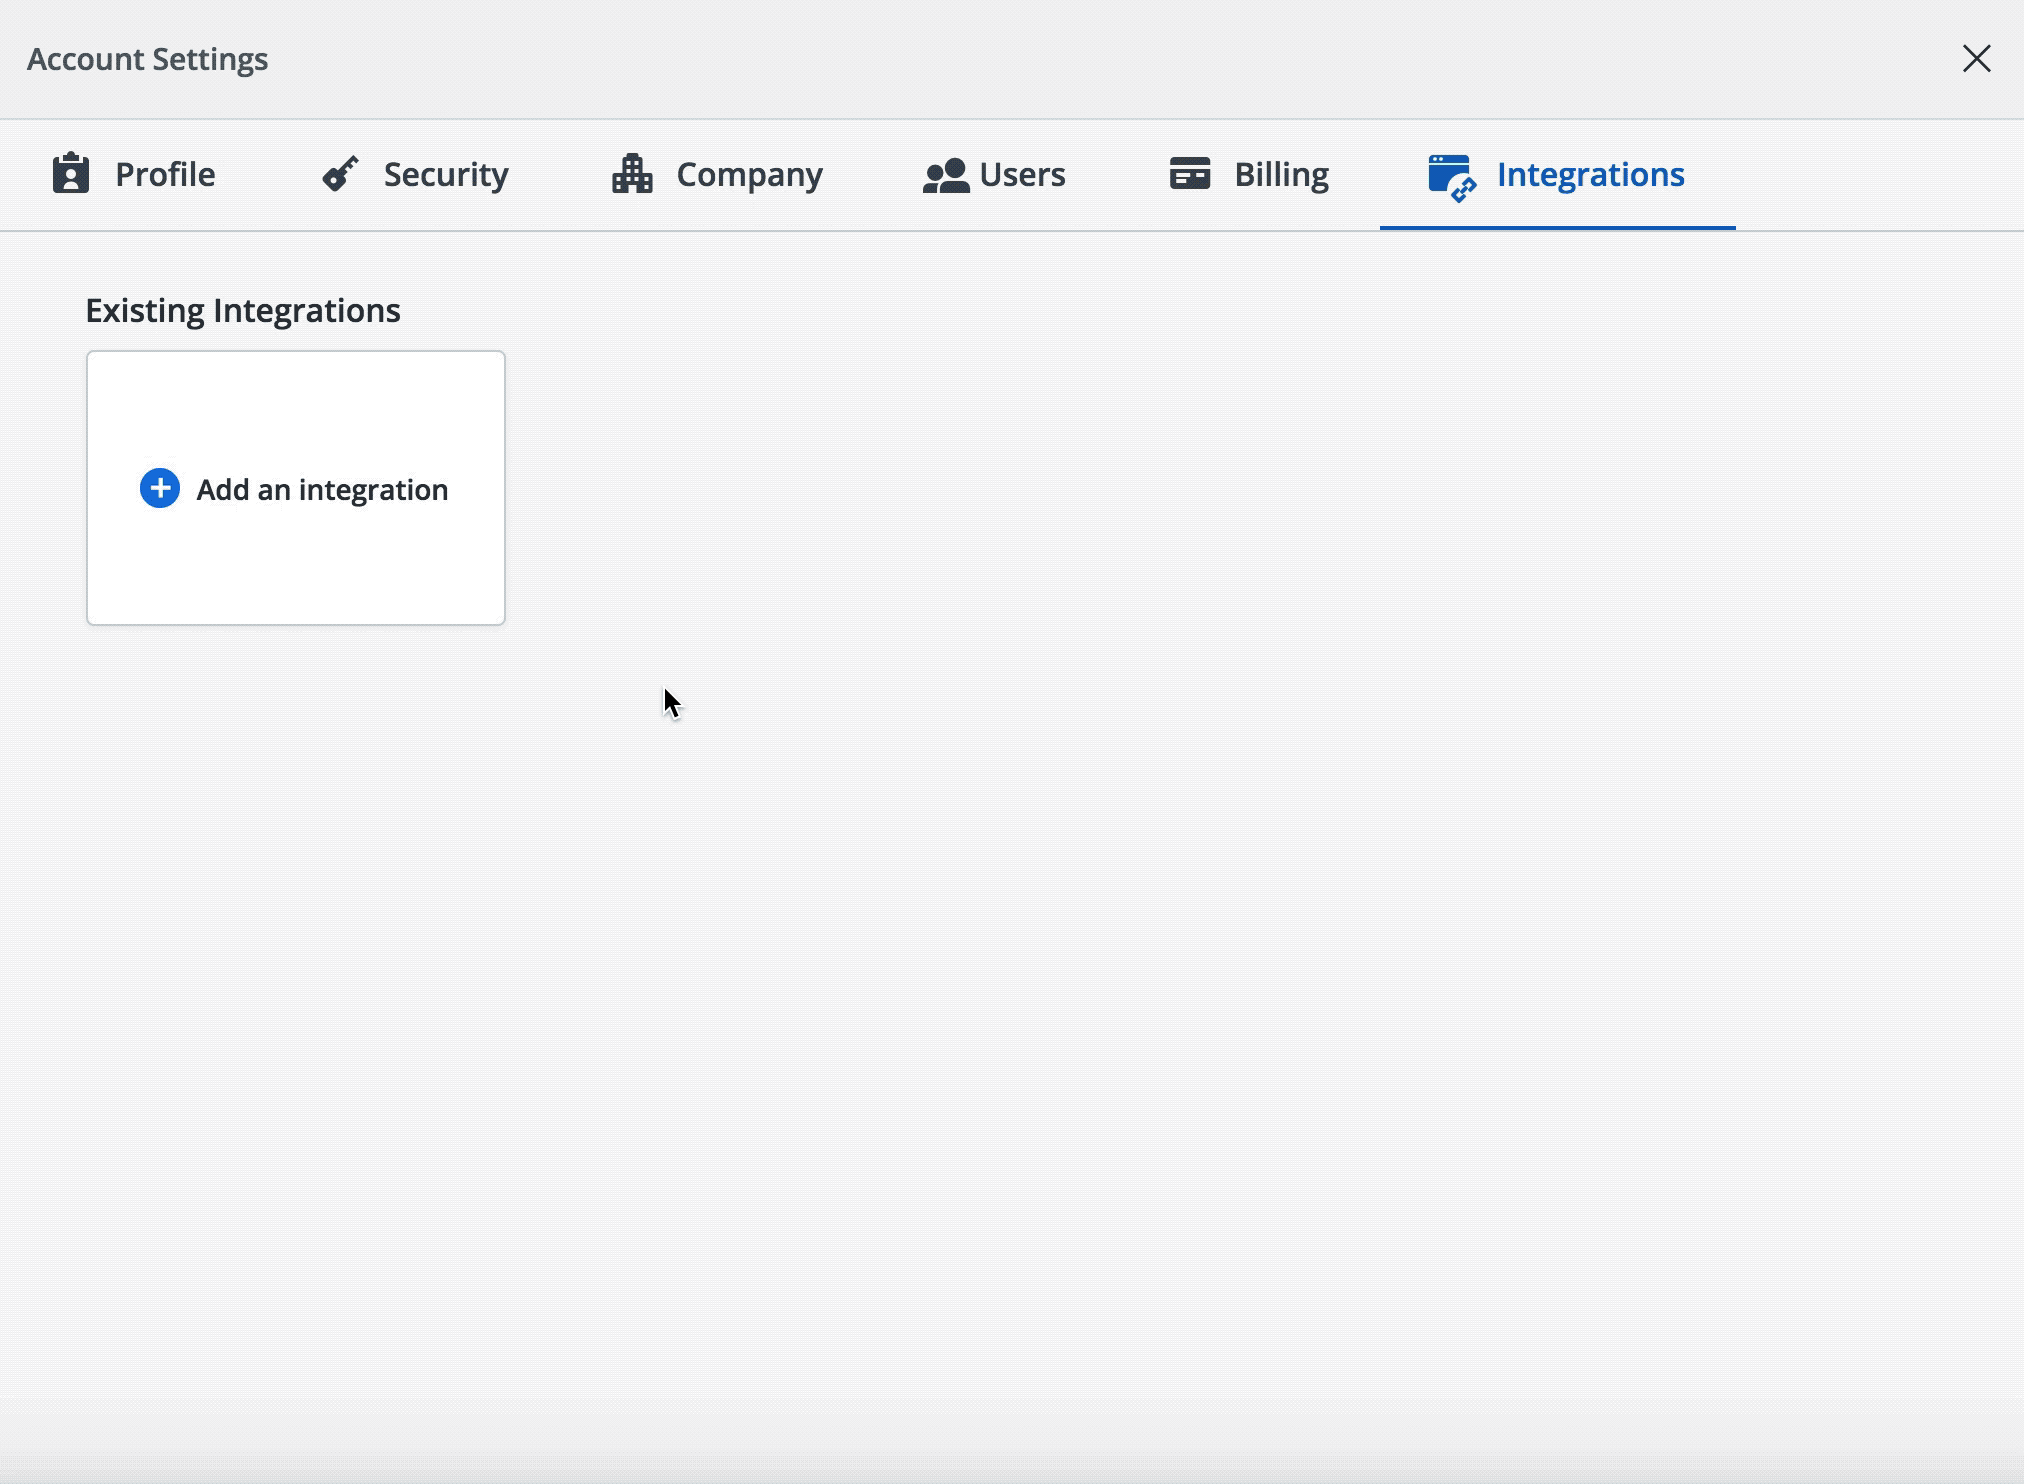
Navigate to the Integrations tab found in the Account Settings page
-
Click the Add an Integration button
-
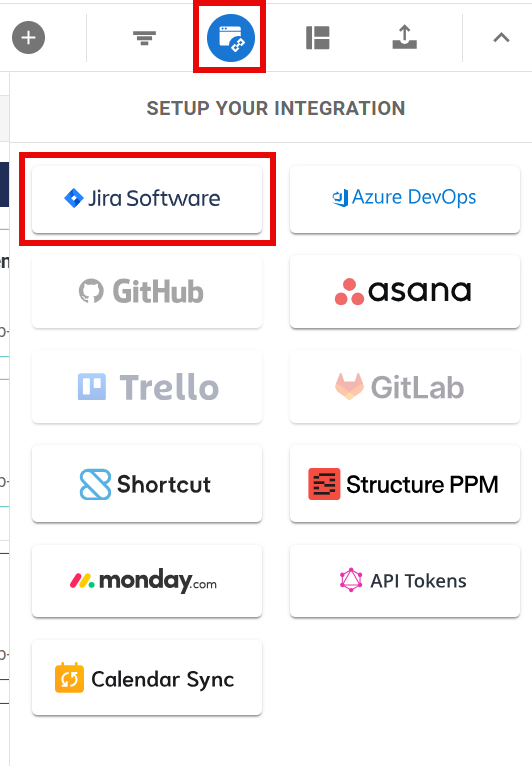
Select Jira Software
-
Input your team details, including the Jira Server Name and Jira Server URL
-
Click Create Integration
Congratulations! You have successfully setup your Jira Server. It is now accessible to all Collaborators on your account.
Adding Two-Way Jira Integration to Your Account
If required, users on Business plans can add two-way Jira Integration to their accounts. Only Account Admins can set up the add-on package on their team's account. Depending on the plan you have, you can either add the add-on manually or upgrade the entire account. For Professional and Enterprise plans, these advanced features are already included.
Adding the Add-On
If you are on a Business Plan, you can either add-on the Jira Integration or upgrade to a Professional plan.
To do this, simply:
-
On the Roadmap navbar, click the Account icon.
-
In the dropdown, select Account Settings.
-
In the Account Settings dialog, click the Billing icon.
-
Check the Jira Integration box
-
Enter your payment information and click Update.
If you don't see the Billing icon in the dialog, you don't have Account Admin permissions. To add the Jira Integration, you must log in using an account that has an Account Admin user role.
Starter Plans
If you have a Starter plan, you can either upgrade to Business and add the add-on, or upgrade to a Professional or Enterprise account.
Integrating your Roadmap with Jira
The following steps require Collaborator or Account Administrator permission.
Now that you have successfully Connected Strategic Roadmaps to Jira, this article will show you how to synchronize your roadmap items with your Jira issues.
Tell Strategic Roadmaps how to Log In to Jira
To set up your roadmap integration, simply:
-
Open a roadmap.
-
Click on the Integrate button located at the top right of the screen.
-
In the dropdown, select Setup Jira Integration.
-
Follow the prompts to select your Jira Server and customize your integration.
Jira Server
On the Jira Server screen, select the Jira Server you want to integrate with.
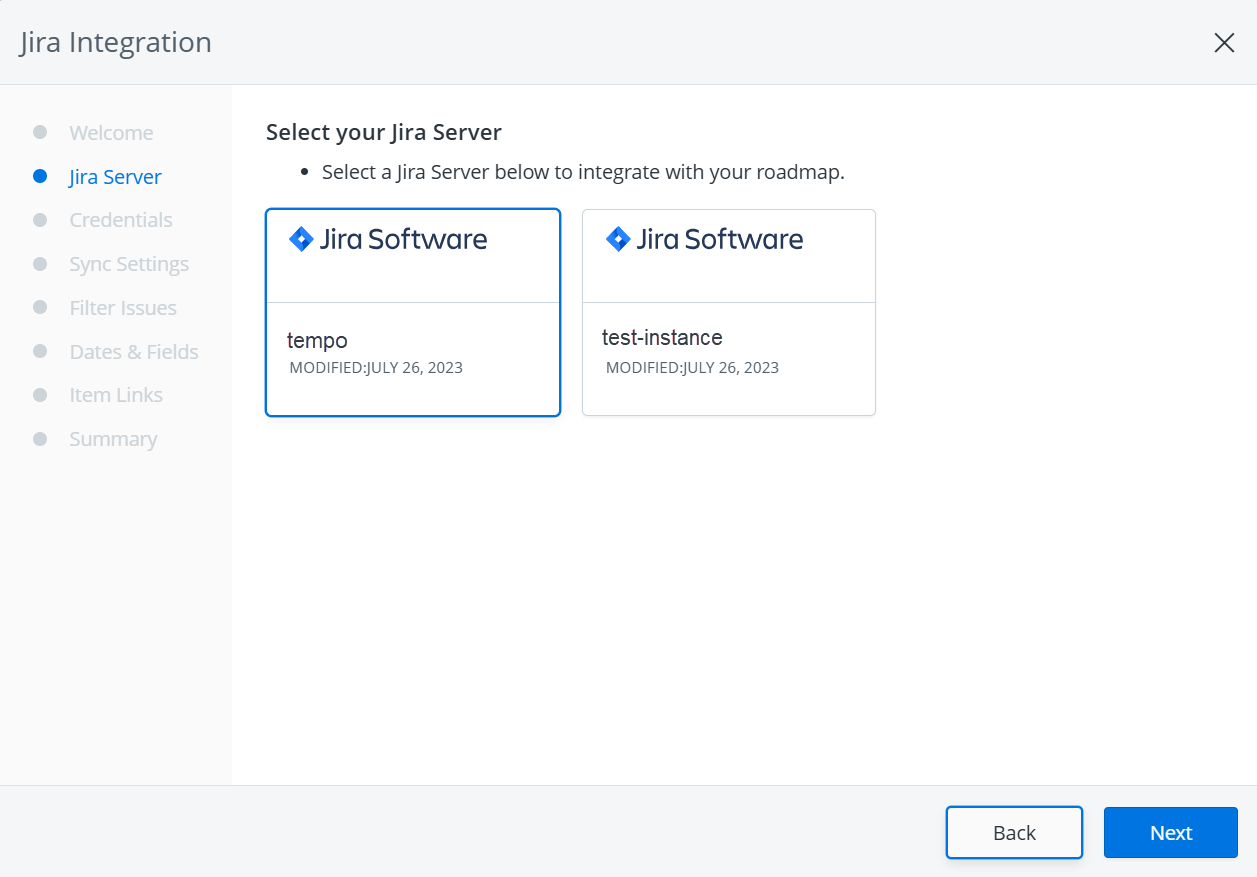
If you don’t see the Jira instance you want to connect to, speak with your administrator.
Credentials
Next, you need to add your Jira credentials.
-
If you’ve already provided your credentials, select them from the provided list.
-
Otherwise, click Add Credentials and enter the email address you use for Jira and your Jira API token. For on-prem Jira instances, you will also need to enter your password.
-
If you do not have an API token yet, click the API Token link outlined below and follow the directions provided.
-

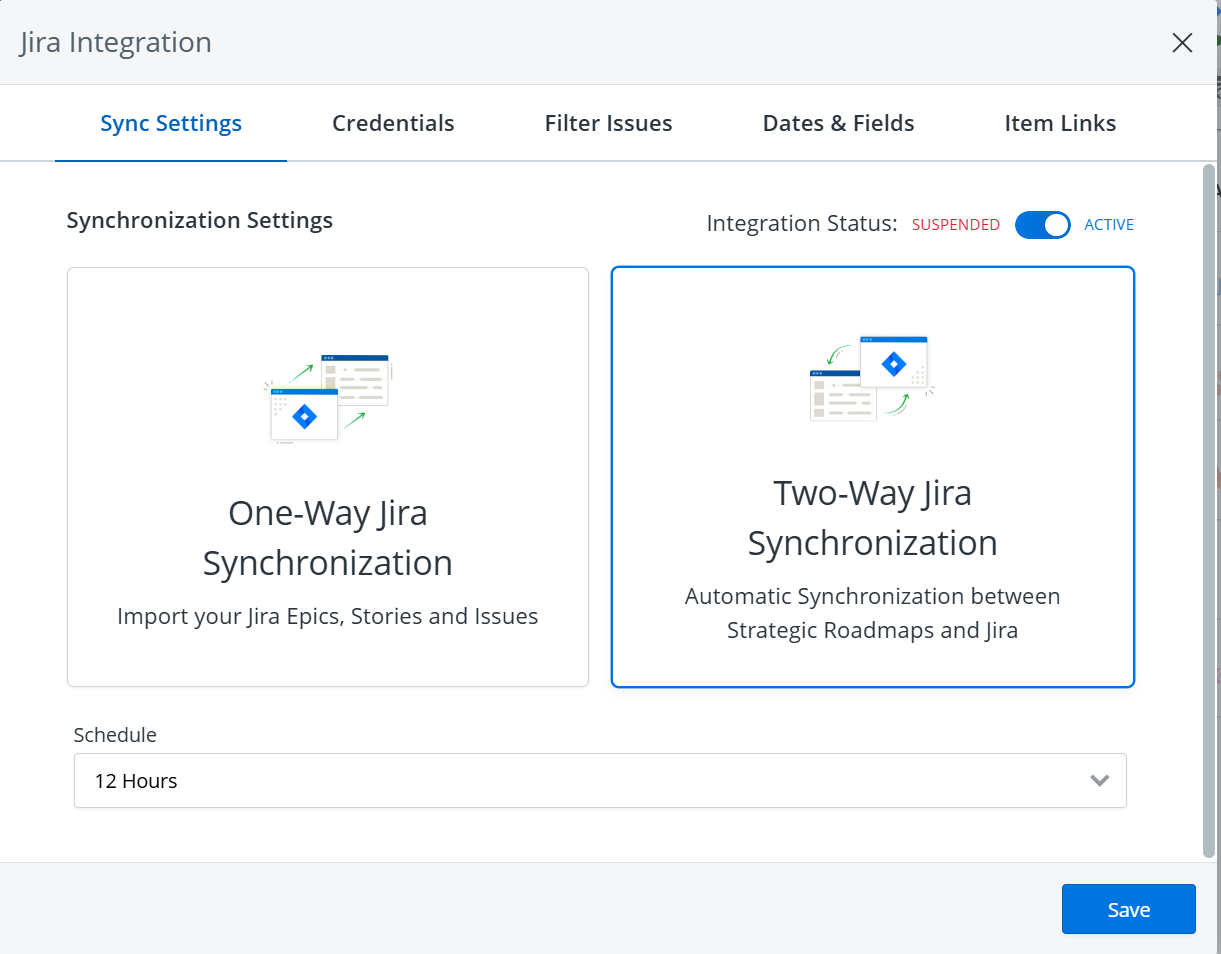
Sync Settings
Choose your sync settings.
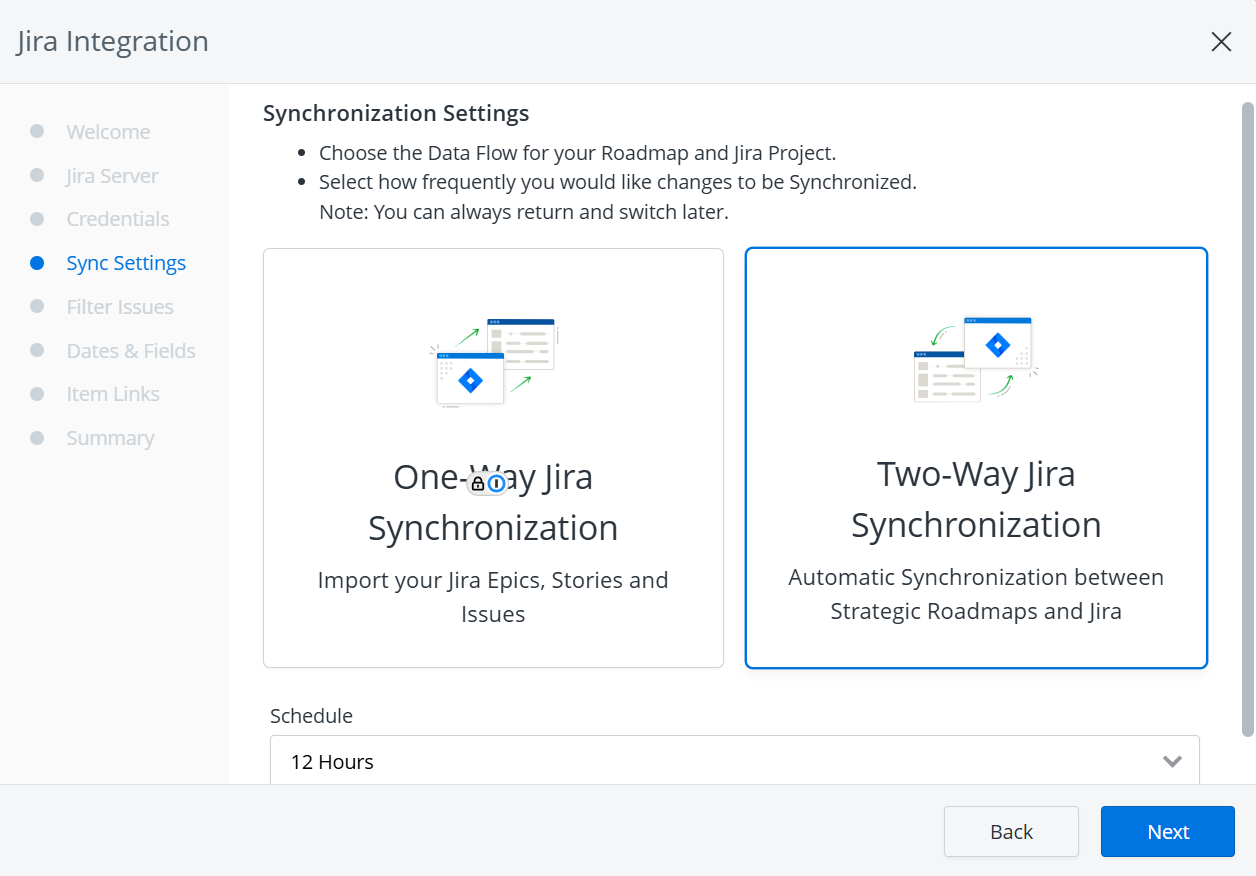
Follow these steps:
-
Choose to set up either a One-Way or Two-Way Jira Synchronization. A one-way sync will let you import your Epics, Stories, and Issues. A two-way sync will let you automatically sync your Epics, Stories, and Issues back and forth between Strategic Roadmaps and Jira.
-
From the Schedule dropdown, select how frequently you would like changes to be synchronized.
-
Click Next.
Filter Issues
Specify which Jira issues should be synced with your roadmap.
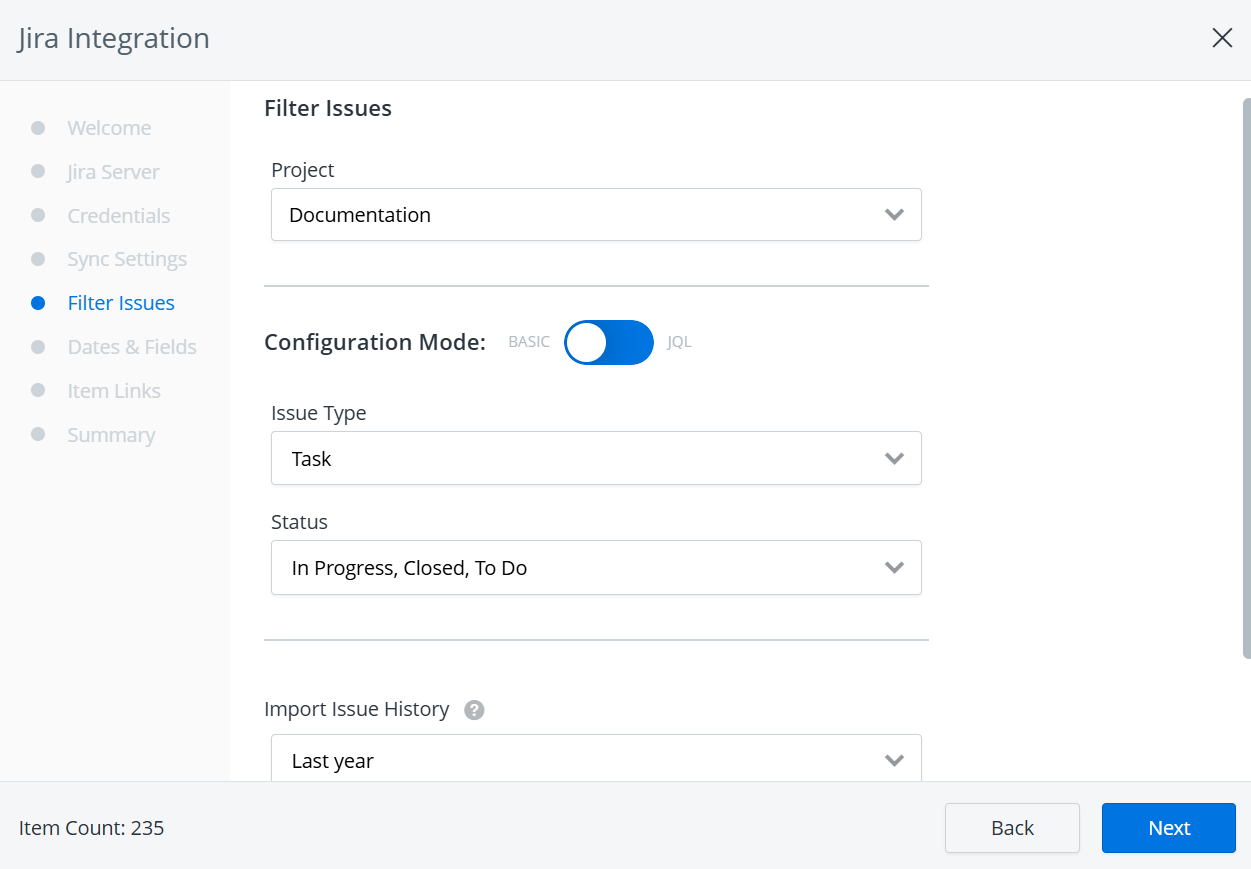
-
Select the Jira Project you want to bring into Strategic Roadmaps from the Project dropdown.
-
Select the issues you want to import. You can do this by selecting the issue types and issue statuses you want to import, or you can switch to JQL and enter a custom query.
-
Under Import Issue History, choose whether you want to import issues from the past year, 90 days, 30 days, or All Issues. Selecting Only Future Issues will only import issues into your roadmap created after today.
-
Select whether you want to automatically delete Jira items from the roadmap when they no longer meet the filter conditions.
-
Click Next.
Use the item counter in the bottom left as a guide. Larger item counts will take longer to sync. Start small and add more items as you see fit.
Dates & Fields
Select the Jira dates and fields to sync with your roadmap.
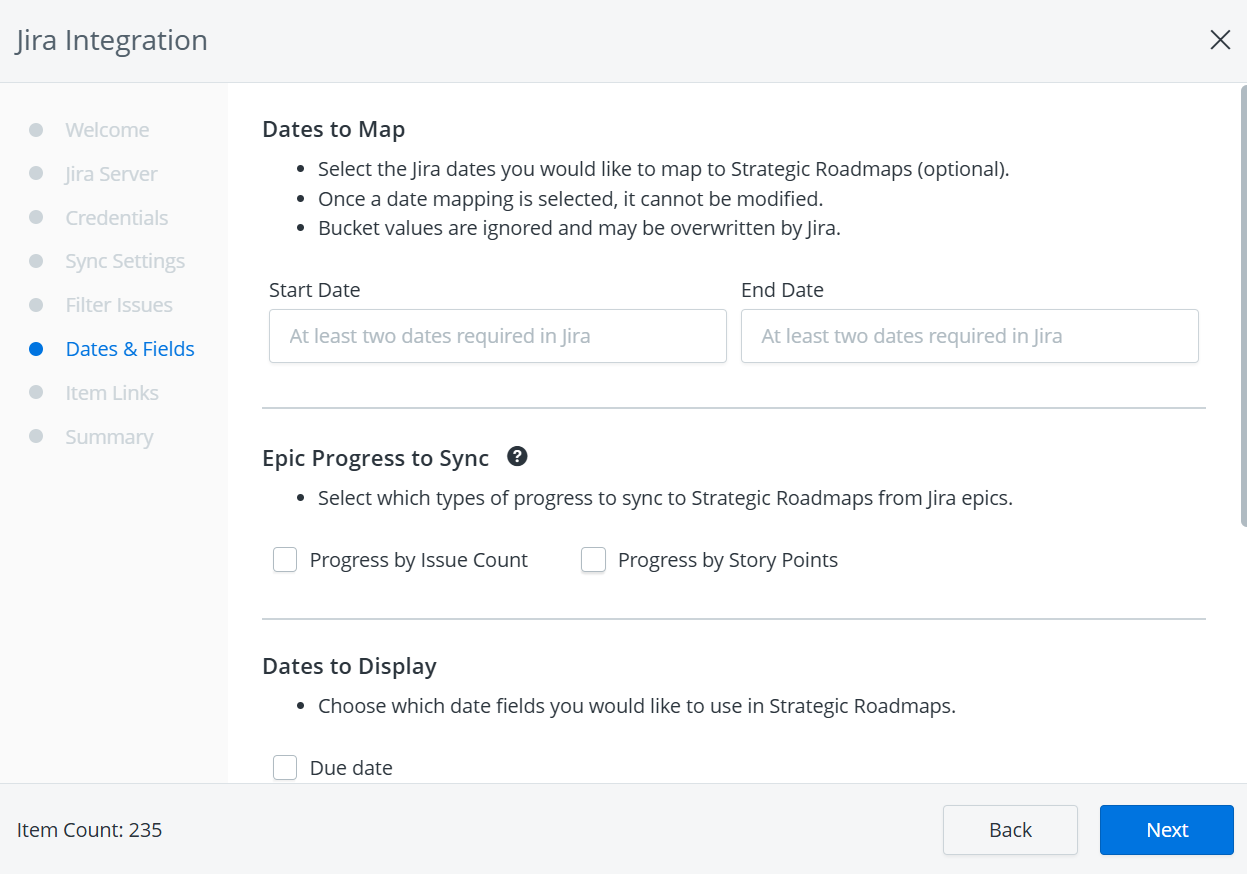
-
Under Dates to Map, you can select the Jira dates that you would like to map to Strategic Roadmaps.
-
Under Epic Progress to Sync, select which Jira progress method you want to sync with your roadmap.
-
Under Dates to Display, select the date fields that should be used with Strategic Roadmaps.
-
Under Fields to Sync, select the Jira fields that you would like to synchronize to Strategic Roadmaps.
-
Click Next.
Click Finish to complete the setup process.
Item Links
Choose whether to include Jira item links in your roadmap or exclude them.
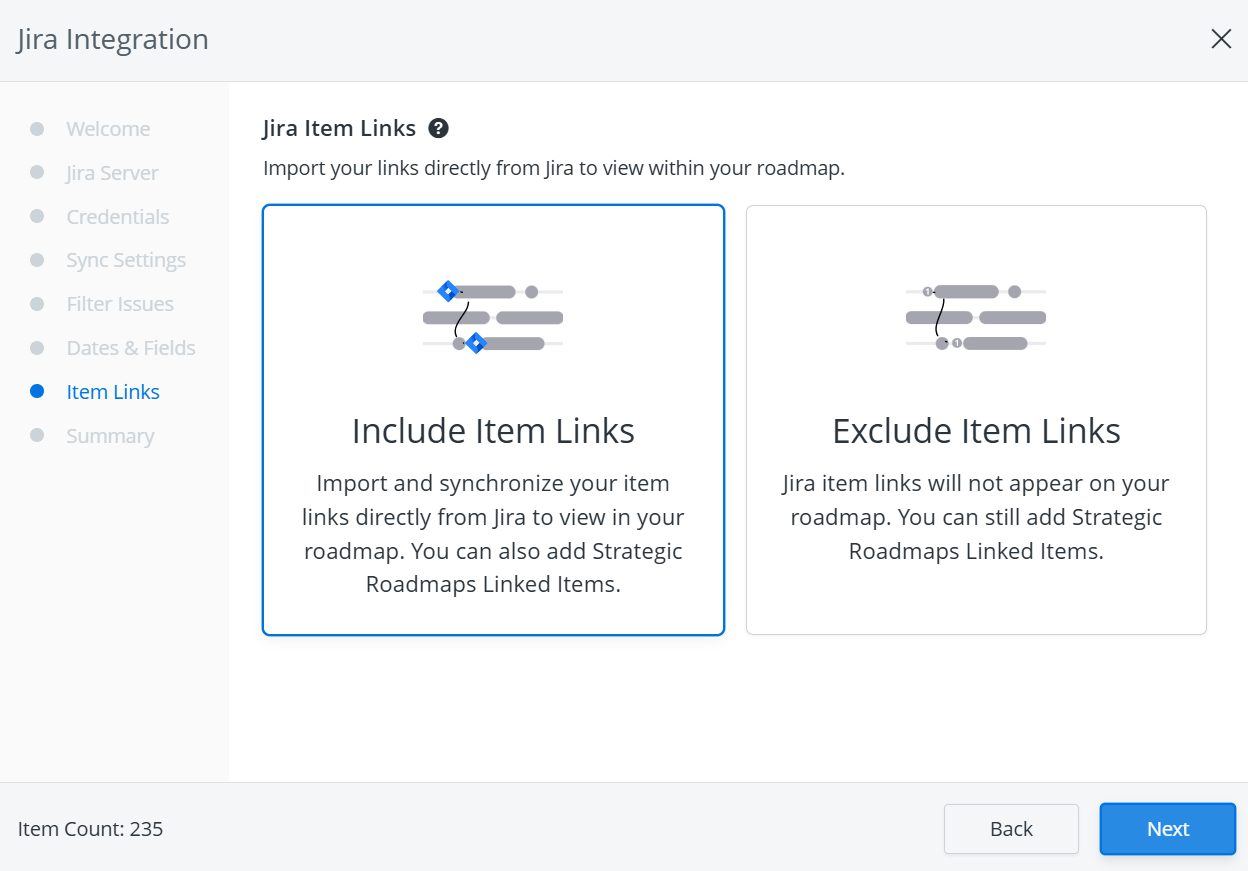
In order to better visualize your data, users are able to select whether or not they would like their item links displayed in Strategic Roadmaps. These links represent the relationships that have been given to your issues in Jira and can be toggled during this screen or from your Modify Setup window later.
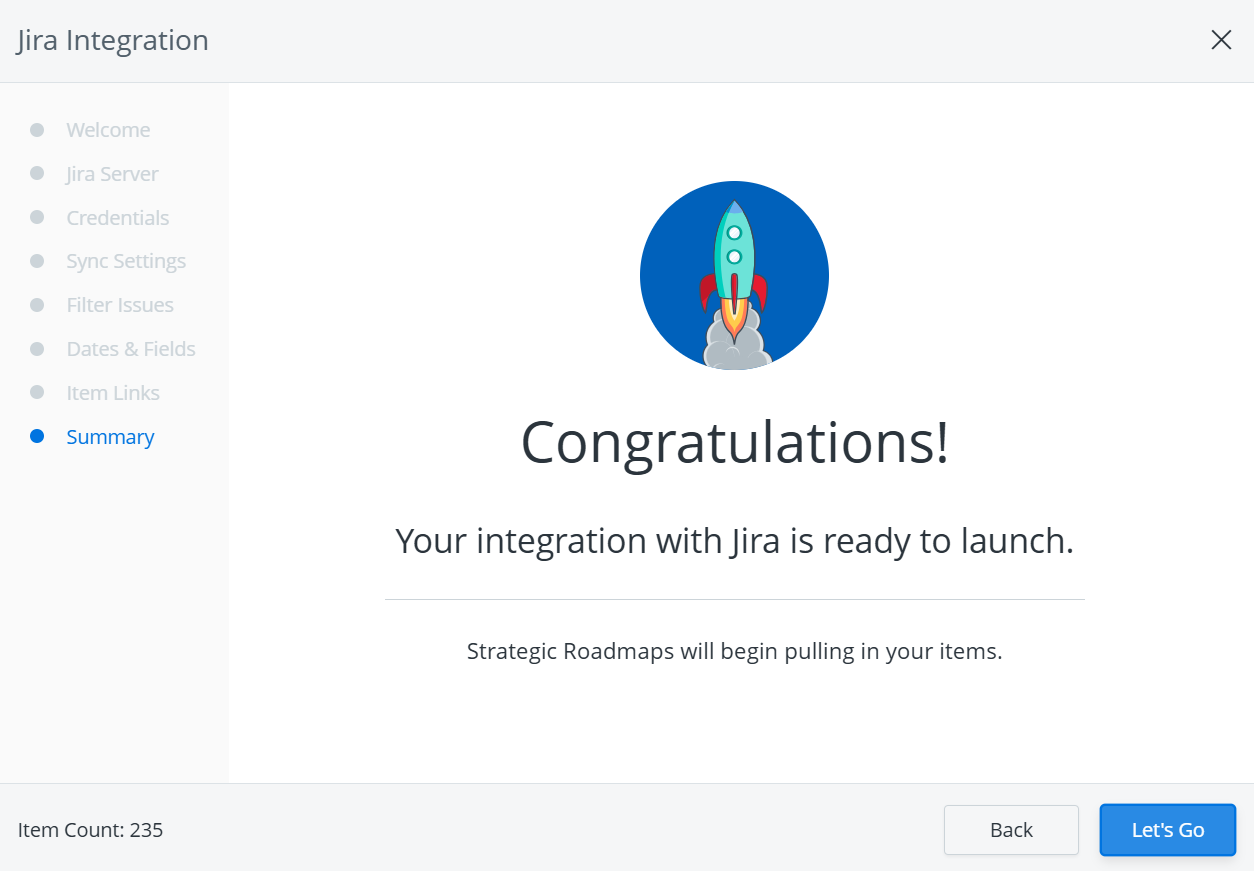
Summary
On the Summary screen, click Let’s Go to complete the integration.
Issues Connecting?
If you're having trouble connecting to your Jira Server, your IT team may need to add the Strategic Roadmaps IP addresses to a whitelist. If the issue persists, please consult our troubleshooting guide or connect with our support team.
Modifying Jira Integration Setup
Once the initial integration setup is complete, the roadmap owner can modify the setup at any time. To do so, open the Integrations panel again and click the Jira Software Settings icon.
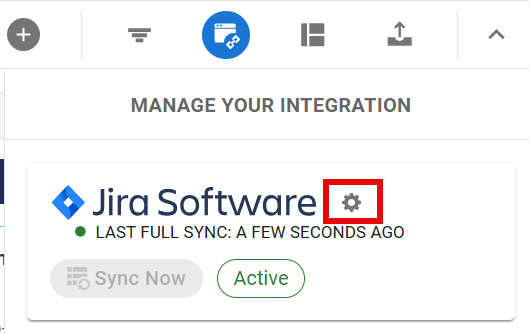
This will open the integration menu, where you can make changes to your sync settings.
Learn More
-
Setting Up Credentials for Jira Integration -
Allowlisting IP Addresses for Jira -
Integrating Linked Issues into Strategic Roadmaps -
Syncing Data with Jira -
Syncing Jira Fields to Strategic Roadmaps -
Creating Jira Specific Views -
Troubleshooting Connection Errors with Jira -
Date & Field Mapping with Jira -
Creating your own JQL Query -
Using JQL to Filter Issues -
Jira FAQ