Editing team permissions requires the Tempo Team Administrator permission or the Manage Team permission for the team in question.
Team permissions define how teams view and work with worklogs, timesheets, and plans. Permissions are applied to permission roles within each team. You can create permission roles and add users to them.
To access team permissions:
-
Select Teams in the Tempo sidebar.
-
In the Teams view, select the team for which you want to edit permissions.
-
On the team's page, click Permissions in the upper right corner (or More - Permissions for smaller screen settings).
(For Tempo Timesheets versions prior to 10.16, click the settings icon at the top-right, and then click Permissions.)
Determining the Visibility of Teams
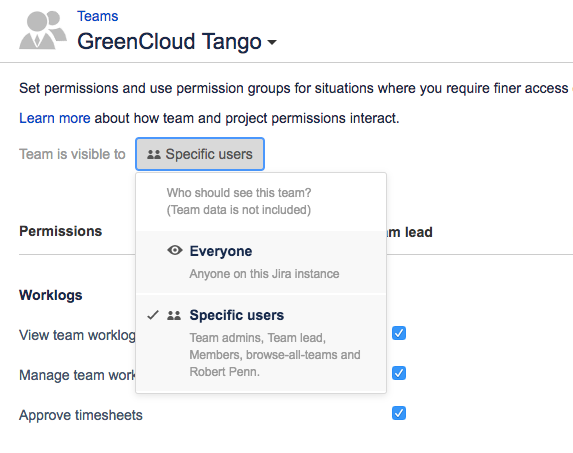
You may not want everyone to be able to view your team's data. You can set view restrictions for the team so that only specific Jira users or groups can view your team.
-
On the team's permission page, click the button next to Team is visible to.
-
Select who should see this team:
-
Everyone - Team visible to anyone on this Jira instance.
-
Specific users - Team visible to the Team Lead, Team Members, and anyone with the Tempo Team Administrator permission. In the pop-up that opens when you select this option, you can search for Jira users or group, and add them to the list of those who can view the team. To remove users from the list, click the trashcan for the respective user/group. When you are finished, click Confirm.
-

Creating Permission Roles
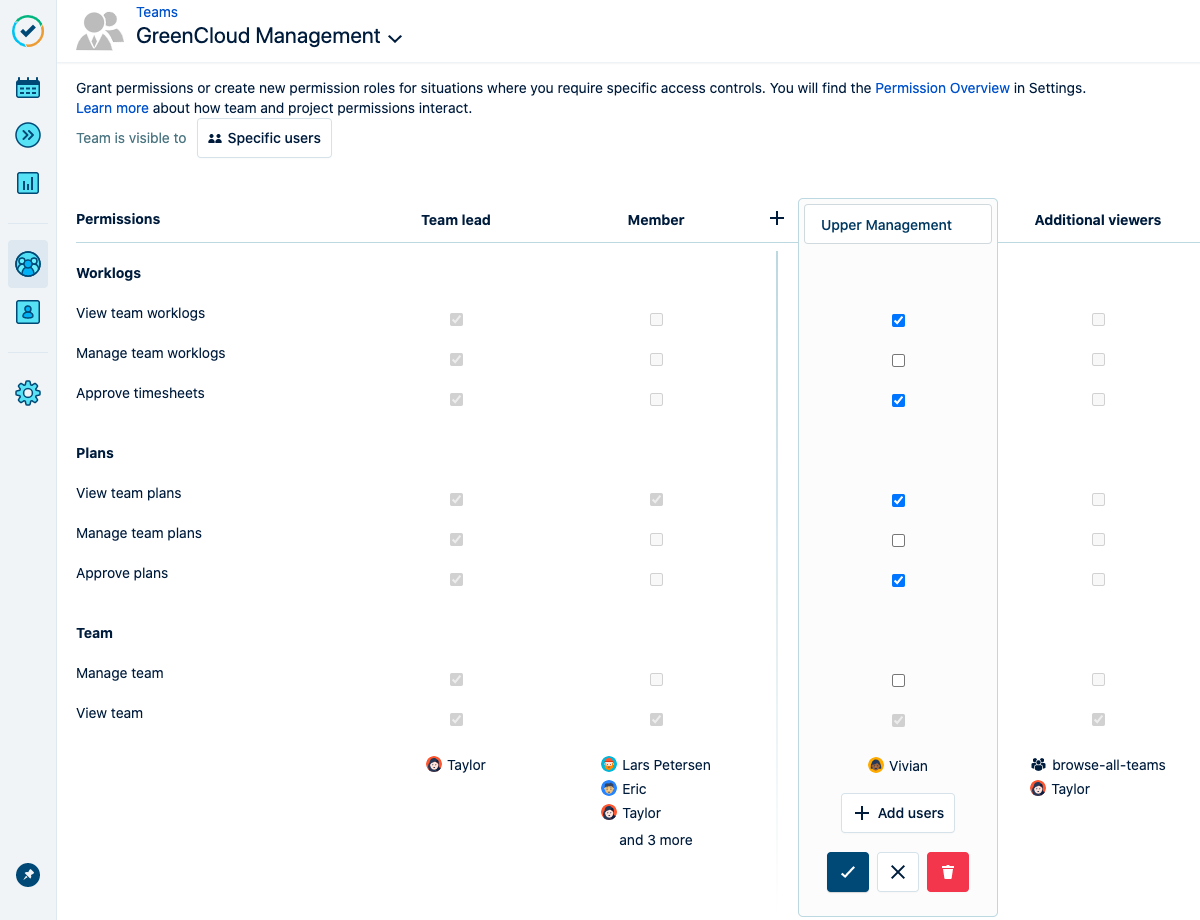
Team permission roles allow you to specify which users in Tempo should be granted a specific selection of permissions. By default, each team has two default permission roles: Team lead and Member. The Team Lead automatically gets permission to view, manage, and approve all plans and worklogs, and also to manage the team. By default, Members don't have any team permissions, but the Team Lead can grant permissions to them.
Adding a new permission role allows you to grant specific team permissions to multiple users at the same time, whether they are a part of the team or not. For example, you can give more or all permissions to a senior team member so that they're like a Team Lead.
Note
Permission roles cannot be reused across teams.
-
Go to the team's Permissions page.
-
To add a new permission role, click Add permission role. If the Add permission role column is not visible, click the + sign in the header row.

-
Name the permission role, and select the permissions this role should have.
-
Click Add users and select the users that should have these team permissions.
-
Click the check mark to save.

Deleting Permission Roles
To delete a permission role, select the role that should be deleted, and then click the delete icon.
Note
Default permission roles cannot be deleted.
Adding Users to Team Permission Roles
You can grant team permissions to your team by adding the team members to permission roles. All members of the permission role are granted the permissions that are selected.
-
Go to the team's permissions page.
-
Select the permission role to which you want to add users, and then click Add users.

-
Search for the users you want to add to the group. When you are finished, click x to close the dialog box.
-
Click the check mark to save the changes.
Team Permission Overview
|
Permission |
Description |
|---|---|
|
View team worklogs |
Permission to view all worklogs for all team members of the selected team. This permission grants access to team members' worklogs, issue summaries, and issue keys - even if these are restricted by your issue security scheme. |
|
Manage team worklogs |
Permission to create, edit, and delete worklogs for members of the selected team. |
|
Approve timesheets |
Permission to:
If the the timesheet approval is set to monthly or weekly, the users with this permission can:
|
|
Manage team |
Permission to:
|
Note
Team plan permissions are for users with Tempo Planner installed. For information about plan permissions, see the Tempo Planner documentation.
Related Topics
