This feature is only available to Collaborators, User Managers, and Account Administrators.
Filters allow you to tailor roadmap visualizations by displaying only the items that are relevant to a specific audience. Unlike standard roadmap data (such as items, fields, and milestones), which lives across all of a roadmap's views, filters only exist within the views they’ve been applied to.
A view's filter set determines which Items and Milestones will appear on your roadmap view and any Items or Milestones which don't match the view's filter set will be hidden from the view.
Note: A view's filter set also applies to a roadmap's milestones and determines which milestones appear in the roadmap's Milestones Table and Timelines (milestones don't appear in Swimlanes). For more on filtering and milestones, please refer to our article to Working with Milestones.
Exploring the Filter Tool on Roadmaps
Filters can be easily applied to a roadmap from any view type, including the Table, Swimlane, and Timeline. In order to apply a filter, users will need to locate the Filter tool in their roadmapping toolbar at the top of their screen.
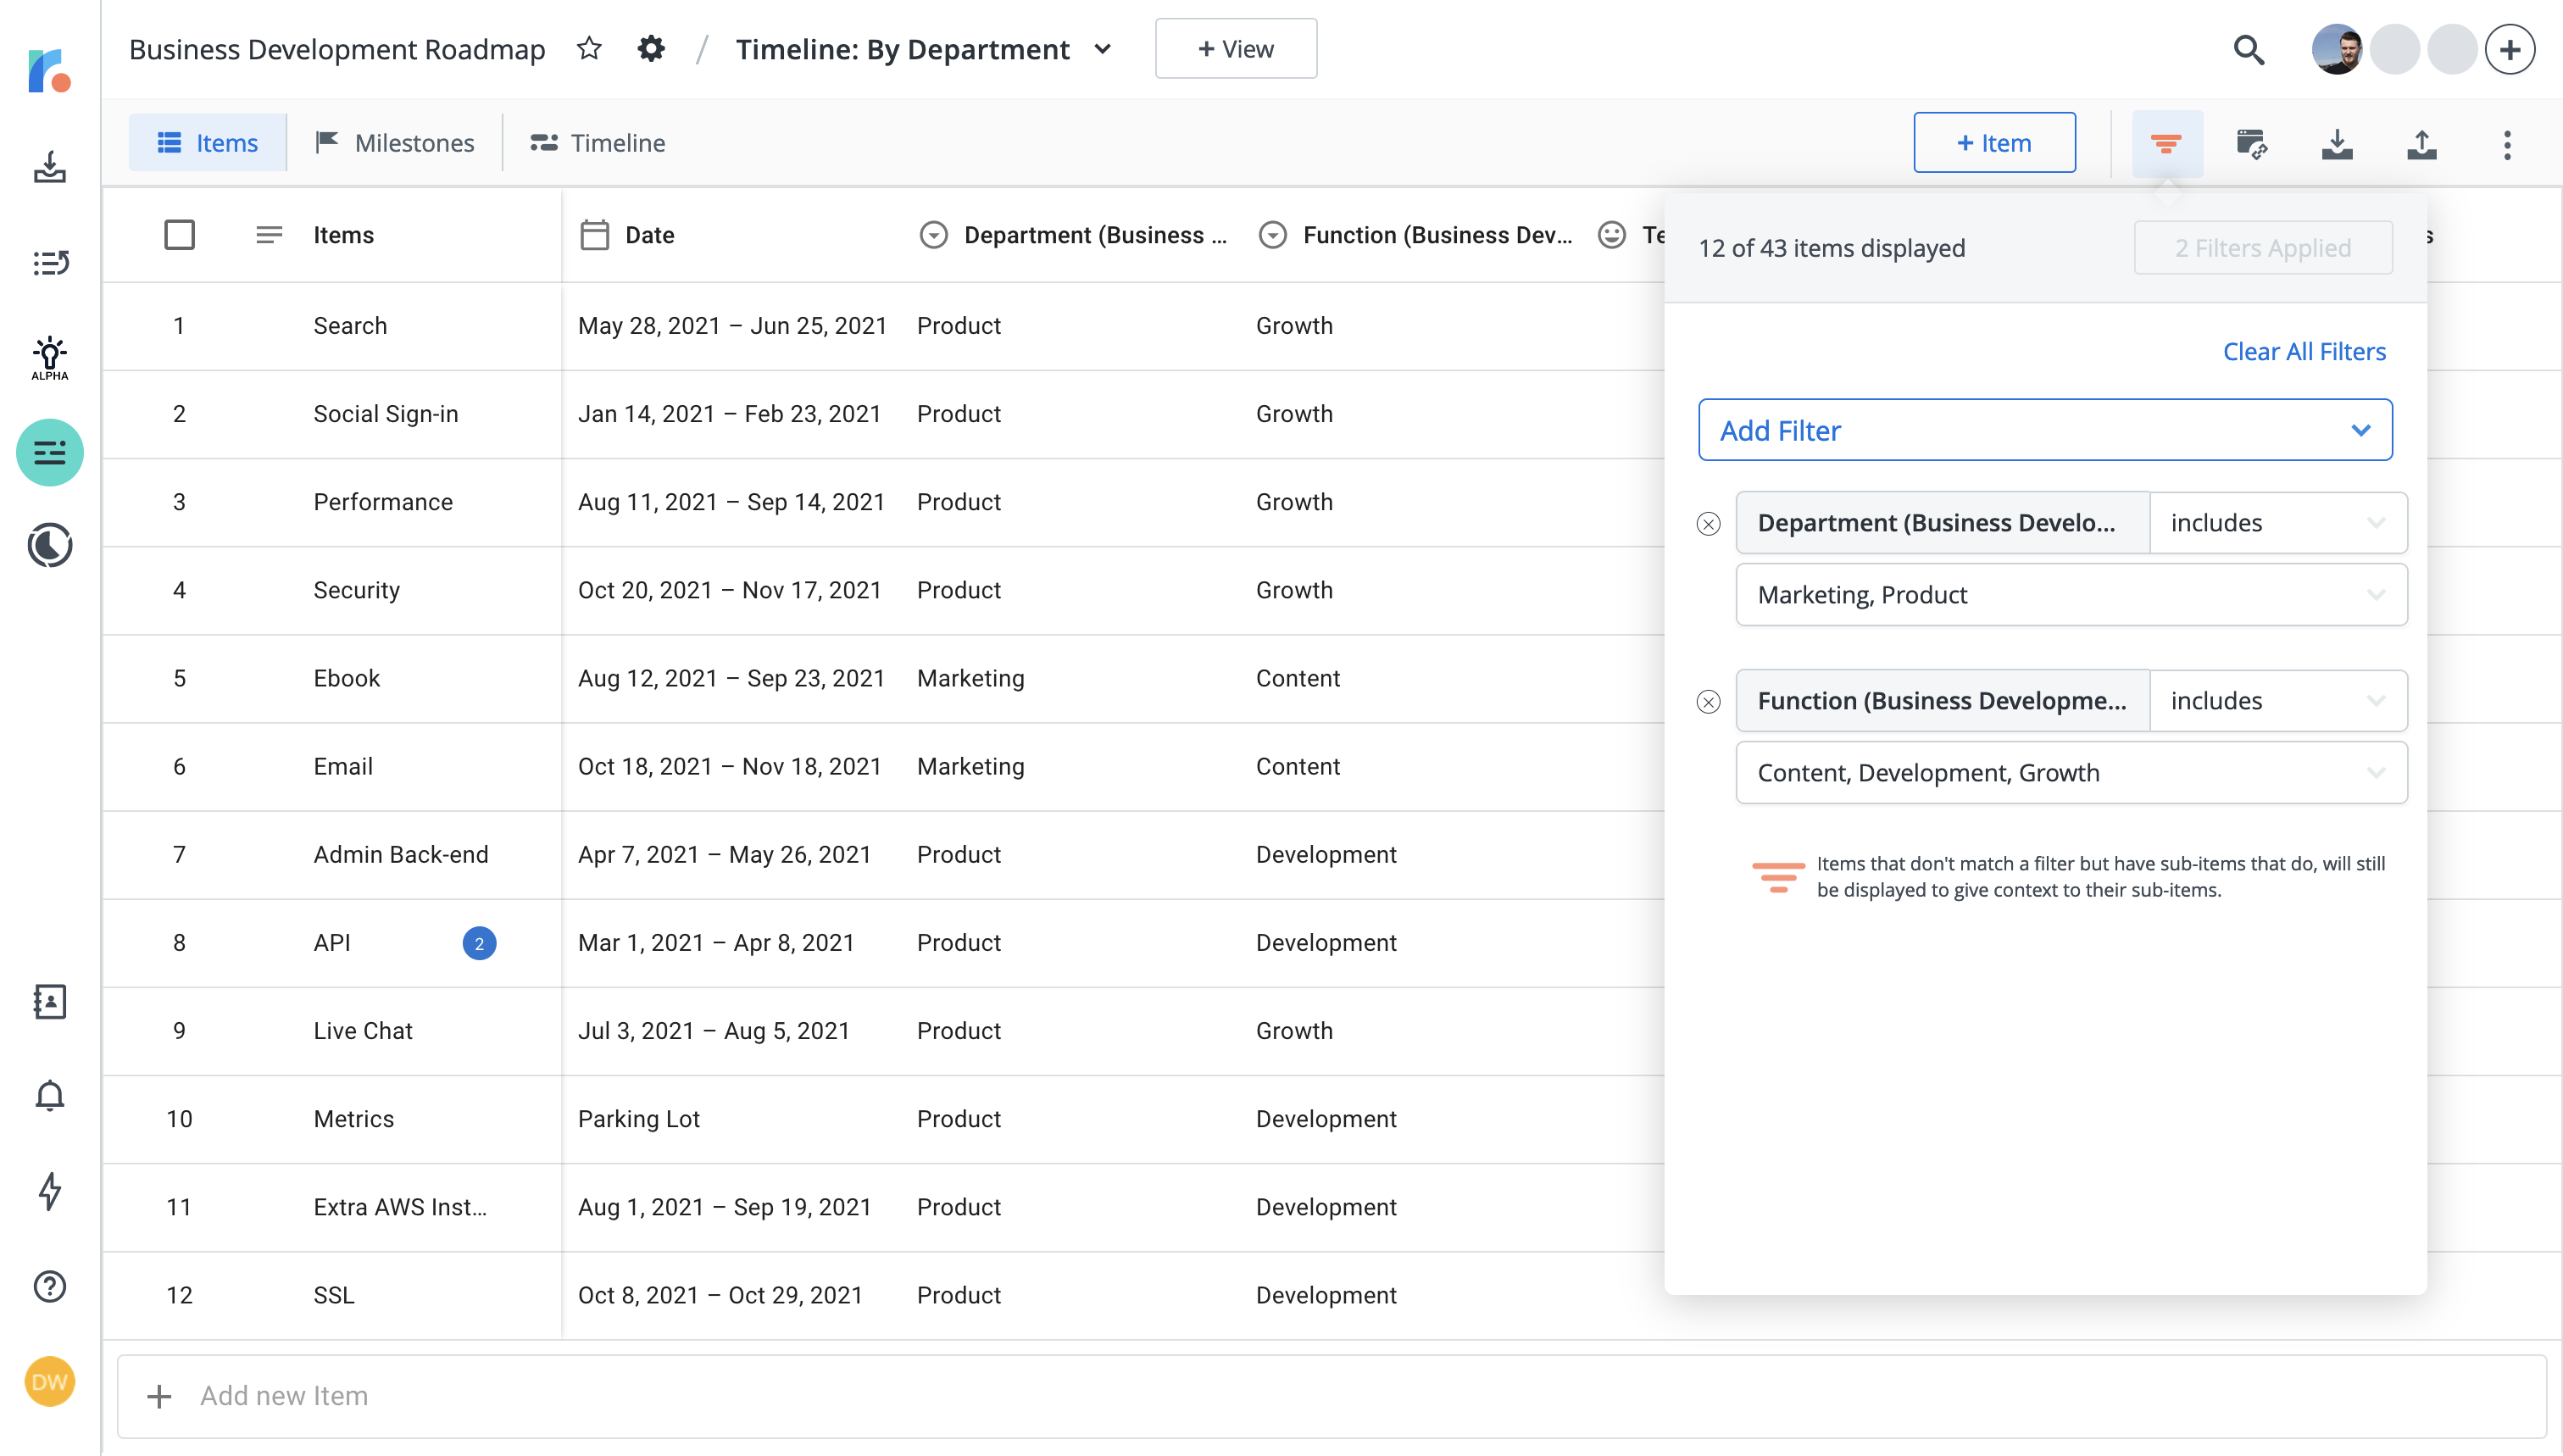
When in the filters menu, users can easily see the number of visible items within the total dataset and the number of applied filters. Users will also have the options to Add Filter(s), Clear All Filters, or Remove Individual Filters by clicking on the respective buttons in the menu. Any changes that are made in this menu are not automatically saved, so users will need to click the Update Filters button to complete any actions.
Filter Permissions in Strategic Roadmaps
To create and update filters on a roadmap view, you must have either Owner or Editor access to the roadmap you're working in. Users with View Only permissions will not have access to the filter controls and will not be able to create or update new filters.
Warning: The limitations for users with View Only access also carry over to date filters that have been applied to the visualization. This means that users with this permission level will not be able to adjust the range of visible dates on the roadmap view and will be unable to interact with the Date/Time controls in the Timeline and Swimlane views.
Filterable Fields in Strategic Roadmaps
Strategic Roadmaps allows users to filter based on certain field types but does not provide filters for others. The following table outlines which fields users can set up filters within Strategic Roadmaps and which fields cannot be used:
|
Field types that can be filtered |
Field types that cannot be filtered |
|
|
Type-Specific Filter Details
|
Field Type |
Filter Options |
|
Single Select List Fields |
Item/Milestone on roadmap…
|
|
Multi-Select List Fields |
Item/Milestone on roadmap…
|
|
Team Member Fields |
Item/Milestone on roadmap…
|
|
Numeric Fields |
Numeric value on Item/Milestone…
|
|
Date Fields |
Item/Milestone has a date which…
|
|
Bucket Fields |
Item/Milestone on the roadmap…
|
Caution: The between filters is inclusive of both the start and end date. This means that any items which occur within the specified date range will be visible, but any items with start or end dates which fall outside of that range will be hidden.
Additional Filter Functions
Filtering for Items with No Value Assigned
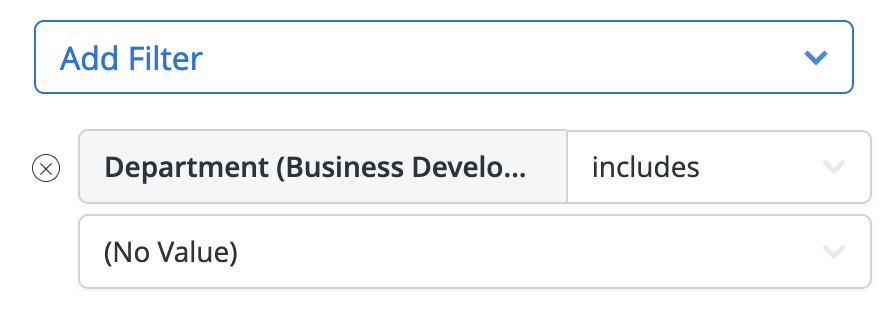
By default, Strategic Roadmaps filters out items with no field value assigned in Single-Select List, Multi-Select List, and Team Member Fields. In order to include items without a value assigned to them, users can select the No Value option located at the bottom of the filterable values list when adding filters to their view.
Warnings for Item Creation in Filtered Views
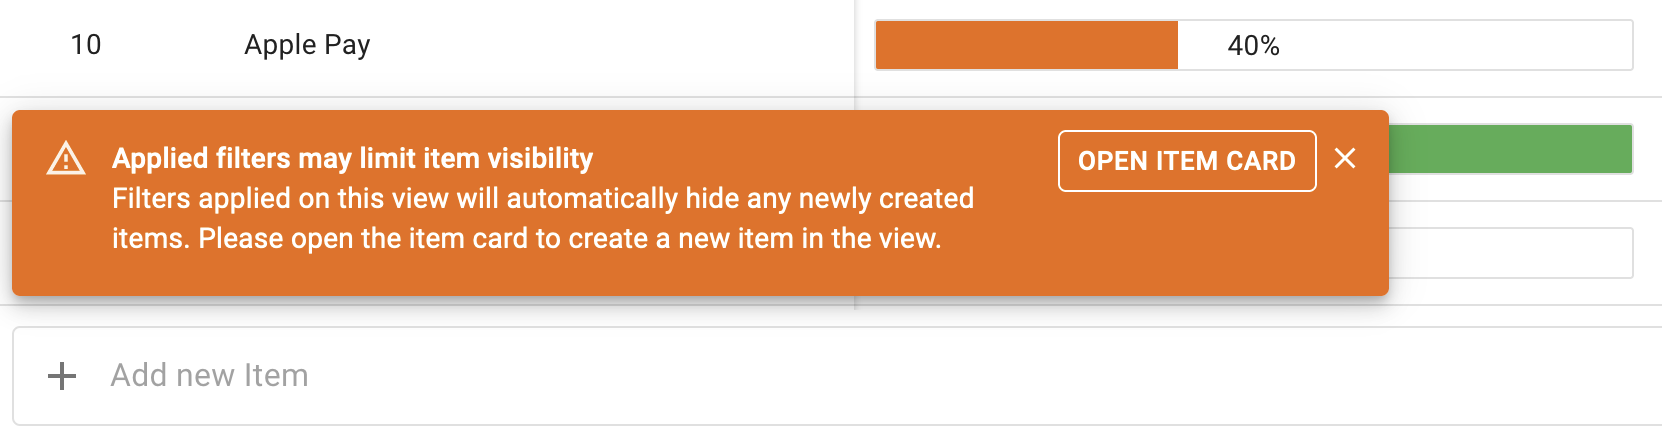
When creating an item in a roadmap view that has been filtered, the visibility of new items may be impacted. Strategic Roadmaps provides users with an immediate warning when attempting to create an item via a method where fields cannot be added, such as the Add New Item bar, and will prompt a user to navigate to the item card.
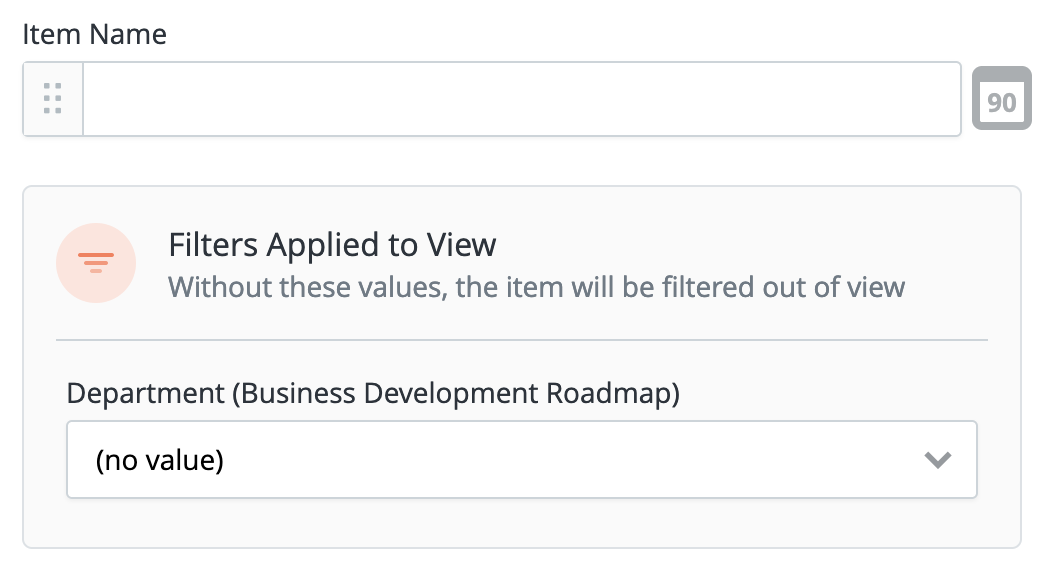
If the user is creating a new item from either the Timeline or Swimlane view, the filter warning will appear at the bottom of the Drag New Item modal that prompts them to apply values to the filtered fields in order to ensure that the item will be visible after it's been created.

If a user disregards this message and creates an item in a filtered view, the item will be hidden and the user will be shown a message which prompts them to navigate to the recently created Item Card in order to apply the appropriate fields (if the user would like the item to be visible in Strategic Roadmaps).
Filtering for Items within Parent/Child Structures
Filter behavior in views with sub-items may differ from the standard behavior for this feature. The filters that are applied to a view will disregard Parent Items that don't match the applied filter if they have a Child item that satisfies the filter requirements. This ensures that items at all levels of data visibility are included in the filtered view and not accidentally hidden because they're grouped under a Parent item.
Copying Filters to a New View

While users can duplicate views in order to copy filters, they can also create a new view on the roadmap and choose to copy the filters from an existing view. This is useful if you were looking to retain the filters of an existing view but present the data in a different visualization type. In order to copy filters when creating a new view:
-
Select the + View button from the navigation bar at the top of the screen.
-
In the New View dialog, locate the filtered view in the Copy Filters From... dropdown
-
Select your Visualization Type and click Create to generate a view with the copied filters