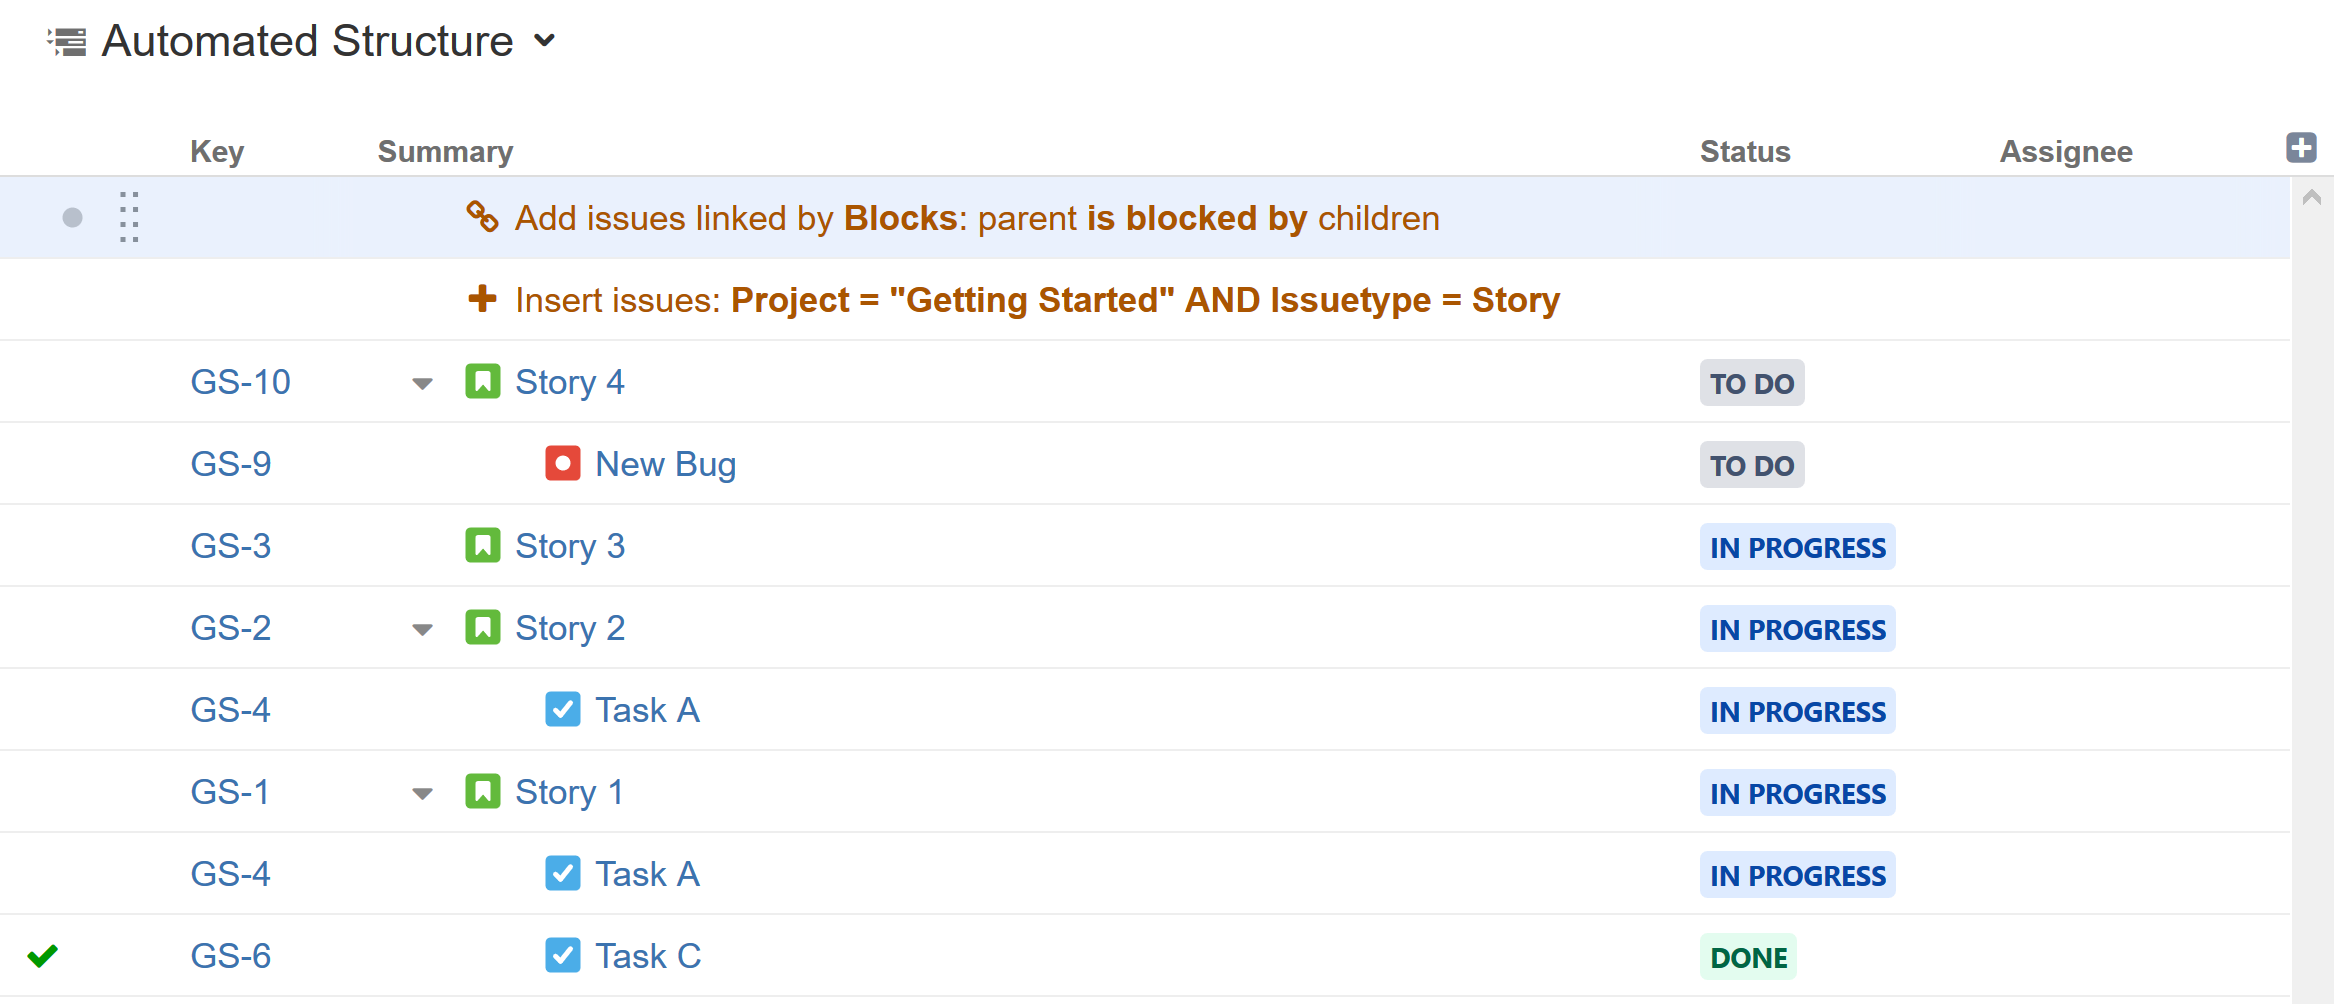
The Linked Items Extender pulls in work items that are linked to work items already in the structure. Linked work items will be placed beneath the current work items in the structure's hierarchy.

When using the Linked Items Extender, some work items may appear in your structure more than once. In the example above, "Task A" appears twice, because it blocks Story 1 and Story 2.
Adding a Linked Items Extender
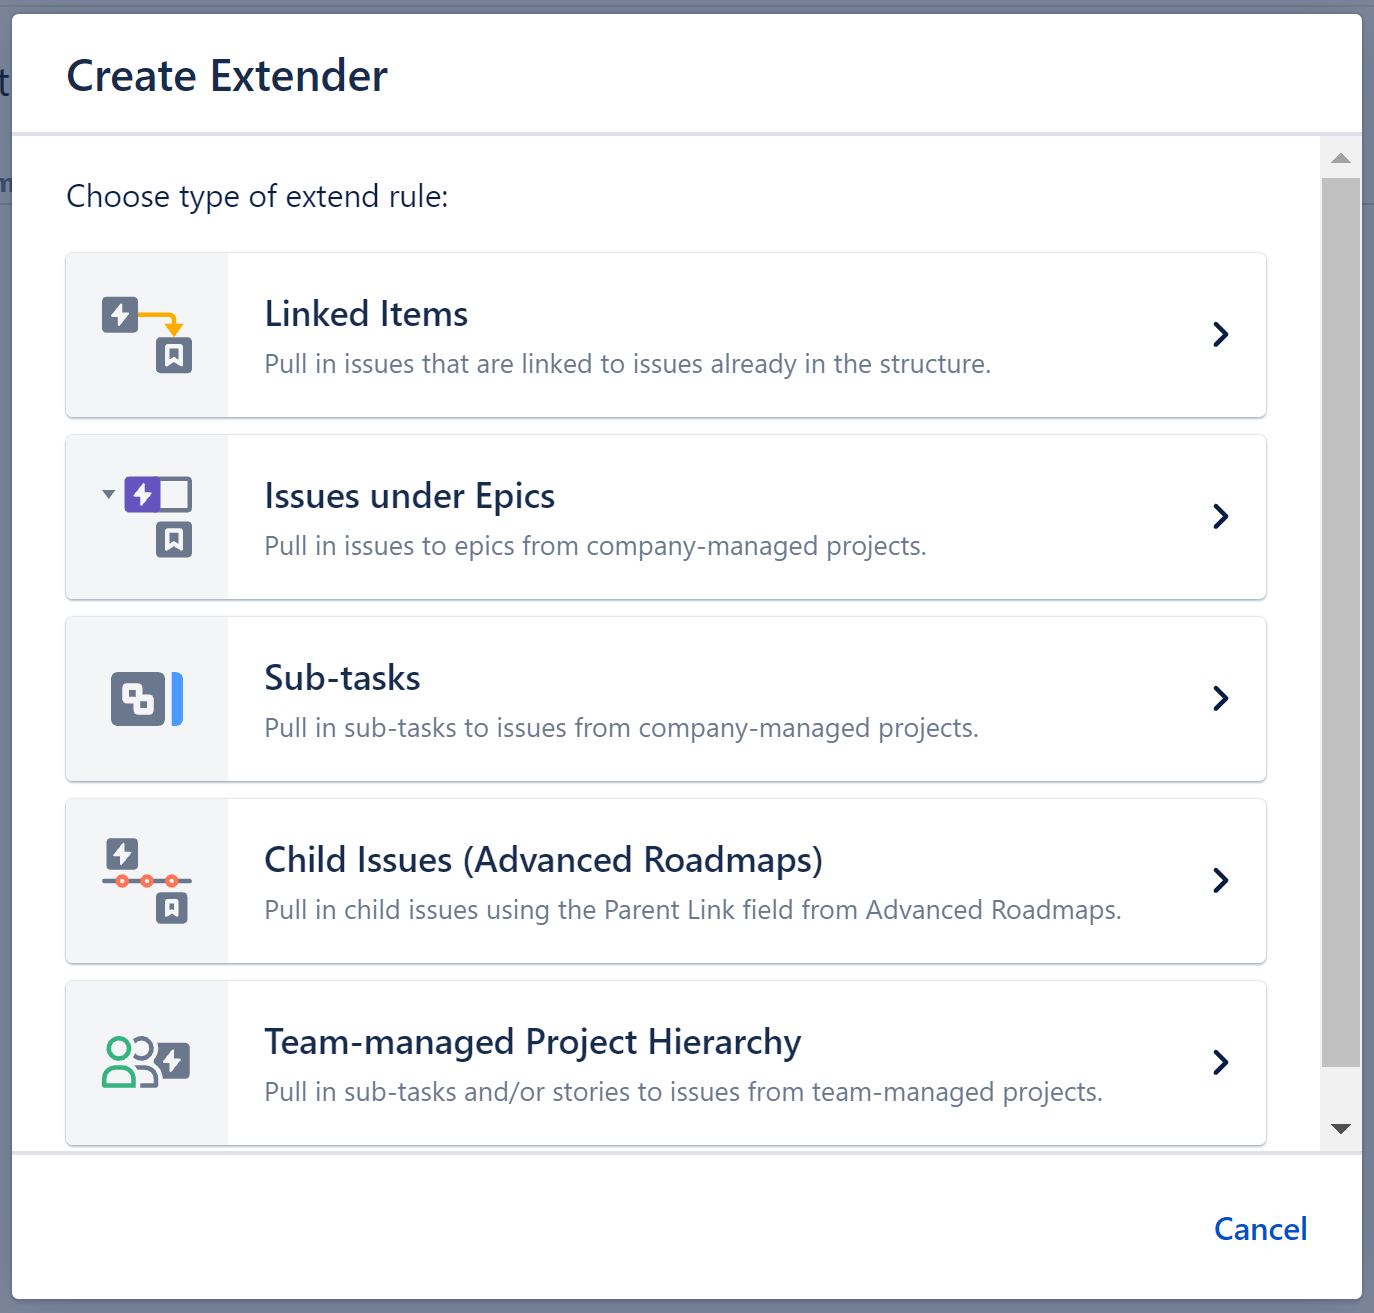
To add a Linked Items Extender, open the Add menu and select Extend.

This will display the Extend generator options. Select Linked Items.

Configuring the Generator
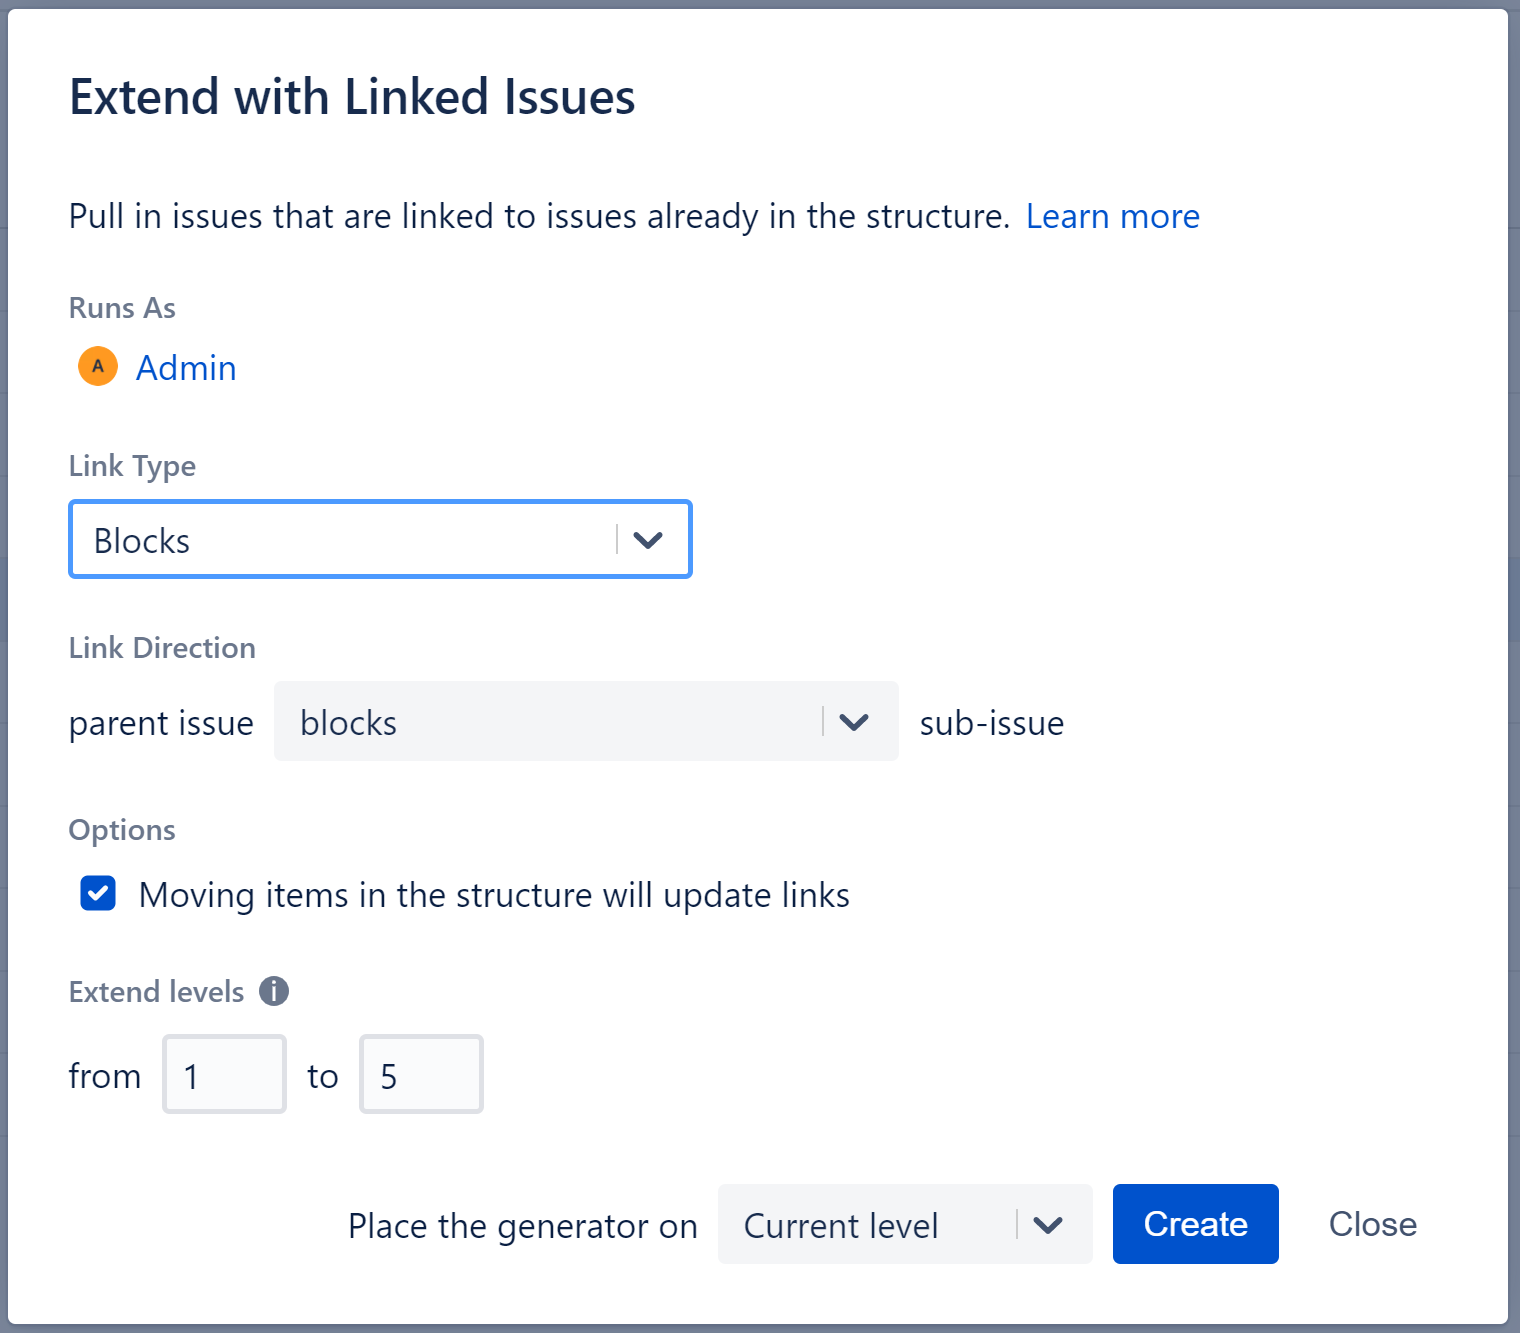
Each Linked Items Extender can be customized to create exactly the hierarchy you need.

Runs As
When a generator runs, it runs as the structure owner. This is important because the generator will have access to the same spaces, work items, etc. as the user listed here – if they don’t have permission to view a work item, it won’t be added to the structure.
Link Type
Allows you to specify which links to add to your structure.
To include Jira Product Discovery links, look for:
-
Polaris work item link - links JDP ideas and their delivery tickets (“implements”)
-
Polaris datapoint work item link - links JPD ideas and their insights
Link Direction
Defines which side of the link is the parent work item and which is the sub-work item.
Moving items in the structure will update links
If this option is checked, links will be updated as you move work items in your structure:
-
Moving a linked work item from beneath one work item to another will sever the original link and create a new link.
-
Deleting a linked work item from the structure will sever its link.
-
Copying a work item under another work item will create a new link.
You can change up to 100 work items with a single move. If you need to update more than 100 work items, simply move them in chunks of 100 or fewer.
Please be aware that it may take up to several minutes to process all changes if 100 work items are moved at one time.
Extend Levels
Allows you to specify which levels in the hierarchy the extender should be applied to:
-
Levels are based on the placement of the generator, where "Level 1" is the level the generator is located on, "Level 2" is the level beneath that, and so on.
-
Linked work items will only be added for those work items within the selected range.
Place the generator on
Select where the generator should be placed within the structure hierarchy. This location will be considered "Level 1" when applying the generator (see "Extend Levels" above).
You have three options:
-
Current level - The generator will be placed on the currently-selected level.
-
Level below - The generator will be placed on the level below the currently-selected item.
-
Top level - The generator will be placed at the top of the structure.
If a level is grayed out, it means it is not possible to place the generator on that level.
See Generator Scope to learn more.
