Enabling this feature automatically disables creating plans by importing Jira work items.
This feature requires you to have the Edit Work Items permission in your Jira space to configure work item fields.
Note: The ability to edit a synced plan respects the Edit Work Items permission in Jira. A user can edit a synced plan if they are allowed to change the work item. In this case, the Tempo Team "Manage plans" permission is not required.
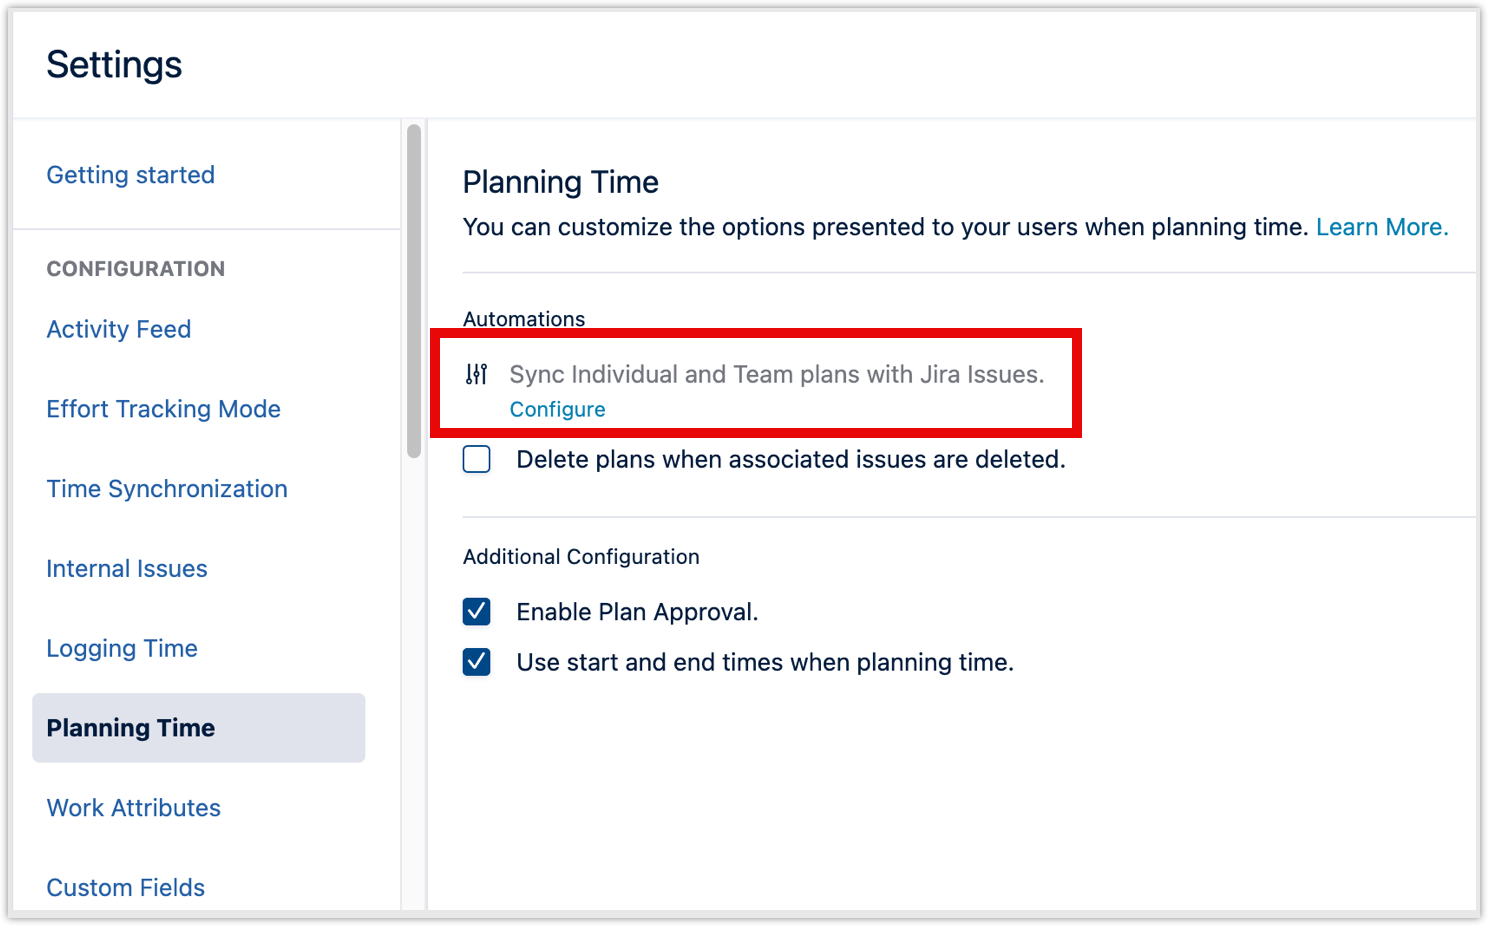
The Sync Plans with Jira Work Items option provides a two-way sync between Tempo Capacity Planner and Jira.
When enabled, creating new work items in Jira can automatically create new Tempo plans; changing synced Tempo plans will update their related Jira work items, and changing Jira work items will update Tempo plans.
Any work items with a “Done” status (Closed, Resolved, etc.) will not be synced with Capacity Planner when Sync Plans with Jira Work Items is enabled. For example:
-
If an work item is Closed and you subsequently enable Sync Plans with Jira Work Items, the Closed work item will not be synced. It must be reopened to sync.
-
If Sync Plans with Jira Work Items is enabled and a synced work item is transitioned to Closed, any work item fields that are subsequently modified will not be synced.
Synced Data
When enabling Sync Plans with Jira Work Items, you must tell Capacity Planner which Jira fields represent the following Tempo attributes for plans:
-
Plan start date
-
Plan end date
-
Total planned time
-
Assignee
These fields remain synced between Tempo and Jira.
For Team plans, the Assignee field must be a Tempo Team. Add the Tempo Team custom field to Jira to keep Team plans synced.
Selecting Jira fields
When choosing which Jira fields are used to sync with Tempo plans, be aware that:
-
The field data types must match. You must select a date field in Jira to sync with a date attribute in Planner.
If you try to sync a plan and encounter an error, verify that the fields listed in the Sync drop-downs for Capacity Planner are the same fields you have configured in the work item view for your Jira space. For example, if you have Start Date, Due Date, Original Estimate, and Assignee fields configured in the Sync drop-down, these same fields should match in the Jira work item view. You can configure the fields for the Jira work item view by selecting Configure at the bottom of the Fields panel or in Space settings>Work Items Layout.
-
We recommend using the default, Original Estimate, Jira field for Total planned time in Tempo. If you want to use a different field, select a
numberfield to sync.-
We do not recommend using the Remaining estimate Jira field because it changes frequently when time is logged, and Jira has limitations with automatic updates to the field. Also, the Total planned time will eventually become zero if the Remaining estimate Jira field reaches zero.
-
When syncing this data between Jira and Capacity Planner, the time unit for the data is displayed in seconds on the Jira work item. The Total planned time in Tempo is displayed in hours. When entering data in the selected
numberfield in Jira, you must enter at least60to see time in the Total planned time field.
-
Plan Time Anywhere
Enabling Sync Plans with Jira makes Tempo plan data available outside of Planner. Planned time can now be viewed directly from Jira and from any app that utilizes Jira fields—if the fields selected above are available in the app, then plan data is available.
Automatically Creating Plans from New Jira Work Items
If Sync Plans with Jira Work Items is enabled, when a new Jira work item is created, a new Tempo plan will also be created if the four fields selected for plan start date, plan end date, total planned time, and assignee are filled in.
Creating Plans from Existing Work Items
If you’re enabling Sync Plans with Jira Work Items for the first time, chances are you already have existing Jira work items. New plans will not be created automatically for these existing work items.
To create synced plans for work items created before Sync Plans with Jira Work Items was enabled, do one of the following:
-
Create new plans for each work item in Capacity Planner.
-
If a work item is missing any of the synced fields listed above, add data to those fields - once there is data in all synced fields, a plan will automatically be created.
-
If all synced fields already have data, temporarily remove the data from a field, and then add it again.
Synced vs. Not Synced
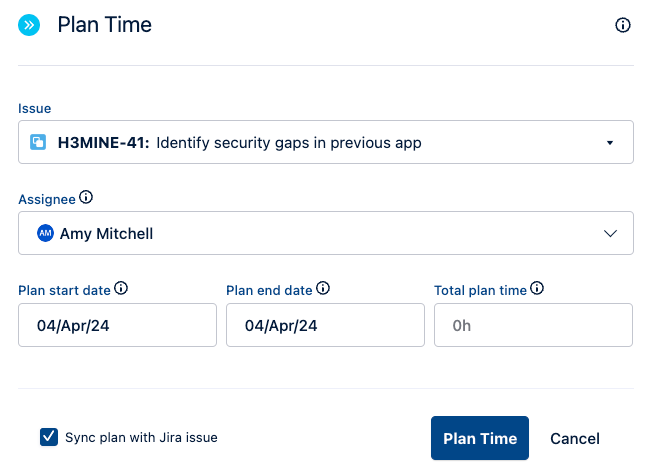
When Sync Plans with Jira is enabled, users will see a simplified planning screen for synced plans. Once a work item is selected, the remaining fields will automatically be populated based on the existing values in Jira. If any values are missing, they must be filled in before saving the plan.
When Sync Plans with Jira Work Items is enabled, the Plan item field is renamed to Work Item, and the Space tab is removed from this field.
When plans are synced with Jira:
-
Any changes made to the plan values in Jira or Planner will be synced with both automatically
-
Only one synced plan allocation can be made per Jira work item. Work Items can have additional, unsynced plans.
-
Plans can only be created for work items
-
Plans can only be created for Jira users
-
Synced plans cannot be recurring plans
-
Synced plans cannot be deleted directly from the Planner screen
-
If neither iteration cycles nor story points are enabled, the plan will be automatically deleted if the work item is deleted or if one of the synced fields on the work item is changed to blank/no value.
-
If either iteration cycles or story points are enabled, you must disable these fallback features to automatically delete the plan as indicated above.
-
Planning without sync
Users can also access the classic planning screen by clearing the “Sync this plan with Jira work item” option.
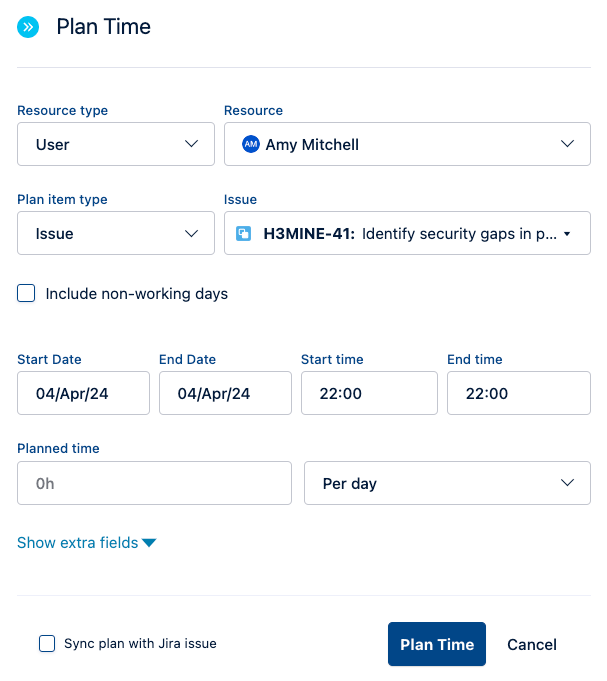
When plans are not synced with Jira:
-
Many plan allocations can be made for a single Jira work item
-
Plans can be created for work items or spaces
-
Plans can be created for generic resources or Jira users
-
Changes made in Planner will not update Jira