-
You must have Tempo Capacity Planner installed to access Planned Time reports.
-
To report on planned time, you need to have Tempo Capacity Planner installed. Viewing plans requires the View Plans permission.
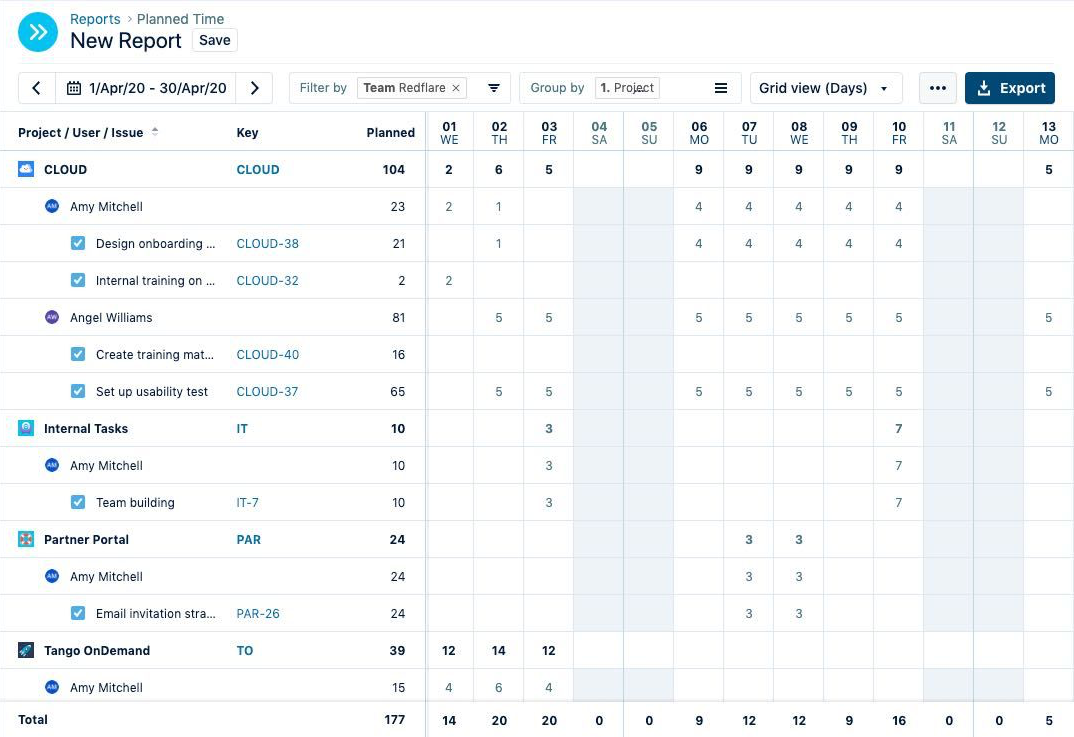
The Planned Time report provides insight into the time that individual users have planned on spaces. You can use filters and grouping options (such as teams, users, spaces, roles, or accounts) to analyze planned hours across different teams or individuals. The report displays the total planned hours and can also include billable hours, helping you review and analyze planned work across your organization.
To create a Planned Time report, select Reports in the Tempo sidebar and click the Planned Time tile on the Reports page.
Epic data is not visible in the Planned Time report if the epic is planned for the whole team, but no child work items are planned for any team members.
Creating a report from the Resource Planning View
You can also generate a Planned Time report from the Resource Planning view in Tempo Capacity Planner. The advantage of this is that the report will use the time period and filters that are currently used in the Resource Planning view - it's all set up for you!
-
Select Planning from the sidebar, and select the Resources tab.
-
Click the View in Report icon in the top-right to generate the Planned Time report.
-
The Planned Time report opens with your current Resource Planner data, including the time period and filters, but you can modify the formatting or filter and group and/or sort the data as you like.
When filtering the Resource Planning view by SKILLS, this data is not available in the Planned Time report.
Filtering by accounts is not available for plans created by spaces. The account filter is only available for plans by work items.
Filter to Include Rejected Plans in Your Reports
By default, rejected plans are not included in any Planned Time or Planned vs Actual reports that you generate. To include rejected plans in your reports, choose a filter called Approval Status and then select the Include rejected plans check box. You can choose this filter when you create a report and also when you view a report.
