Configuring the Scheduler requires the Tempo Administrator permission.
The Scheduler can be used to configure intermediate closing dates within an open period. After a scheduled closing date, users who do not have the Approve Timesheet permission for their team cannot log time or edit worklogs for that period: their timesheets are locked. If users need to complete or edit their timesheet for that period, they must request a grace period.
You can also use the Scheduler to send email reminders to users to complete their timesheets.
To enable the Tempo Scheduler:
-
Click Jira settings :settings_dc: at the top-right, and then select Manage apps.
-
Under Tempo in the sidebar at the left, select Scheduler.
-
Click Enable Tempo Scheduler and confirm your credentials by entering your admin username and password, when prompted.
-
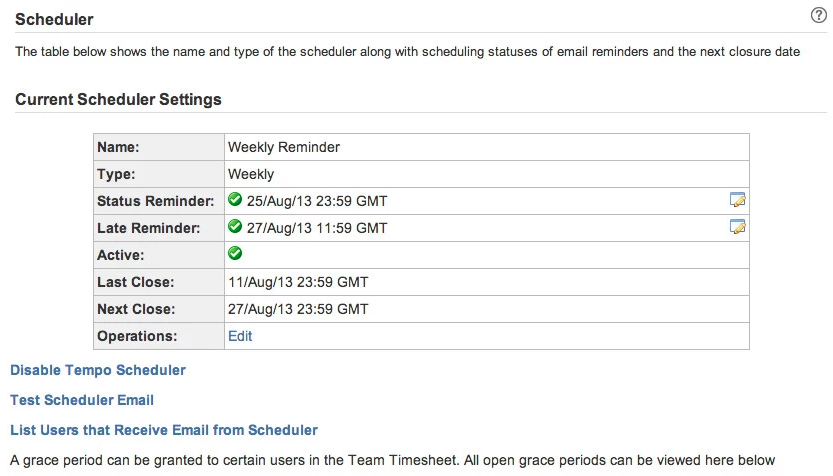
The Scheduler view opens and shows the current settings.
-
Green checkmarks indicate active items.
-
Inactive items are flagged with a red minus sign.
-
-
In the Operations field, click Edit to open the Scheduler settings for editing.

Configure the Tempo Scheduler
In the Edit Scheduler area, you can set the Scheduler to run Monthly, Weekly, or Bi-weekly. If it's Monthly, the settings work in conjunction with Period Configuration.
The Scheduler runs checks every 10 min.
There are two types of Email Settings to send notifications to users:
-
Status reminders with information about the logged hours versus required hours.
-
Late reminders for unfinished logged hours at the time period set by the scheduler.
To receive the emails, users must have Work on Issues permission for at least one project, and they need to either have logged some time or be in a workload scheme with more than zero required hours.
Granting the "Work on Issues" permission for "Any logged user" is not enough: you need to grant this permission for specific users or a group of users.
To configure the Scheduler:
-
In Edit Scheduler give a Name to your scheduler.
-
In Type, select whether you want the scheduler to close after the default reporting period, monthly, weekly, or biweekly. The default reporting period is Monthly in Period Configuration.
-
If Period is selected, then the default period in Period Configuration is used.
-
The default period is set in Tempo > Settings > Period Configuration.
-
-
Configure the settings closing period and email notifications accordingly:
-
For Period setting, the end date is the last date one the Default monthly period, as defined in the Period Configuration.
-
For the Weekly and Bi-Weekly settings, the end date is the weekday selected in Repeat on (Weekly).
When using Bi-Weekly, you need to check the dates when emails will next be sent to identify the first and second weeks in the bi-weekly period.
-
-
Select Make Scheduler Close to close the selected period for time registration.
-
Specify the number of days after which users can no longer log time or edit their timesheet in the Close field. Scheduler will close Timesheet editing on this date, which means that the timesheets are locked. Closure happens at 11:59 PM in the Jira server’s timezone (23:59).
-
You can set a maximum of five working days (Saturdays and Sundays are considered weekend days).
-
Holidays that are defined in the Holidays schemes are considered.
-
-
Choose who you want to notify. You can send email reminders to all users that timesheets are due, and reminders to late users with uncompleted timesheets. You can choose how many hours prior to the period closing date you want the email notification to go out to late users, up to 24 hours.
-
When checked, the Status reminder for all users email will be sent to all users on the end date at 11:59 PM in the Jira server’s timezone (23:59).
-
When checked, the Status reminder for late users will be sent to users who have not logged sufficient hours to their timesheets.
-
If Make Scheduler Close is not selected, enter how many hours after the end date you want to send the reminder.
-
If Make Scheduler Close is selected, enter how many hours before the period is closed you want to send the reminder.
-
-
-
Click to select the checkbox to Activate This Scheduler.
-
Save your changes.
Disabling the Scheduler
-
Click the Disable Tempo Scheduler link in the scheduler window.
Related Topics