This feature is only available to Account Administrators.
Purchasing a Subscription
Only Account Administrators can switch your Strategic Roadmaps account from a trial account to a paid account.
Switching to a paid account is simple and easy. All you need to do is select a plan, choose the number and type of licenses you want to purchase and enter your payment information.
Selecting a plan
Strategic Roadmaps offers three different plans: Starter, Business, and Professional. Each plan is designed to meet the different needs of different individuals or organizations. You can get full details of each plan on our Pricing page.
Don't worry if you choose a plan and later find out it doesn't quite meet your needs. You can change to a different plan at any time.
You are able to select a plan in the Billing tab in Account Settings:
-
On the Roadmap navbar, click on your Avatar.
-
In the menu that appears, select Account Settings.
-
In the Account Settings dashboard, click the Billing tab.
NOTE: If you don't see the Billing tab in the dashboard, you don't have Account Admin permissions. To perform Account Admin tasks, you must log in using an account with an Account Admin user role (see our article on managing user roles and permissions). -
In the Billing panel, click the Select Plan button for the plan you're choosing.
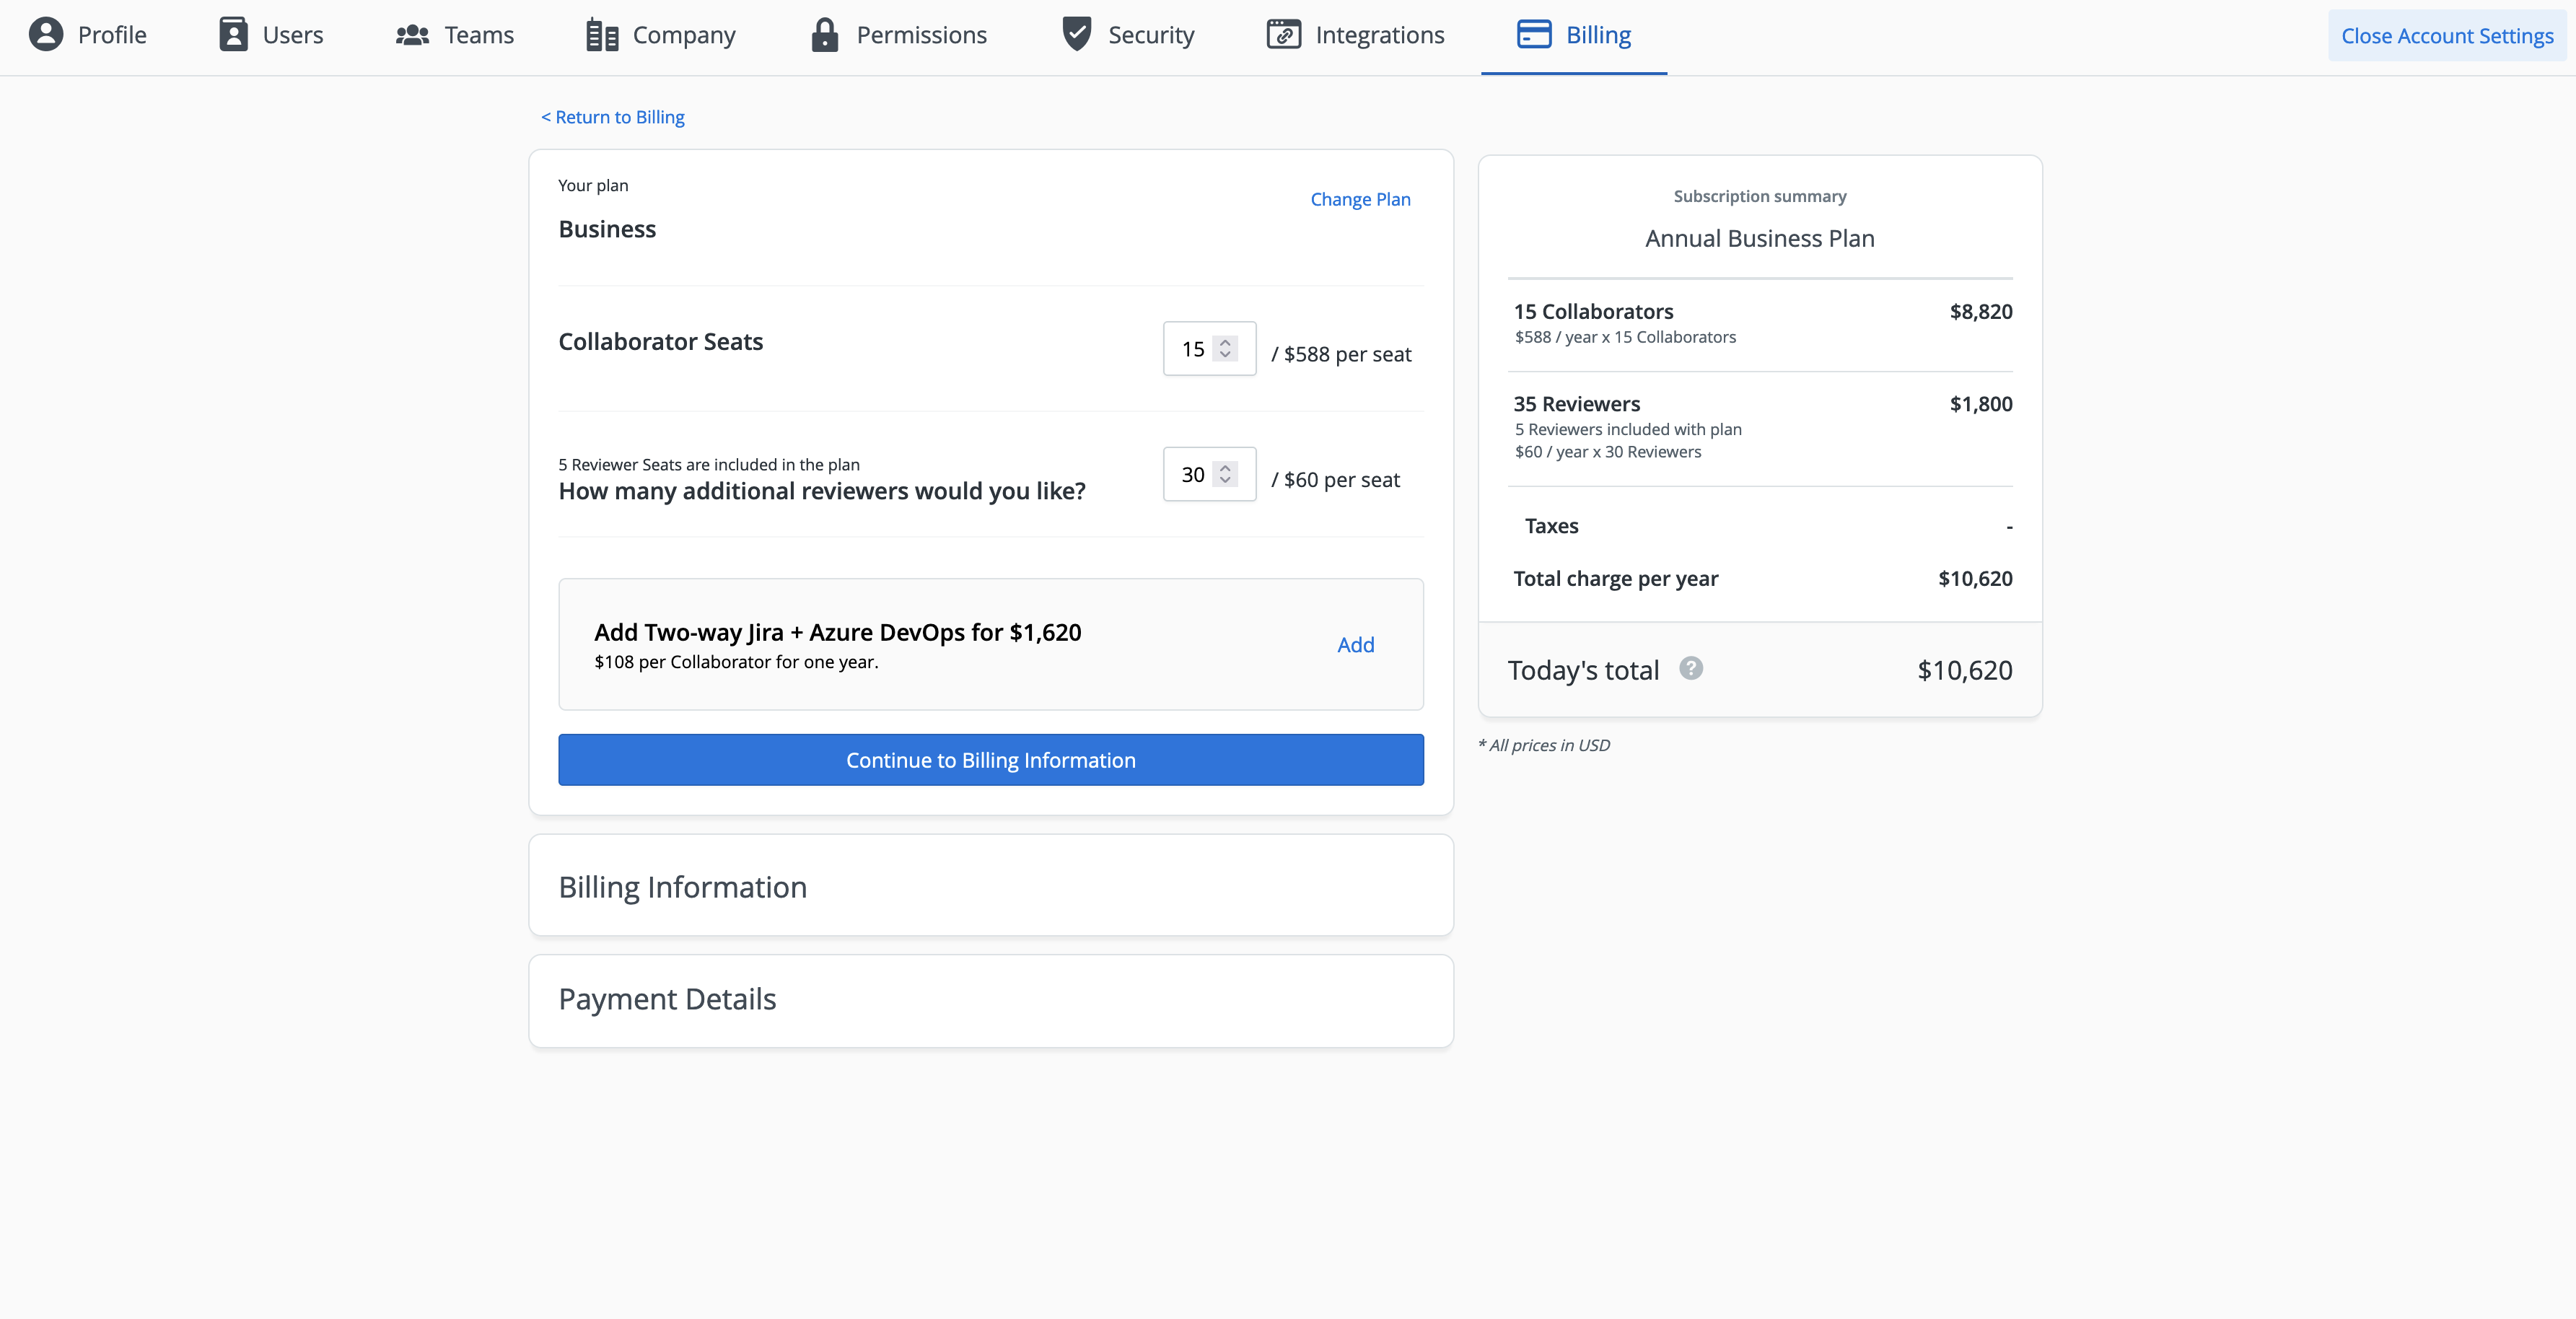
Selecting License & Billing Options
After you select a plan, choose the number of licenses you want to purchase for each license type: Collaborator or Reviewer (see our article on managing user roles and permissions).
-
Enter the number of Collaborator licenses you want to purchase.
-
Enter the number of Reviewer licenses you want to purchase.
-
If you choose the Business Plan, an optional upgrade to the full Jira Integration is available.
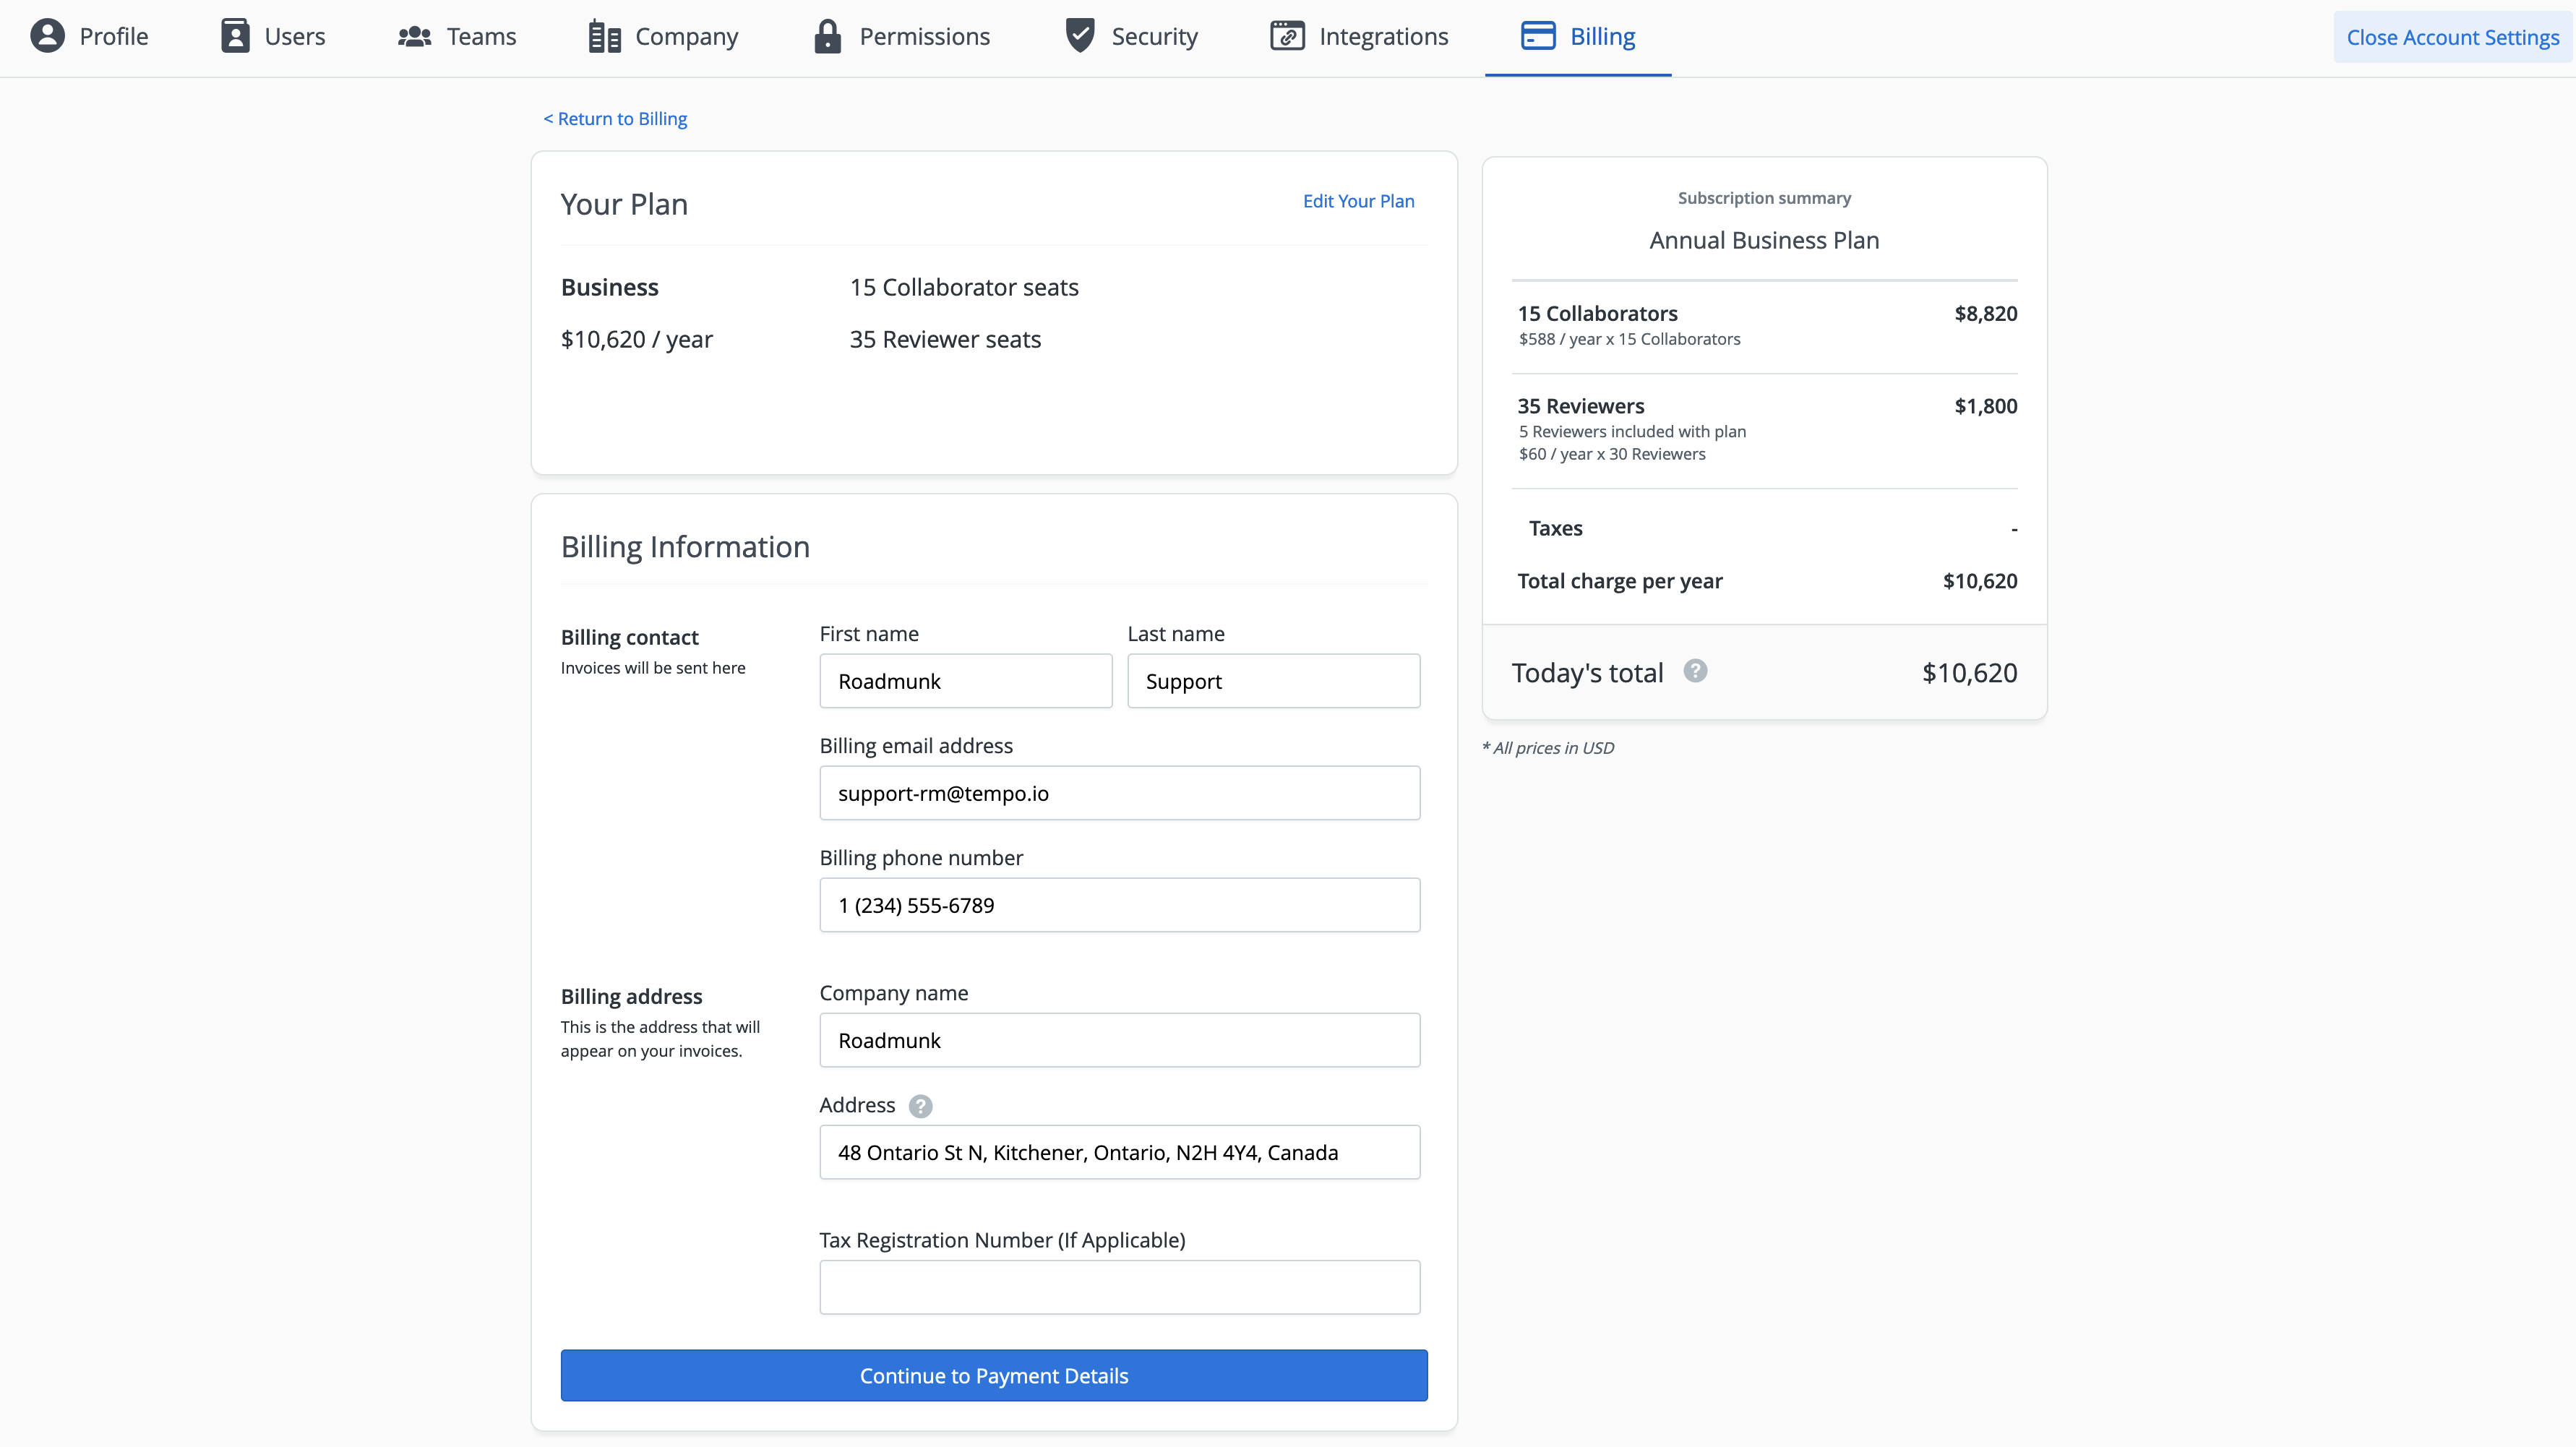
Entering Payment Information
The final step in switching to a paid account is entering payment and billing information.
-
In the Billing Information panel, enter your billing contact and address details. All receipts and invoices will be delivered to the email listed here.
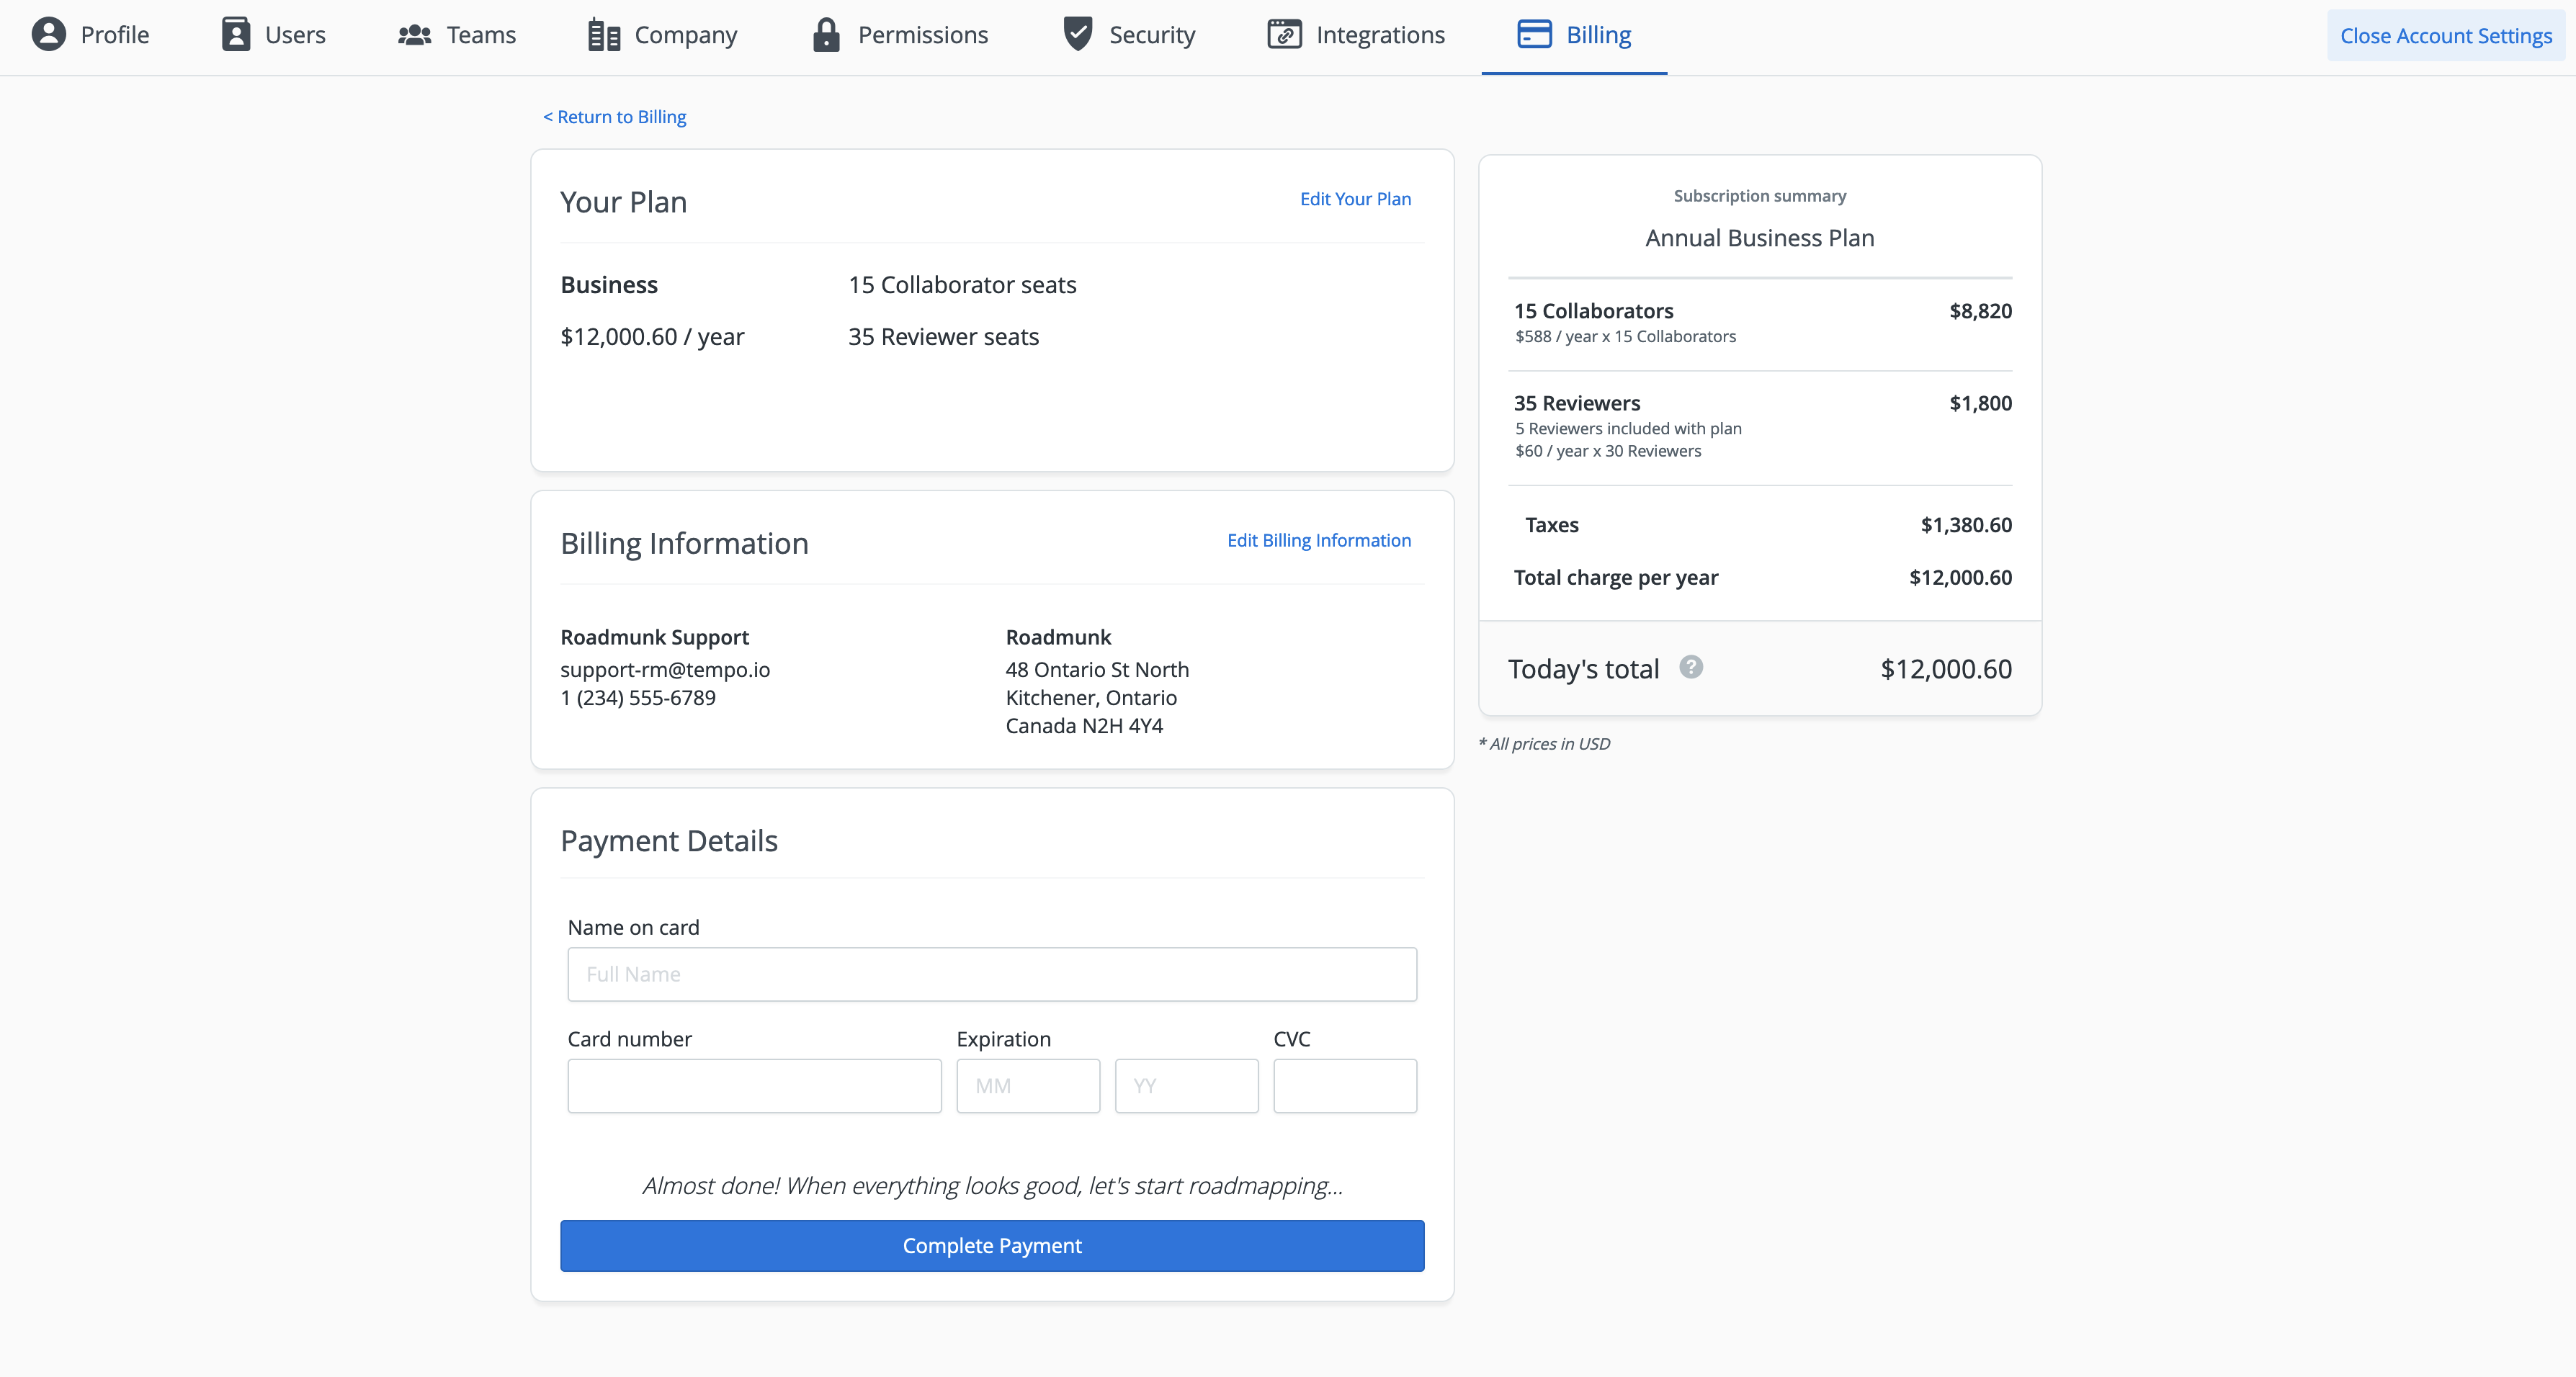
-
In the Payment Detail panel, enter the information for the credit card you want us to charge.
-
Click Complete Payment.
Now that you're done selecting a plan and purchasing licenses, you can start adding users to your account.
Need an Enterprise-level plan?
If you want to align roadmapping across your entire organization, we offer an Enterprise plan with unlimited Reviewers, Private Cloud, advanced customization, and more. To find out more, contact our Support Team.
Managing Your Strategic Roadmaps Subscription
Only Account Admins can change your Strategic Roadmaps plan and change the number of licenses in your account. You can make these changes at any time, and changes are pro-rated based on the time you have left on your current plan.
You make changes to your plan in the Billing panel in Account Settings.
Opening the Billing tab
-
On the Roadmap navbar, click on your avatar.
-
In the menu that appears, select Account Settings.
-
In the Account Settings dashboard, click the Billing tab.
If you don't see the Billing tab in the dashboard, you don't have Account Admin permissions. To perform Account Admin tasks, you must log in using an account with an Account Admin user role (see our article on managing user roles and permissions).
Changing to a different plan
-
Click Update Plan in the top-right of the Your Plan panel.
-
Click the Change Plan option beside your current plan.
-
In the Select Your Plan dialog, select the plan you would like to move to.
-
Save the changes to your plan by pressing the Update button at the bottom of the panel.
Changing your billing options and number of licenses.
-
If you're not already in the Billing tab, navigate to it in Account Settings
-
Click Update Plan in the top-right of the Your Plan panel.
-
Enter the desired number of Collaborator and Reviewer licenses in Number of Seats section.
-
Save the changes to your plan by pressing the Update button at the bottom of the panel.