Once you've customized the time pivot in a Timeline and added pivot headers, you can format the layout and colors of the headers and items.
Changing the width and order of headers
Widen the header width
-
Mouse over anywhere along the right edge of the headers.
-
Click and drag the blue bar to set the desired width.
Change the order of the headers
To change the order of a header or subheader, click and drag up or down it to its new position.
Formatting a Timeline's layout
You format a Timeline's layout in the Format Layout tab. To open the tab, click the Format icon on the View navbar.
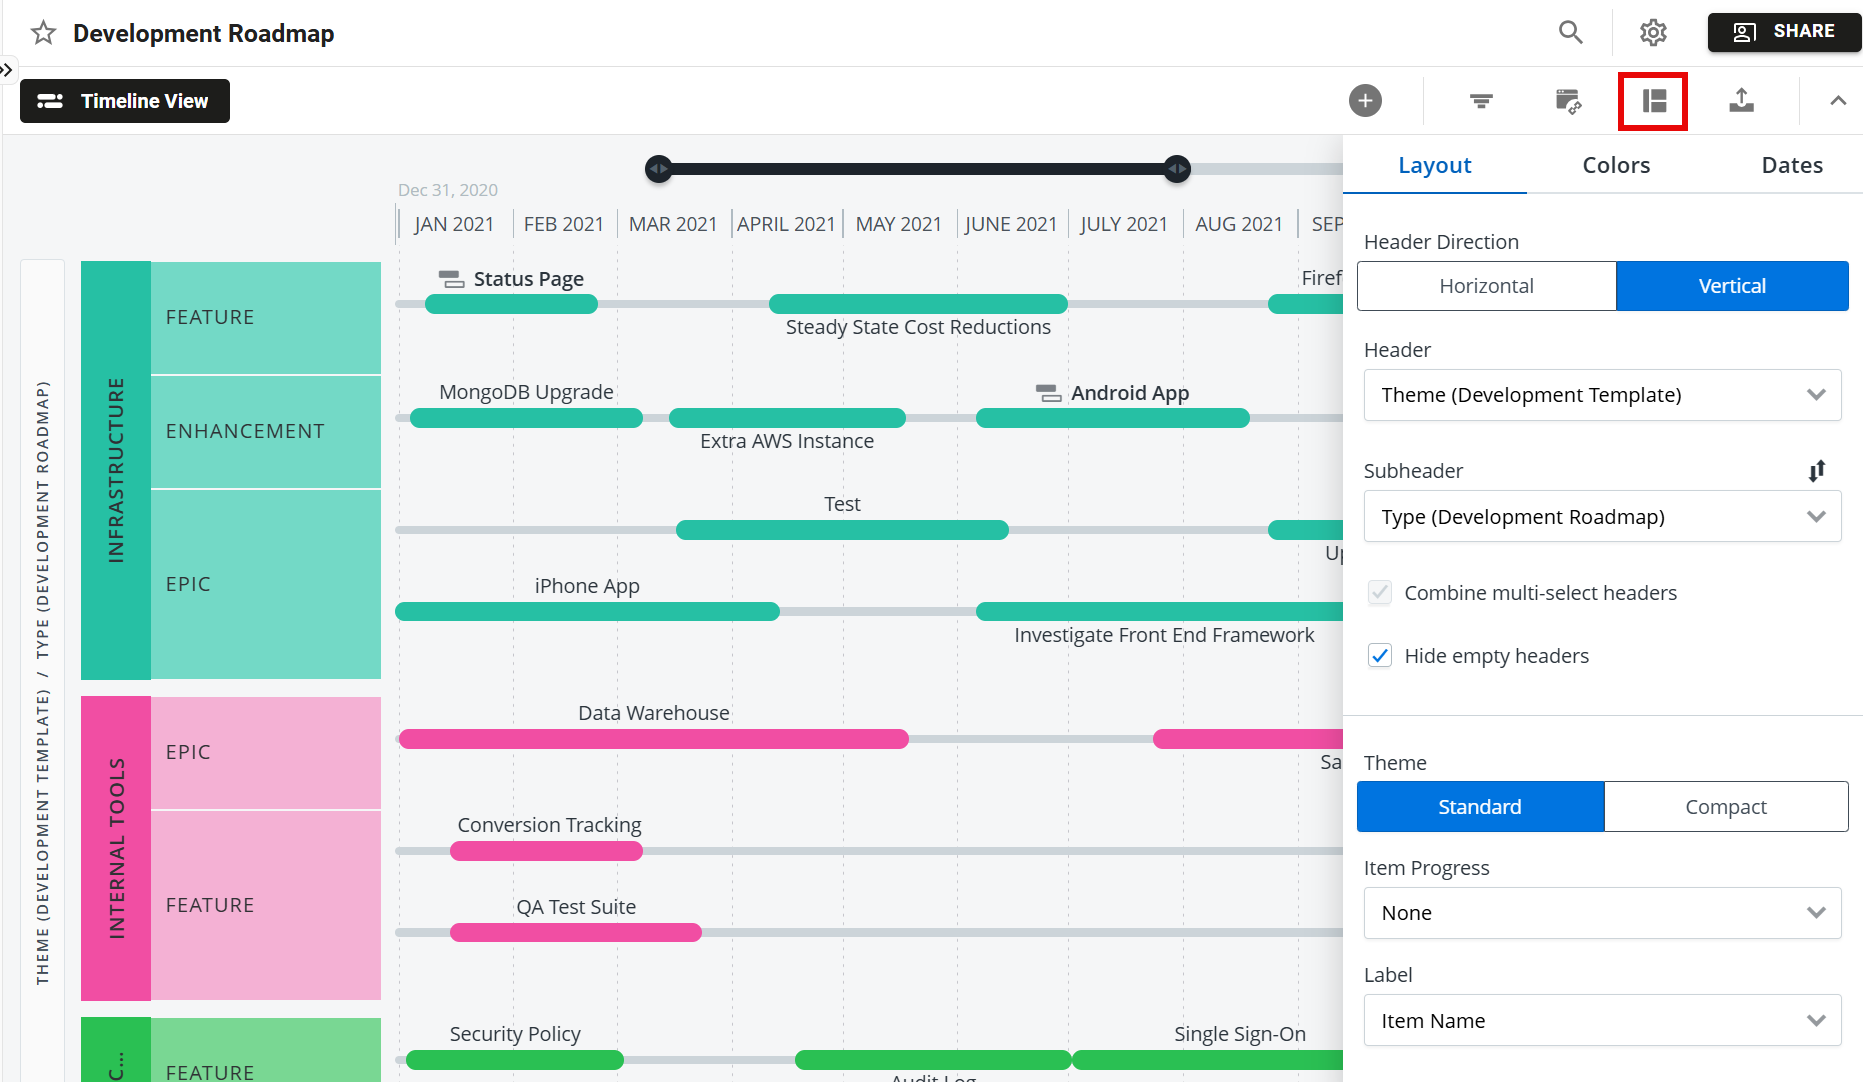
1. Change header orientation
Another way to give your headers more space is to change the orientation of the main header. The default orientation is Horizontal.
-
In the Format tab, find the Header Direction label.
-
Select Vertical.
2. Choose the Timeline theme
Another way to provide more screen space for your Timeline is to switch from the default Original theme to the Compact theme.
-
In the Format tab, find the Theme label.
-
Select Compact.
The Compact theme works best with a Horizontal header orientation.
3. Select a different item label
By default, items on a Timeline are labeled with their name (Items field). To create an additional pivot in the Timeline, you can select a different field for the label.
-
In the Layout tab, open the Label dropdown.
-
Select the new field.
4. Adjust the size of item labels
You can adjust the size of item labels from Regular to Large or Extra Large.
-
In the Layout tab, open the Label Size dropdown.
-
Select the new size.
5. Show milestone dates
By default, milestones are displayed in a Timeline together with their date. You can choose to show only the milestone icon.
-
In the Layout tab, de-select Show Milestone Dates.
6. Combine multi-select headers
If a header field in a Timeline is a Multi-Select List field, you can choose to display each selected value in a field as a separate header or to combine all selected values into a single header. To combine values into a single header:
-
In the Layout tab, select Combine multi-select headers.
If the selection is grayed out, it means that none of the header fields is a Multi-Select List field.
Formatting a Timeline's colors
To format a Timeline's colors, open the Format menu and select the Colors tab at the top.
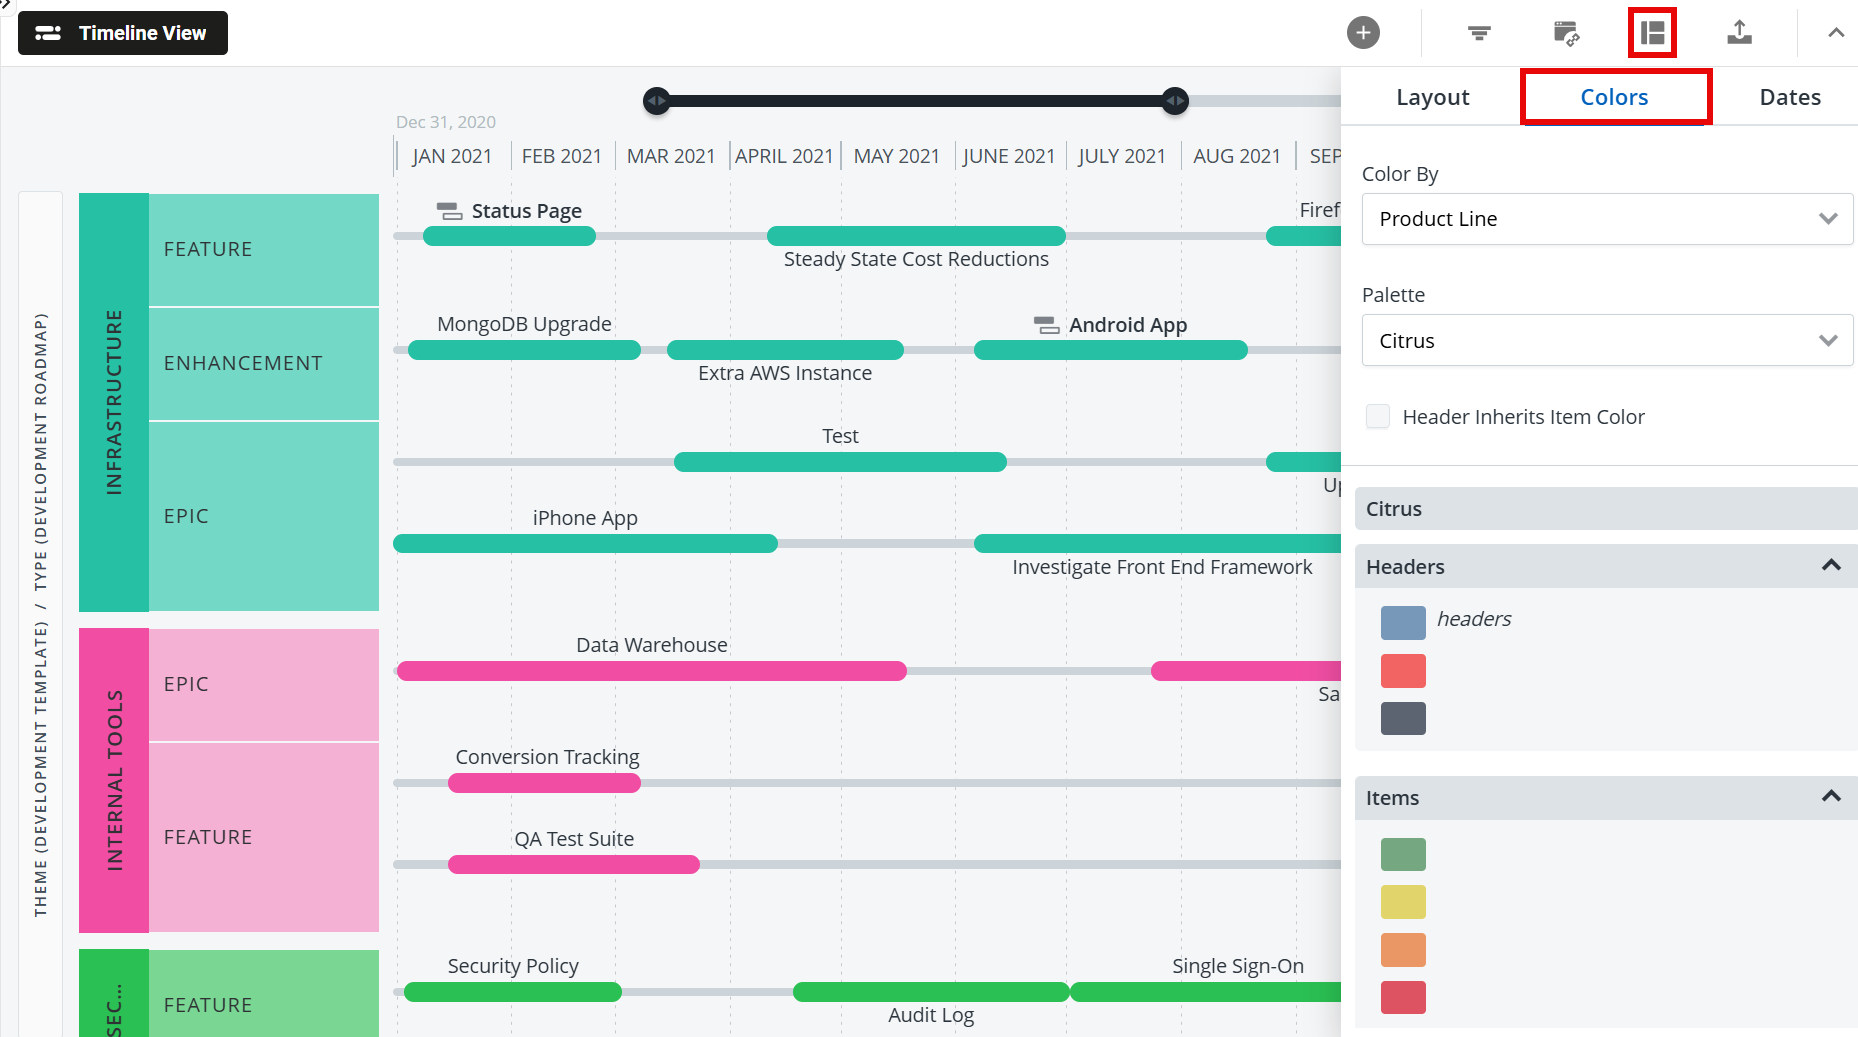
You have two options when setting a Timeline's colors: Color By Base Color and Color By Field. The default setting is Color By Base using a range of blues.
Change the Base Color
-
In the Colors tab, Below the Color By dropdown, click the paint drop and select a new color.
Color the Timeline by field
In addition to making your Timeline more visually appealing, Color by Field allows you to create a color-based pivot in addition to the time and field header pivots.
-
In the Colors tab, click the Color By dropdown.
-
In the dropdown, select the field you want to use for the color-based pivot. NOTE: At the moment, we do not support coloring by multi-select fields.
-
In the Palette dropdown, select the color palette you want to use.
-
To make the colors of the Headers match the colors you choose for the items in the Items section of the tab (see step 6), select Header Inherits Item Color below the Palette dropdown.
-
In the Headers section of the tab, drag and drop the Header label onto the color you want to apply to the Timeline's headers.
-
In the Items section of the tab, drag and drop the selected field's values (see step 2) onto the color swatches on the left to indicate how you want to color-code the items on the timeline.
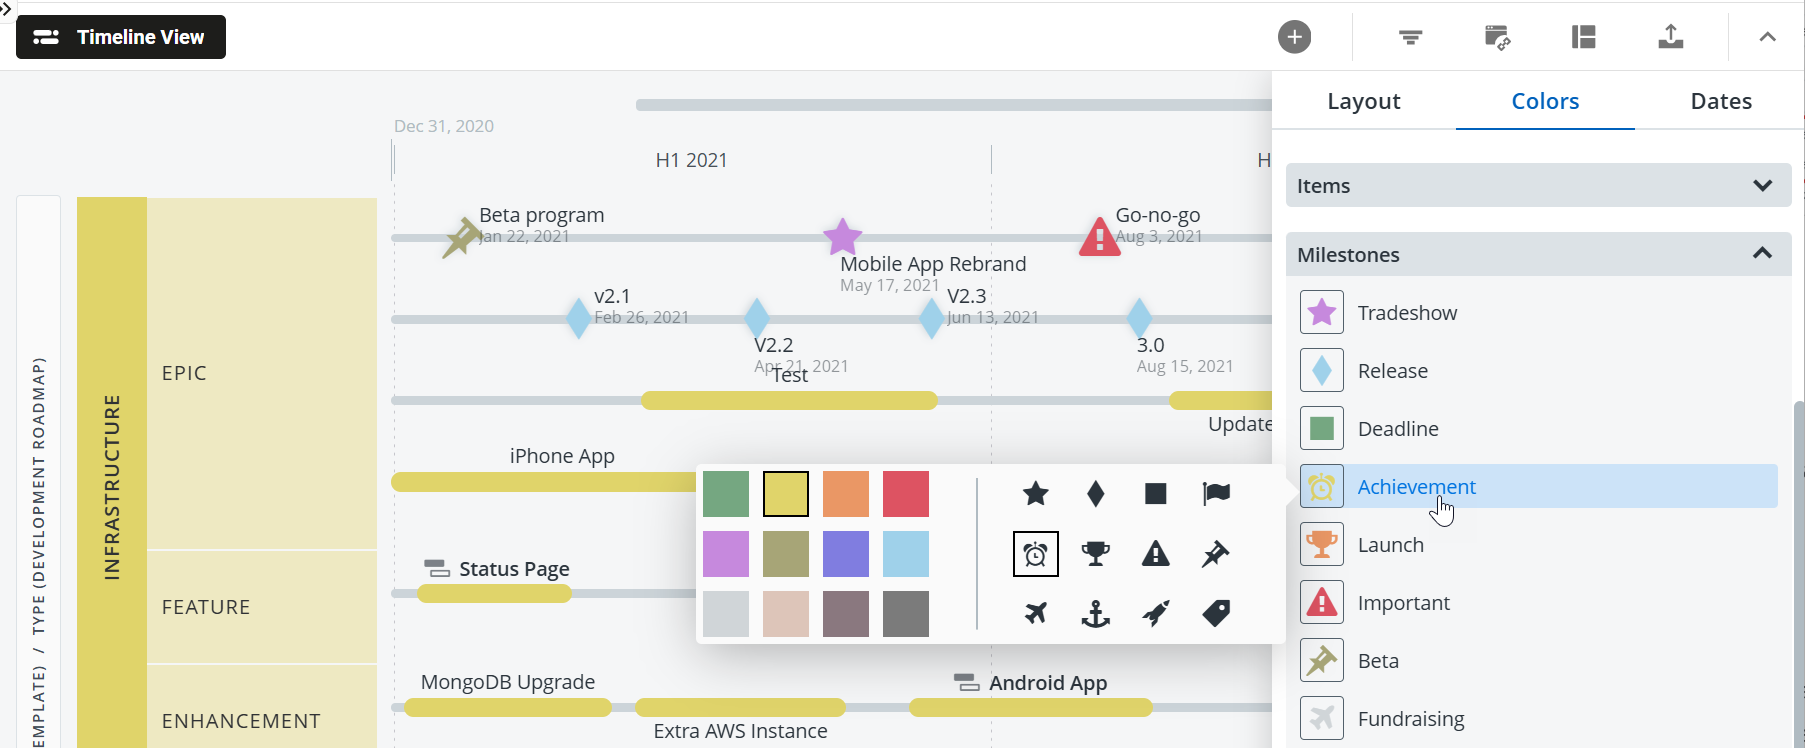
Set milestone icons and colors
You can also use the Format Color tab to select the icon and color to use for each milestone type that appears in Timeline
-
In the Colors tab, scroll down to the Milestones section.
TIP: You can also collapse the Headers and Items sections above. -
Click the milestone type you want to format.
-
In the flyout, select the new icon for the milestone.
-
Select the new color.
-
Click the Format icon, to close the tab.
Here's a snapshot of what your Timeline might look like after you format the layout and colors.
