This article will show you how to add a temporary, local groupings to a structure. To permanently group a structure, consider using a Group Generator.
Groups allow you to reorganize your work items with the click of a button. This way, you can quickly focus on specific business cases and see aggregate results from your data. You can group work items by most Jira fields, including custom fields.
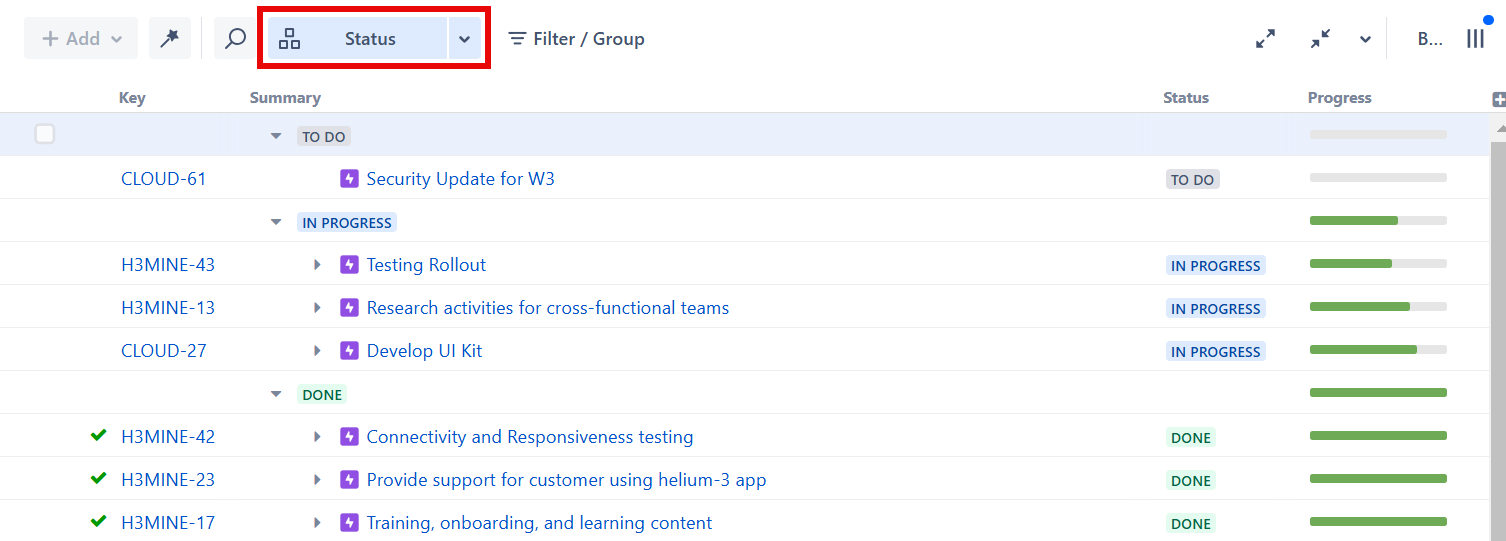
When you add a group to a structure, it creates a temporary, local adjustment, without changing the structure for everyone else. If someone opens the same structure while you have a group applied, they will still see the original structure.
When a temporary group is applied, drag and drop is not available between these groups.
To add a permanent, global grouping, try a Group Generator.
Adding a Group
To add a new group, select the Filter / Group button and:
-
Choose a saved group, or
-
Create a new group
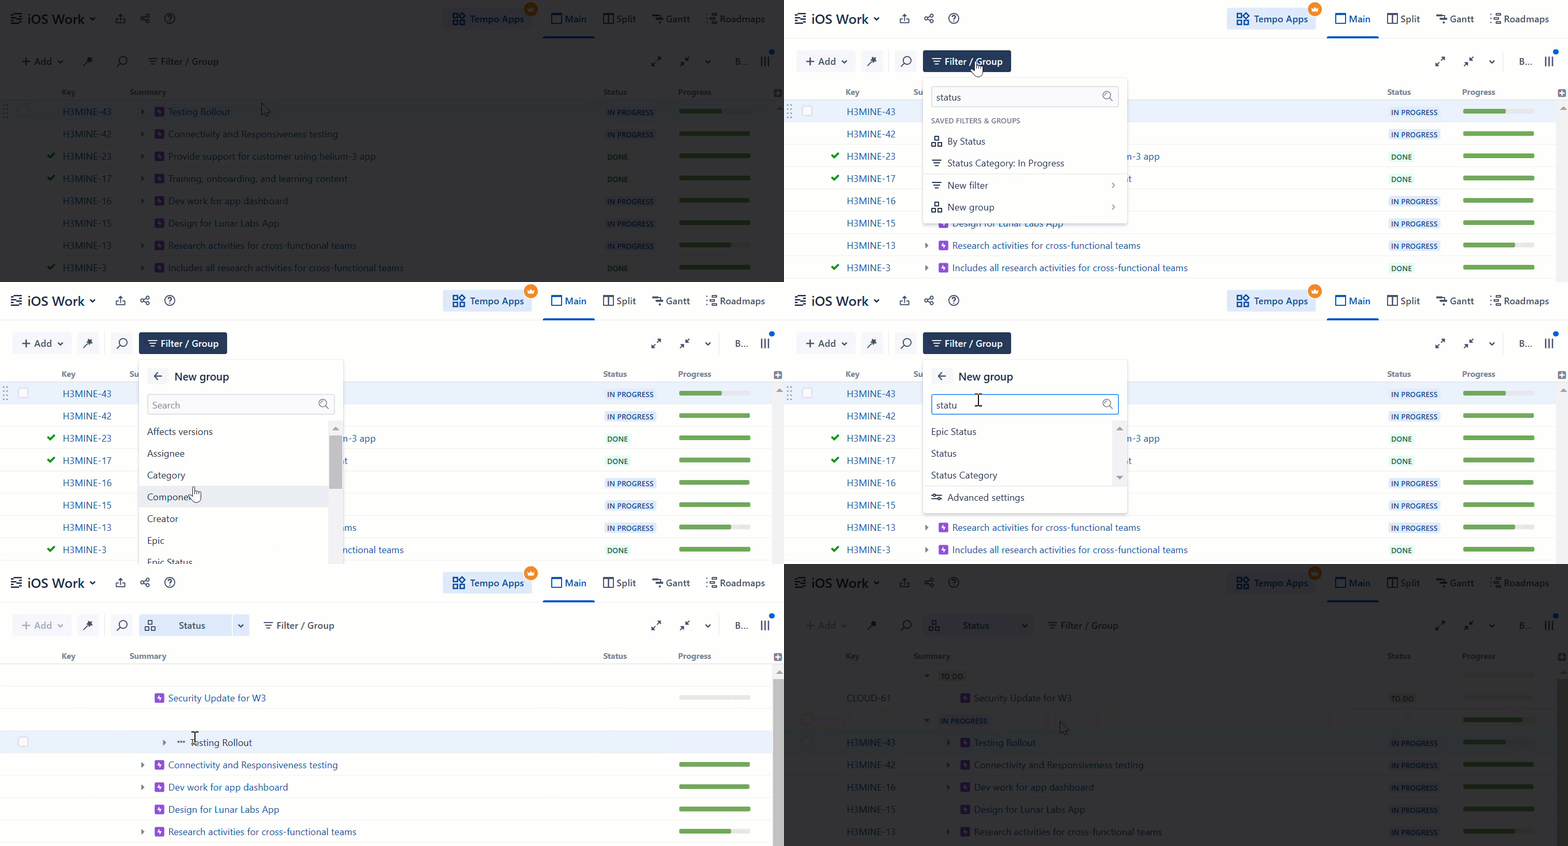
To customize the grouping level or consider other groups, select Advanced Settings at the bottom of the field list.
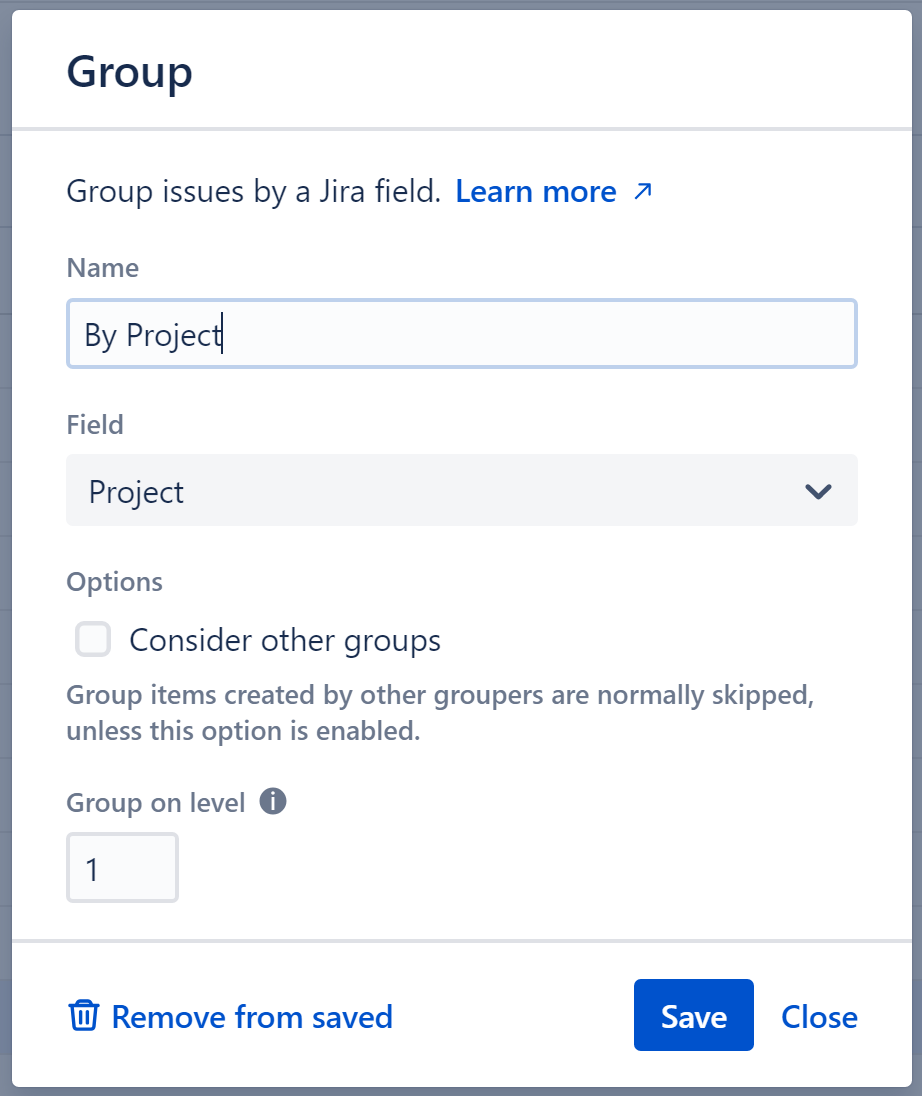
-
Name - This is the name that will be displayed on the Filters and Groups panel.
-
Field - Select the field you want to group work items by.
-
Consider other groups - By default, items created by another Group will be skipped unless this option is selected.
-
Group on level - Select which level within the hierarchy should be grouped.
Once you've configured the group, click Create. If you have Control permission for the structure, you can also add the new group to the Saved list by selecting Save Group.
You can edit these settings after a group has been created. See Editing a Group
Saved vs Unsaved
When you create a new group, it is temporary, only available to you, and will disappear the moment it's closed.
If you have Control permission for the structure, you can also save groups for later use and to share with others. See Saving a Group below.
Deactivating or Reactivating a Grouping
Once a group has been added to the Filters and Groups panel, you can deactivate or reactivate the grouping simply by clicking its name.

Removing a Group from the Panel
To remove a group from the Filters and Groups panel, select the down arrow next to the group’s name and choose Remove from panel.
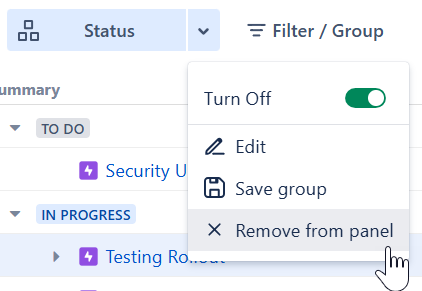
Unless the group has been saved, this will permanently delete the group.
Saving a Group
You can save groups to use again later and share with other users. Once saved:
-
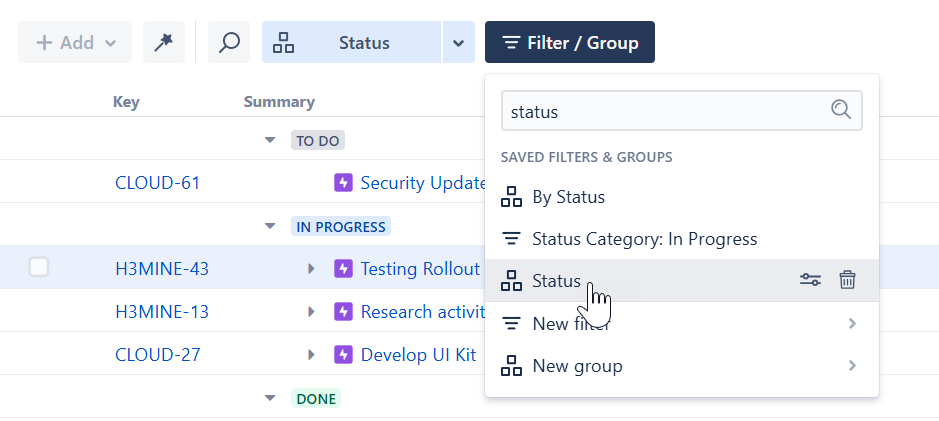
You can remove a group from the Filters and Groups panel and find it later in the Saved list
-
Anyone with access to the structure can access the group in the Saved list.
You must have Control access for a structure to save a group or edit a saved group.
To add a new group to the Saved list:
-
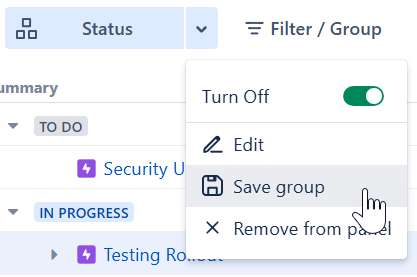
Select the down arrow next to the group’s name
-
Select Save group
-
Name the group and select Save
Once saved, the group will appear in the Saved Filters and Groups list.
Grouping Order
Groups that affect the same levels are applied in the order they appear on the Filters and Groups panel.

To change this order, drag the groups into the order you want them applied - see Reordering Filters and Groups.
If groups are configured for different levels, the order they're applied won't matter.
Editing a Group
Changes to a saved group affect all users with access to the structure.
To make changes to an existing group:
From the Panel
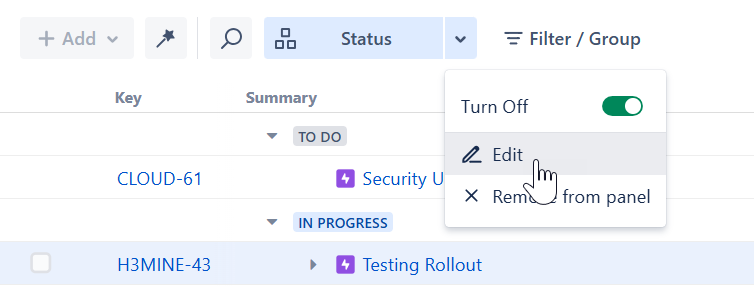
If the group is currently applied in the Filters and Groups panel, select the downward arrow next to its name and choose Edit.
From the Saved List
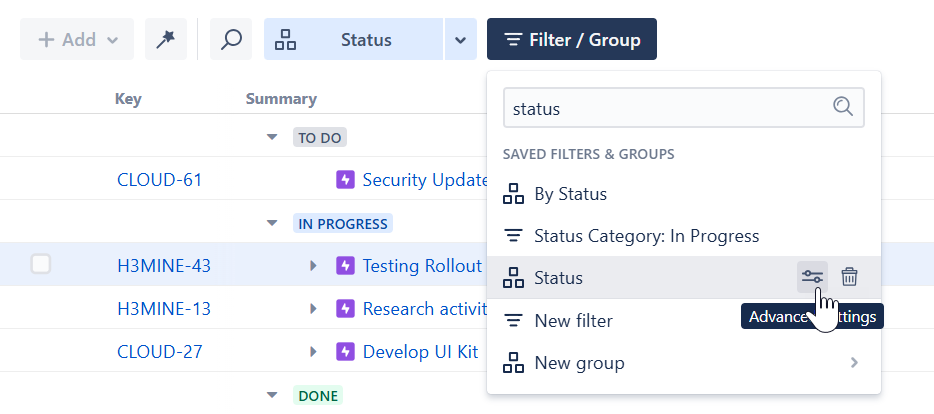
Select the Filters / Groups button, locate the group you want to edit, and select the Advanced Settings icon next to that group.
Reordering Filters and Groups
To change the order filters and groups are displayed in the Filters and Groups panel, simply drag a filter or group from one location to another.

Deleting a Group
To delete a group that hasn’t been saved, simply remove it from the Filters and Groups panel.
To delete a saved group:
-
Select the Filter / Group button
-
Locate the group you want to delete
-
Select the trashcan icon next to that group
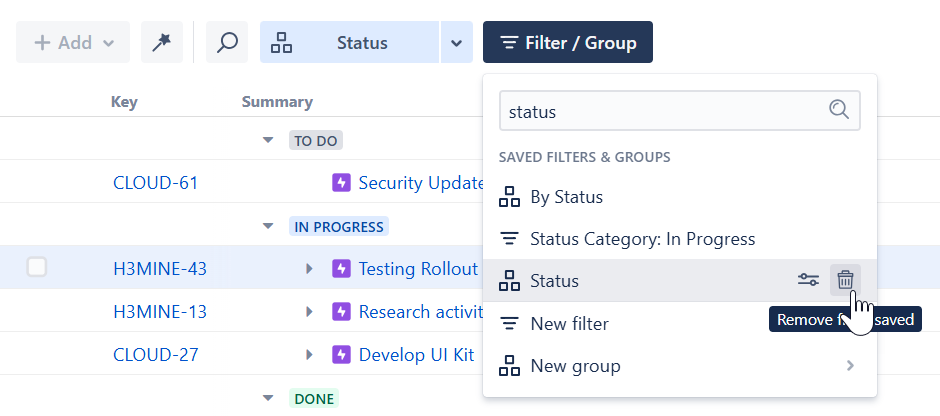
Deleting a saved group removes it for all users.
