Before exporting data, we kindly recommend you to create a separate database for Jira data export and add its configurations to SQL Connector. Since it’s just a recommendation, feel free to export Jira data in a convenient way for you.
You can use our comprehensive step-by-step guide to configure the database you need.
If you already have a database you’d like to use, please proceed to the steps below.
-
Being signed in to your Jira Cloud instance, select Apps, and then select SQL Connector for Jira.
-
On the left-side menu, select Databases, and then select Create database.

-
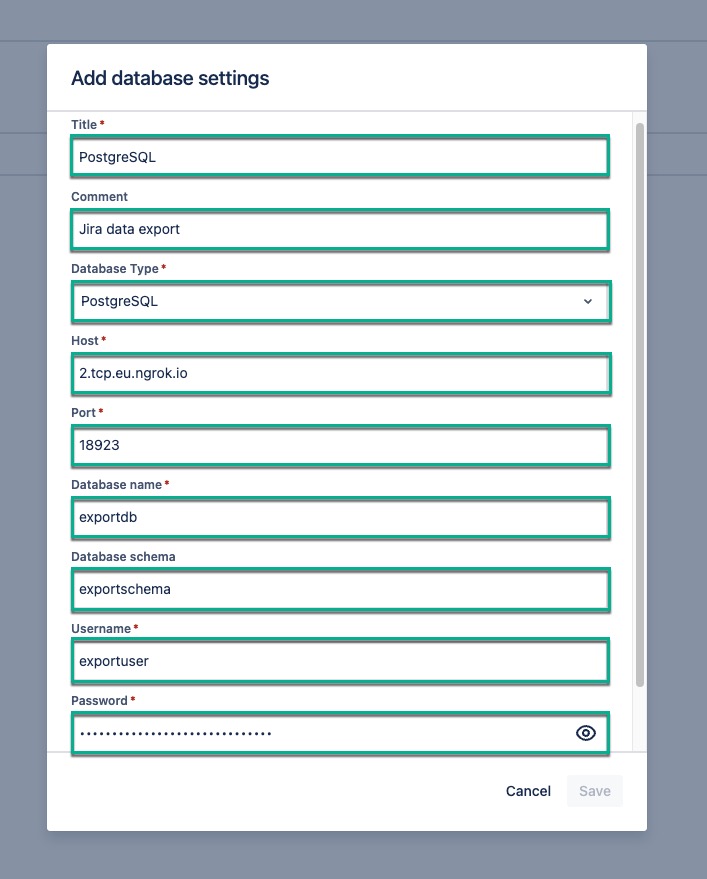
In the Title* field, enter the title for your database.
-
[Optional] In the Comment field, enter any useful information.
-
In the Database Type* field, select the type of your database.
-
In the Host* field, enter the host of your database.
Private IP address is not allowed. Read more.
-
In the Port* field, enter the port of your database.
-
In the Database name*, enter the name of your database.
-
[Optional] In the Database schema*, enter the data schema.
-
In the Username* field, enter the username of your database.
-
In the Password* field, enter the password to your database.
-
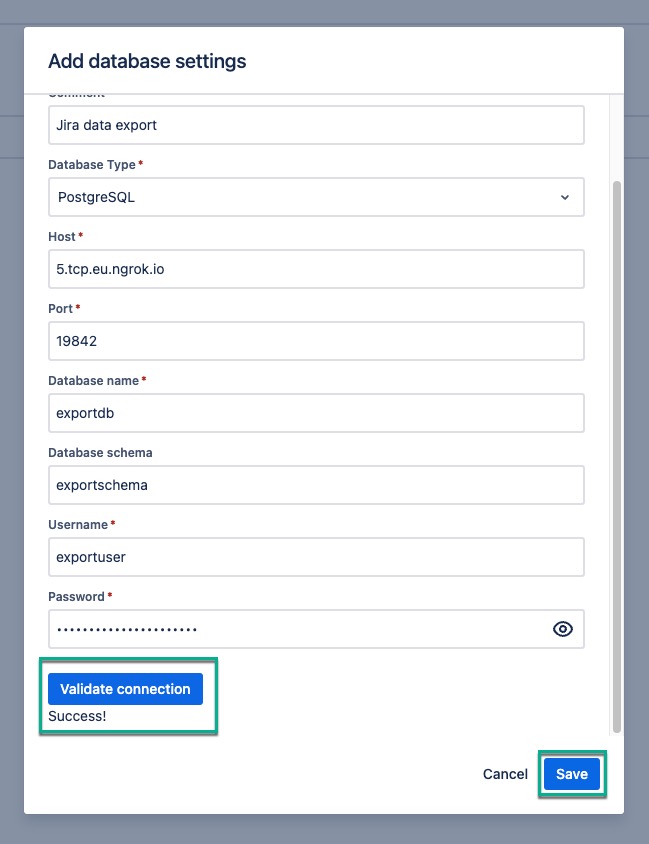
Select Validate connection, and then select Save.