This article is for Cloud and Data Center.
Approving a plan in Tempo Planner is very simple. Here are three ways of reviewing, approving or rejecting a plan.
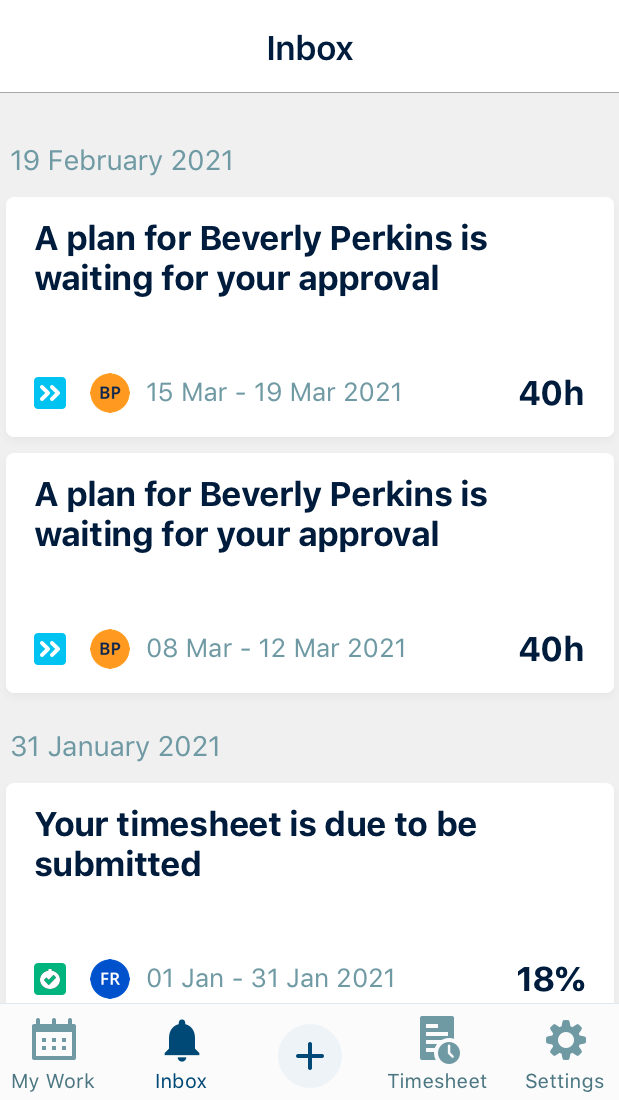
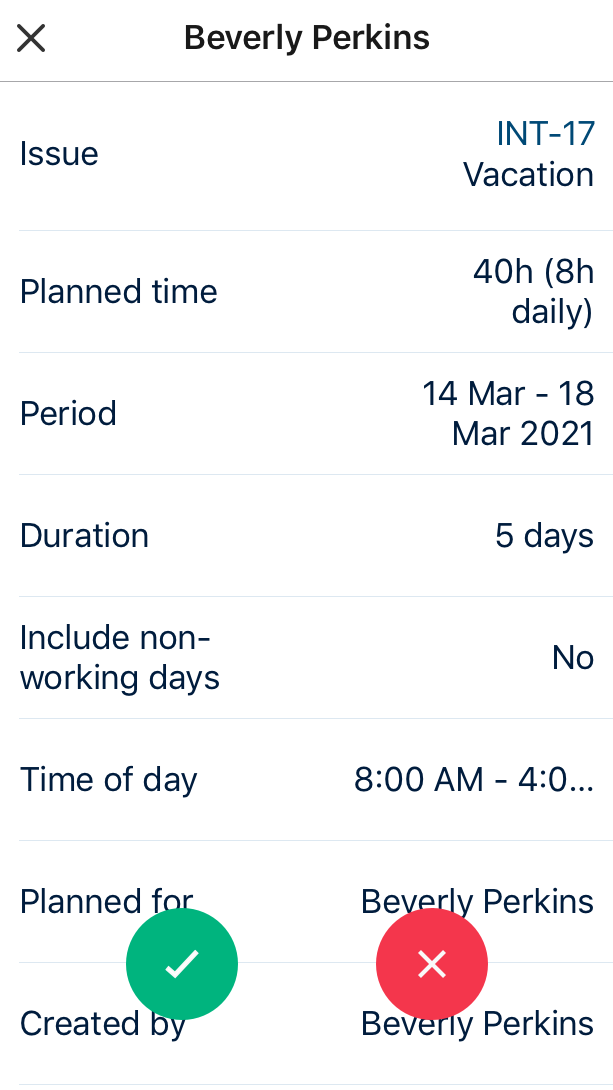
Approving plans through the mobile app

|
|
|
|---|
Approving plans through the approval request email
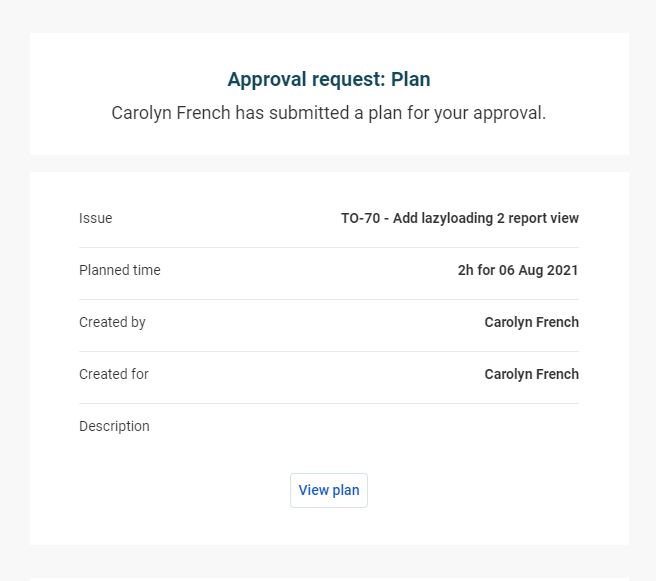
When a team member creates a plan, the team lead will receive an email saying that there’s a plan pending approval. To review and approve the plan, click in the “View Plan” button from within the email.
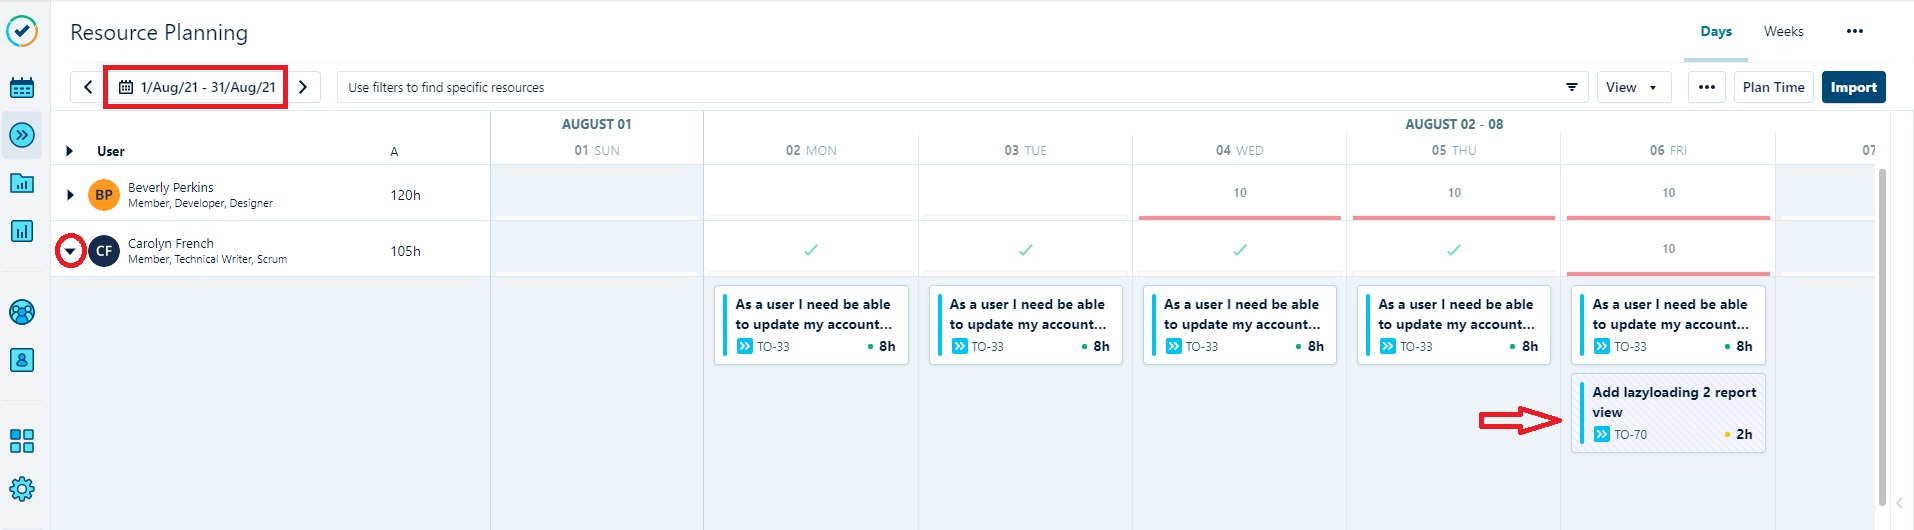
It will bring you to the Resource Planning view filtered by the user who requested the plan and the plan’s period.
The plan waiting for your approval will be crossed and greyed out.
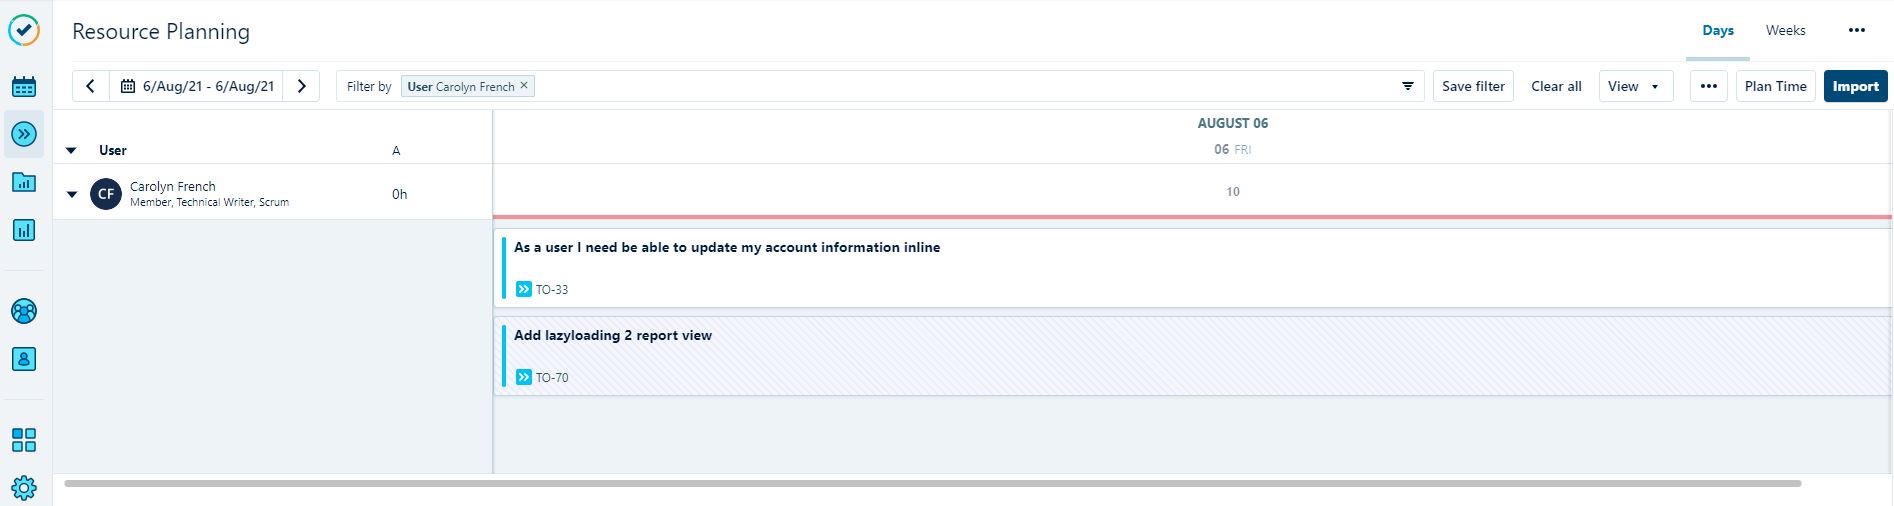
Click on the plan, and if all details are good, change the approval status to “Approved” and it’s done!
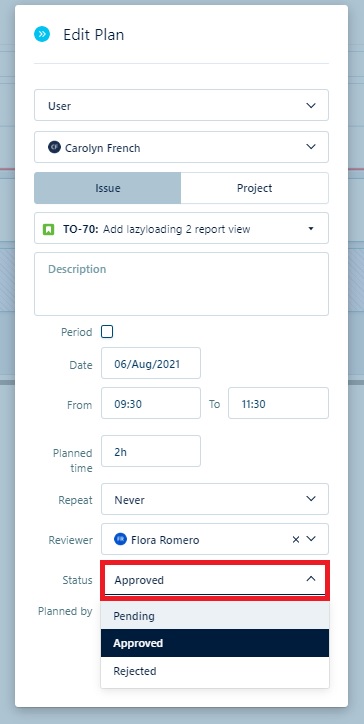
The team member will receive an email saying that their plan has been approved.
Approving plans directly on the Resource Planning view
In the Resource Planning view, choose the period of the plan on the top left side. Then you can either filter by user or scroll down to the user you need to approve a plan. Click on the user to expand the planning details and click on the plan.
Check the details and change the status to approve.