You can configure an incremental refresh on Tableau Cloud by following these steps.
📘 Instructions for WDC (web data connector) with Tableau Bridge
-
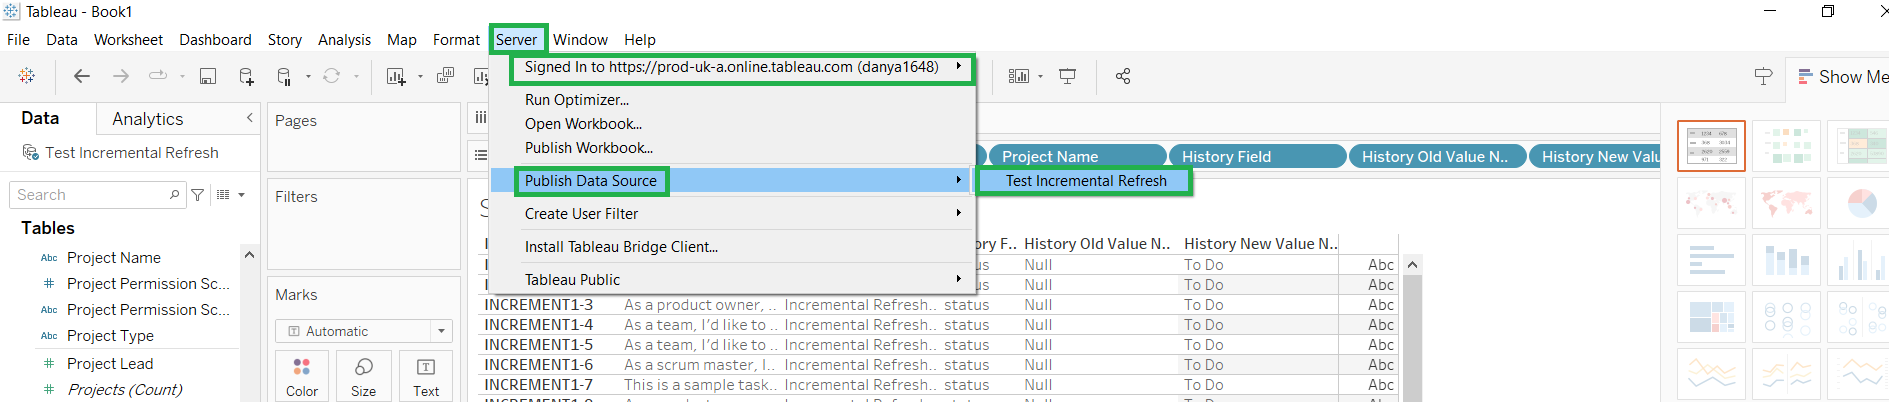
In Tableau Desktop, make sure to sign in to your Tableau Cloud account and publish your data source there:
-
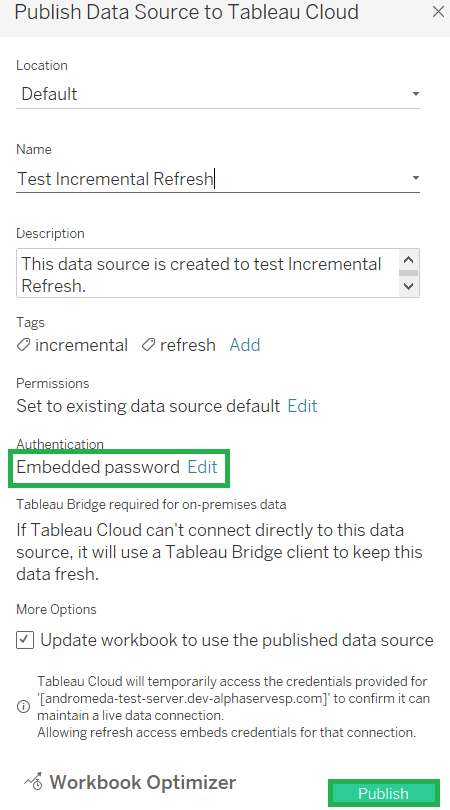
Use the Embedded password option within the Authentication field and enter the credentials associated with your source (Jira username and password or PAT (Personal Access Token)). Click Publish:
-
After successful publishing, proceed to the installation and initial setup of Tableau Bridge, as shown here.
-
In Tableau Cloud, go to Settings > Bridge and add a new empty pool of clients:

-
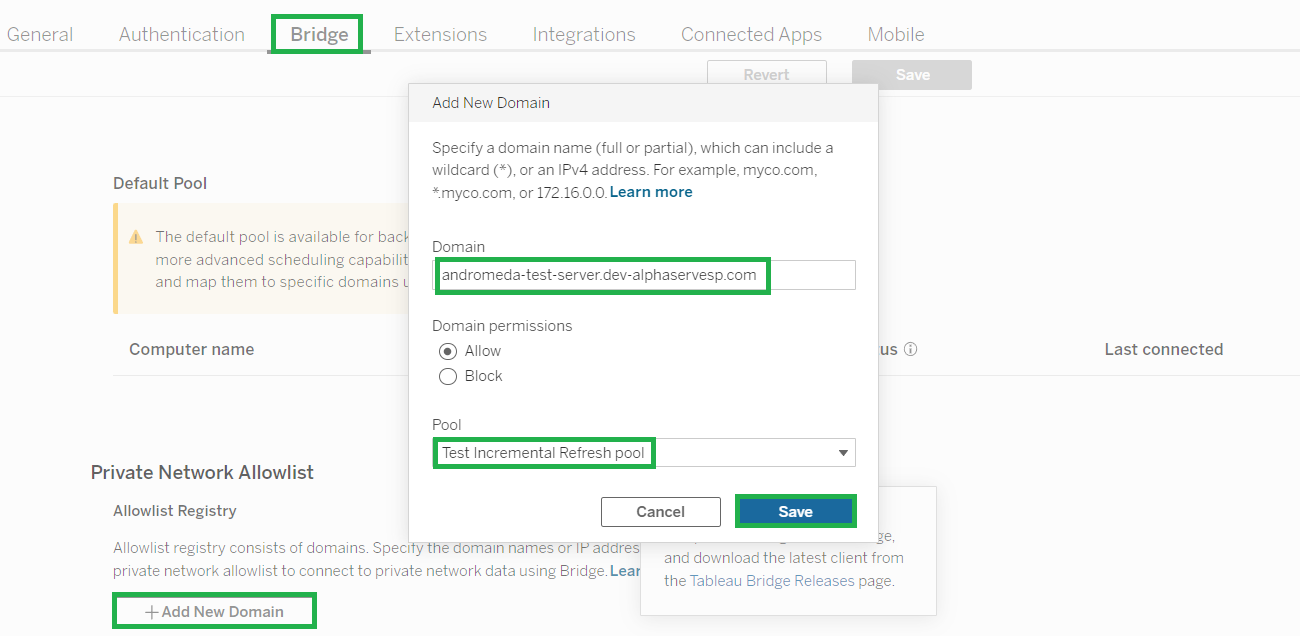
Then scroll down to the Private Network Allowlist section and add your Jira Server/Data Center domain name or IP address to the allowlist of Tableau Bridge. During the process, select the newly-created pool:
-
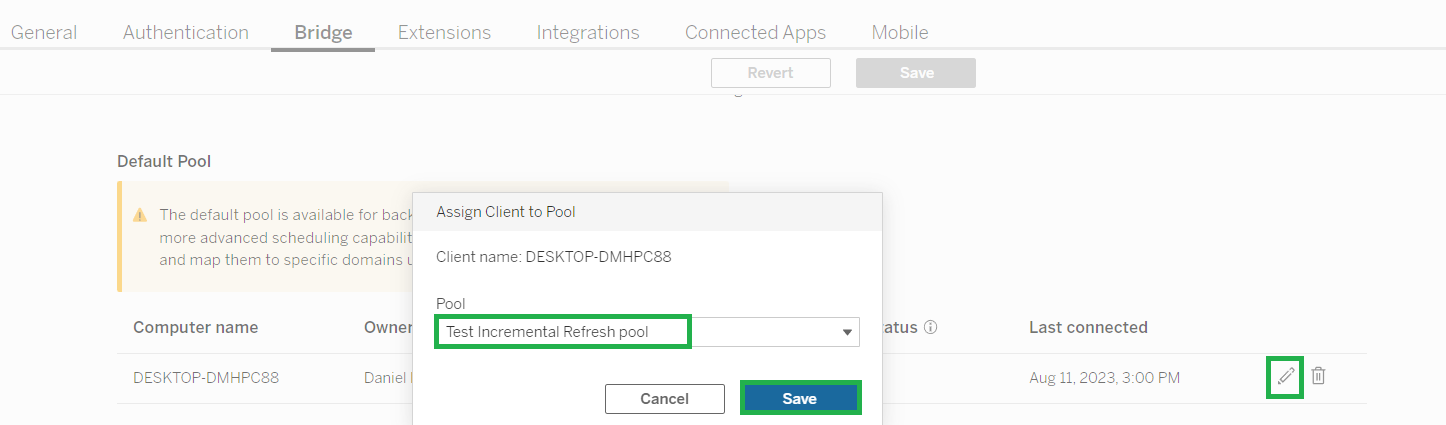
Under the Default Pool section, find the machine where the Tableau Bridge client is installed and add it to the same pool you configured before:
-
This way, you redirect the pool from your current machine to the required Jira instance.
-
Remove the added pool and domain/IP to return a default pool to the present machine;
-
Update the chosen instance by editing the domain/IP and assigning the appropriate pool to it;
-
Add another instance to the existing pool and refresh data from the same Tableau Bridge client.
-
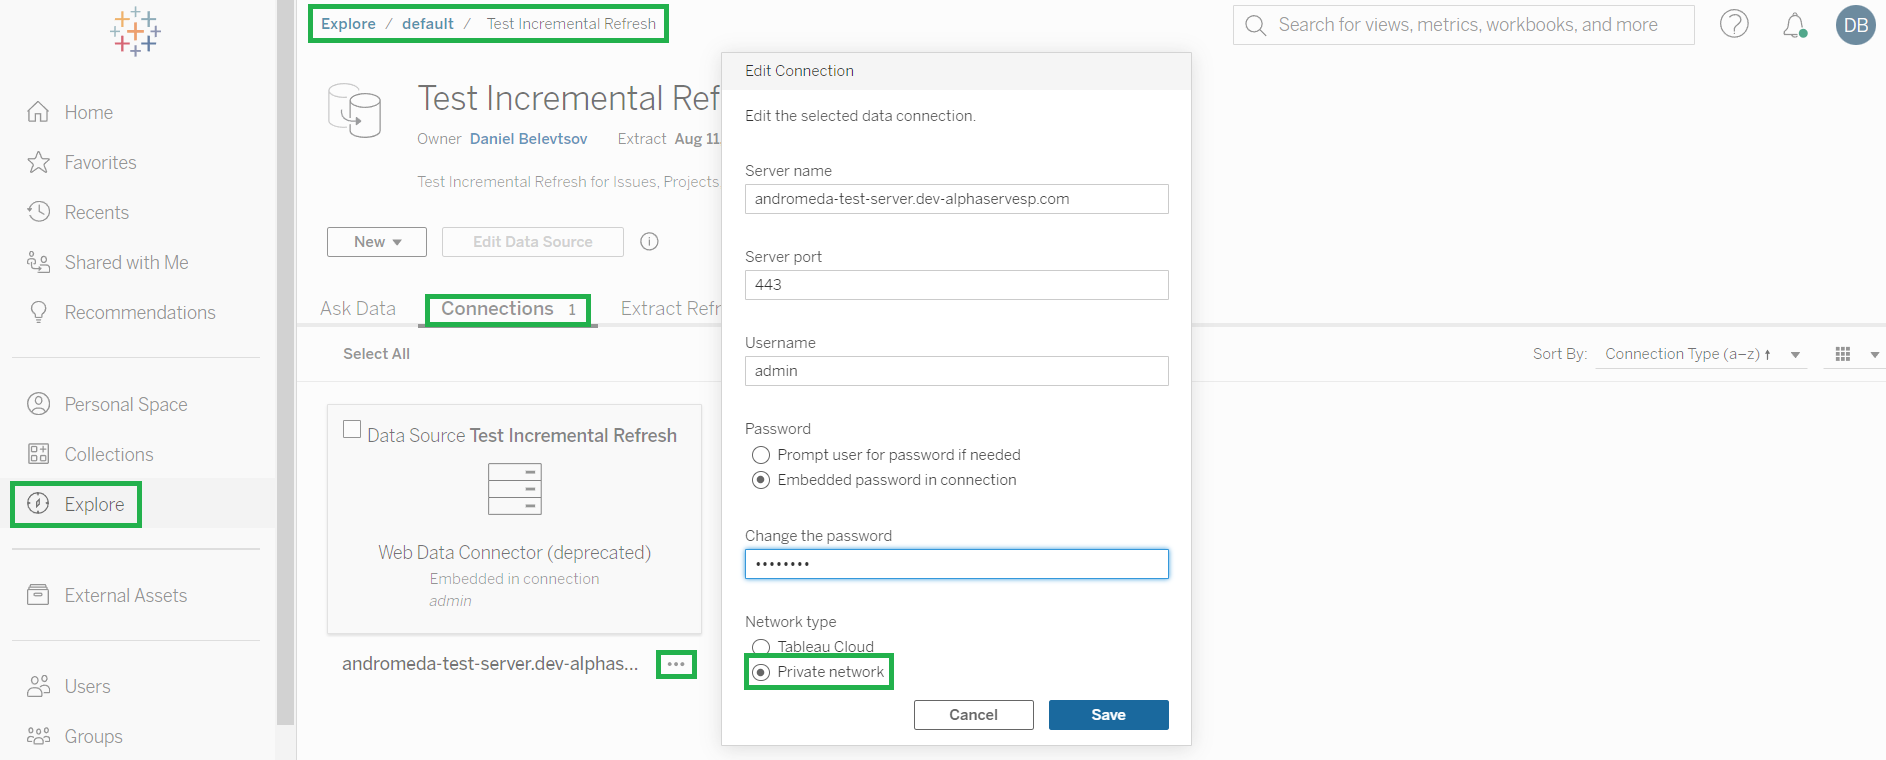
Once it is done, go to Explore > your project (like default) > your data source > Connections > the More button (…) > Edit Connection… and double-check the details. Make certain the Private network option is chosen under the Network type section:
-
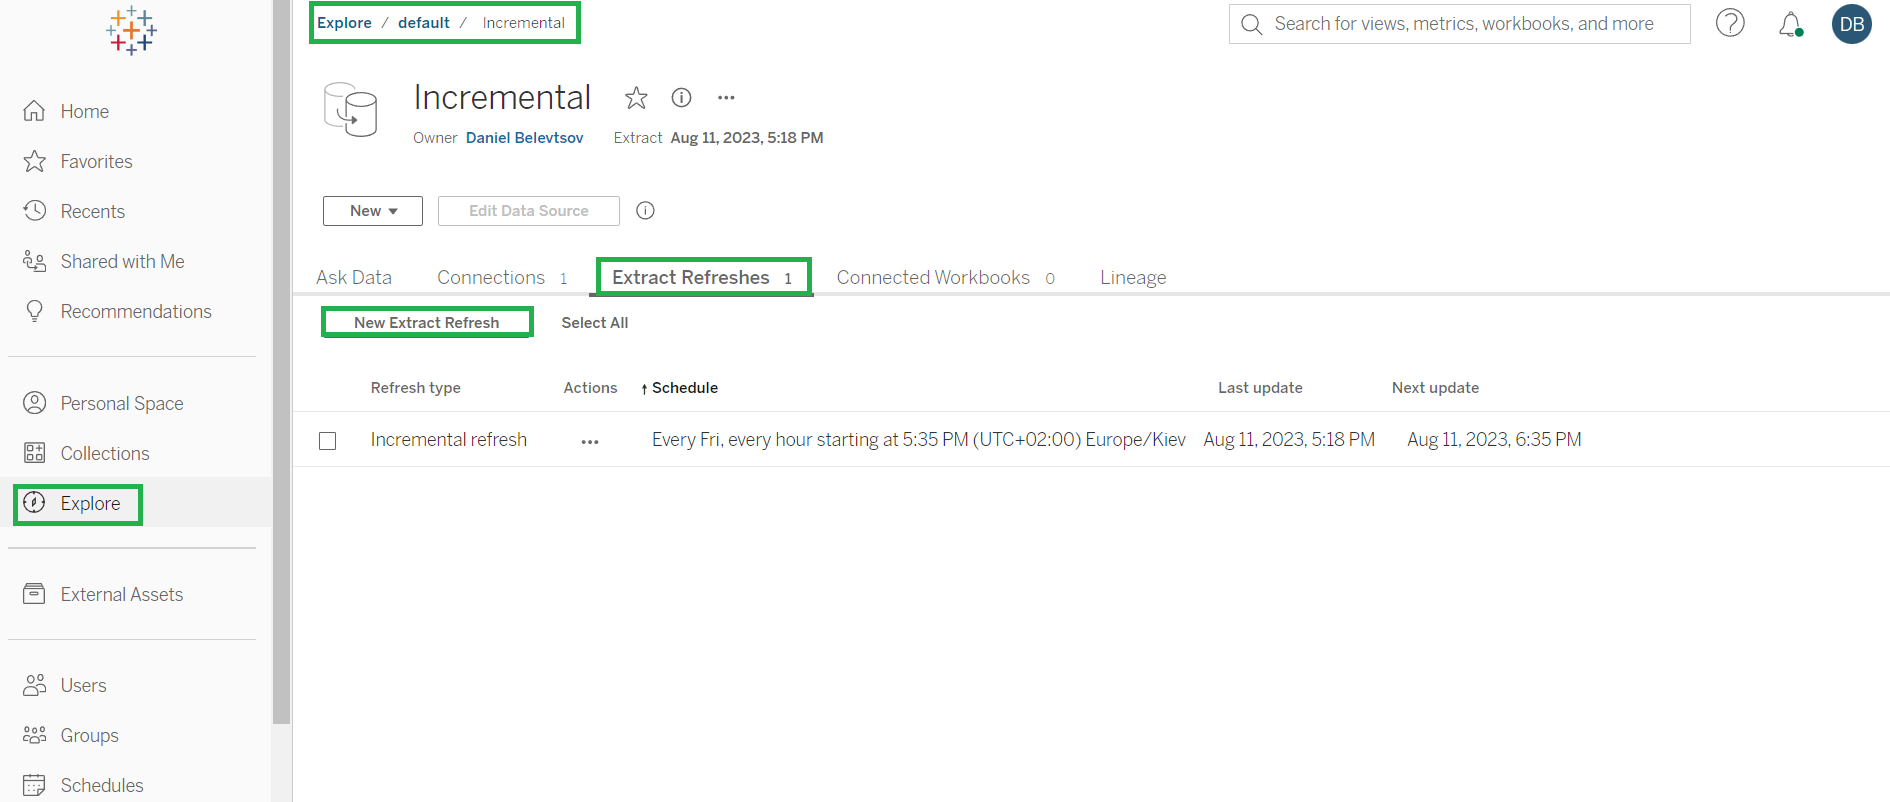
Schedule an incremental refresh in Extract Refreshes > New Extract Refresh:
-
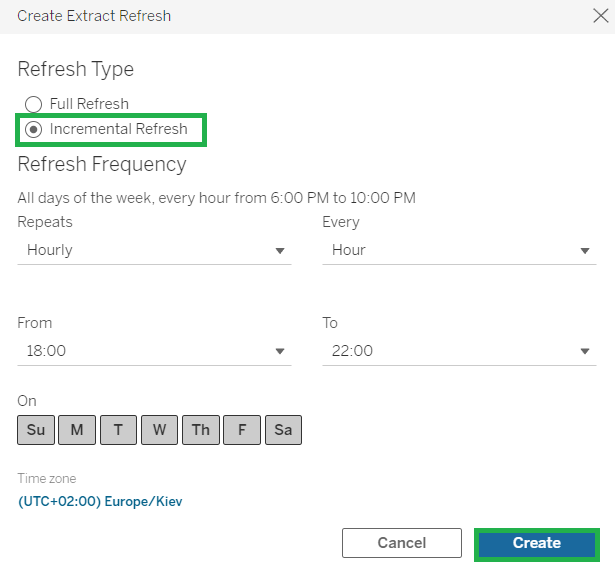
Select Incremental Refresh, determine the schedule, and press Create:
-
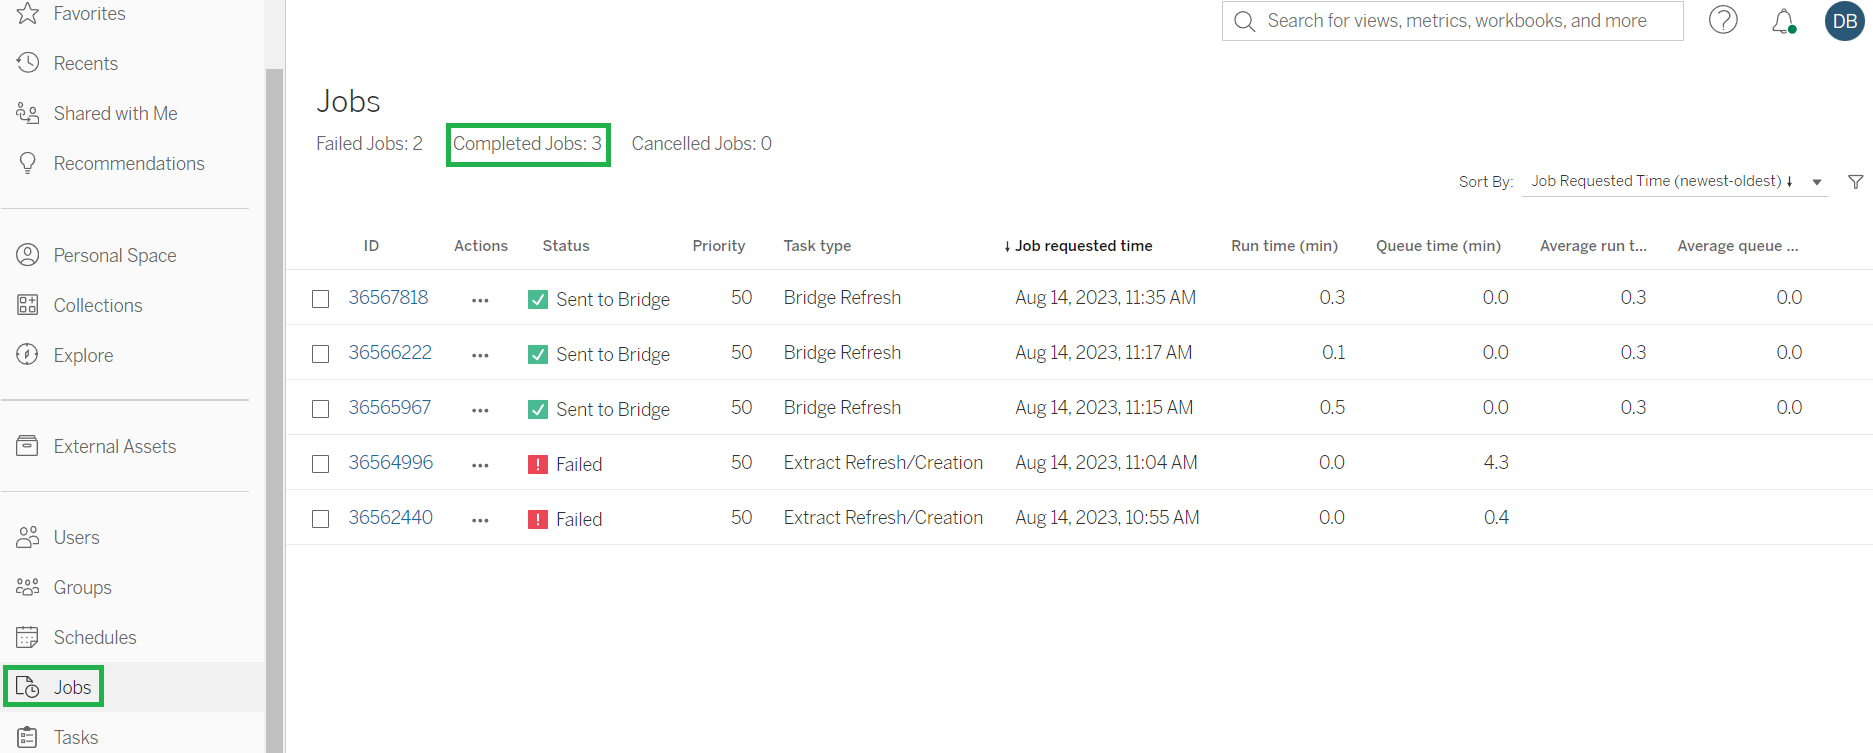
View the incremental refresh progress in Jobs: