In this tutorial, you will track CAPEX and OPEX on worklogs. You will do this by creating accounts and linking them to Jira projects, issues, and worklogs. Then you will view all logged CAPEX and OPEX hours in a custom report.
Prerequisites:
-
A Jira project management project is needed for this tutorial.
-
The project must have at least 2 project tasks with original and remaining estimates.
-
Make sure the Account field is available on the Issue page.
-
Make sure you know exactly which issues are Opex and Capex related. For example, Task - 1: Development = CAPEX, Task - 2: Training = OPEX.
Step 1: Creating Tempo Account categories
Before creating accounts, define the Account Categories by which to group your accounts. Create new categories for your customer accounts, such as Development, Sales and Marketing, Training, Service and Maintenance, etc. Specify a type for your categories: Billable, Internal, Capitalized, or Operational.
Example:
|
Account Category |
Account Category Type |
|---|---|
|
Development |
Capitalized |
|
Training |
Operational |
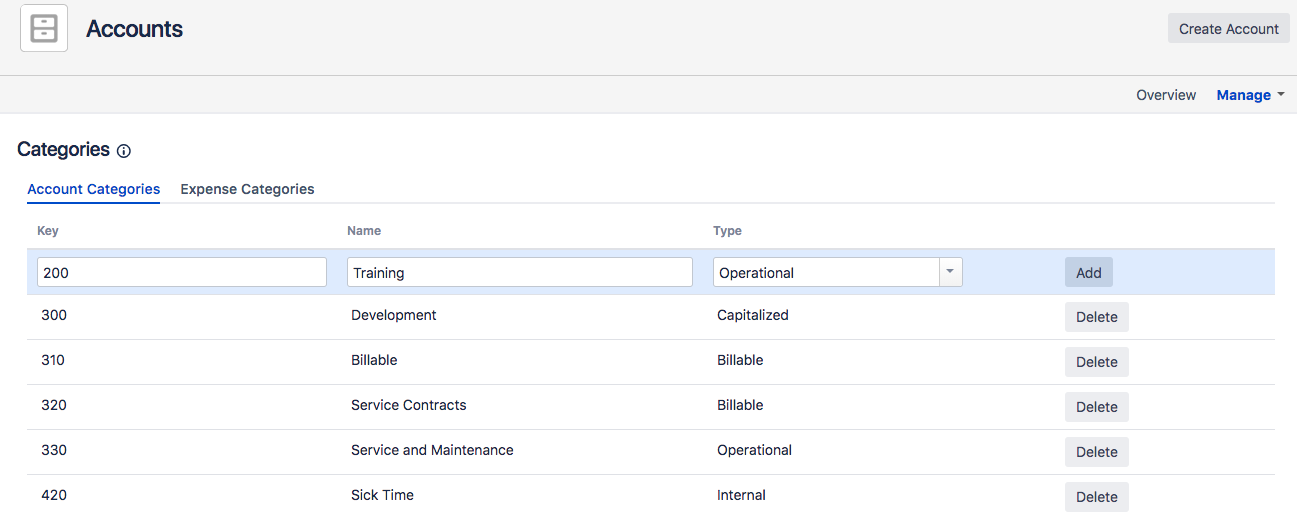
Follow the instructions in Creating and Deleting Account Categories to define your account categories.
Step 2: Creating a CAPEX account and linking it to your Jira project
Now you can set up accounts and link them to your Jira projects and issues. Create a CAPEX account and name it App Development. Assign Taylor as the Account Lead and associate the Development category with the account. Because you already categorized Development as Capitalized, the account will automatically be specified as a Capitalized account.
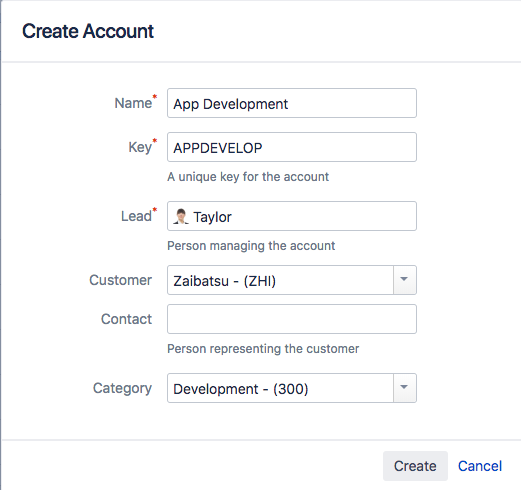
Follow the directions in Creating and Editing Accounts to add the new account.
When you have created the account, you need to link it to your Jira project.
Step 3: Creating an OPEX account and linking it to your Jira project
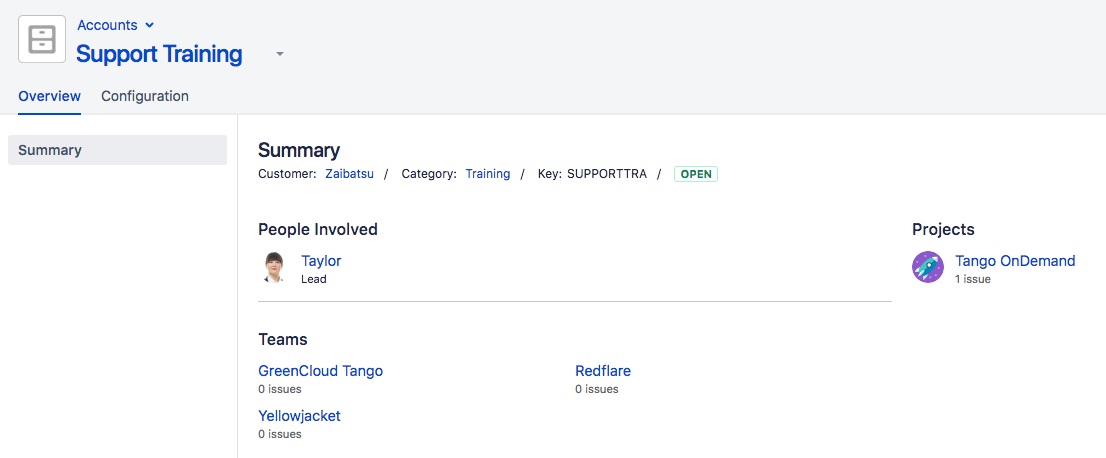
Similarly, create an OPEX account and name it Support Training. Again, Taylor is the Team Lead and the category is Training. This account will be specified as an Operational account type.
Again you need to link the the account to the same project as in Step 2.
Step 4: Linking a CAPEX account to issues
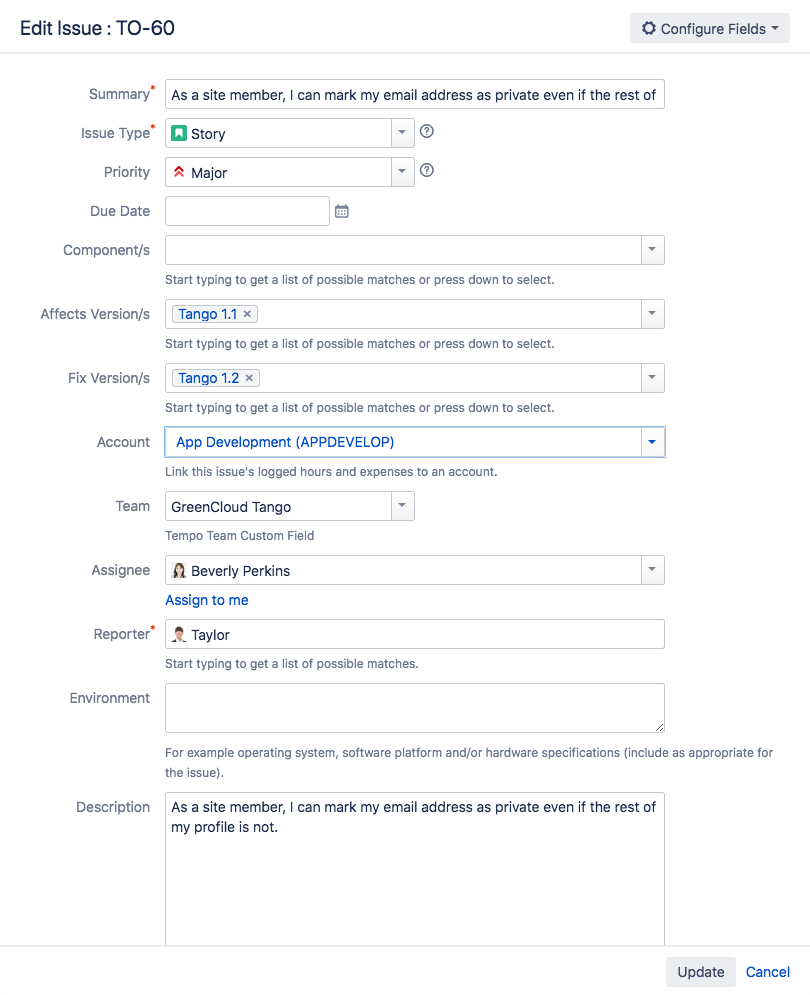
Now you need to link the project issues to the correct accounts; for example, issues that relate to capitalized work, such as development, should be linked with a CAPEX account. Open a development issue and associate your App Development account to it.
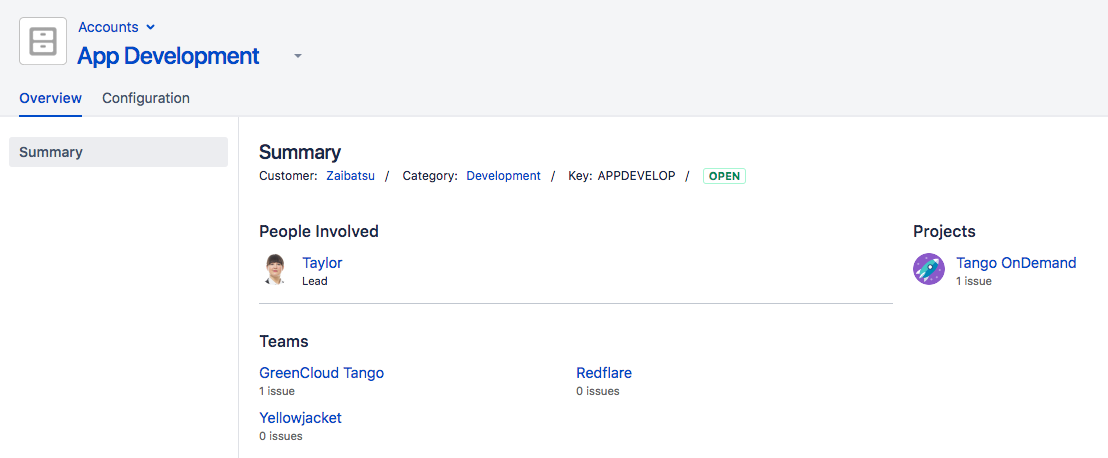
When you have updated the issue, log some time to it. Then browse to the App Development account. The issue count under your linked project should now show 1 issue.
Step 5: Linking an OPEX account to issues and logging time
Similarly, the project issues relating to operational work, such as training, need to be linked to an OPEX account. Open a training issue and link the Support Training account created in Step 2 to it.
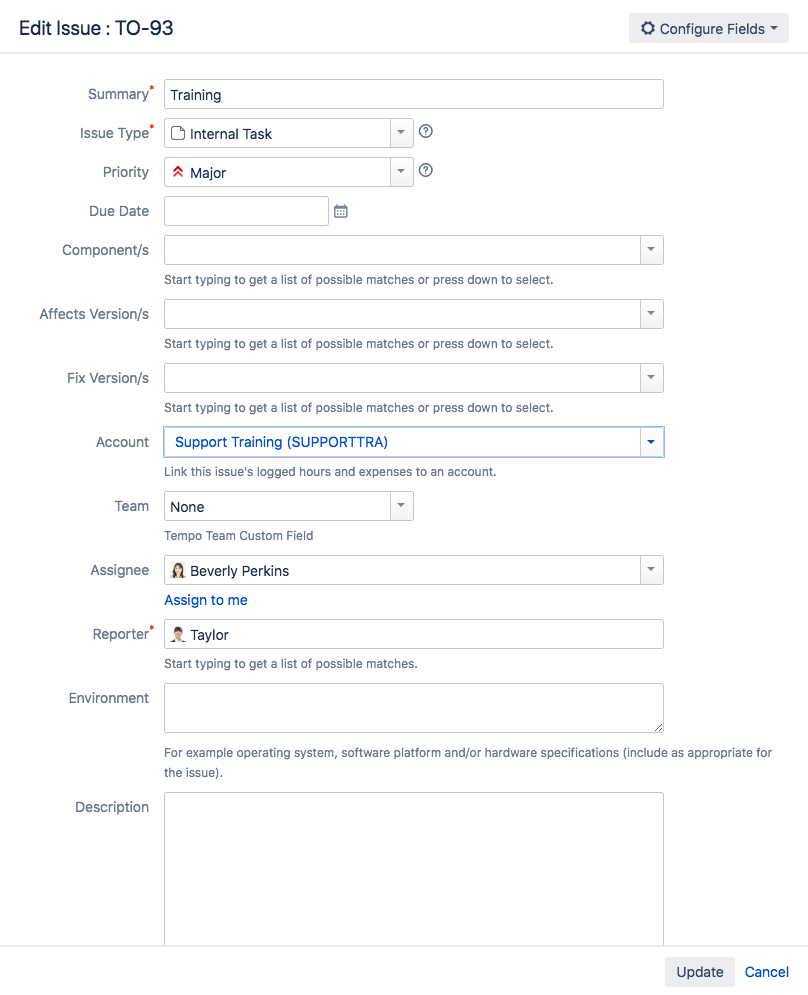
When you have updated the issue, log some time to it. Then browse to the Support Training account. The issue count under your linked project should now show 1 issue.
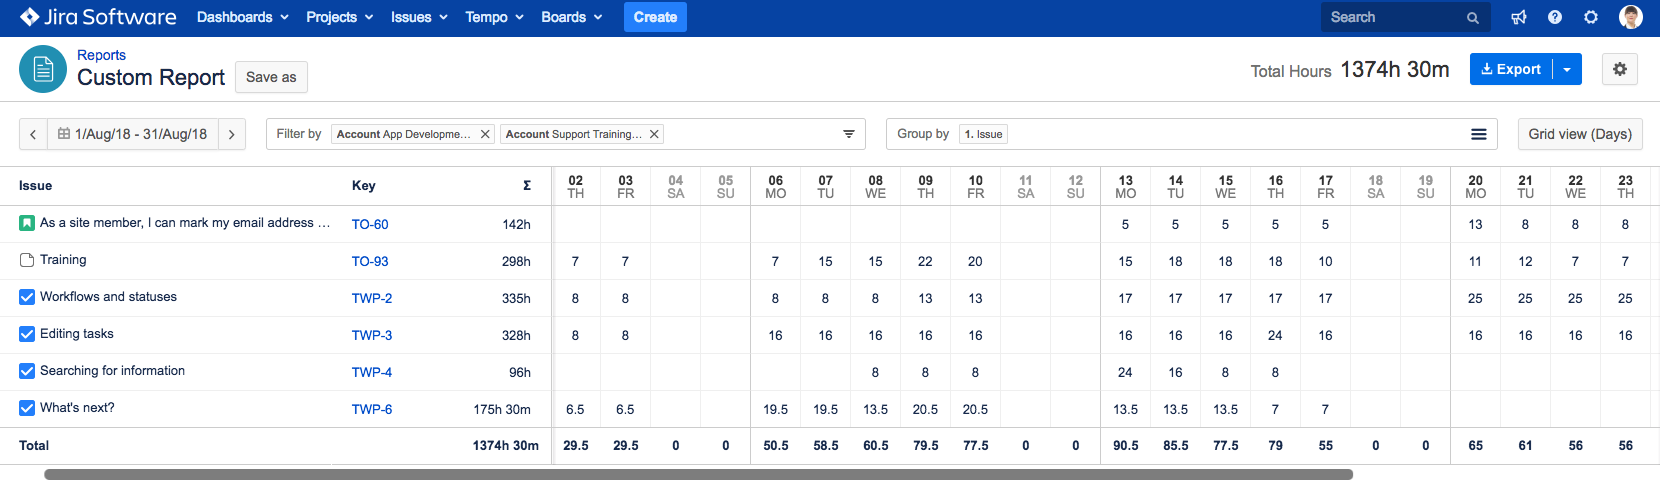
Step 6: Viewing all CAPEX versus OPEX hours
In a Custom Report, you can view all hours logged to issues that are linked to the CAPEX and OPEX accounts. Generate a Custom Report, filter it by App Development (CAPEX) and Support Training (OPEX). You can then export the data for invoicing.
Step 7: Viewing all CAPEX versus OPEX hours across accounts
If you have multiple CAPEX and OPEX accounts, you can view all Capitalized and Operational hours logged on issues across your accounts. Generate a Custom Report, filter it by Account Category Type (Capitalized or Operational).
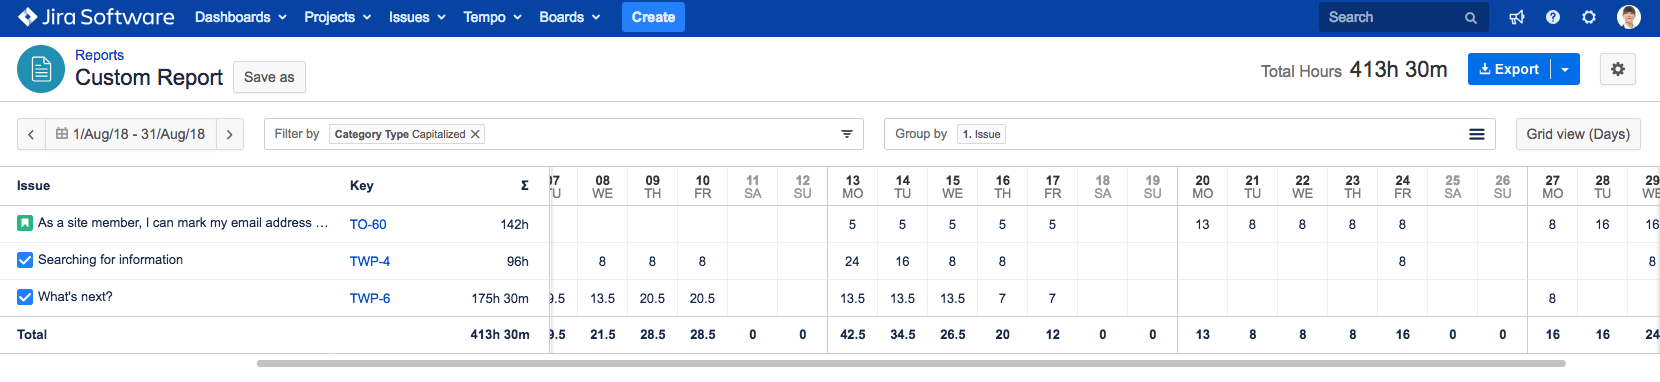
Follow the steps in Viewing Reports to generate the report.