Get Access to the Migration Assistant App
The first step is to obtain access to the Jira Cloud Migration Assistant App from the Atlassian Marketplace.
You should verify your licenses to see if you have the latest versions of Tempo and Jira installed. If the latest version of Tempo is not installed with the JCMA then the migration might encounter problems along the way.
Do the following necessary steps before starting the migration:
-
Upgrade to the latest version of Jira. See Tempo version compatibility.
-
Install the highest Tempo version compatible with the installed Jira version. See Tempo latest versions.
Make sure that you have the latest versions of Tempo software with the latest version of Jira installed. Upgrading is necessary to avoid any problems that might occur during migration.
Set Debug Level Logging
Enable the debug level logging option on your Data Center instances so that any issues that might be encountered during migration can be traced back for better troubleshooting purposes. To do so:
-
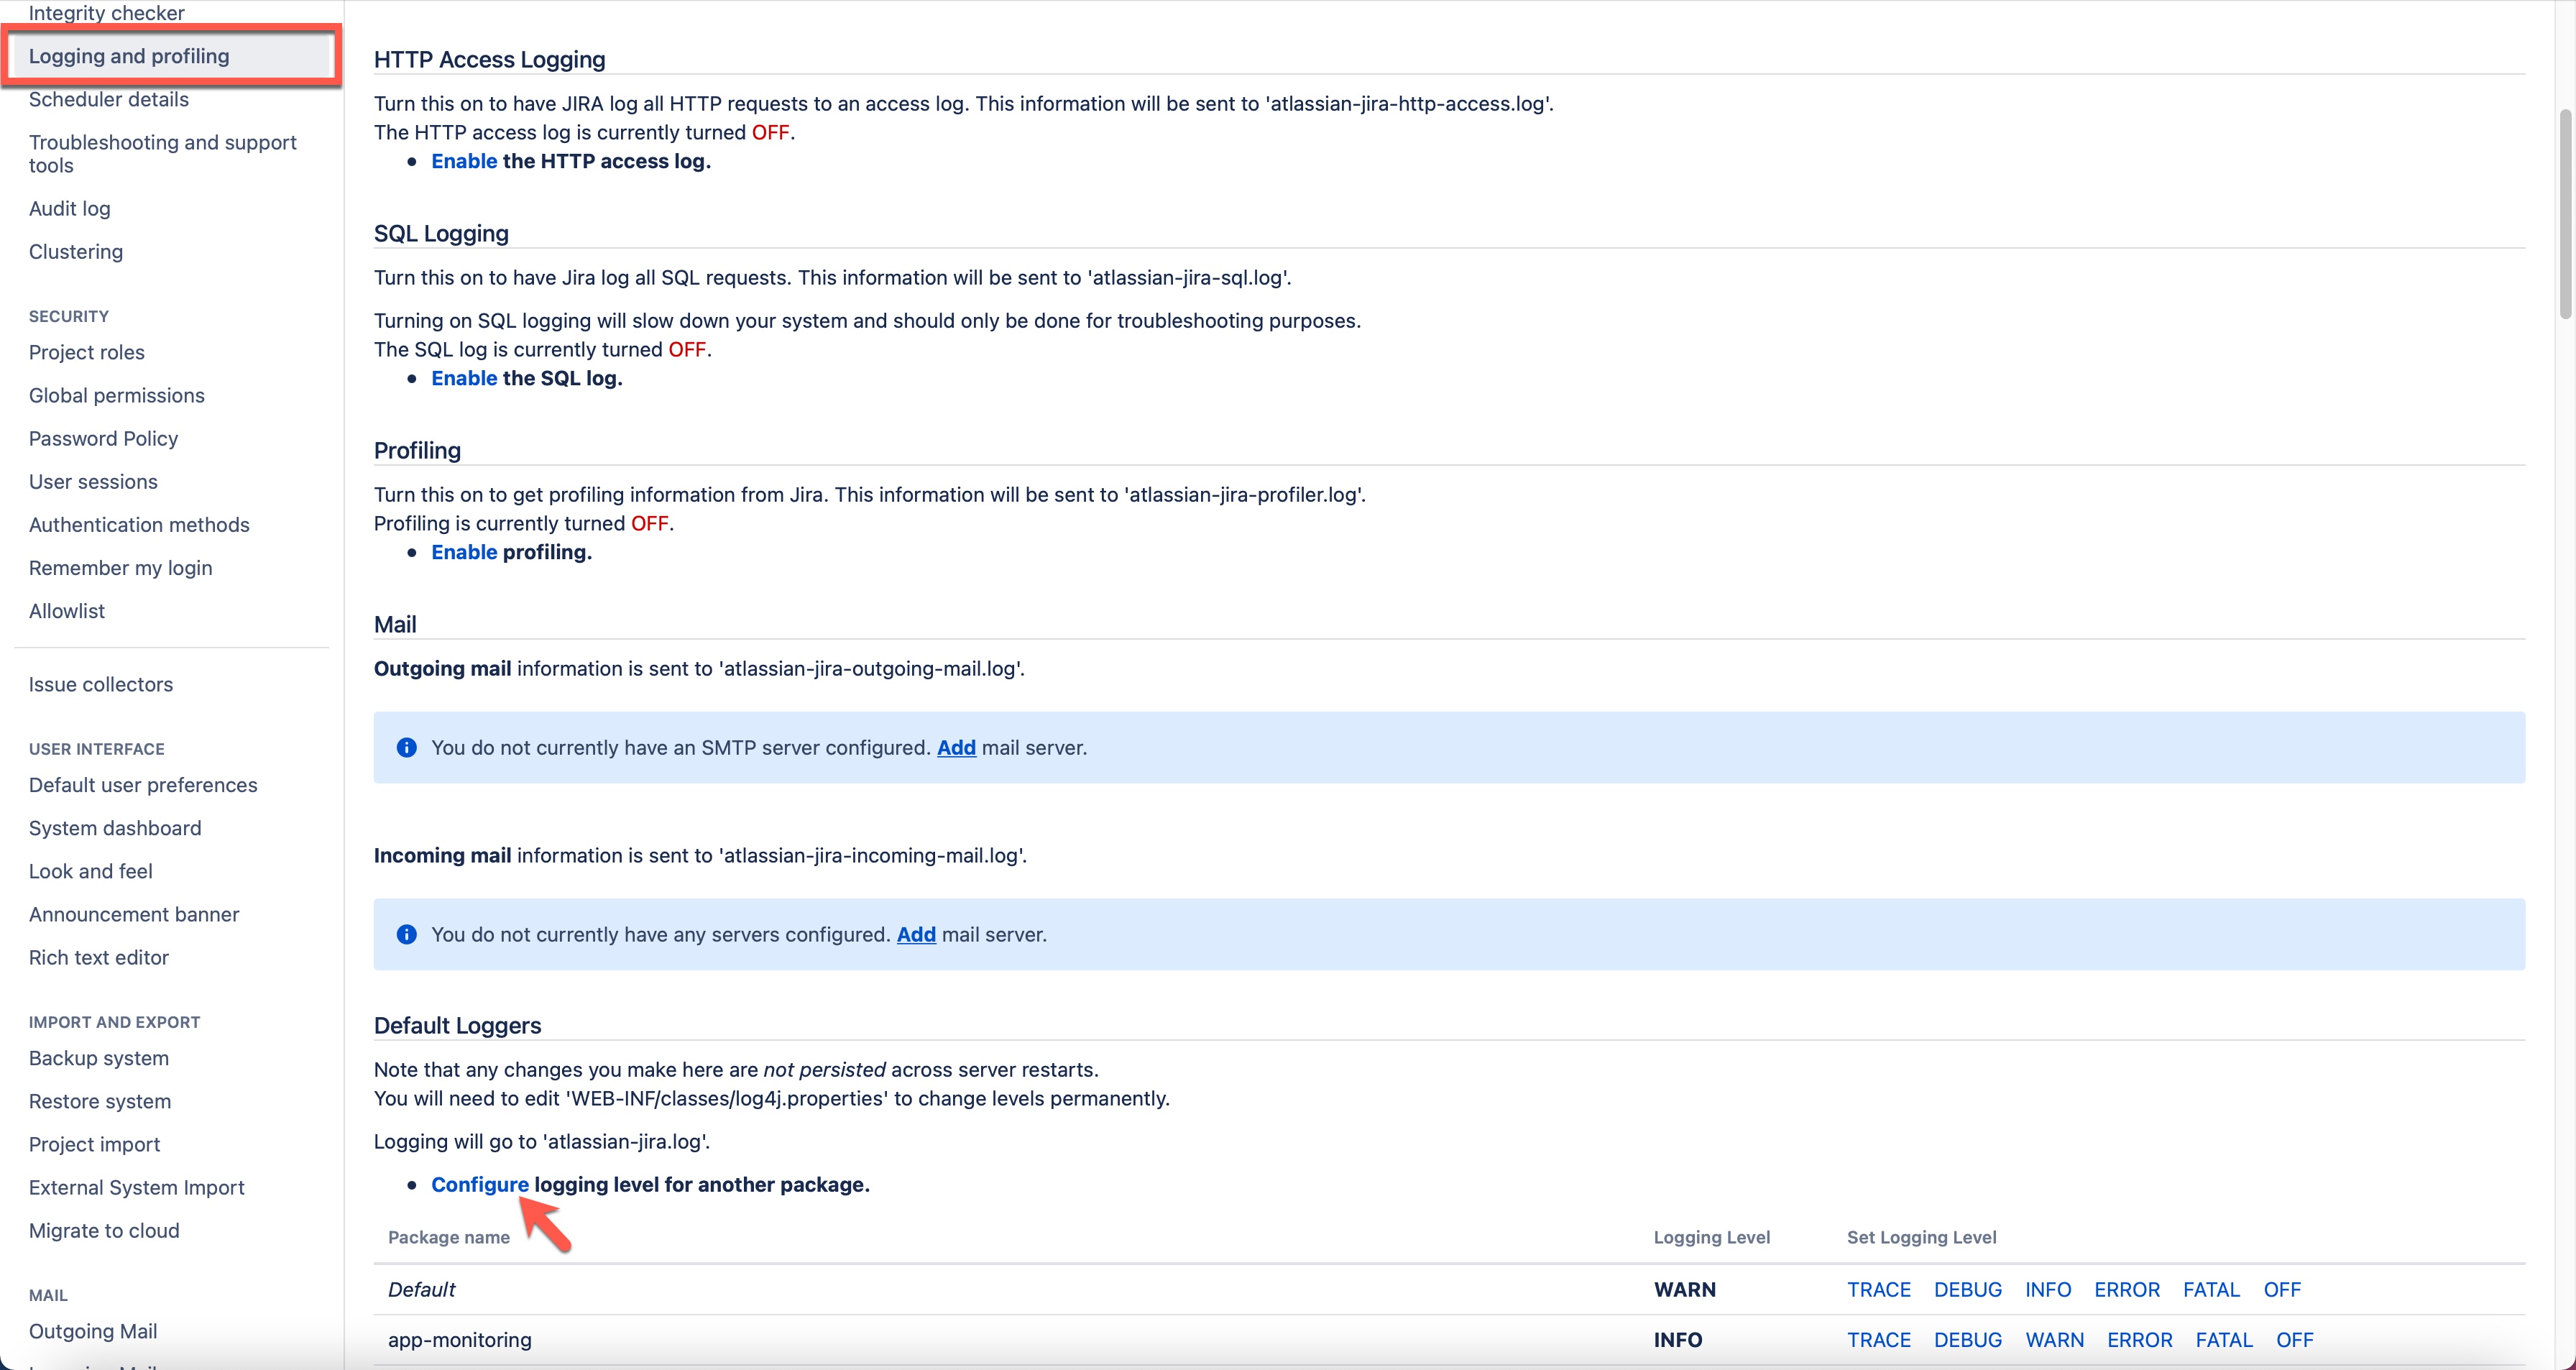
Click the Cogwheel for Settings and select System.
-
Click Logging and profiling in the side panel.
-
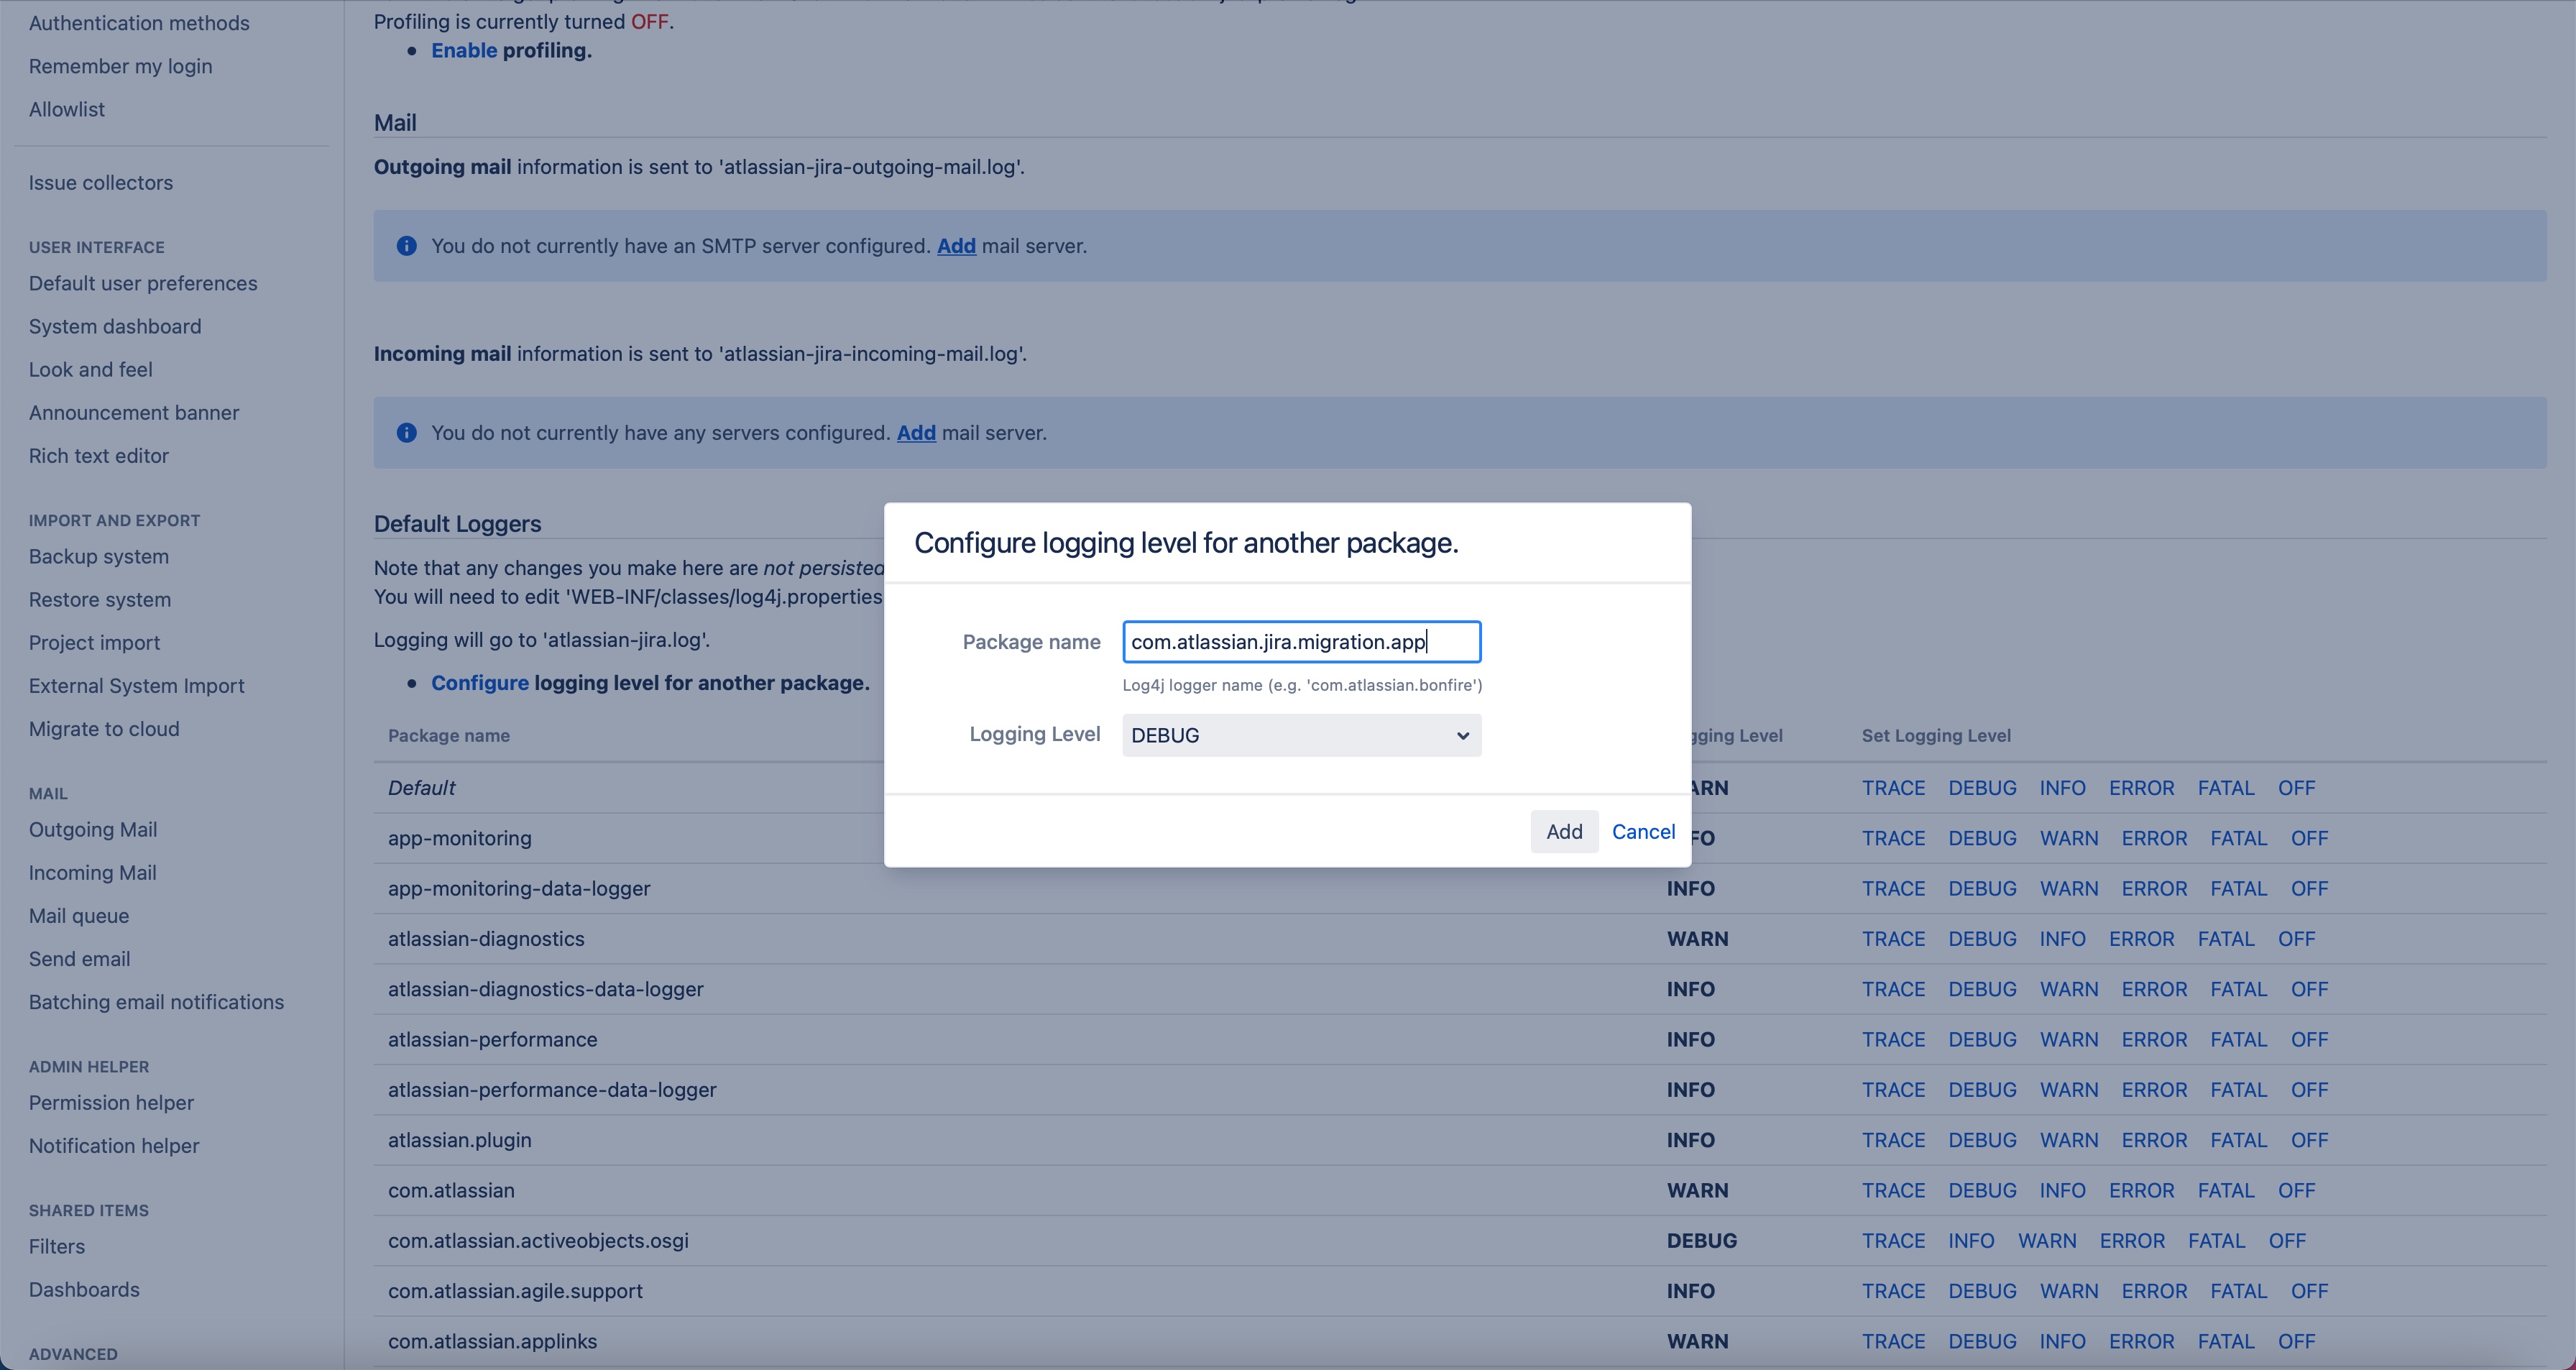
Scroll down the page to Default Loggers.
-
Click the Configure logging level for another package.
-
In the Configure logging level for another package window, do the following:
-
Enter the com.atlassian.Jira.migration.appPackage name and set the Logging Level to DEBUG.
-
Enter the com.tempoplugin.core.migrationPackage name and set the Logging level to DEBUG.
-
-
Click Add after each addition.
This enables debugging and logging that can provide the support team with troubleshooting clues in case problems are encountered during the migration process. A Support.zip file is needed.
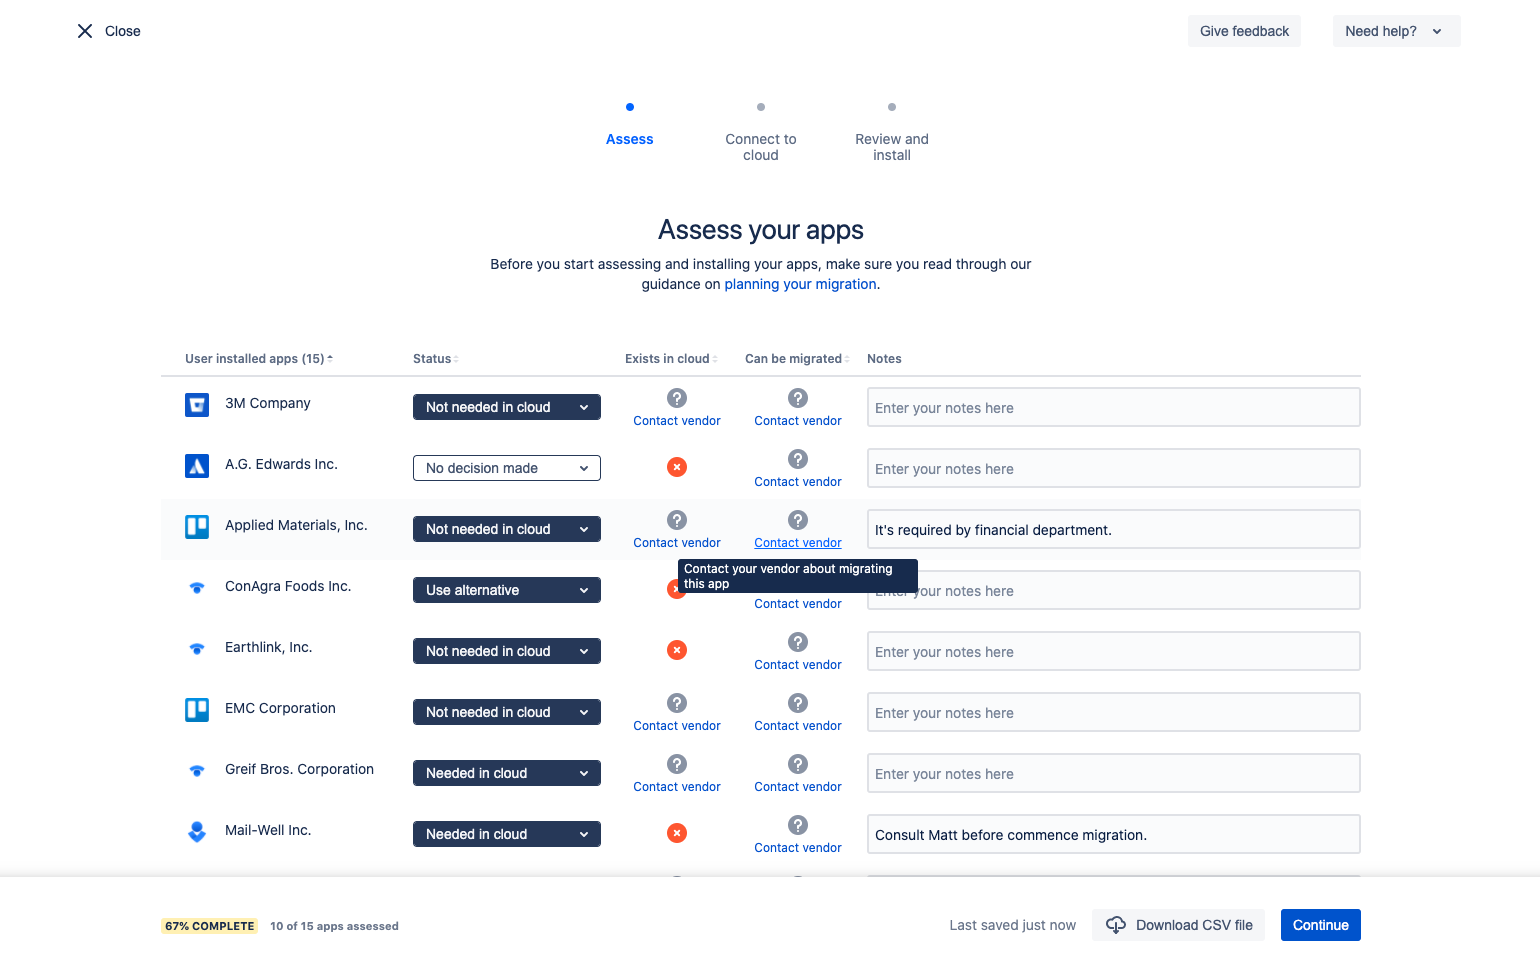
Audit and Assess Your On-prem Apps
Atlassian recommends auditing your On-prem apps, including Tempo, and assessing your on-prem apps before using Jira Cloud Migration Assistant tool.
Install and Configure Tempo on Your Cloud Site
It is strongly recommended to install and configure Tempo on your Cloud site before you attempt the migration. It's a necessary step to eliminate any risks posed by your apps blocking your migration during crucial steps.
Match Time Zones
During migration, please ensure your Cloud instance uses the same time zone as your on-prem instance; otherwise, you will see worklogs shifted forward/back by hours or even days.
If you have already performed your migration and notice your worklogs were shifted, please reach out to the Atlassian support team and request validation on the data on their end. Once the times are correct and fixed in Jira, please submit a Tempo Support request to have our team run the Timestamp Sync fix for your instance.
Connect Your Instance and Run the Migration App
Atlassian has comprehensive documentation outlining the steps you should follow once your access to the Cloud Migration Assistant app is enabled. Generally speaking, you are required to follow these key steps:
-
Connect to your destination Jira Cloud site
-
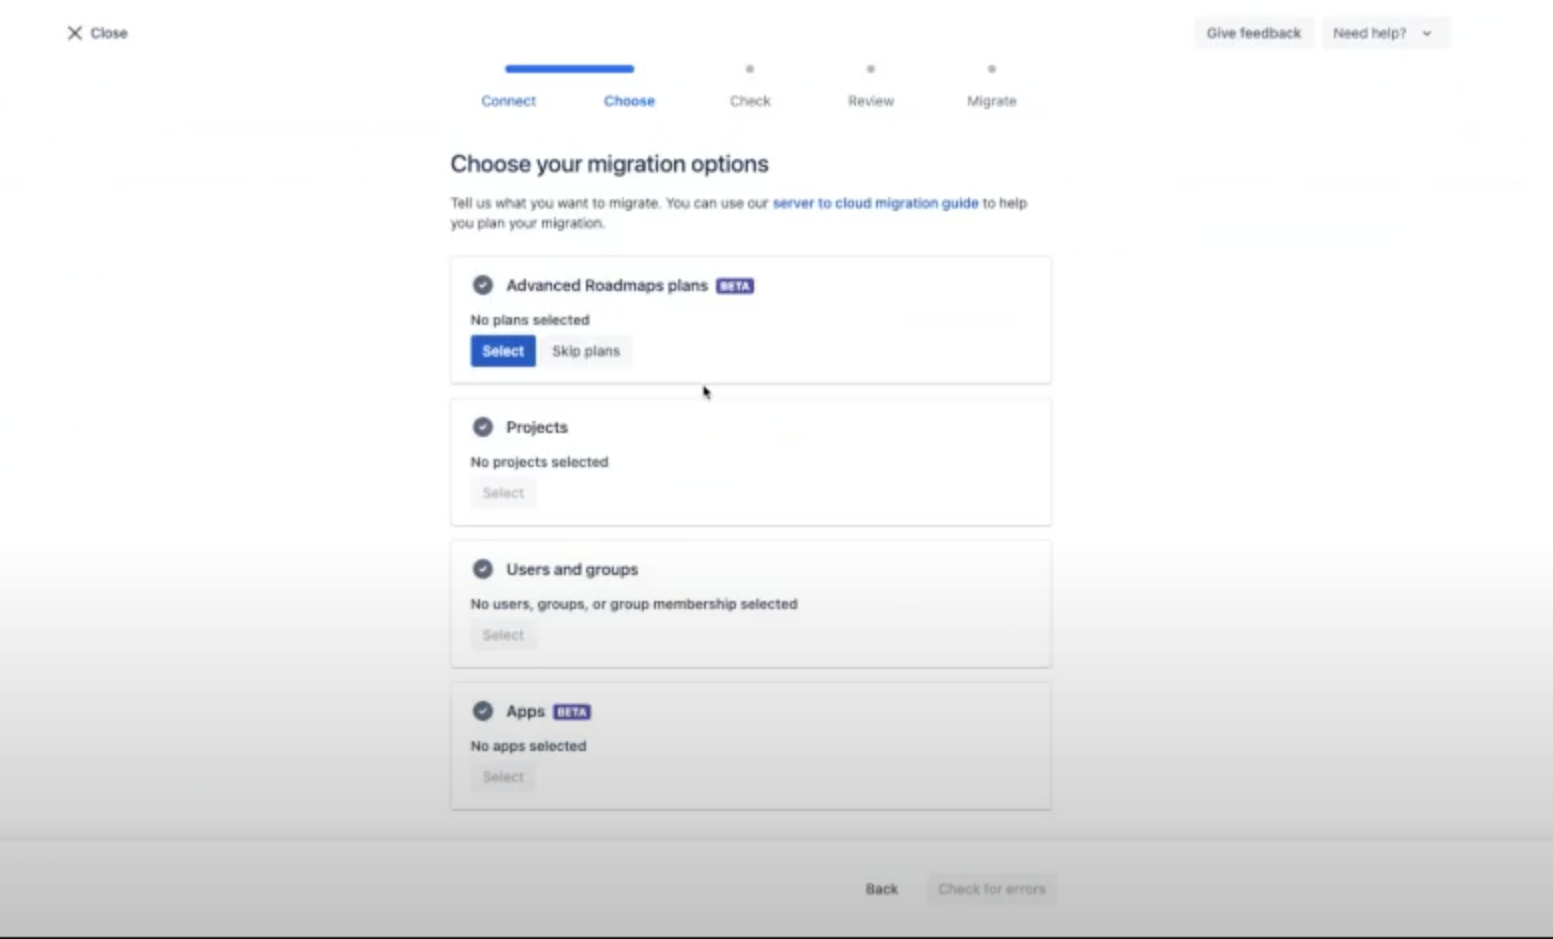
Choose your migration options:
-
Make sure you select the Projects and the Tempo Apps they are associated with so they are migrated together; otherwise, data will not be migrated correctly.
-
We recommend selecting the option to migrate all projects, users, and groups from the Jira directory.
-
-
Check for errors before you either save or run the migration
Monitor Your Migration Progress
Once you've initiated the migration, you can use Jira's Migration dashboard to monitor its progress. The dashboard indicates whether your migration projects are Saved, Running, Finished, Incomplete, or Failed.
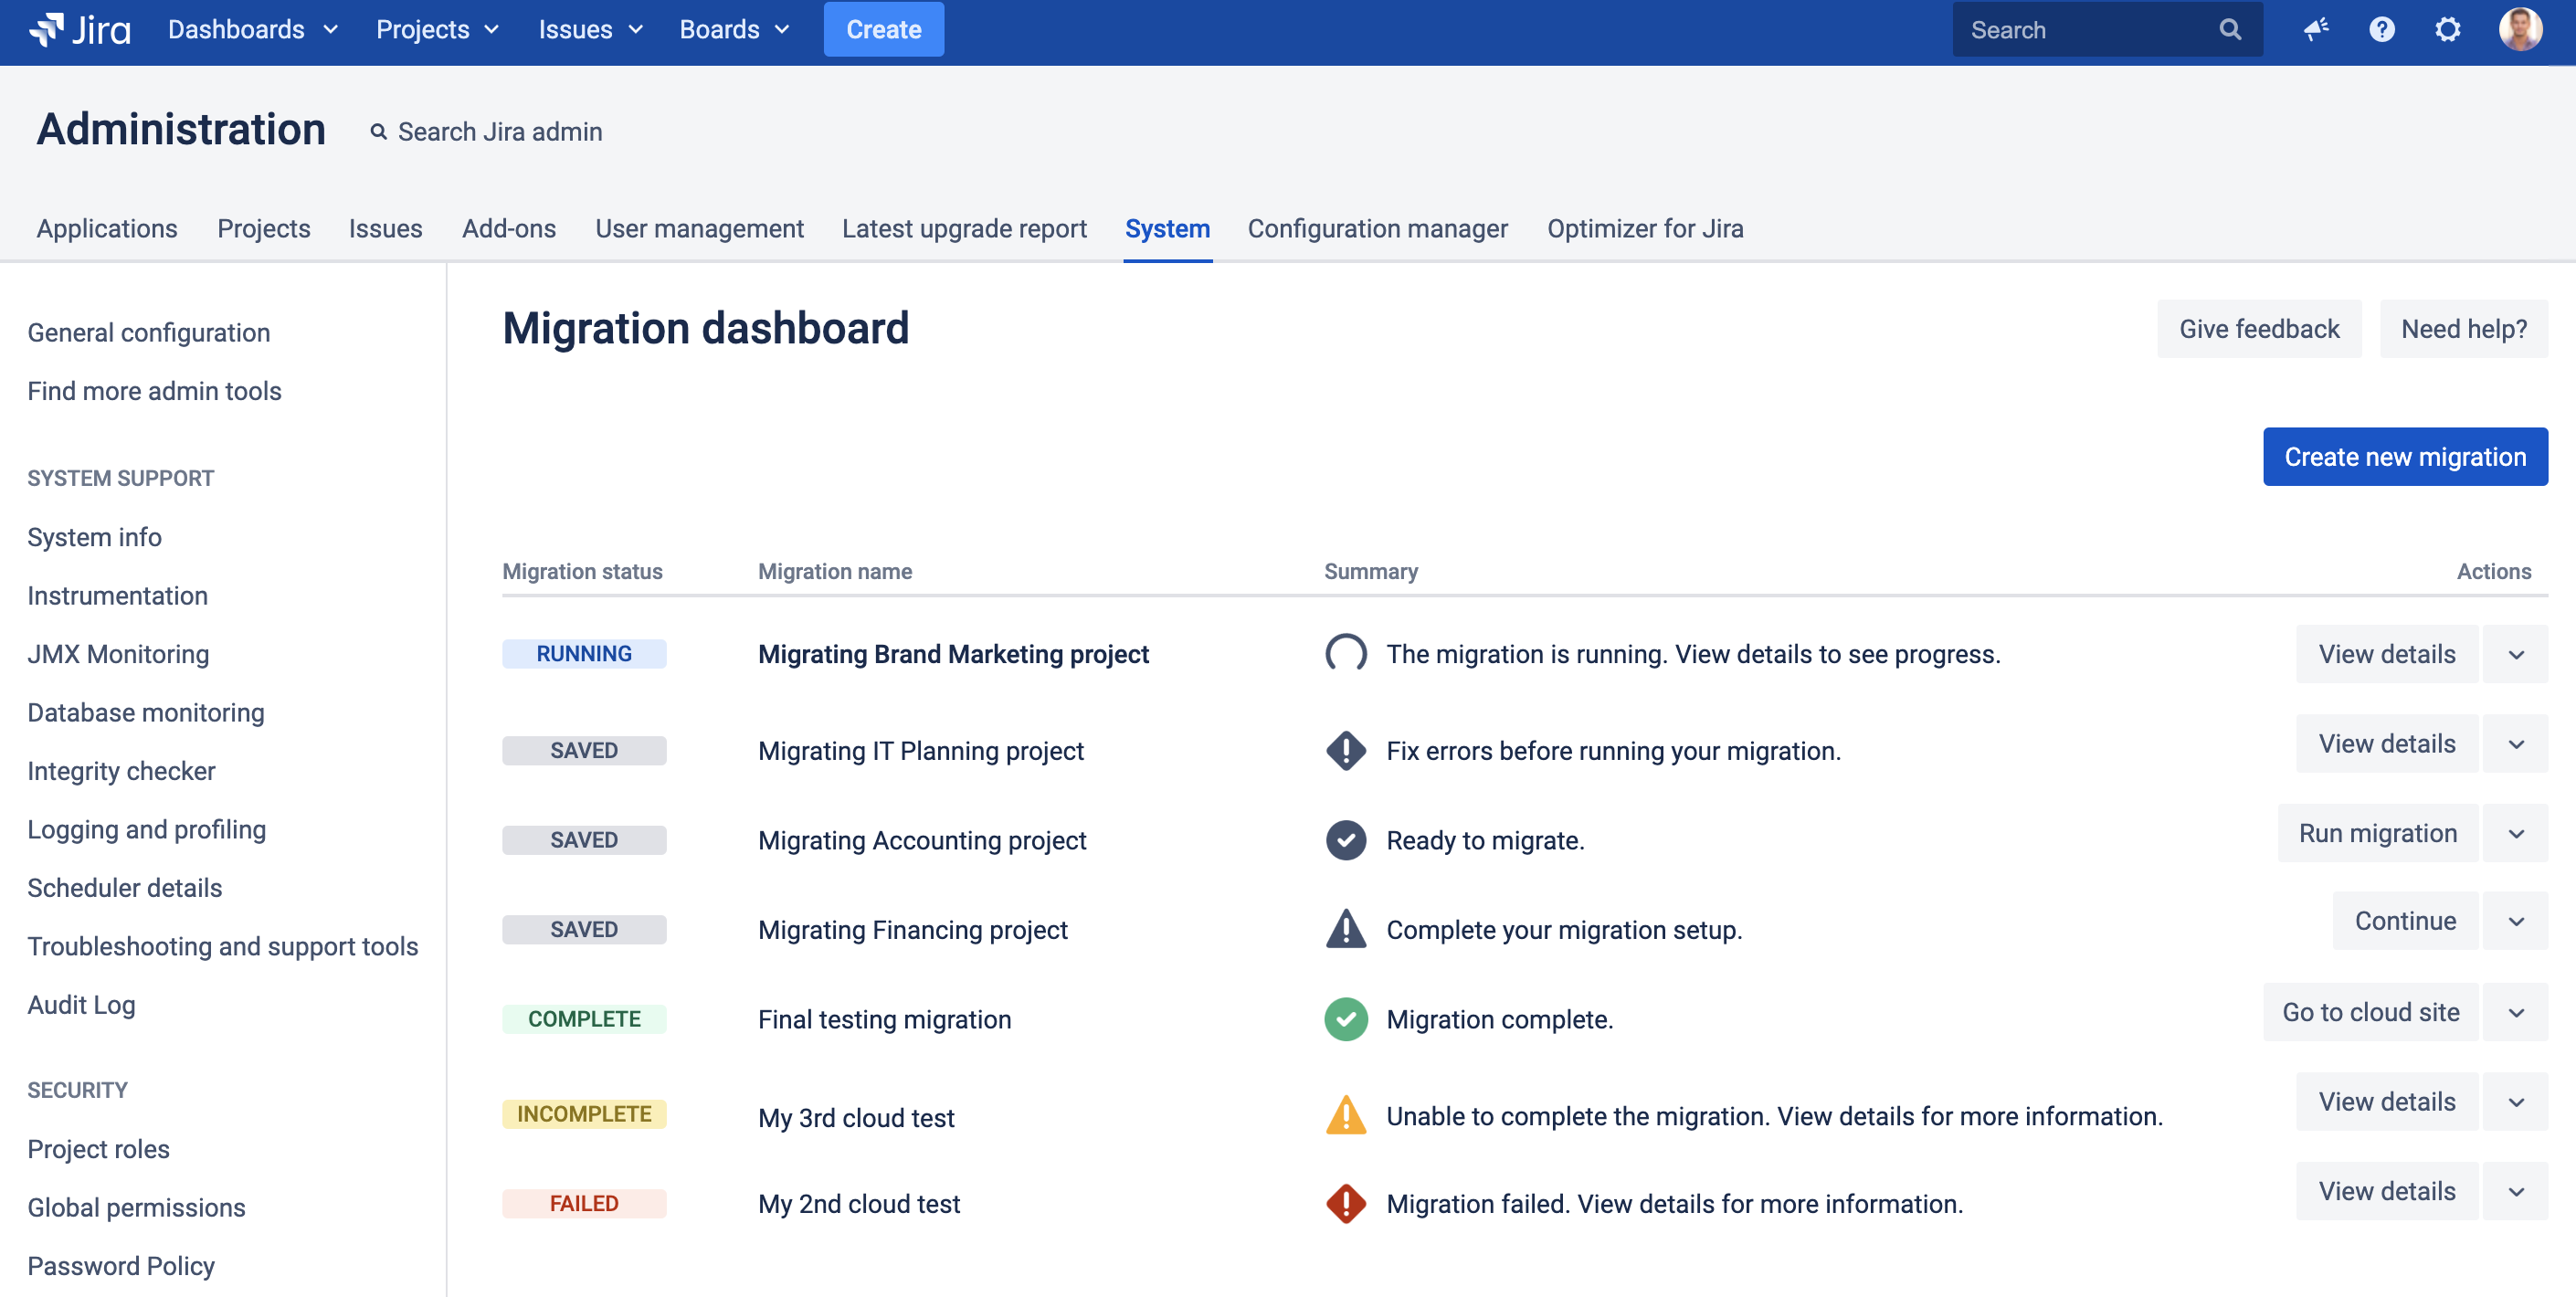
Select View details from the migration dashboard to see detailed information about the progress of your migration project while it is running. A progress report screen also shows details of the migration processing.
Verify that Data Migrated as Intended
Once your migration is complete, it is critical that you confirm that everything is migrated as intended. It is especially important that you confirm the migration of the Tempo data.
A key way to confirm that your worklogs are migrated is to go to Tempo's Logged Time Report:
-
If you have the proper permissions, then you should be able to see all worklogs there.
-
If you have the right permissions but you don't see your Tempo worklogs, then they may not be synced yet from Jira to Tempo. Contact the Tempo support team for Assistance.
-
If you have Work attributes that are configured, then verify that the migration is completed and worklogs are in place, and then contact support to execute the migration of Work attributes.
Depending on the size of your organization, you may need to supplement your in-person verification of the remaining data with scripting, so you can verify the data at a larger scale.
If you are missing data during migration, then consult the Migration Steps. This can happen if you are using older versions of the software, where some data might not migrate properly. You must contact Tempo support team for assistance.
For older versions, we recommend migrating your data manually. See Data Center to Cloud Manual Migration Guide .
Feedback and Support
One of the key goals is to get feedback on how the Migration Assistant App is working for you, particularly with regard to your Tempo data. Please contact the Tempo support team with your comments and questions, and they will do their best to help you.