Certain styles and features in this article represent an upcoming version of Strategic Roadmaps that is only available to a limited number of users at this time. For early access to this feature and more, please reach out to our support team.
Video Walkthrough
Roadmap Settings Toolbar
Search Tool
Quickly jump to items both within your roadmap and within your account by clicking into the Search icon on the toolbar. For more details on how our search works, please refer to our article on Working with Global Item Search.
Roadmap Settings Menu
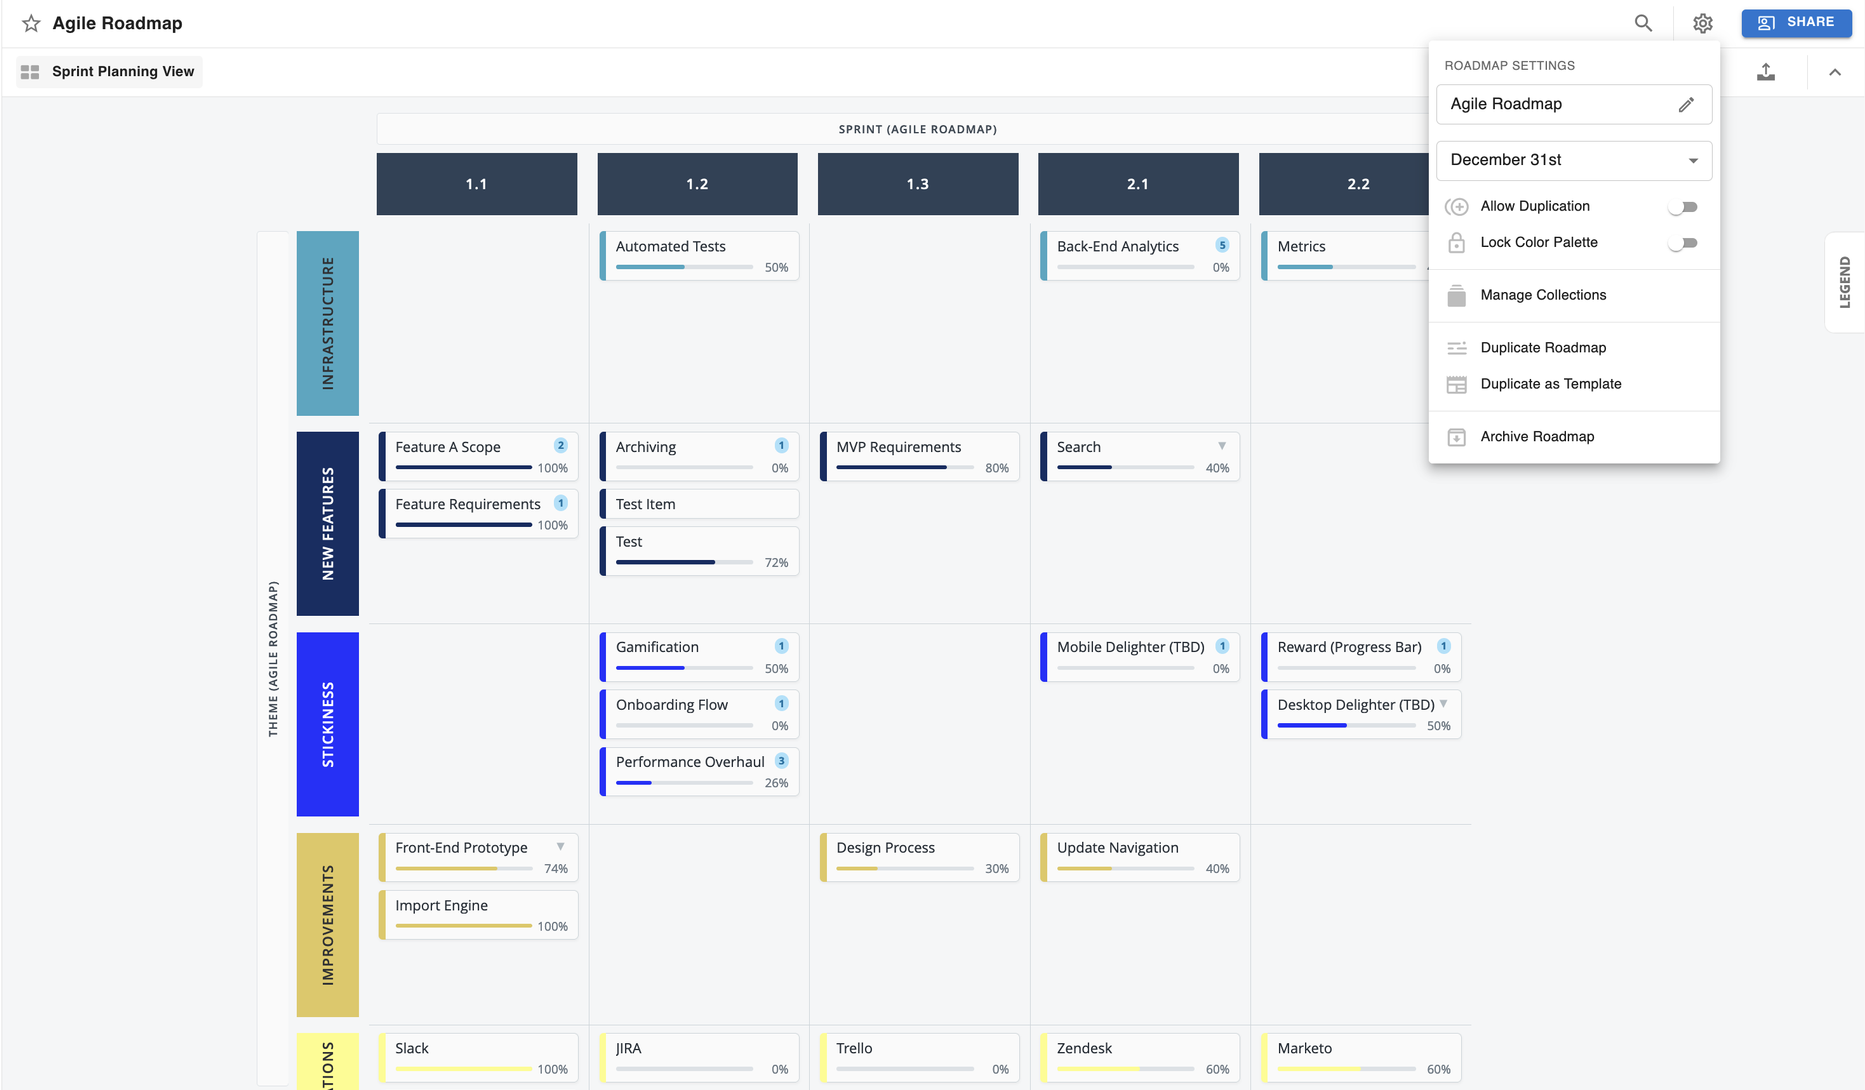
The Roadmap Settings menu allows you to quickly update the details of your roadmap and complete a number of actions related to how your roadmap can be interacted with. The following actions are available in this menu:
-
Roadmap Name: Users are able to both view the current roadmap name and edit the name at any time by clicking on the Edit Roadmap Name icon beside the name.
-
Fiscal Year End Date: From this dropdown, users can customize the Fiscal Year End date for their roadmap. For more details on this feature, please refer to our guide on how to Set Up & Manage Fiscal Year Settings.
-
Allow Duplication: By default, any Collaborator who has been assigned View-Only permissions for a specific roadmap is not allowed to duplicate that roadmap; however, when this option is toggled on, those users will be able to create duplicates of the roadmap for themselves.
-
Lock Color Palettes: When toggled on, this feature prevents Collaborators with Editor permissions from changing the color palettes, swatches, and their respective field values from the Colors tab of the Format Panel across all views in the roadmap. More details can be found in our article on Working with Color Palettes.
-
Manage Collections: For users on Professional plans that have setup Collections in Strategic Roadmaps, the Manage Collections option lets you quickly add or remove a roadmap from a Collection. For more details, please refer to our article on Roadmap Collections.
-
Duplicate Roadmap: Allows any user with Owner or Editor permissions to create a duplicate of the roadmap. Please see the details above for "Allow Duplication" to find out how View-Only users can be granted permissions to duplicate roadmaps.
-
Duplicate As Template: A part of the Custom Templates feature which allows Account Admins to quickly duplicate a roadmap as a Custom Template and share it with their team members. For full details, please refer to our article on building and managing Custom Templates.
-
Archive Roadmap: Allows Roadmap Owners and Account Admins to archive a roadmap. When a roadmap is Archived, a user will be presented with additional options to Restore or Delete the roadmap. More details on this feature can be found in our article on Working with Archiving.
Sharing Settings Menu
By clicking the blue Share button in the top-right corner of the screen, you will open the Sharing Settings menu. This allows you to view and update the list of users who have access to the roadmap and their editor permissions within the roadmap. For more details on roadmapping permissions, please refer to our article on Sharing & Collaboration in Roadmaps.
Navigation & Actions Toolbar
Viewfinder Panel

Navigating the views on your roadmap is simple with the Viewfinder Panel. By clicking the view button in the top-left corner of your roadmap, the panel will open and provide you with an alphabetically sorted list of available roadmap views. You can also quickly create new views from this panel by clicking the Add New View button, with there being no limit to the number of views you can create.
When hovering over your views in the Viewfinder, you can also access the View Settings menu. From this menu, you will be able to make the following changes to any custom views:
-
Rename View: Allows you to change the name of the current view.
-
Duplicate View: Allows you to create a duplicate of the current view.
-
Delete View: Allows you to delete the current view from your roadmap.
When Lock Formatting is enabled for a view, the only option available in this menu for that view will be Duplicate View. While the original view will remain locked, the duplicated view will be unlocked upon creation.
Integrations Panel
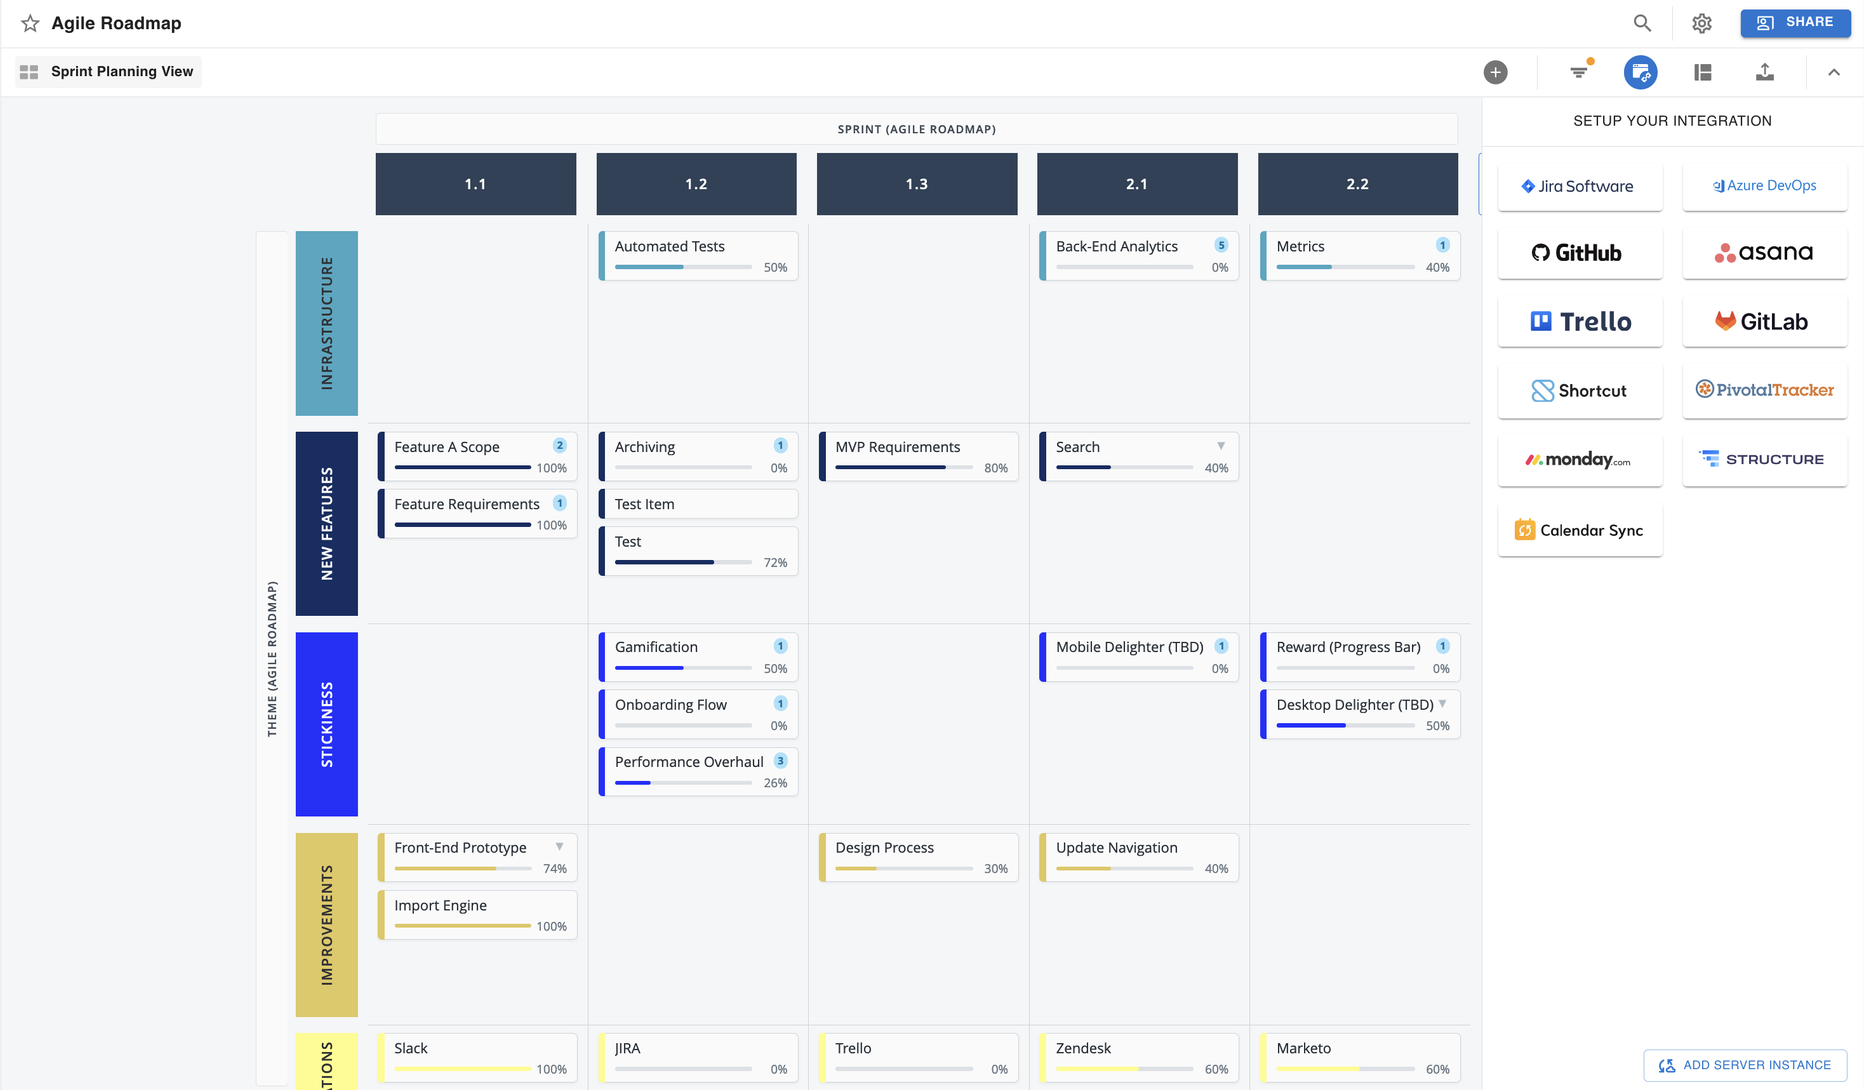
The Integrations Panel allows you to setup and manage how your roadmap integrates with third-party tools. When a roadmap is integrated with a third-party tool, users will see a small Integration Details card which summarizes the current integration status, along with a button to trigger a sync/refresh of your roadmap data and a settings gear which takes you into the Integration Settings menu.
This panel also houses our Calendar Sync feature which allows you to enable an ICS version of your roadmap that can be setup in most major web-based calendars. For more details on this feature and how to setup your roadmap in your personal calendar, check out our guide for Syncing Roadmaps to Calendars.
Format Panel
Format Panel in Roadmap Views
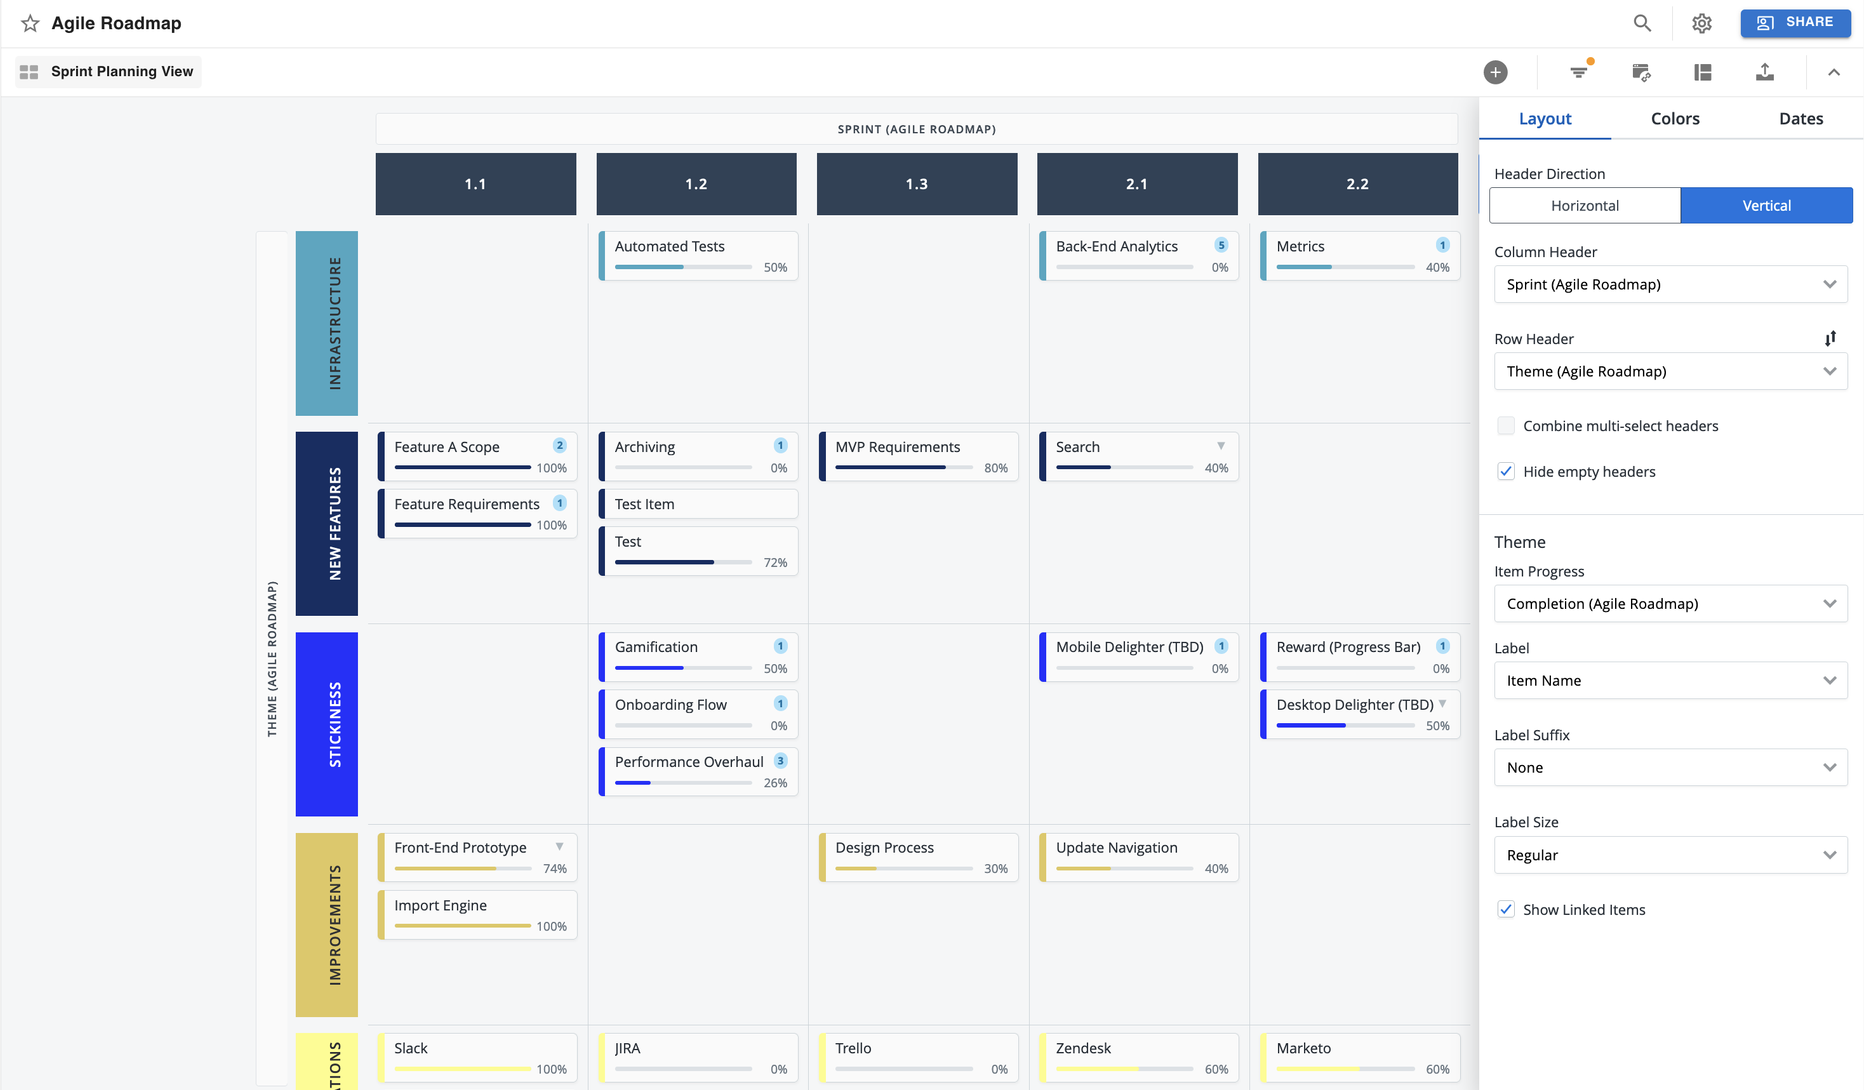
In the Swimlane and Timeline views, the Format Panel is affectionately known as "the base of operations for all things customization" for your roadmap. This panel allows you to set up and manage a number of customization options for your roadmap, including custom headers, roadmap styles, labels, colors, and more. To explore all of the options for customization in your roadmap, make sure to check out our guides on Formatting & Customization.
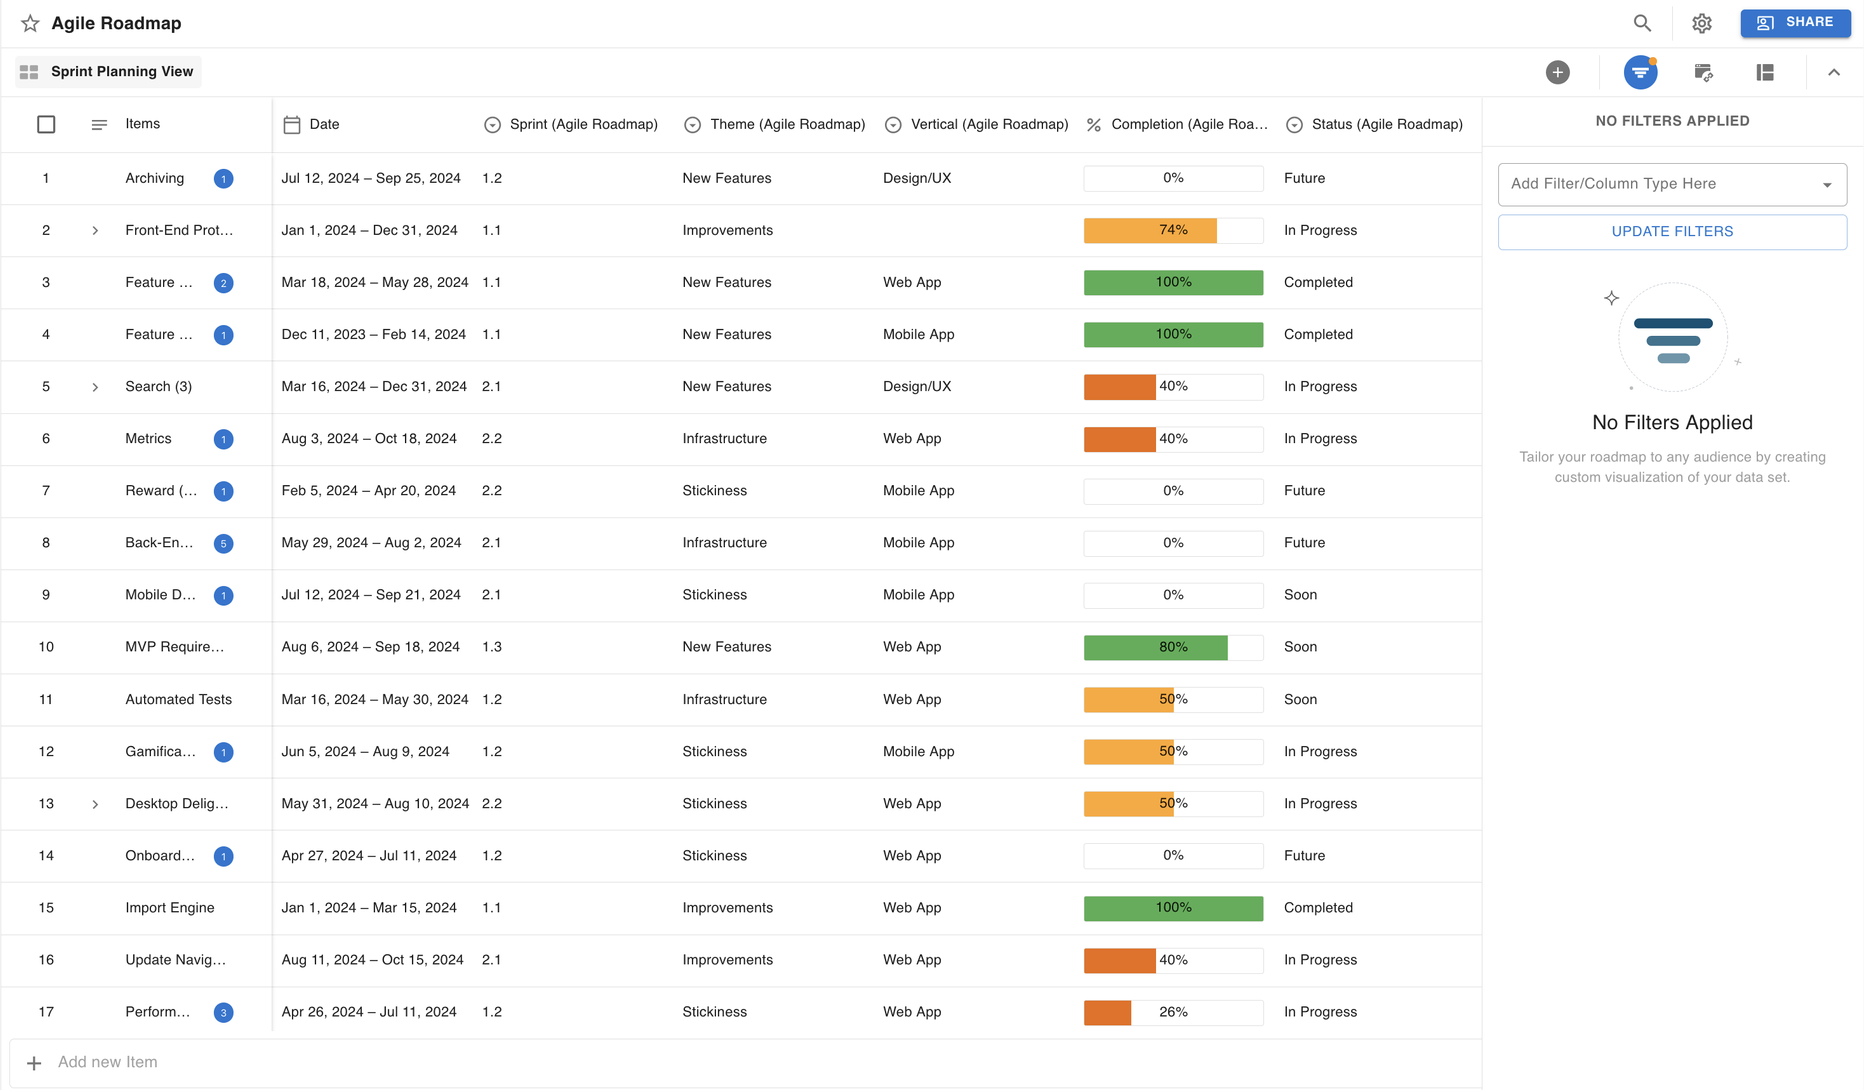
Format Panel in Table Views
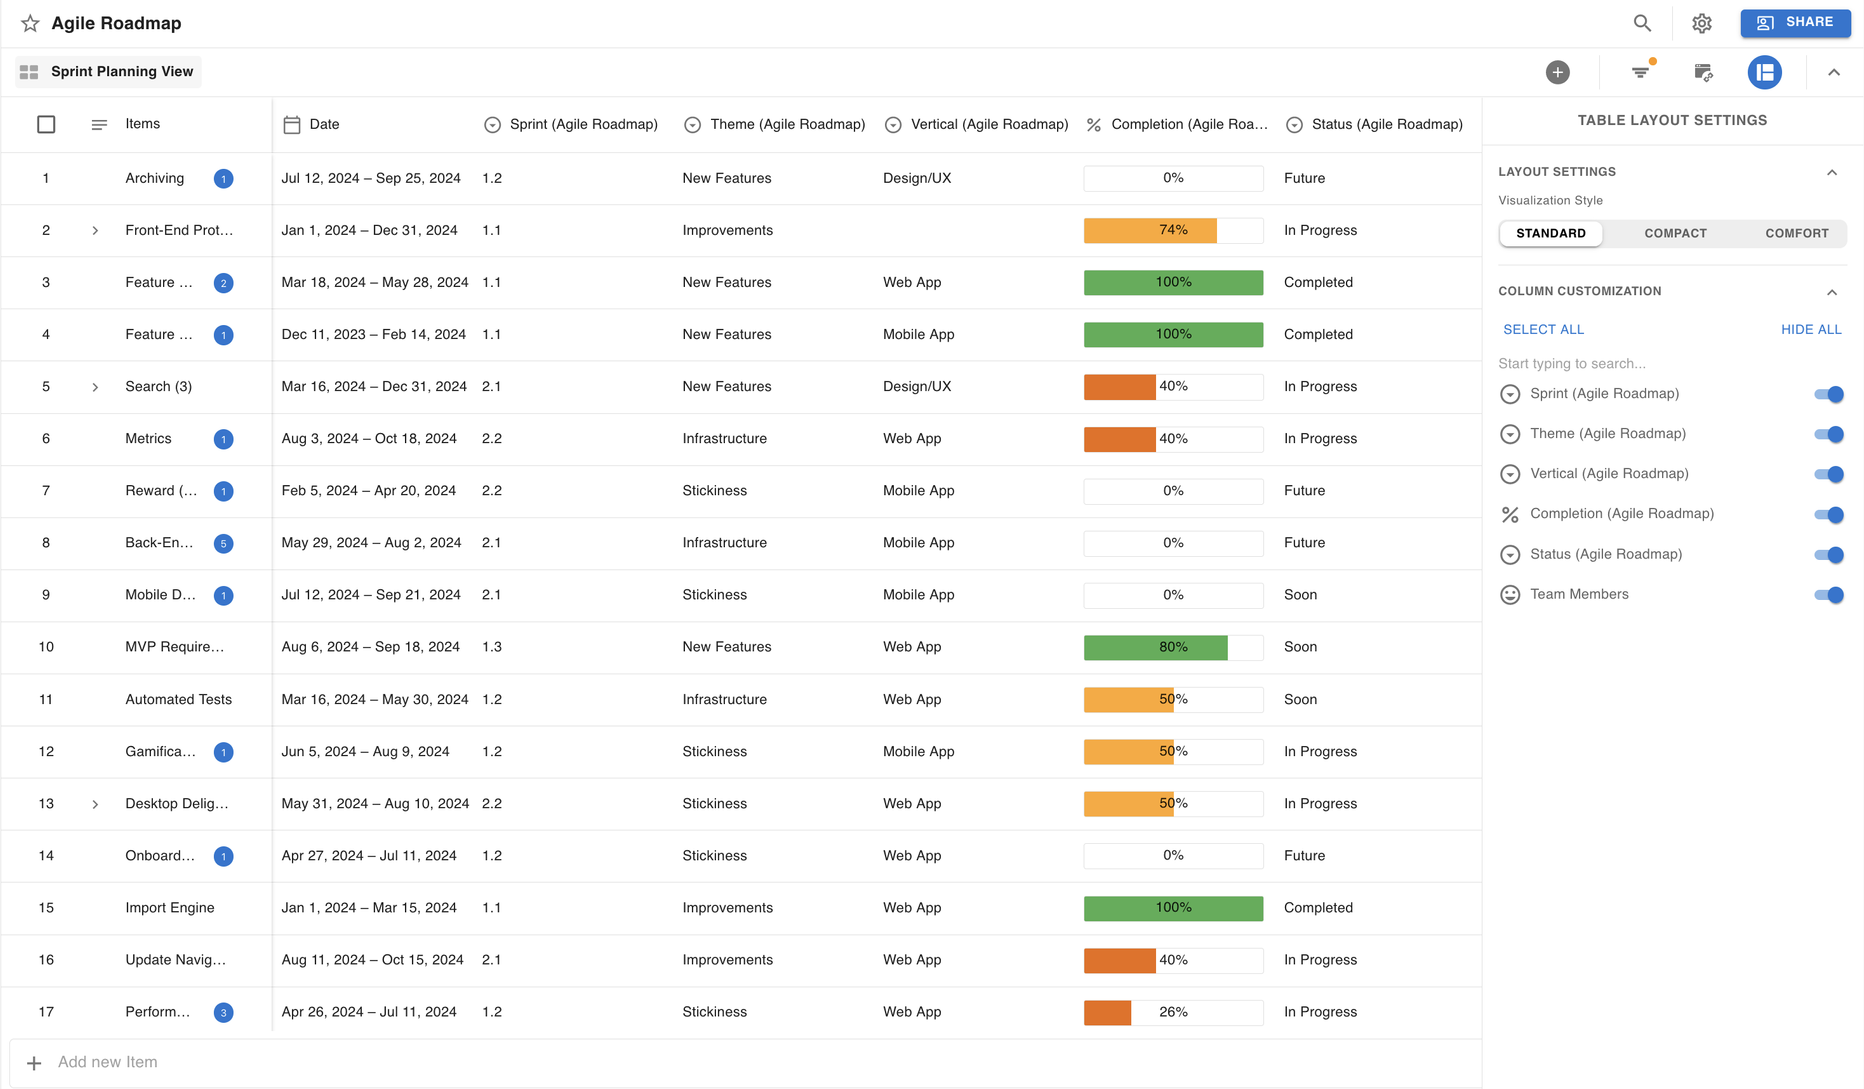
When working in the Table View, users are also able to interact with a Table-Specific format panel which allows them to control which Field columns are visible on the Table itself and set the visual style of the Table - either Standard, Compact, or Comfort. For more details on the Table View and available format settings, please refer to our article on Getting Started in the Table View.
Export Preview Panel
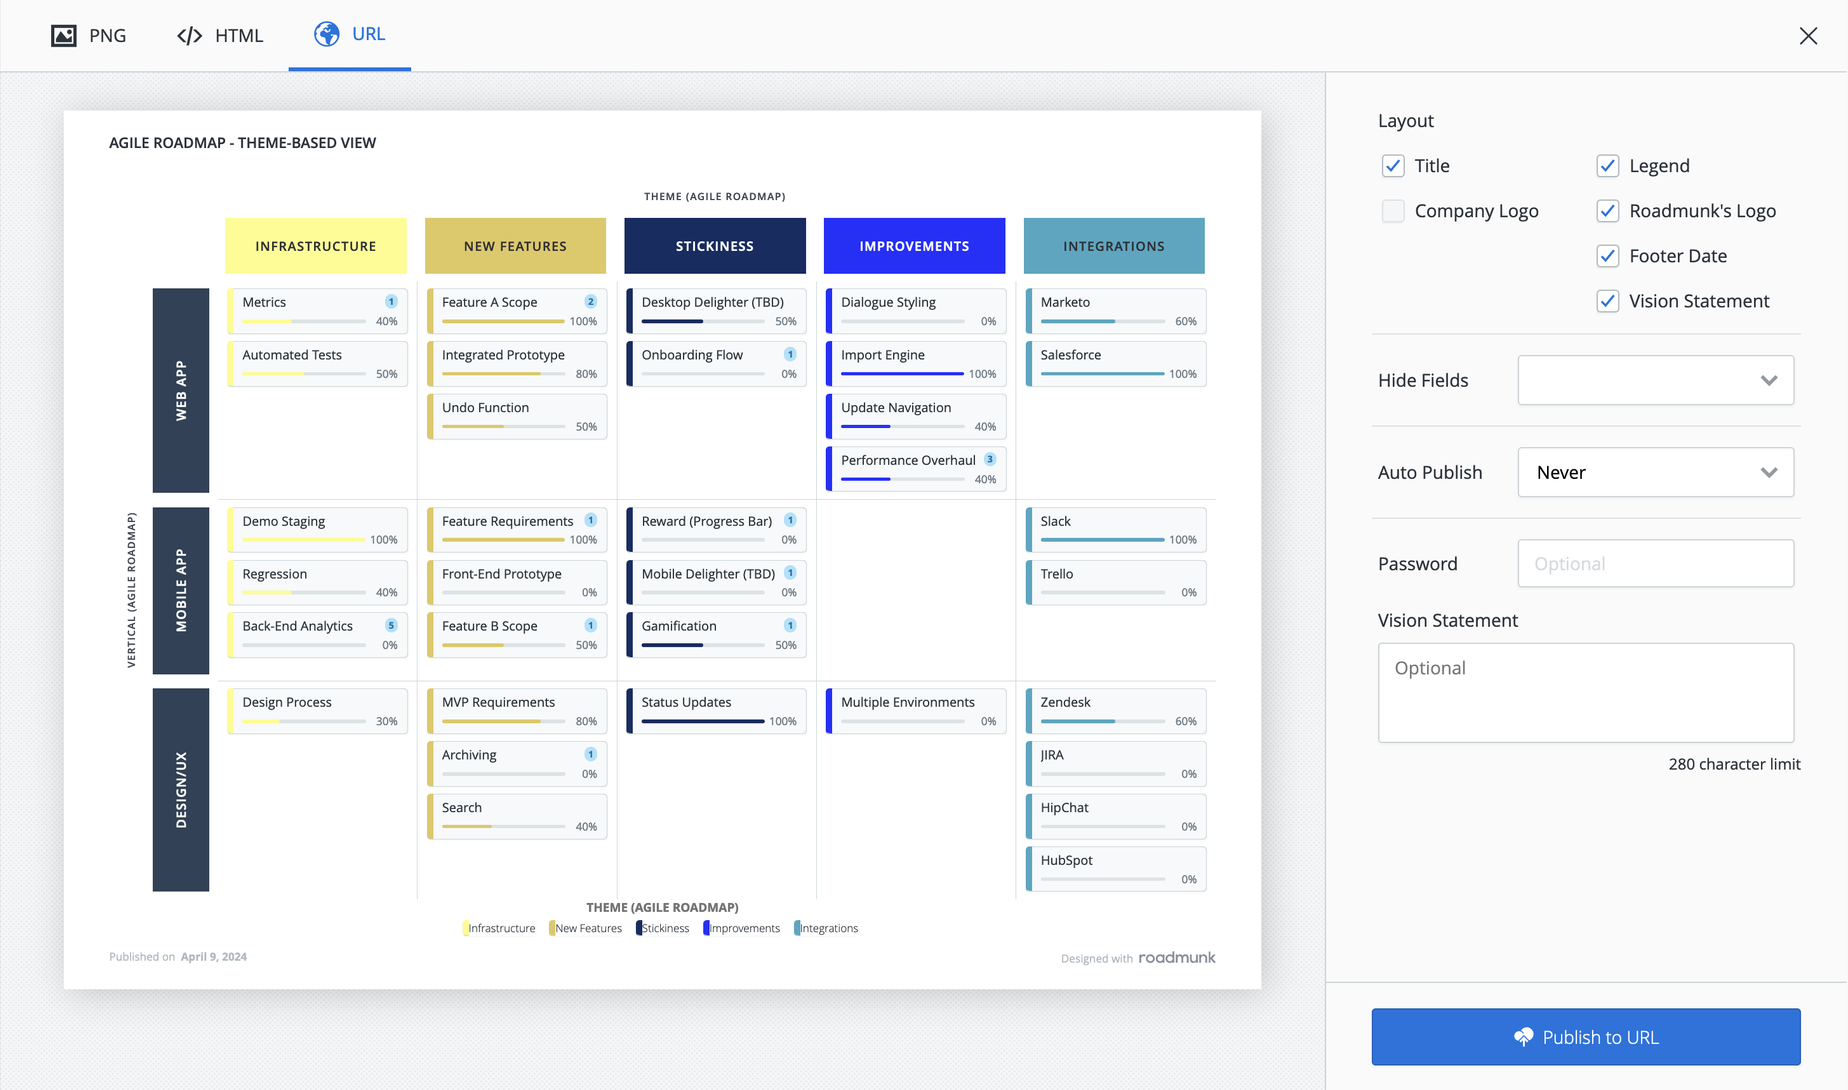
Before a user can publish or export a roadmap visualization, they are able to see an Export Preview panel which overlays the entire roadmap screen. In this panel, users are able to export their roadmap to a number of static or interactive formats and view additional details if the roadmap has been published. For more details on our export options, please review our article on Publishing Roadmaps.
Filter Panel
The Filter Panel allows users to control which data in their roadmap will be visible within a specific view. From this panel, users can quickly add and remove filters as needed for almost all fields available in Strategic Roadmaps. When there are active filters on the roadmap view, users will see an orange indicator badge in the top right corner of the Filter icon on the sidebar. For more information on pivoting and filtering roadmaps, our article on Working with Filters provides additional details and breakdowns of filter types and limitations.
Quick Actions

The Quick Actions menu allows you to choose from a number of common actions that can help to make your roadmapping experience simpler:
-
Create New Item: In the Table View, this action opens the Item Card in the Create State. In the roadmap visualizations (Swimlane & Timeline Views), this action opens the Drag New Items modal.
-
Standalone Sub-Items: When toggled on in the roadmap view, this feature separates sub-items from their parents and displays them as standalone items in the roadmap.
-
Lock Formatting: When toggled on in the roadmap view, users are unable to change or update the customization settings for this particular view without first unlocking it.
-
Import CSV: Available in the Table View only, this action triggers the Import CSV modal.
-
Export CSV: Available in all views, this action triggers a CSV export of your current roadmap view.