While Trello provides teams with a medium for creating content-rich boards, it can be hard for teams to get a high-level picture of their project. To better visualize your Trello boards in a consumable, simple to understand roadmap, users can create a one-way connection with Trello which allows them to pull content into their roadmaps and visualize it against other projects across all the tools your team uses on a daily basis.
Getting Started with Trello
Linking Strategic Roadmaps to your Trello Instance
In order to connect your Roadmaps to your instances & boards in Trello, an Account Admin on your Strategic Roadmaps account will need to establish the connection between Strategic Roadmaps and Trello first. Once this connection is established, users will be able to view and select this integration option during their on-roadmap setup and save both instance & credential details for future setup of additional roadmaps.
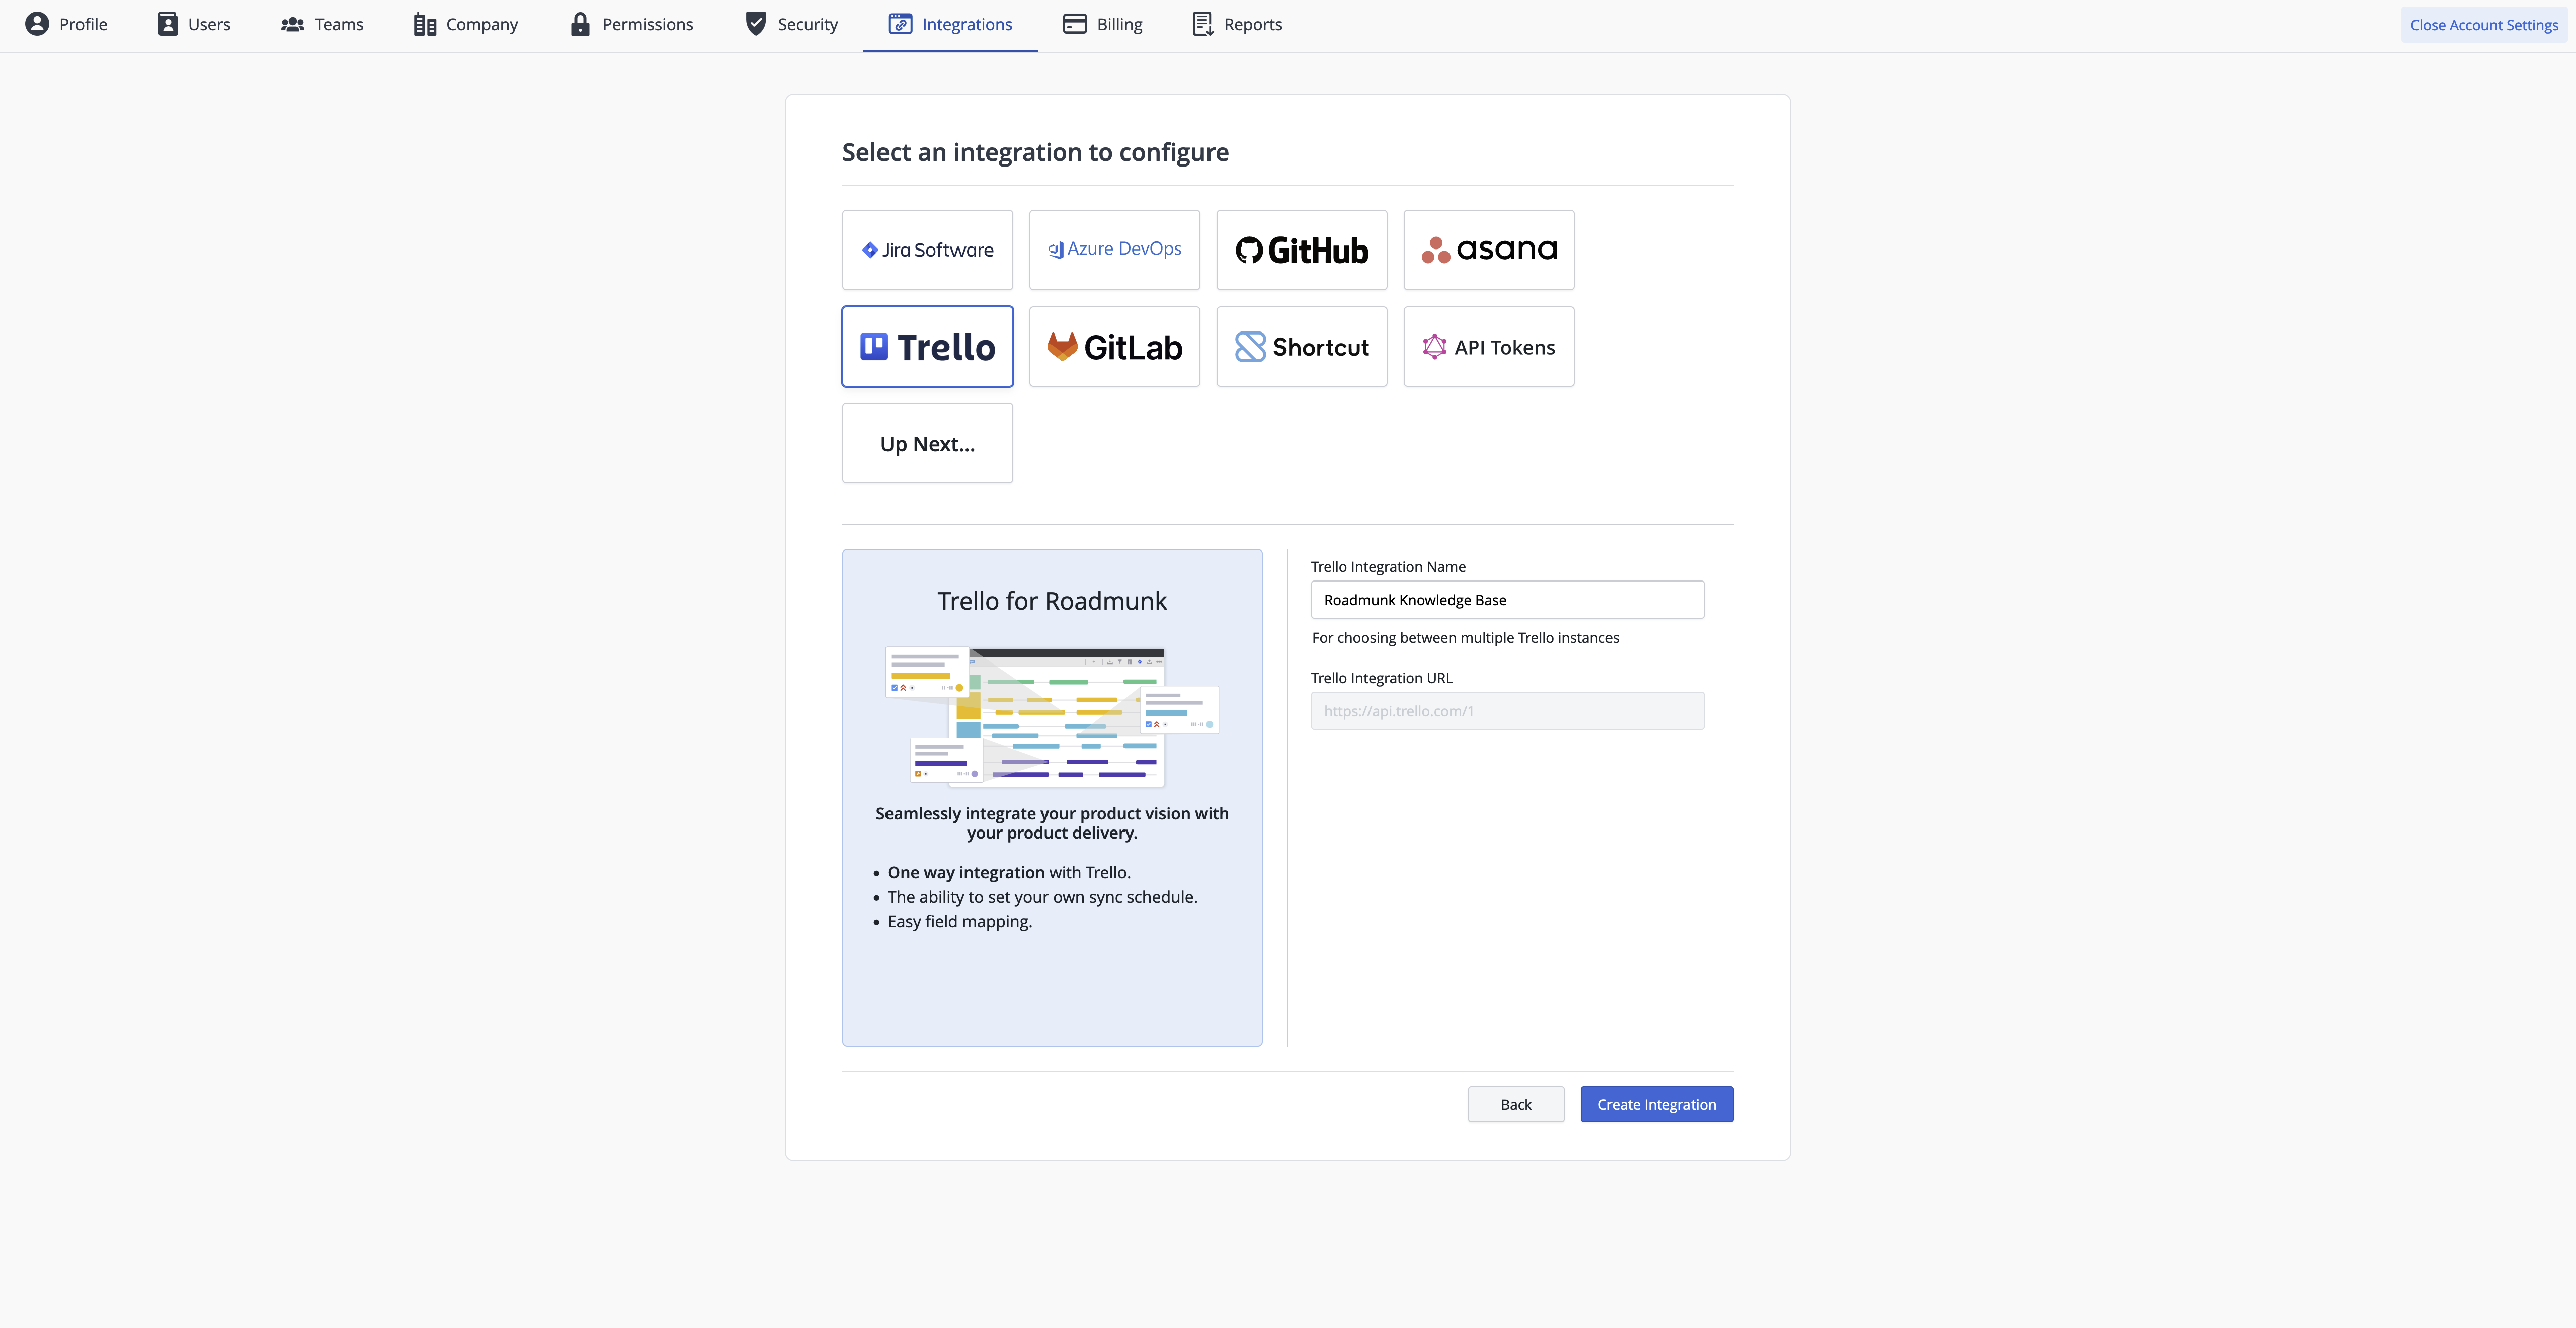
Generating Credentials for Strategic Roadmaps in Trello
In order to authorize the data transfer between Strategic Roadmaps and Trello, Strategic Roadmaps relies on a user-generated credential which allows the user to view and pull their data from their projects. In this case, we require a Personal Access Token (PAT) generated in Trello as your credential and during the roadmap setup will allow you to set a Credential Label so you can easily differentiate this particular token from others you may use (in the case of teams working across multiple active Trello deployments).
Users can generate a Personal Access Token from the Trello Power-Ups and Integrations Admin Management page, in Trello.
-
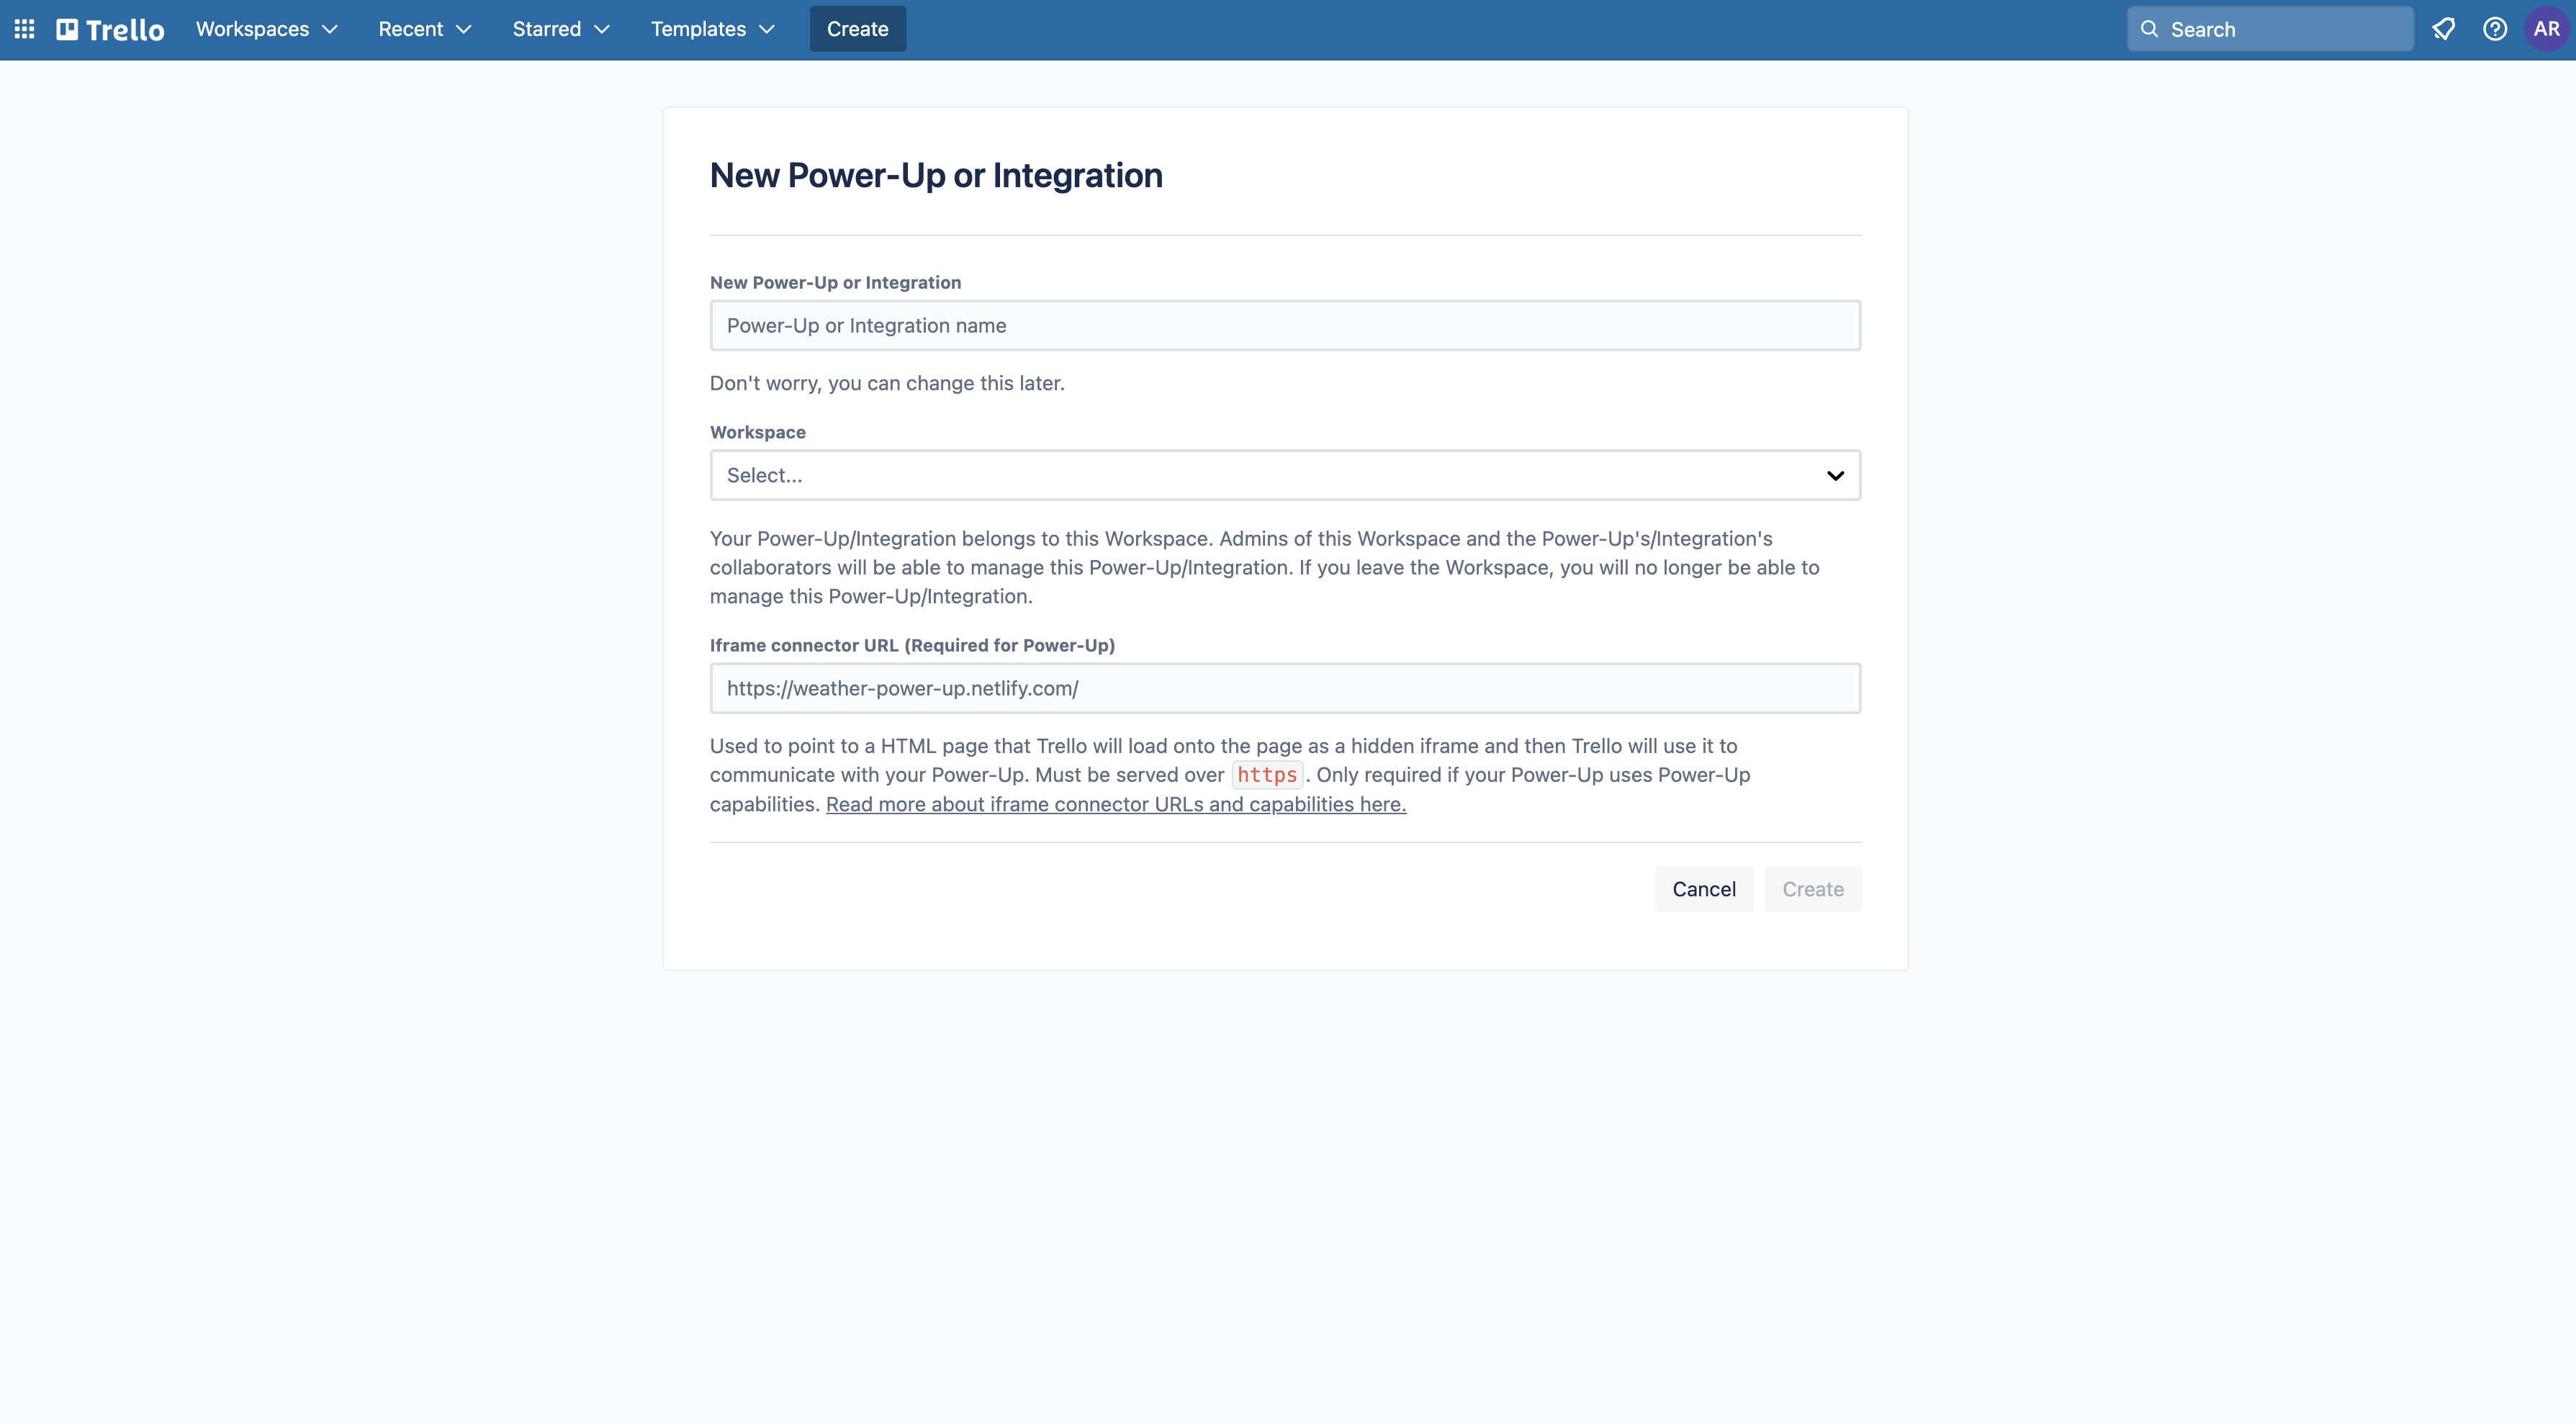
On the Trello Power-Ups and Integrations Admin Management page, click the New button.
-
In the New Power-Up or Integration field, type a name for the integration you are setting up. It can be anything but to be helpful, we recommend something along the lines of “Strategic Roadmaps Integration”.
-
In the Workspace drop-down, select the Workspace that you want the roadmap to integrate with.
-
Don’t add or modify anything in the Iframe connector URL field.
-
Click the Create button.
-
On the API key page, click Generate a new API key. In the pop-up window, click Generate API Key.
-
Click the Copy to clipboard button next to the API key field and paste that value into the API Key field in Strategic Roadmaps.
-
To the right of the API key field, there is some text and towards the end of that text is the word “Token” that is hyperlinked. Click that Token link.
-
Scroll down and click the Allow button.
-
Manually copy the token string in red font and paste that into the Personal Access Token field in Strategic Roadmaps.
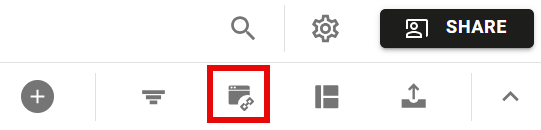
Connecting your Roadmaps to Trello
Integrations Setup Walkthrough
It's a quick and easy process to set up an integration between your Trello boards and your team's roadmaps in Strategic Roadmaps. The setup process can be broken down into three stages: triggering the integration, applying synchronization settings, and applying field and filter settings. Once those have been completed, your roadmap will be set to pull and visualize data from Trello as needed.
Step 1 - Triggering the Roadmap Integration
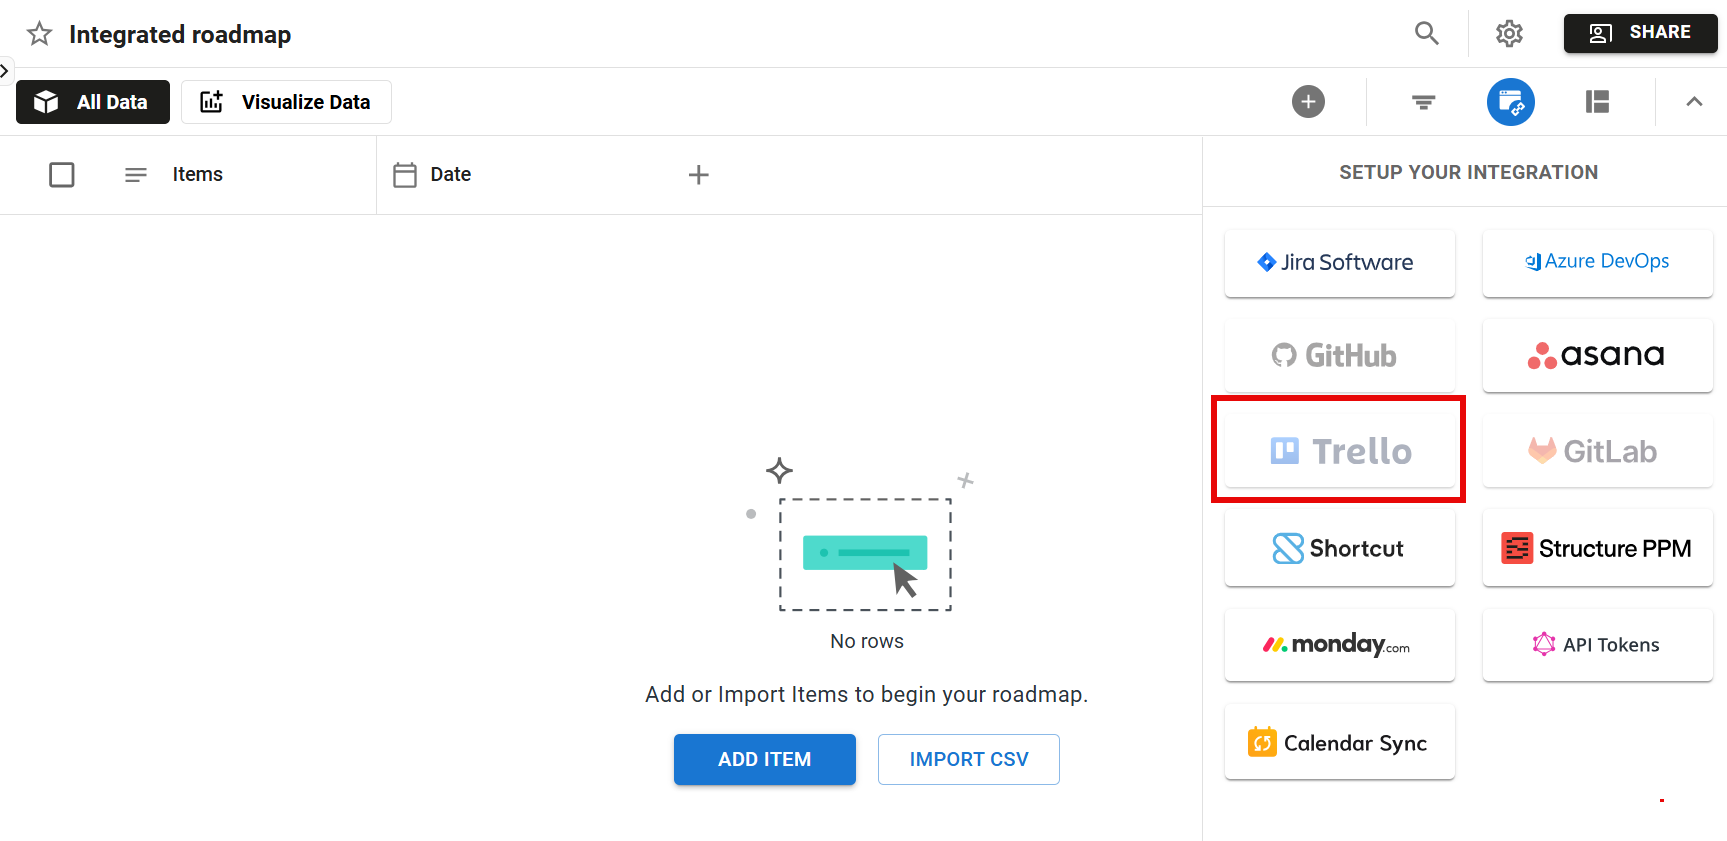
Once the integration connector has been set up by your Account Admin, you will be able to select the Trello option in the Integrations tool on your roadmap. Triggering this integration will not overwrite your existing data; however, once you've linked a roadmap to a board you are unable to remove that connection or change the specified project.
This option will activate a setup wizard which will walk you through the process of connecting your roadmap to a specific board in Trello to act as a data source for your roadmap.
Step 2 - Applying Synchronization Settings
Once in the setup wizard, you will be prompted to follow the preset workflow to complete the integration. In the first phase of this workflow, you will have the option to select which Trello connector you would like to pull project data through, the synchronization direction (one-way, at this time), and the automatic sync cadence (default is set to 12 hours).
Step 3 - Applying Credentials, Field & Filter Settings

Once your instance has been selected, you'll be prompted to choose your credentials for syncing with Trello. If you haven't previously set up credentials to sync with, please enter the Personal Access Token that was generated in the steps above and apply a Credential Label for future reference.
After these details above have been provided, you will be able to select the project you would like to pull data from and the state of issues being pulled to bring in only the relevant content is being pulled. Once these settings have been applied, you'll be able to specify Start Date & End Date and select the Trello fields to use on your roadmap. While the specified project can't be changed after the setup, the user-defined dates and fields can be updated later if needed.

Once you've completed this phase of the setup, you'll be taken to a confirmation screen to let you know that the integration has been set up successfully. After completing the setup wizard, you'll be returned to the roadmap view where your data will begin to populate from your specified Trello project.
What to Expect After Integrating
Once you've integrated your data from Trello, there will be a few changes to your roadmaps. The following changes may occur after you've set up your integration:
-
All fields pulled from Trello are Account-Level by default - Since the properties and values of these synchronized fields are managed in Trello, we automatically promote them to account-level so they can be accessible as common fields in Portfolio roadmaps.
-
There is an External ID field that appears in the Items Table view - When synchronizing data from Trello, we pull in the ID of each task for reference on your roadmap. This is clickable and linked out to your team's Trello instance, so you can quickly access the respective work item from either your Table view and Item Card.
-
Unable to change or add new boards on a single roadmap - As with our other integrations, we limit connections between roadmaps and third-party tools to be a 1:1 connection. This means that you will be unable to sync multiple boards into a single roadmap; however, you will be able to create multiple roadmaps for each board and use those as sources in a Portfolio roadmap.
-
Additional Date fields will be read-only - Due to a variance in field formatting between Strategic Roadmaps and Trello, any additional Date fields selected which are not mapped to Start and End Dates will be pulled in as read-only text fields.
Modifying Trello Integration Setup
Once the initial integration setup is complete, the roadmap owner will be able to modify the setup at any time. To do so, from the Items Table or in a roadmap visualization, simply click the Integrations button and select the "Modify Setup" option for Trello from the drop-down menu. This will open the integration setup menu and you can update sync settings, credentials, filter work items, and select fields.