After migrating Tempo data to your Cloud instance, you also may need to update the Tempo Account field in your migrated Cloud instance. This article provides more detailed instructions about how to update the Tempo Account custom field for your Jira issues with the old value from your Data Center instance. This is necessary since the Tempo Account custom fields get a new identifier in the Jira Cloud instance and the Tempo Accounts get a new identifier after a reimport of the Tempo Accounts into the Jira Cloud instance.
The same approach can and should be followed for the Tempo Team custom field if you have set this field on your Jira issues.
-
Start by extracting the Jira issue Account information from your (old) Data Center instance. You should only export the issues that have a Tempo Account value set to limit the number as much as possible. Export the Jira issues into a csv file. The only fields you need is the Jira issue key and the Tempo Account field value.

-
Import the extracted csv file into a spreadsheet that you are going to work with for the updating purpose. Your spreadsheet should look similar to the one below.
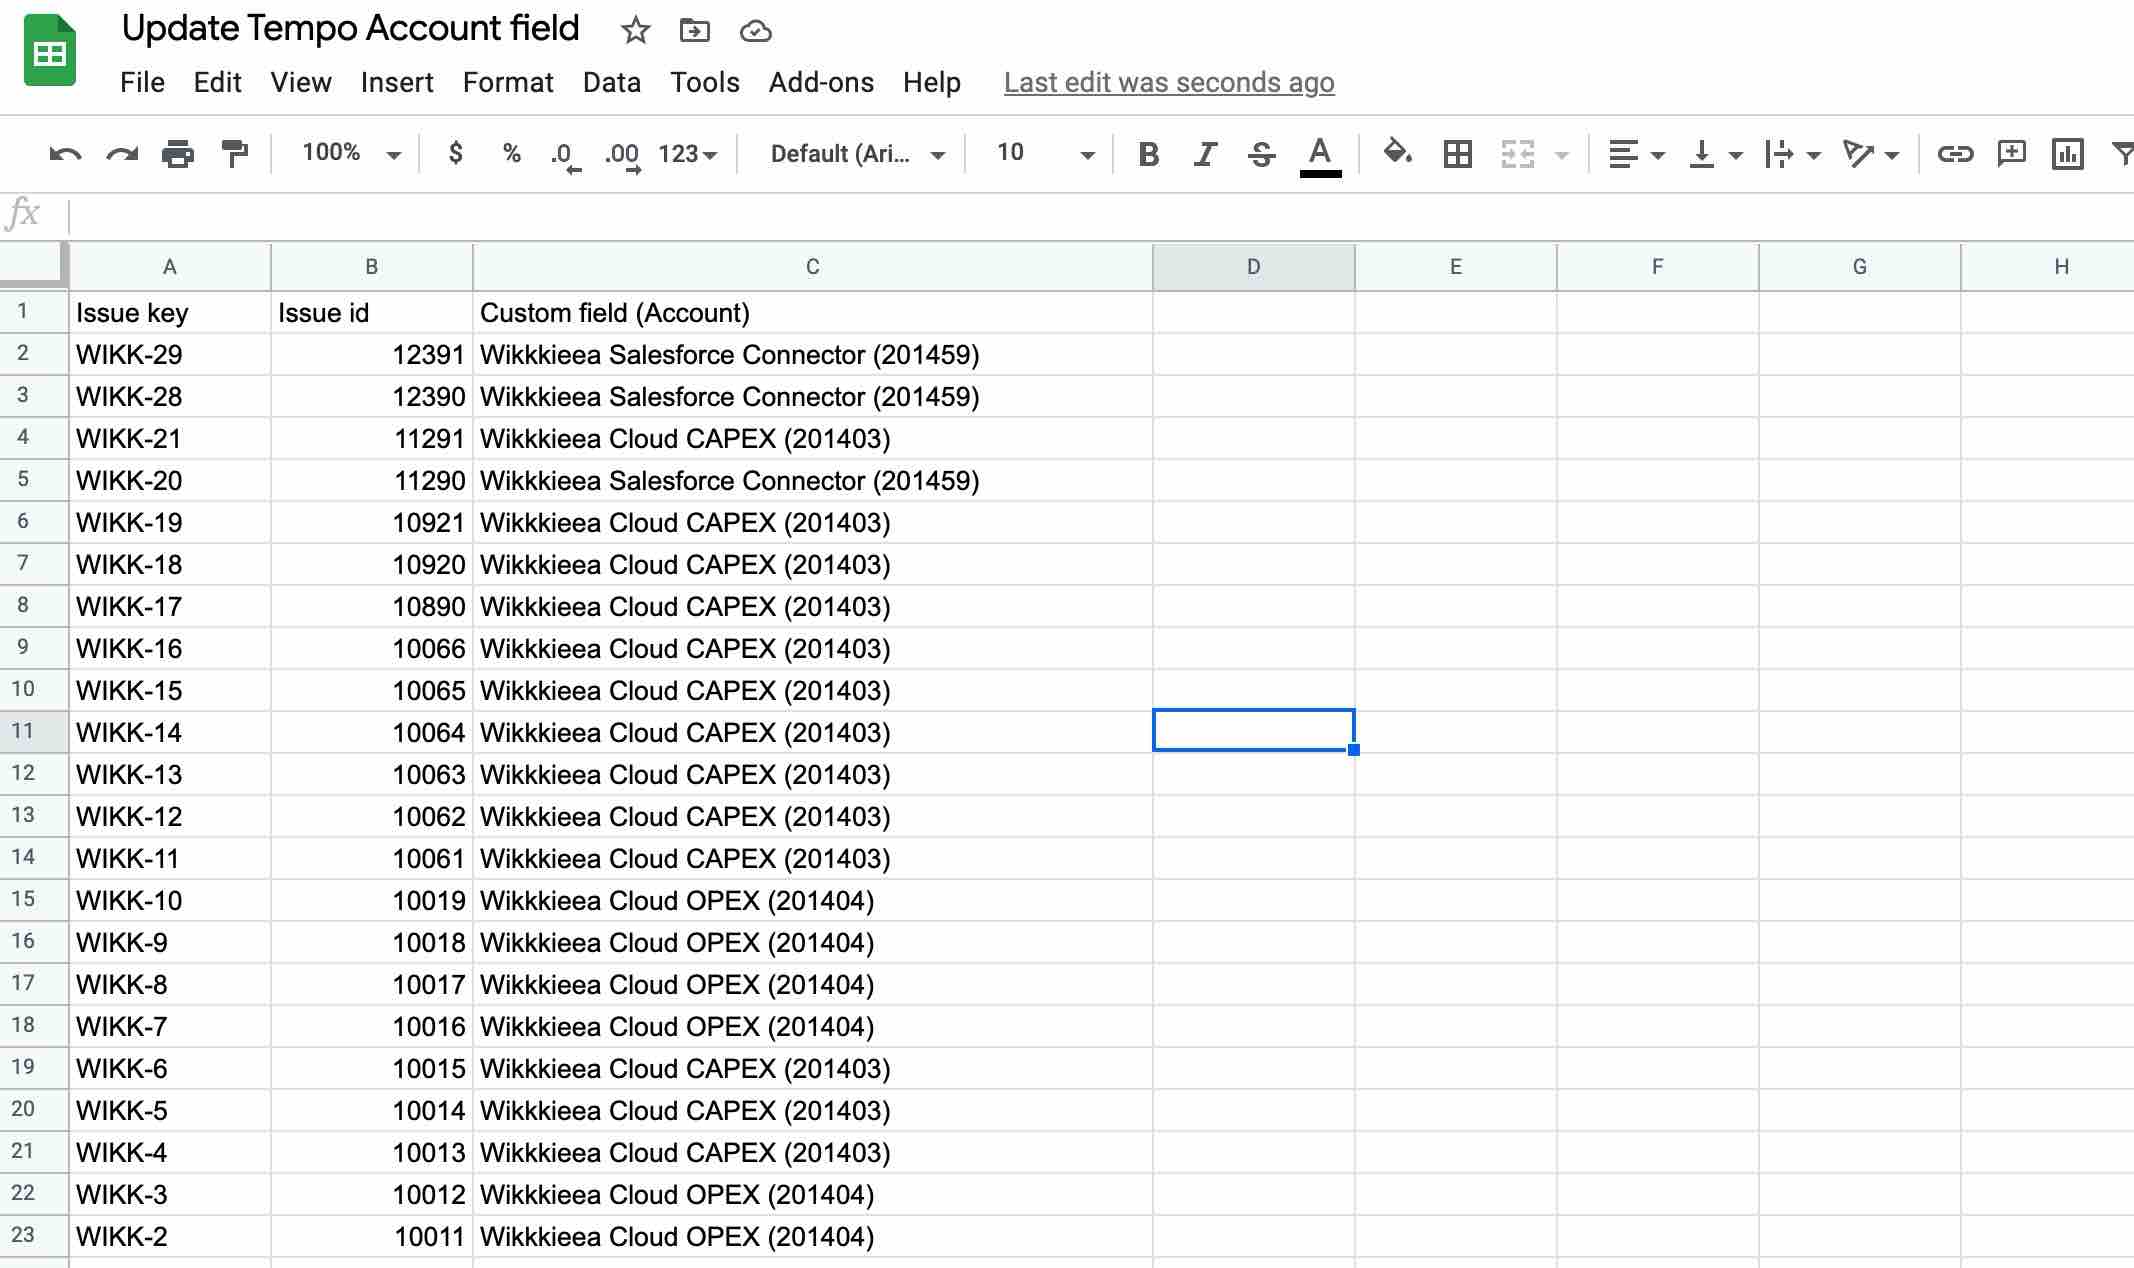
Since the export attaches the Tempo Account key in brackets we will need to get rid of that as we do the mapping later only against the Tempo Account name. Add an extra column and populate it the the Tempo Account name only by using a formula like:
=left(C2,find("(",C2)-2) -
Now you will need to extract all Tempo Accounts from your Cloud instance since we need the new identifier of the migrated Tempo Accounts. Therefore you will need to leverage the Tempo REST APIs. You can retrieve all Tempo Accounts with the following curl command:
curl --request GET 'https://api.tempo.io/core/3/accounts' -H 'Authorization: Bearer {TempoAPIToken}'From the response extract the values in the “results” section and save the content to a file. Find an json converter tool of your convenience (like https://www.convertcsv.com/) to convert the json content to a file format that can be used in your spreadsheet (e.g. csv).
-
Insert the csv file into your spreadsheet (into a new sheet) and after that you should have something similar to the file below.
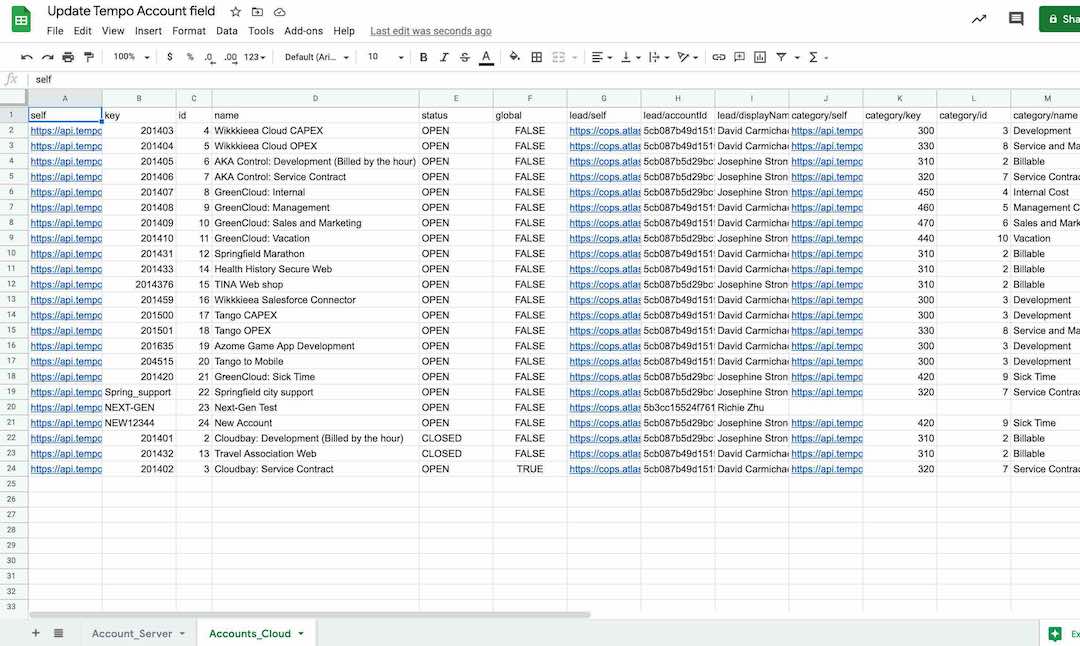
The only data we need is the “name” and the “id” column. As we are working with the “lookup” function later it is better to switch the columns so that the “name” comes first and then the “id” column.
In the previous sheet with the Jira issue we inserted a “lookup” function into column “E” to get the new identification of the Tempo Account to update the Jira issue.1
=VLOOKUP(D2,Accounts_Cloud!A:B,2,false)Your spreadsheet should look like:

-
The final information we need is the Tempo Account Jira custom field ID. This information can be retrieved by calling the Jira REST API:
curl --request GET 'https://{JiraCloudUrl}/rest/api/3/field' --user '{AtlassianUser}:{AtlassianAPIToken}'This will include information about the Tempo Account custom field. Look for the key "io.tempo.jira__account".
"id": "customfield_10201", "key": "io.tempo.jira__account", "name": "Account", -
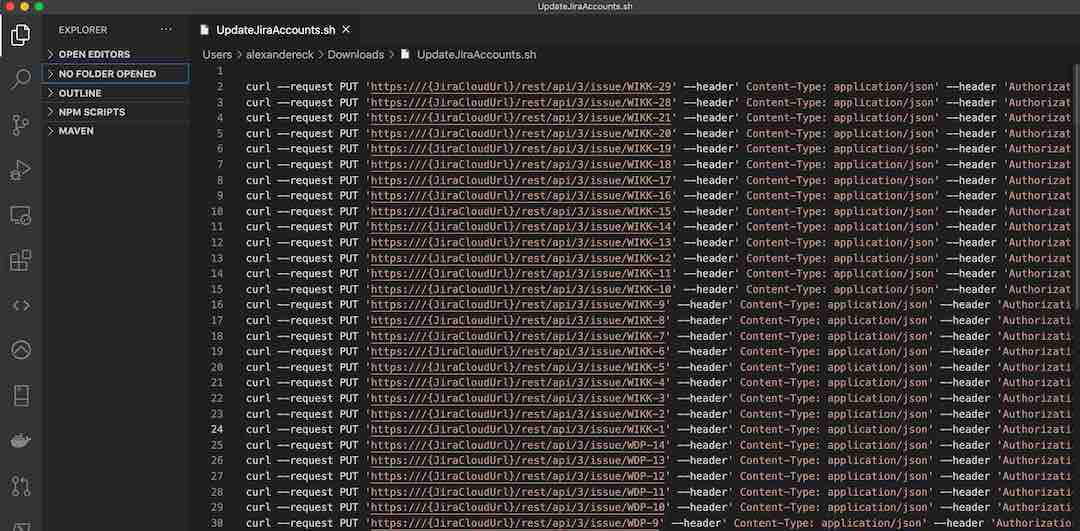
Now we have all the information we need and we can start to populate our spreadsheet with the update commands that we will run later in batch. In column “F” of our spreadsheet insert the formula:
="curl --request PUT 'https:///{JiraCloudUrl}/rest/api/3/issue/"&A2&"' --header 'Content-Type: application/json' --user '{AtlassianUser}:{AtlassianAPIToken}' --data-raw '{""fields"": {""customfield_10201"": "&E2&"}}'"Of course you replace the formula with your matching values for the Jira Cloud url, the Atlassian token and the Jira customfield ID retrieved from the response above.
You can copy the content of the column “F” and paste it into a new text file that you will need to save as an executable shell script (e.g. “UpdateJiraAccounts.sh”).
You simply run the batch update commands from the command line by executing the text file you have populated:
sh UpdateJiraAccounts.shWatch out for any warning errors that you might get during the output.