There are several different ways you can add items to a roadmap, but for the sake of this tutorial we will be covering the two most common: creating items manually or importing items from a CSV file. Whichever way you choose, the simplest and easiest place to add items is the All Data view.
The All Data items table gives you a tabular view of the items (data) in a roadmap. Each row in the table represents an item, and each item is made up of fields (with one field per column in the table). With every item you create, a new row is added to the table.
Adding New Items from the Items Table
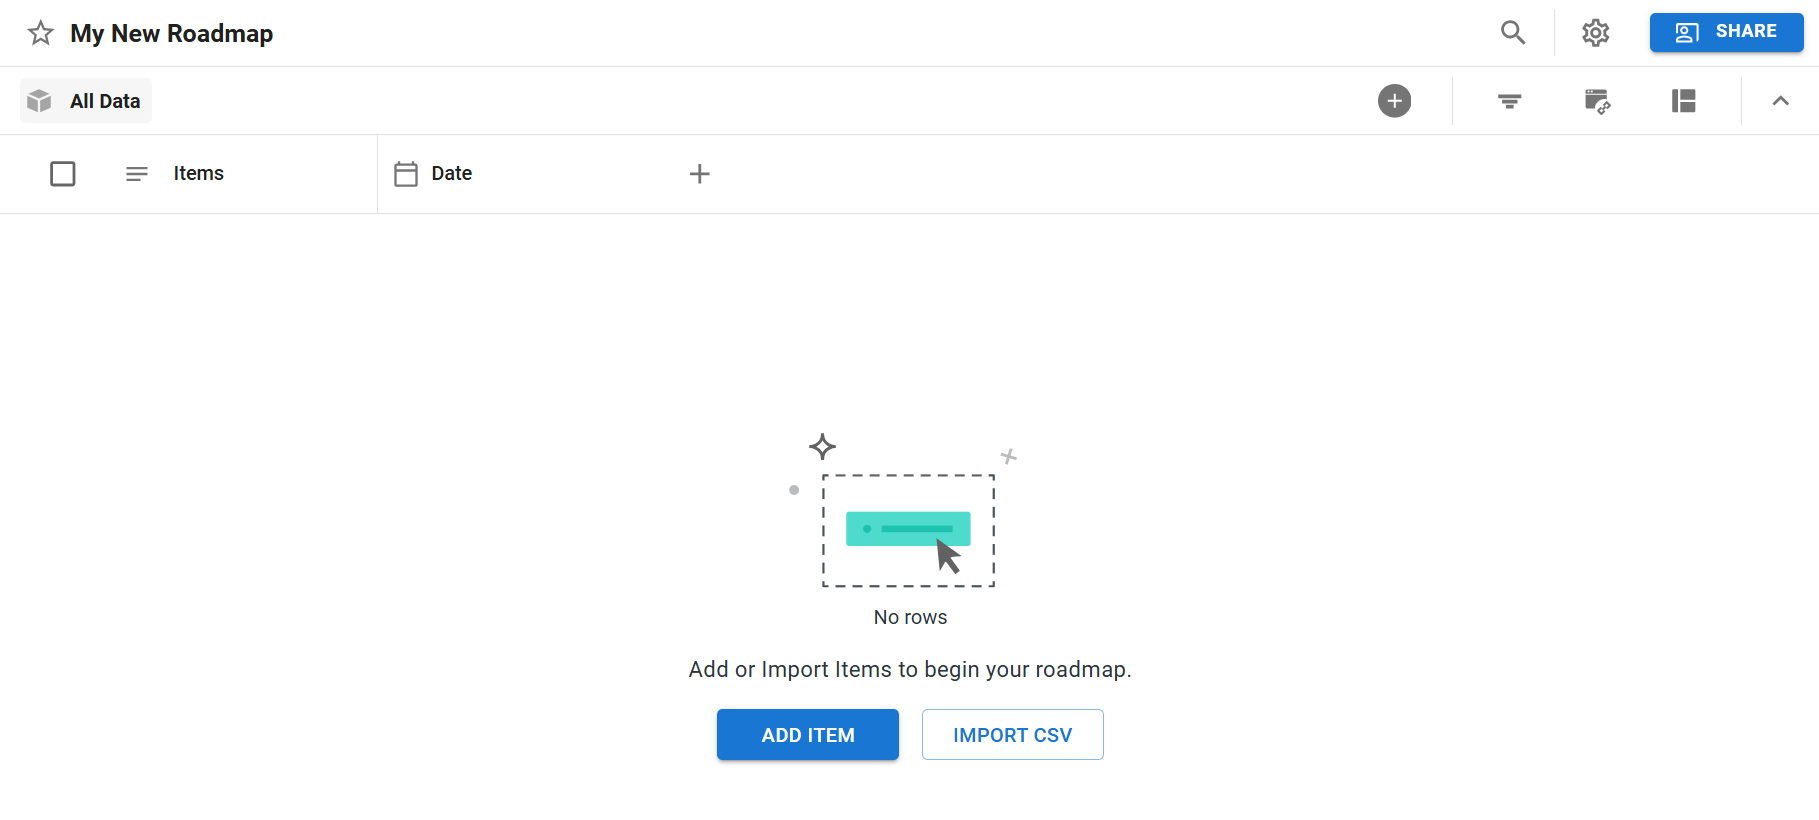
If you don’t have any items in your roadmap yet, you’ll see an Add Item option in the middle of the screen.
-
Click the Add Item button.
-
Enter a name for the new item.
-
Either click out of the table or press the Enter key to save your changes.
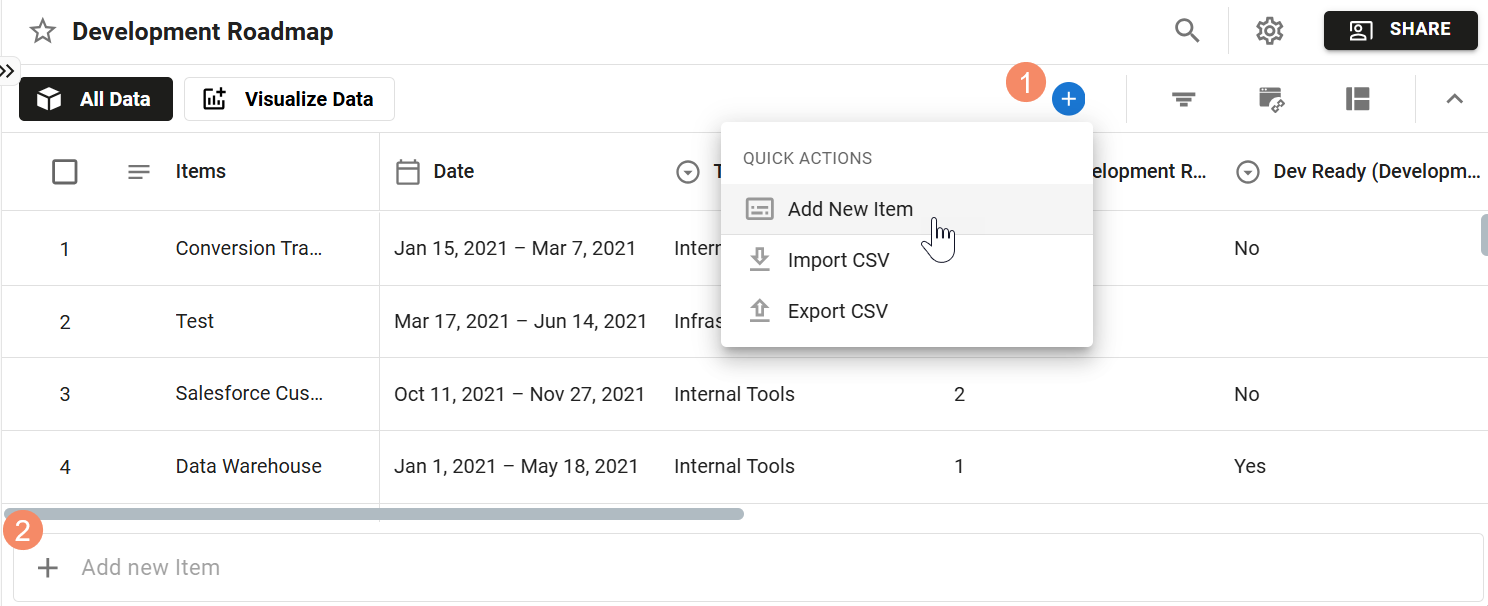
If you already have items in the roadmap, there are two ways to add new items from the items table:
-
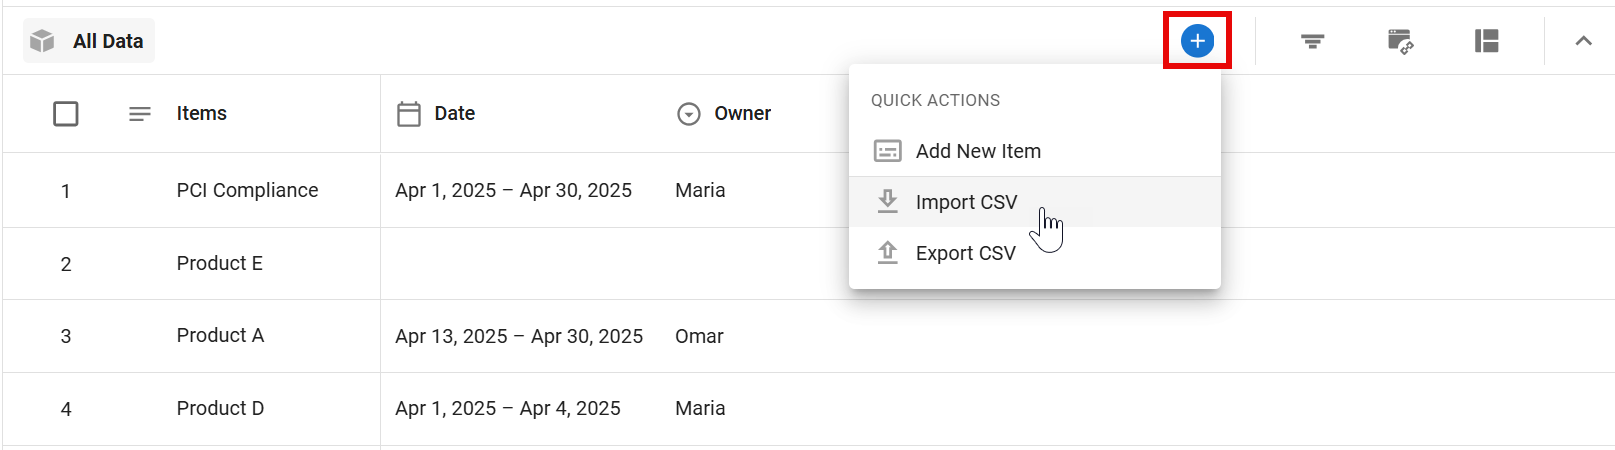
Click the + button and select Add New Item
-
Start typing the items name into the + Add new Item bar at the bottom of the table
Every roadmap created from scratch starts out with two default fields: Items and Date. Although you can create a new item just by filling in the Items field with the item's name, you won't get much out of your roadmap if you don't complete the other fields.
Adding New Items from the Item Card
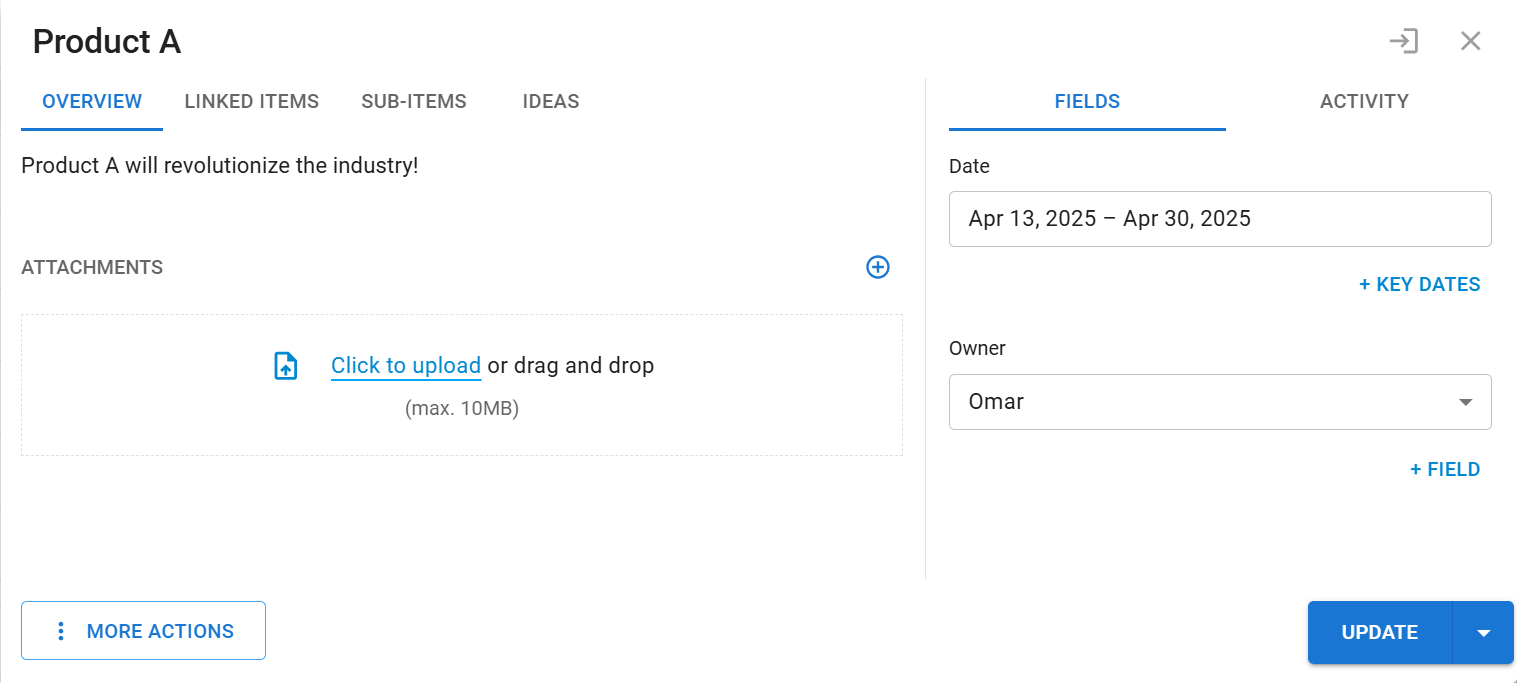
Alternatively, you can also click the (+) button in the roadmap toolbar and select Add New Item to create a new roadmap item. This will bring you to the Item Card, where you can provide additional details about the new item.
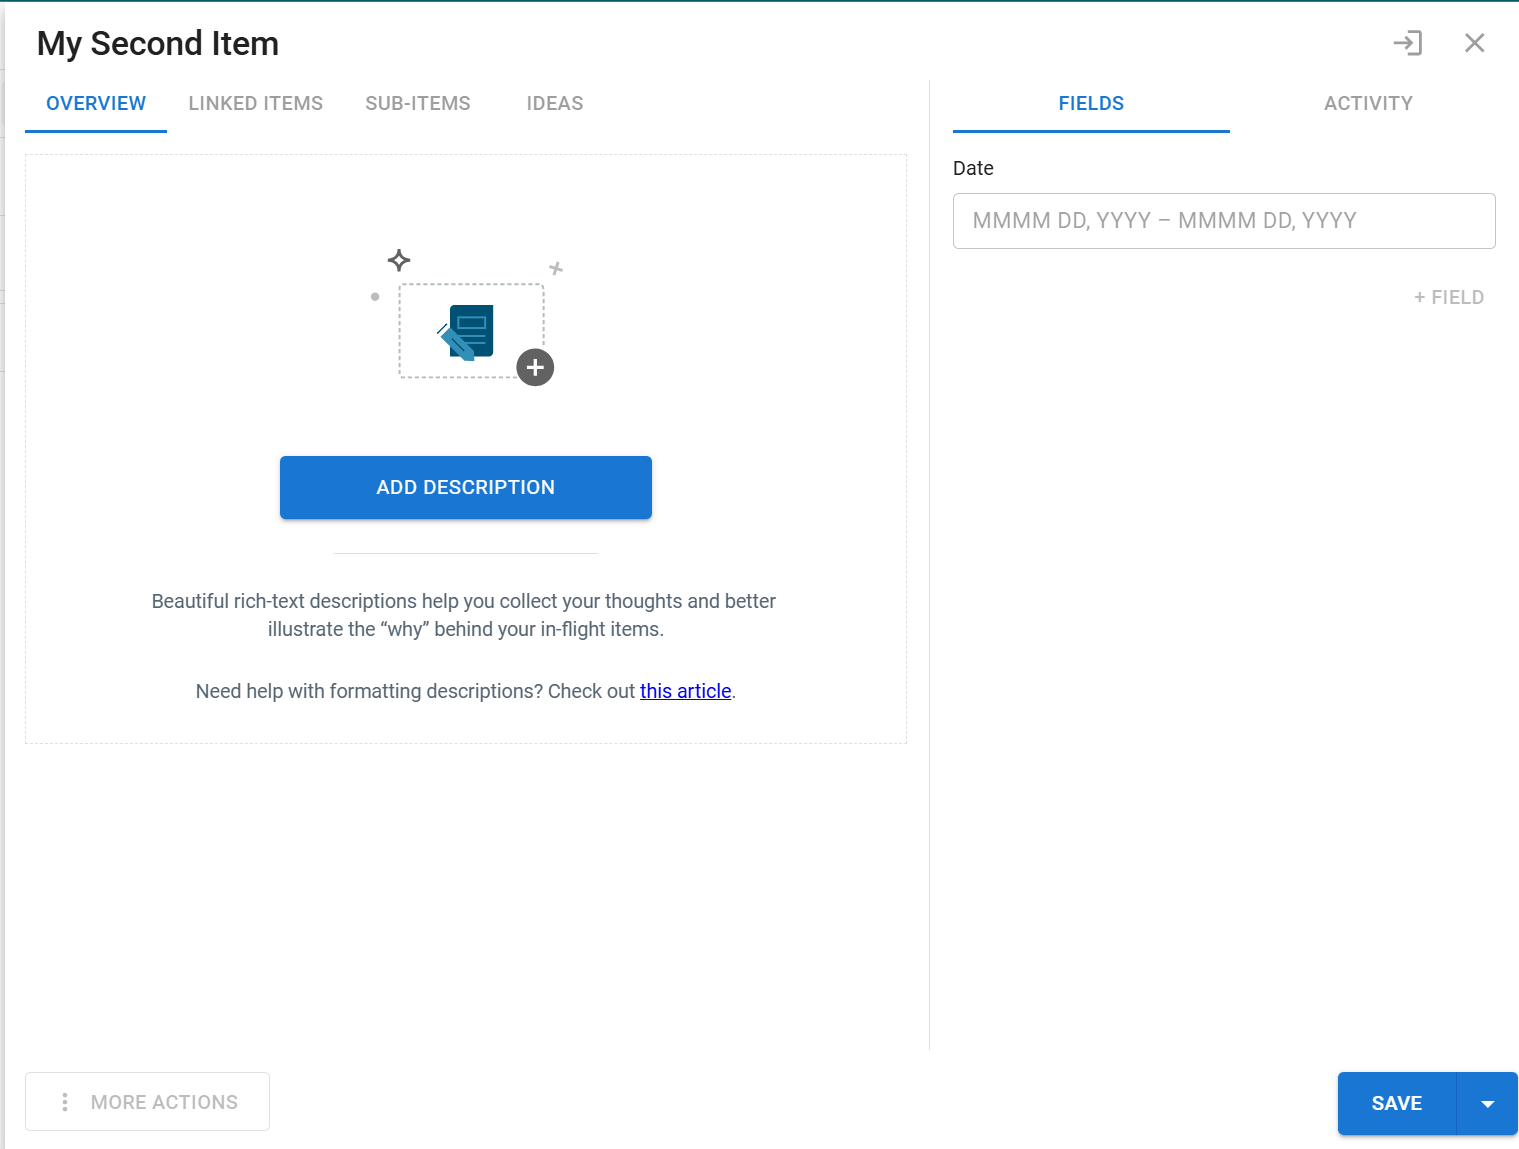
Once the item has been created, the item card can be accessed by clicking into the item name on your All Data view and will also show a summary of any active Linked Items, Sub-items, and Linked Ideas for that respective item.
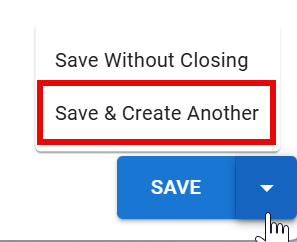
When creating multiple items that share the same fields, you can also create another item by opening the Save menu and selecting Save & Create Another. This will replicate all the same fields as the previous item created except for the item's description.
Inline Item Creation
The item table also supports inline item creation, letting you quickly add items to your roadmap.
-
Navigate to the All Data view.
-
Go to the + line at the bottom of the table.
-
Input your item name and press Enter. You can add consecutive items without interruption.
-
You can drag and drop items to any location in the list, and update fields inline.
Setting an Item's Date
An item's Date can be a range of dates or a specific date.

-
Click inside the item's Date field to open the date picker.
-
To set a date range, select the Start Date and the End Date. To set a specific date, select it as the Start Date. The End Date is automatically set to the same date.
-
Click anywhere off the date picker to close it.
You can also set the date(s) in the item card.
Fixed Date or Bucket?
If you don't have fixed dates for an item yet, you can add the item to a time bucket, such as Soon or Future. Buckets let you be more flexible with scheduling, so you can start roadmapping your strategy before you have all the pieces.
To add an item to a bucket, click the Bucket icon in the date picker instead and select the bucket from the drop-down menu.
Congratulations!
You've just added your first roadmap item. To view its details, click the item's name in the table to open its item card. The item card is like command central for items, where you can view, edit, and manage everything associated with an item.
Importing Data from a CSV File
To import Items from another application into Strategic Roadmaps:
-
Export your data to a CSV file
-
Import the CSV file into Strategic Roadmaps
Setting up the CSV
The CSV file needs to follow some simple formatting for the import to work. Your CSV file must have:
-
An Item field that maps to the roadmap's Items field
-
Field name headers
To make creating this file easy, we've created a CSV template you can download here.
The template has Items, Descriptions, and Start and End Date columns. It also has a Bucket column for items without fixed dates. If your data has other fields, just add them to the template, and they'll be automatically added to the roadmap.
IMPORTANT: The items in the CSV file should have either Start and End Dates OR a Bucket. If they have both, only the Buckets will be imported.
Strategic Roadmaps has a handful of application-specific Field names that cannot be used for Fields on your import. If any of these Field names exist on the CSV, they will not be imported. These Field names include: Error, Internal ID, External ID, Child Of, Source, Item, Milestone, Description, Start Date, End Date, and Date.
Starting the Import
To import your CSV file, go to the items table. Then:
-
If the roadmap is empty, click the Import from CSV button.
-
If the roadmap already has items in it, open the Quick Actions menu and select Import from CSV.
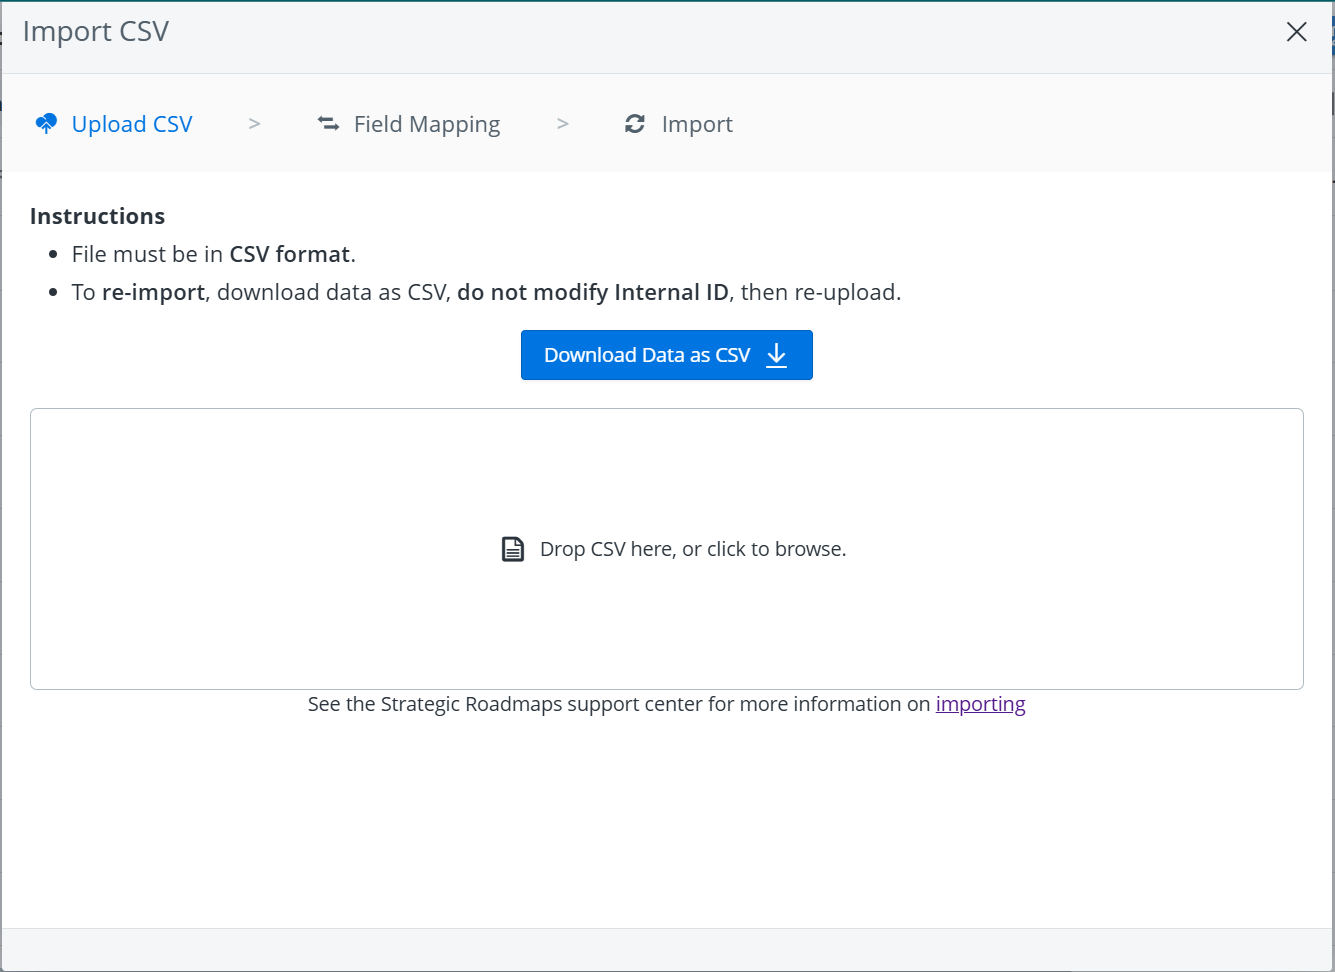
Uploading the CSV
The Import CSV dialog walks you through the import, starting with uploading the CSV file.
To upload your file, drag it to the center rectangle, or click “Drop CSV here, or click to browse” to select the file from your computer.
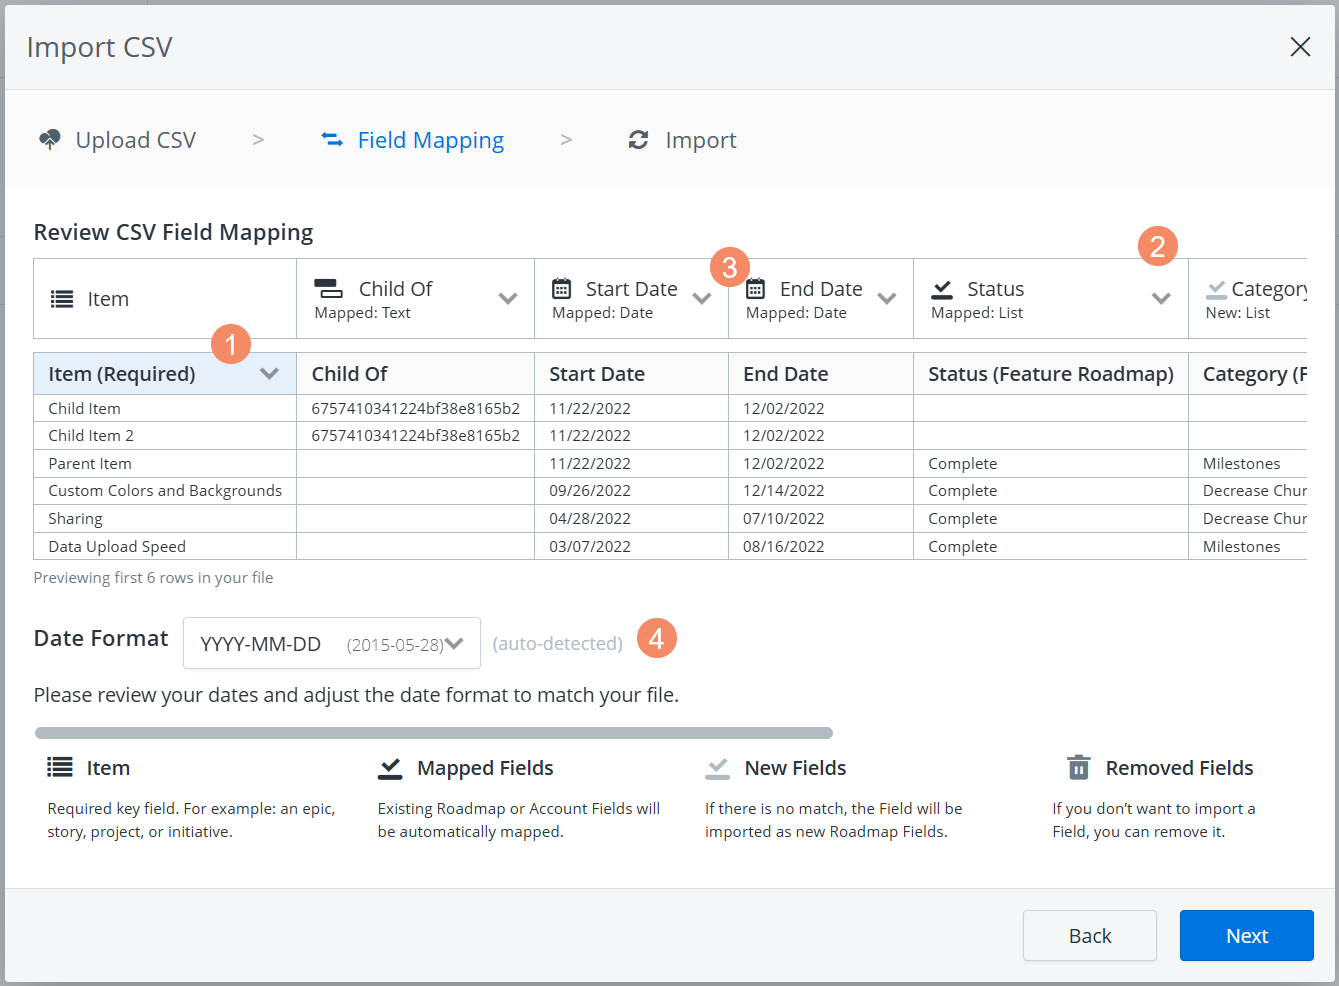
Checking field mappings
-
In the Field Mapping tab, you should see the Item field in the CSV mapped to the Item field in Strategic Roadmaps.
-
You should also see the remaining fields in the CSV mapped to the corresponding fields in Strategic Roadmaps:
-
If a field is not mapped correctly, click the field’s title and select a corresponding field.
-
If you decide not to import a field, click its title and select Do Not Import from the dropdown.
-
-
If the CSV file has both Start and End Date AND Bucket, choose the one you want to import and remove the other. If an item has both, only the Bucket will be imported.
-
Strategic Roadmaps auto-detects the date format in the CSV and sets the format in Strategic Roadmaps to match. If the formats don't match, select the right one in the Date Format dropdown.
-
If everything looks good, click Next.
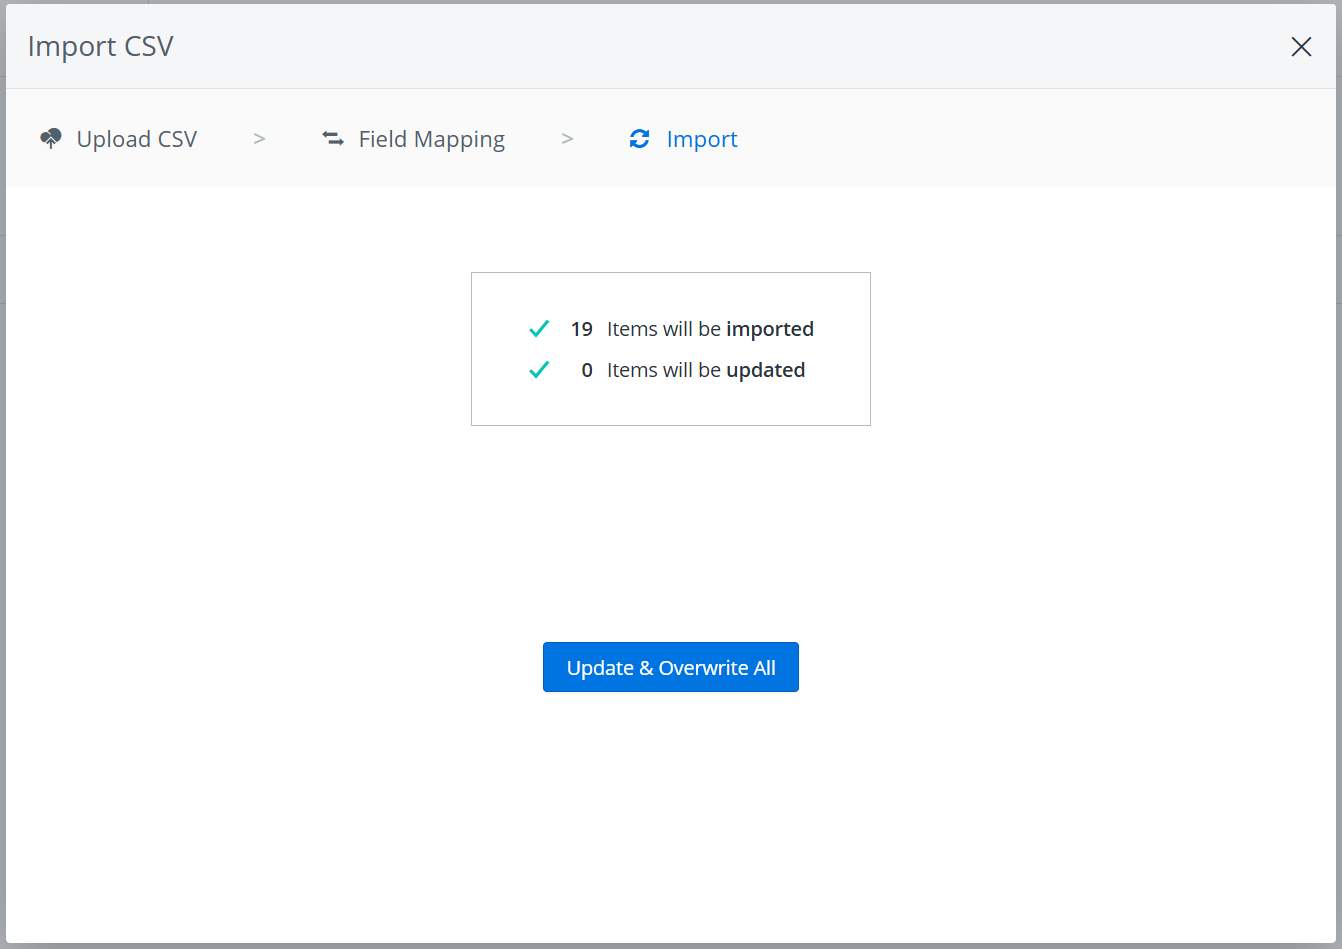
Finishing the Import
-
The Import tab shows a quick summary of how new items will be imported and existing items will be updated. Since we’re starting from a brand new roadmap, there are no existing items to be updated.
-
To finish the import, click Update & Overwrite All.
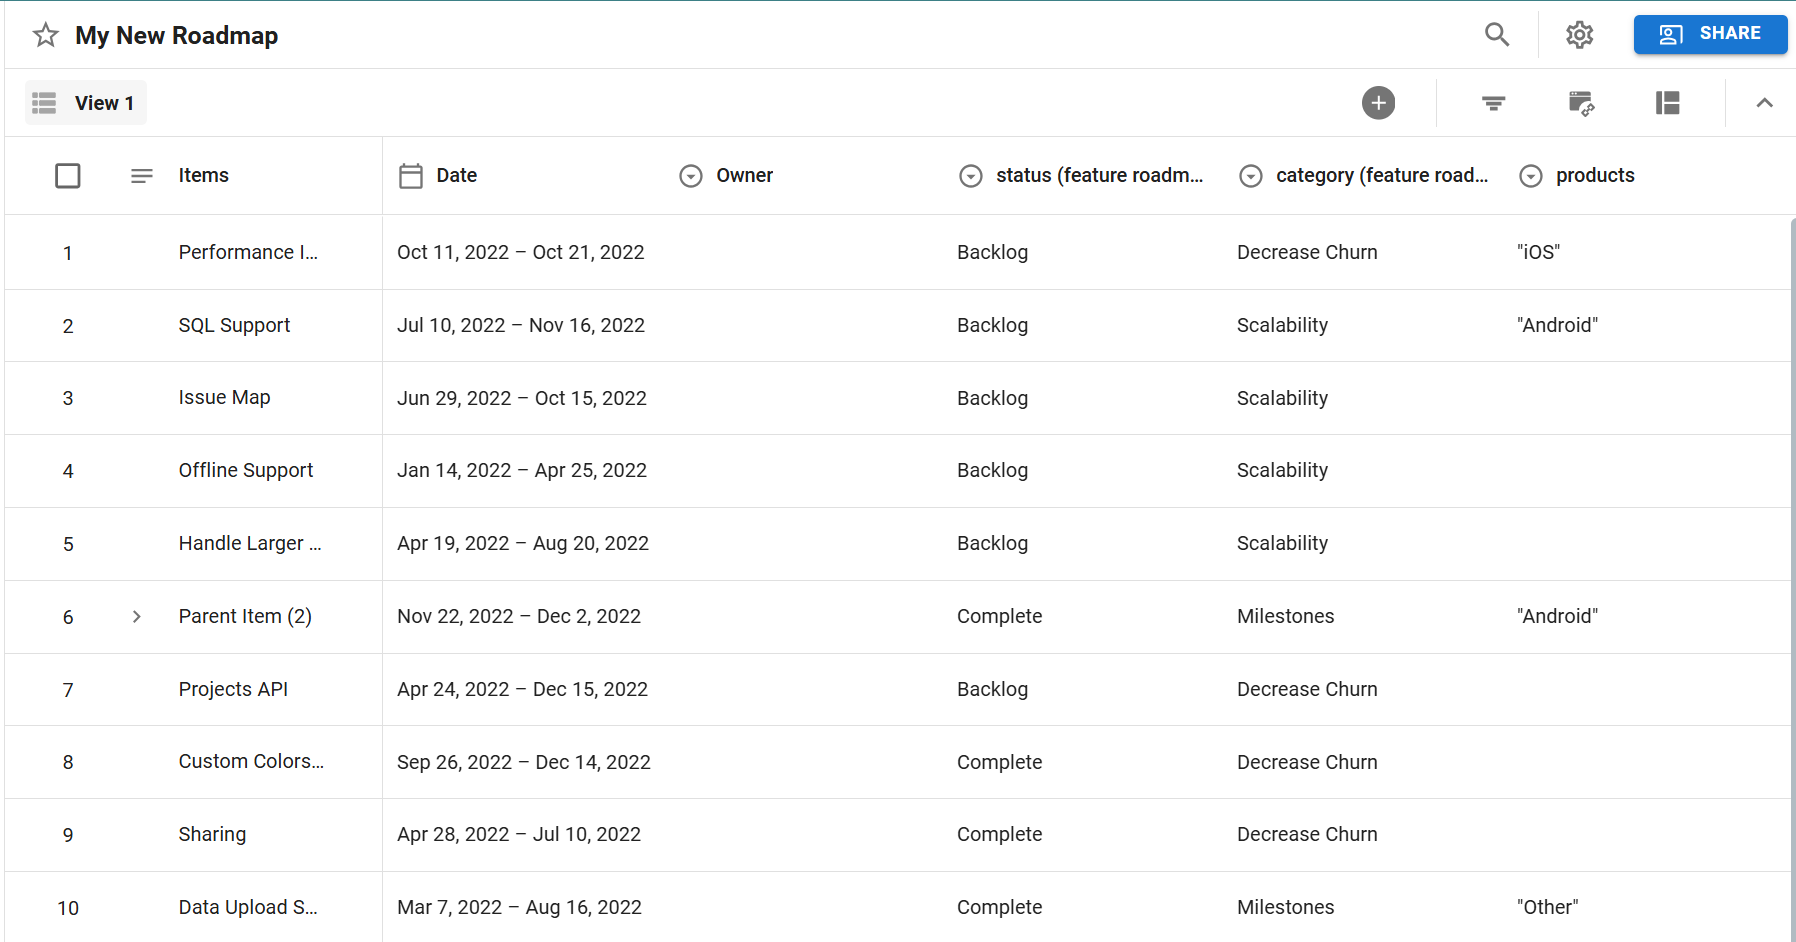
Success!
And voila, you can now see all the items from the CSV in the roadmap's item table
What's next?
You've now seen how all roadmaps in Strategic Roadmaps start out with the two default fields: Items and Date. You've also seen how other fields are added to a roadmap through a data import. Next, let’s look at how to add fields to your roadmap.