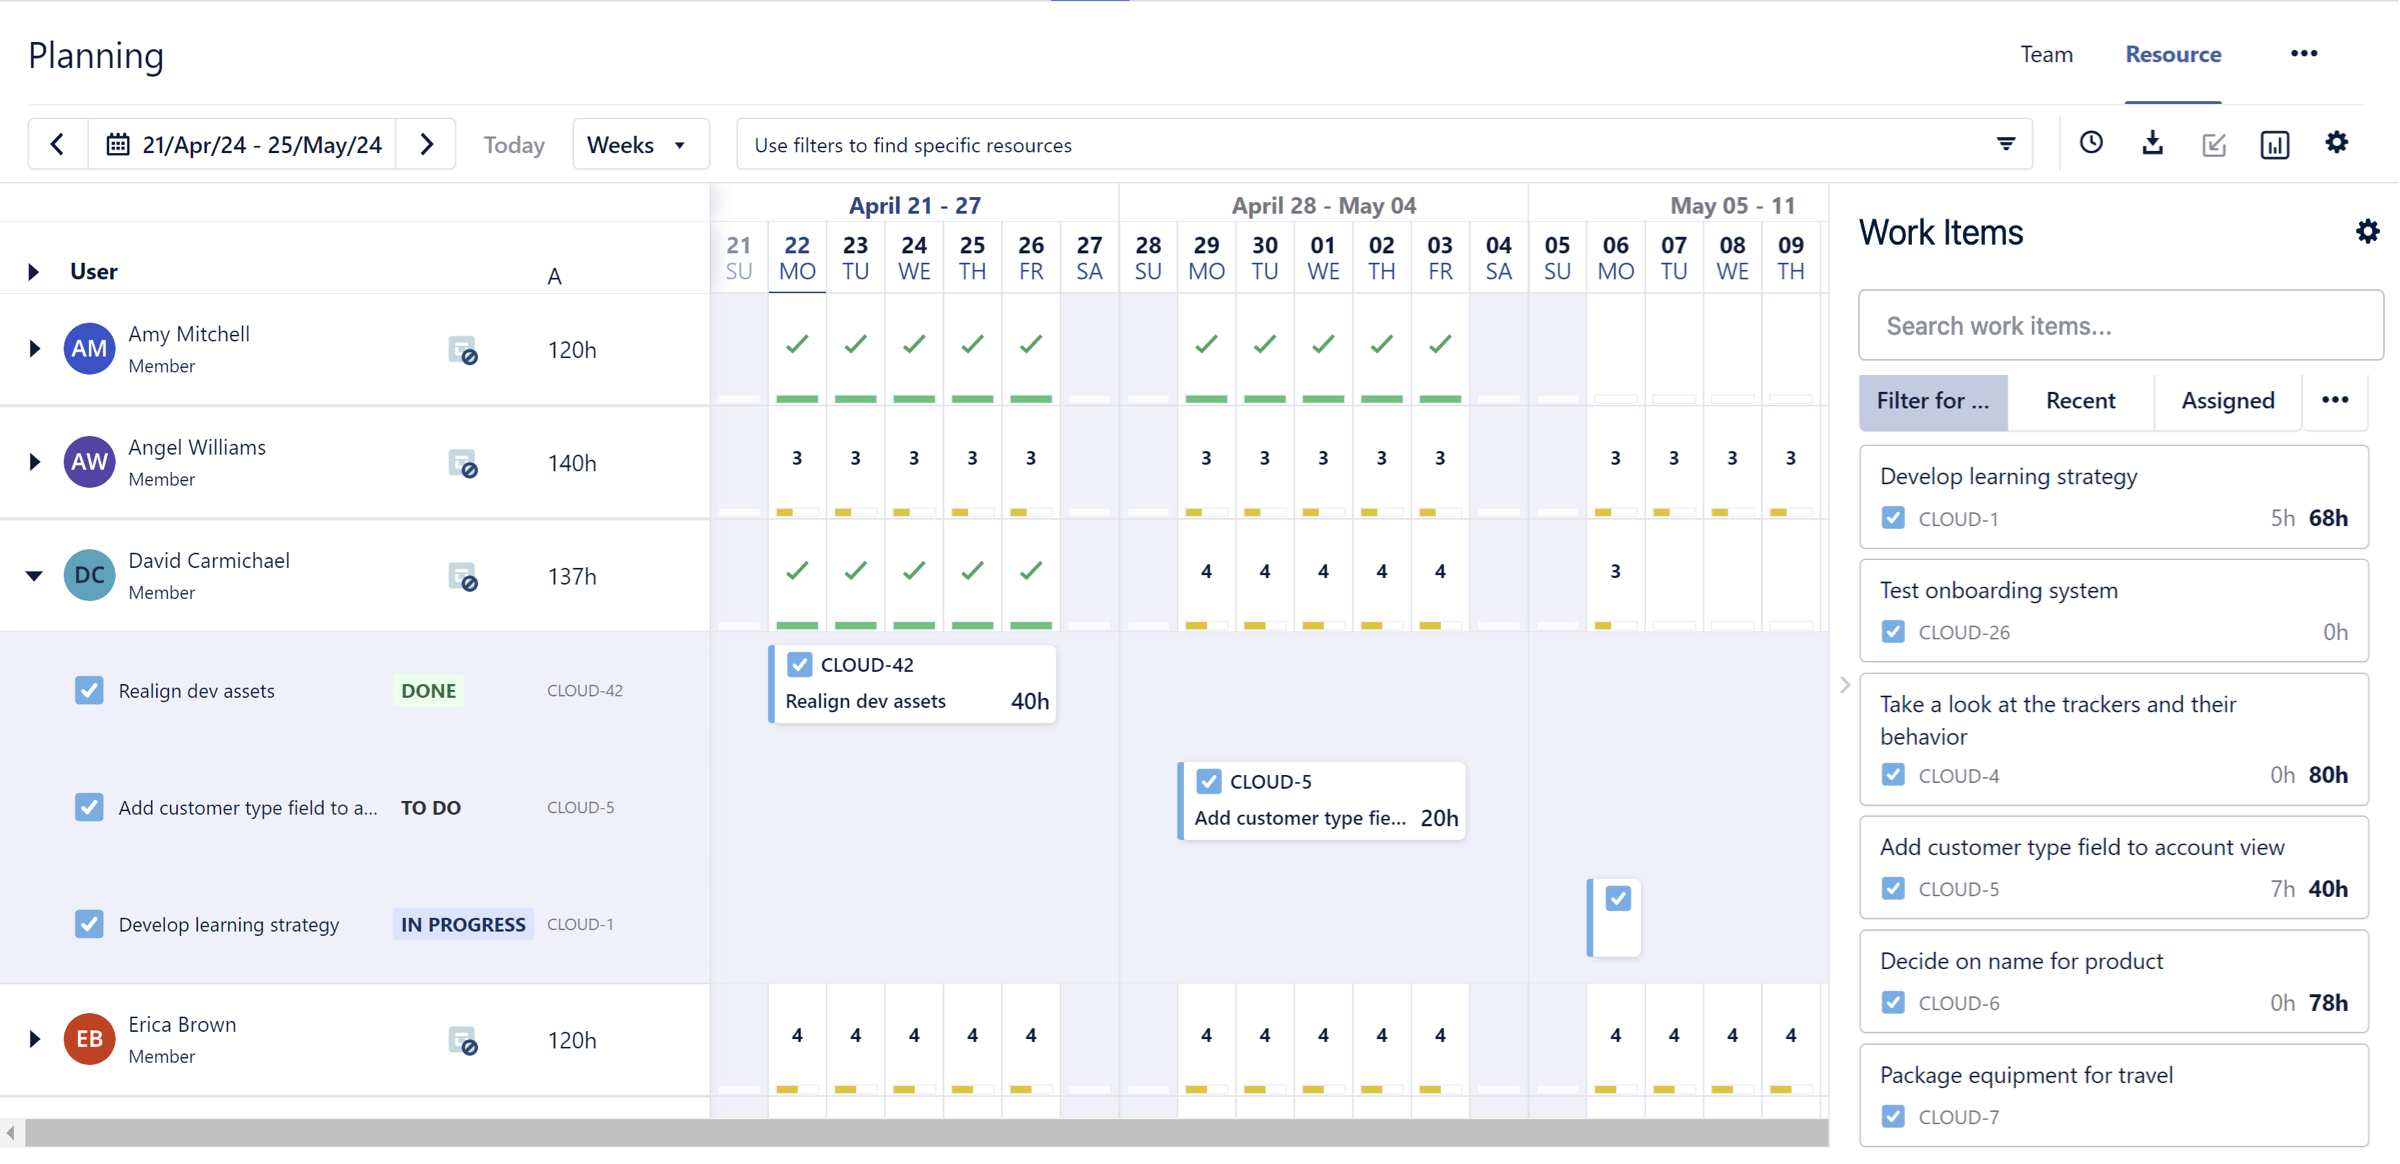
In the Resource Planning view, you can see all your resources and how their planned time is allocated - do they have enough work planned? do they have too much? are there any vacations coming up? You can also sort the resource list by name or available hours to quickly see what you want.
By default, all resources you have permission to view are displayed in the Resource Planning view, but you can filter who's displayed here - see Filtering Resources to do this.
To access Resource Planning, select Planning in the Tempo sidebar. The Weeks view is displayed by default - see Overview of the Resource Planner for more information.
Plans that have their Jira work items deleted are shown on the Resource Planning view. If you wish to delete those plans, you can modify the default settings in Setting Planning Options.
-
Viewing your resources in Resource Planning view requires the View Plans permission for the teams to which the resources belong.
-
Resources must be a part of a holiday scheme or workload scheme, or a member of a Tempo team, to be visible in the Resource Planning view.
-
To view calendar events in Resource Planning, make sure users are connected to the Enhanced calendar with automation.
Viewing How Much Resource Time Is Allocated
Resources are displayed in a list on the left side of the Resource Planning view, followed by their available hours for the selected period.
The main calendar on the right side of the Resource Planning view is where you can see the total number of hours that each individual is scheduled to work on each day. The number of working hours available for each resource is according to their workload scheme, such as 8 hours per day.
-
A red bar indicates that a resource is over-allocated. The total number of hours planned is also shown.
-
A yellow "progress" bar shows you the relative amount of hours that are already allocated.
-
A green check mark indicates that a resource is fully allocated.
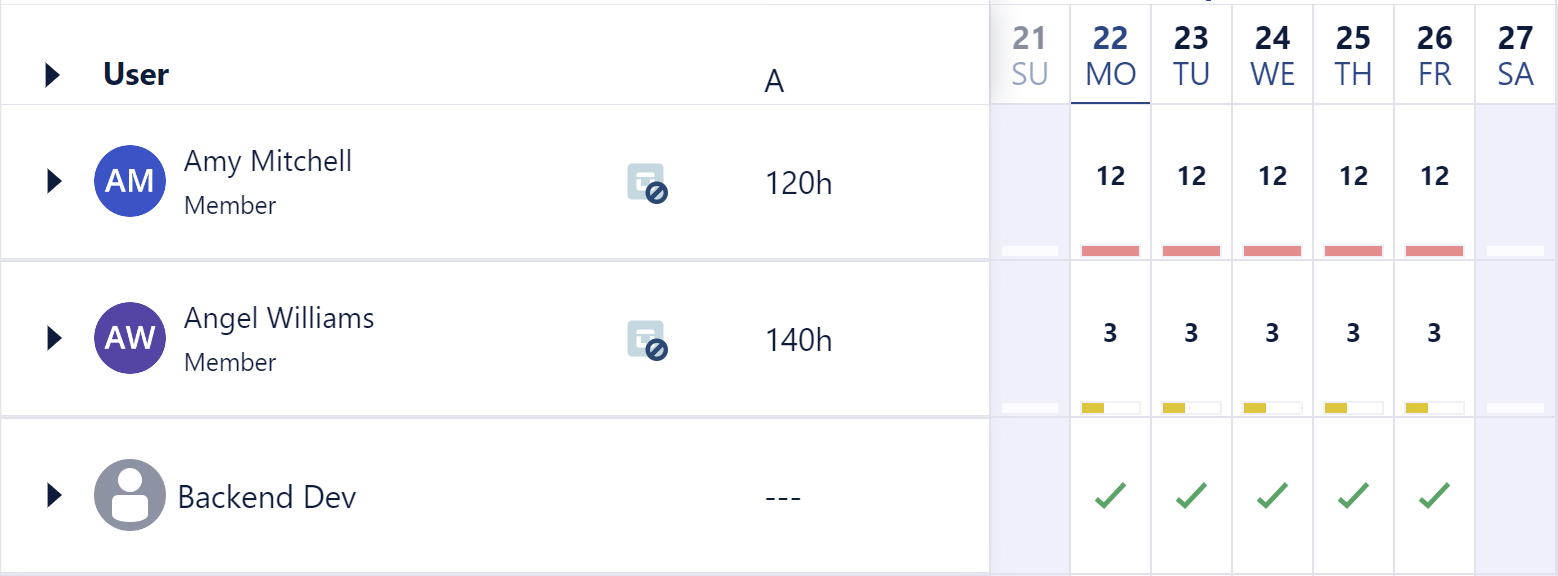
Generic resources are always shown in green regardless of allocated hours, as they are not linked to a workload scheme.
Sorting the Resource List
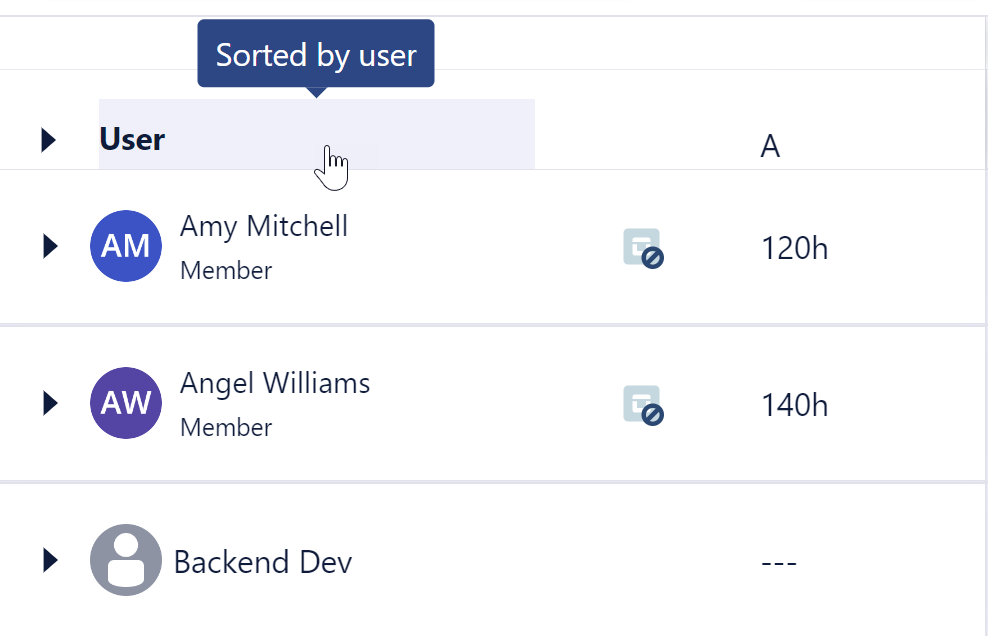
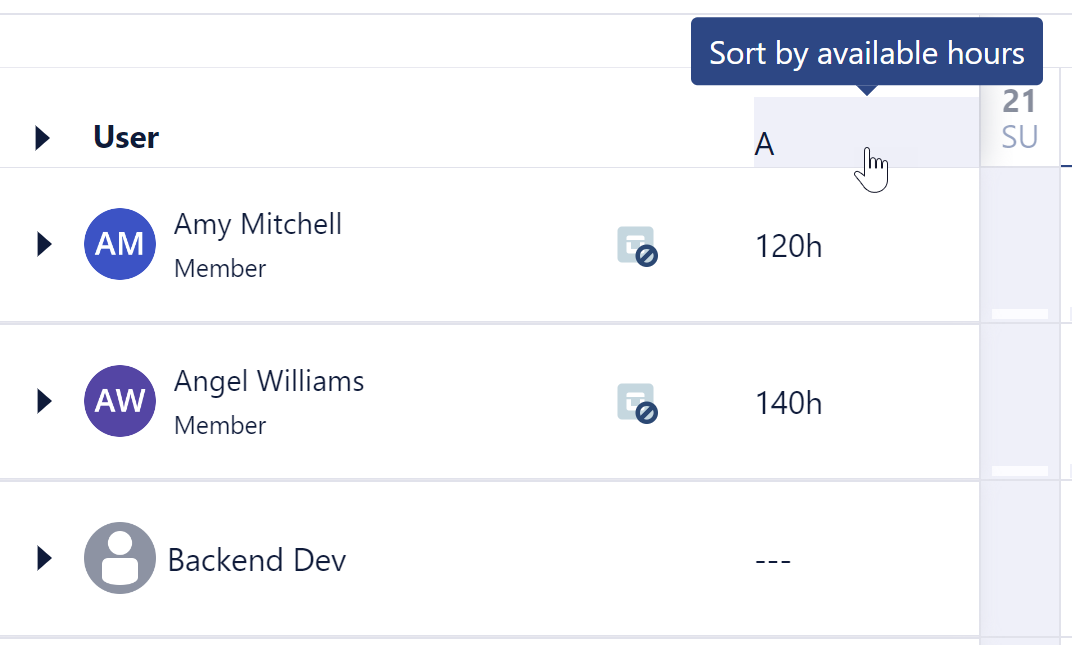
By default, the resource list is sorted by user name in alphabetical order. You can also sort your resources by the number of hours that they have available.
-
Click User to sort the resource list in alphabetical order (the default shown). Click again to reverse the order.
-
Click the A to sort by availability, so the resources with the most hours available are at the top. Click again to sort in descending order.
Viewing the Resource's Plans
You can view the plans per Jira work item for each resource by expanding their name in the resource list on the left.
-
Click the triangle next to User at the top of the resource list to Expand all or Collapse all resources' plans at once.
-
Click the triangle next to a resource's name to expand or collapse only that resource's plans.

-
If user skills are defined, they will appear under the resource's name. Learn how to show User skills.
When a resource's plans are expanded, you can see the plans on each Jira work item and that work item's current workflow status, such as TO DO, IN PROGRESS, or DONE. The statuses that are displayed depend on how your Jira instance is configured. Seeing the status of each Jira work item makes it easier for resource managers and team leads to plan for their resources.
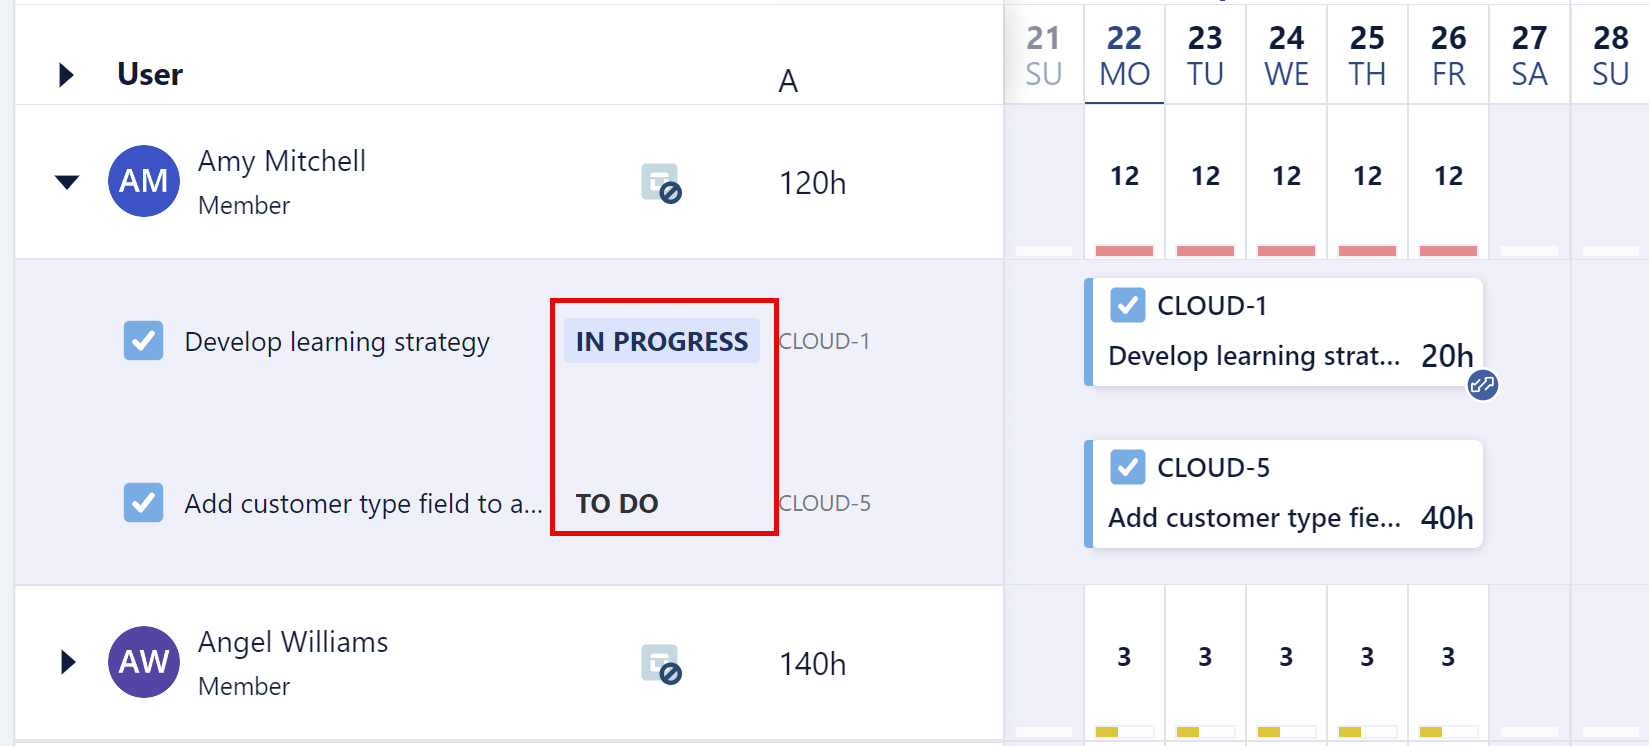
Plan Approval Status
If your company is using the plan approval process, you can see the approval status of each plan:
-
A white background and a green dot indicate an approved plan.
-
A purple shaded background and a yellow dot indicates a plan that is pending approval.
-
A gray shaded plan with strikethrough text and a red dot indicates a rejected plan. Sorry!

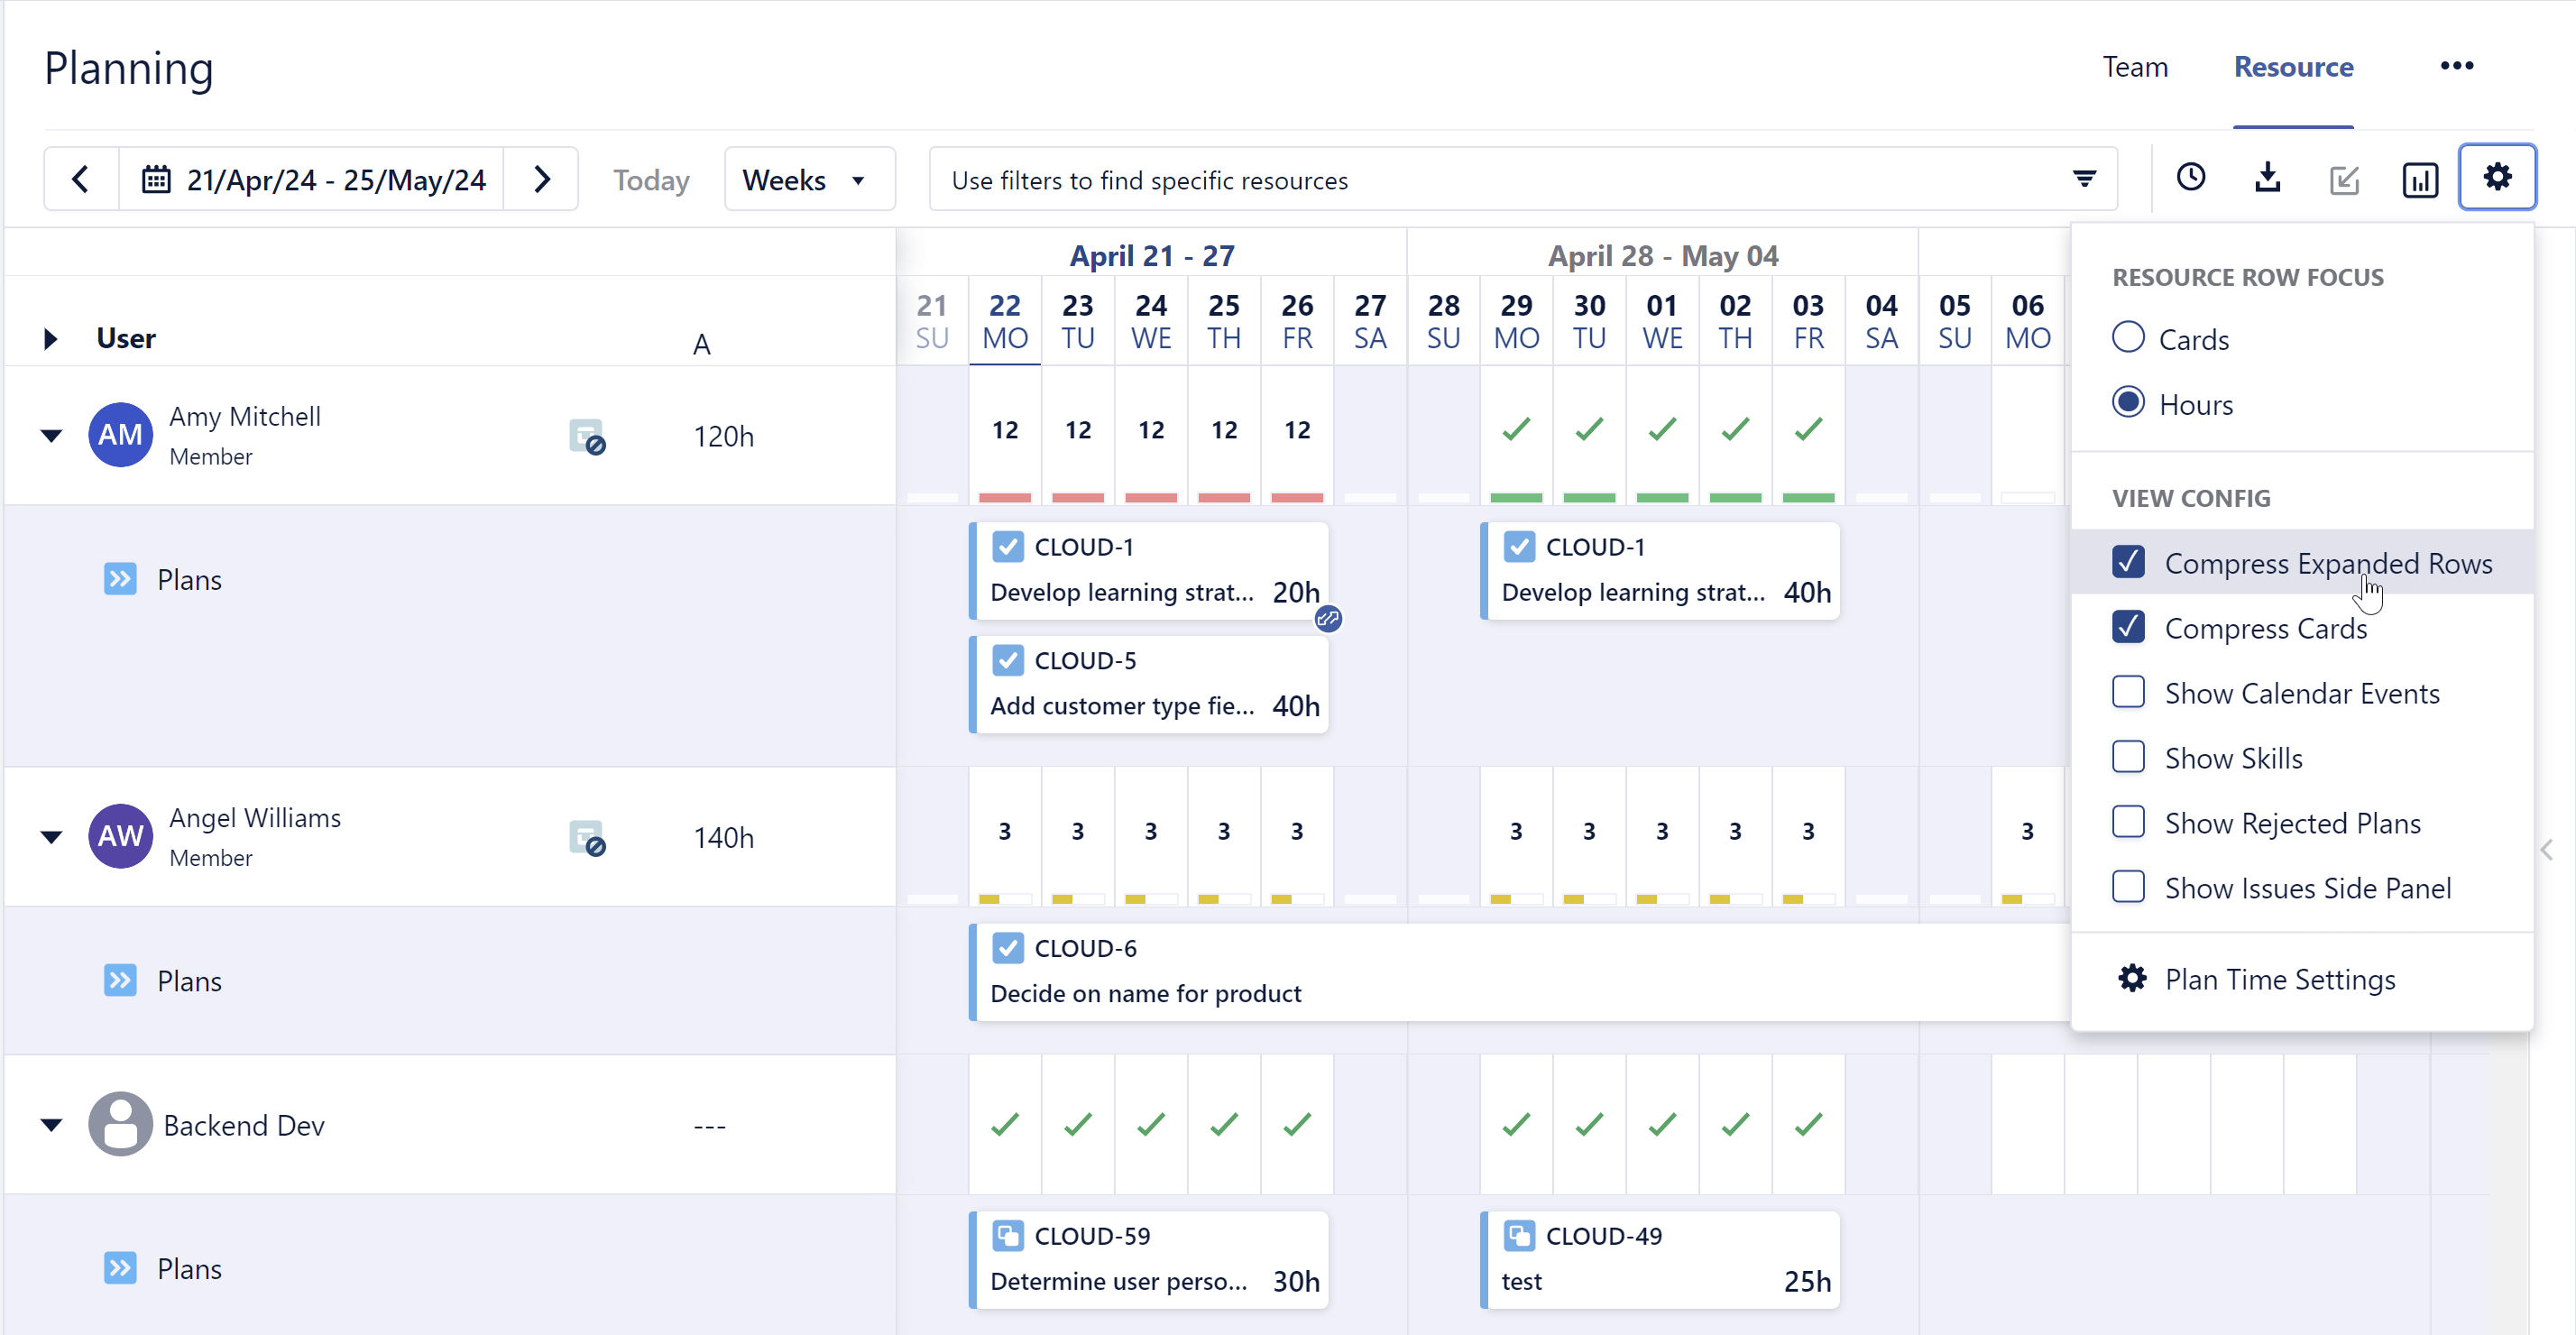
Viewing the Resource’s Plans in Compressed Mode
When planning for a large team you can use the compressed mode to see all plans and all calendar events without scrolling down multiple lines of Jira work items. When compressed, Jira work items are summarized under each resource name. Plans and calendar events are collapsed to take less vertical space making it possible to list all plans and events on a single page at a time.
The total number of hours is displayed for Plans and the planned periods span across the same horizontal lanes in order to save valuable space on the planning board. Similarly, the total number of hours is displayed for Calendar events and events span across one horizontal line. Tooltips provide plan and event details.
-
Click the triangle next to the resource's name to expand it, or click the triangle next to User and select Expand all.
-
In the upper right-hand corner, click the Settings cogwheel and check Compressed View.
The Resource Planning view switches from regular mode to compressed mode.
-
In a compressed mode, the plans under each user are summarized to indicate the number of plans and the total number of hours. The Plans are staggered horizontally on the same horizontal lane to save vertical space.
-
The work item key might not appear if the plan duration is less than four days long. In this case, you can hover over the planning board to see the work item key and other details in the tooltip.
-
If the Show Calendar Events in the Settings cogwheel is checked, then events are displayed. Events are summarized in front of the Calendar events label when the Resource Planning view is compressed.
-
Click on the horizontal block to open the Edit Period Plan window, if you wish to make any changes.
-
To return to regular mode, click the Settings cogwheel and uncheck Compressed View. This will undo the compressed mode and switch to regular mode, where plans and events appear separately per Jira work item.