How to Export Custom Field
To export Jira Work Management custom field:
-
Go to the Data Sources page, select the required data source, and then select Edit.
-
Under the Jira Work Management tab, find Issue Custom Fields, and then select the required field.
.gif?cb=54cde2eba667f6a38b5ff5cab5a21a74)
To export Jira Service Management custom field:
-
Under the Jira Service Management tab, find Service Management Custom Fields, and then select the required field.
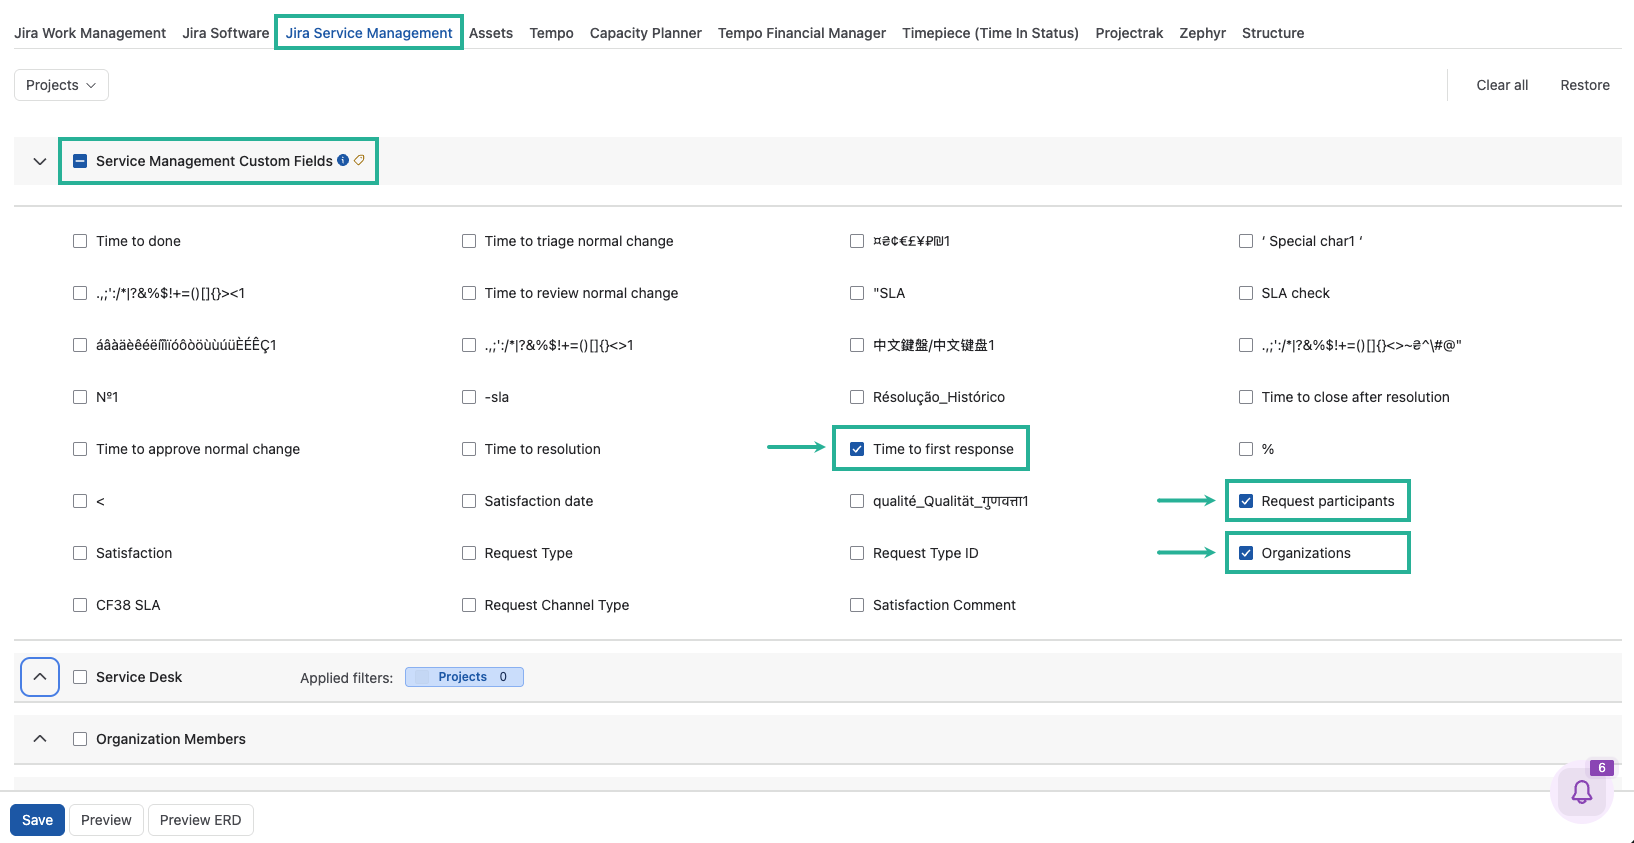
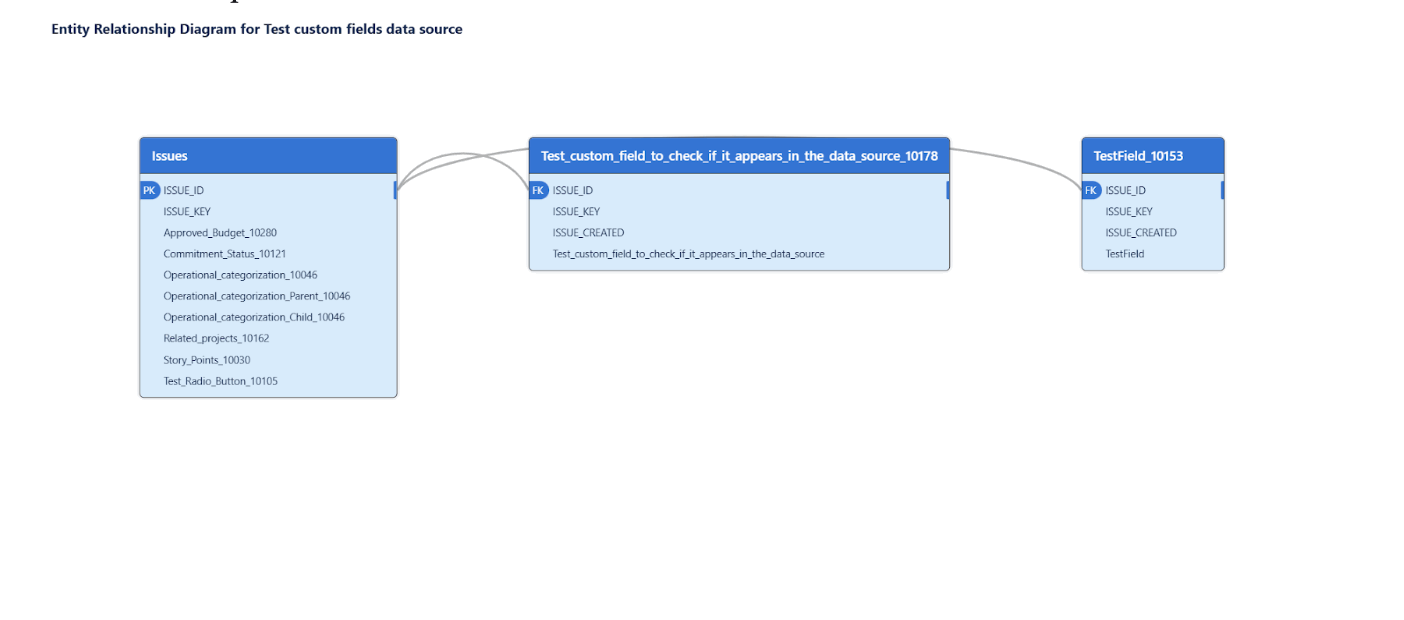
Custom fields are available in the Issue Custom Fields and Service Management Custom Fields tables under the Jira Work Management and Jira Service Management tabs. The custom field is exported either as part of the Issue table or as a separate table. To determine where a custom field is exported, select Preview ERD and locate the field.
As for adding a field to the Jira dashboard template, you will need to customize it yourself or ask for assistance from experts. We can only help you with setting up the configuration of your data source.
Single-Value & Multiple-Value Custom Field
When you add a new custom field to an existing data source, verify whether it’s a single-value or multiple-value field. The field type determines how it appears in Power BI.
-
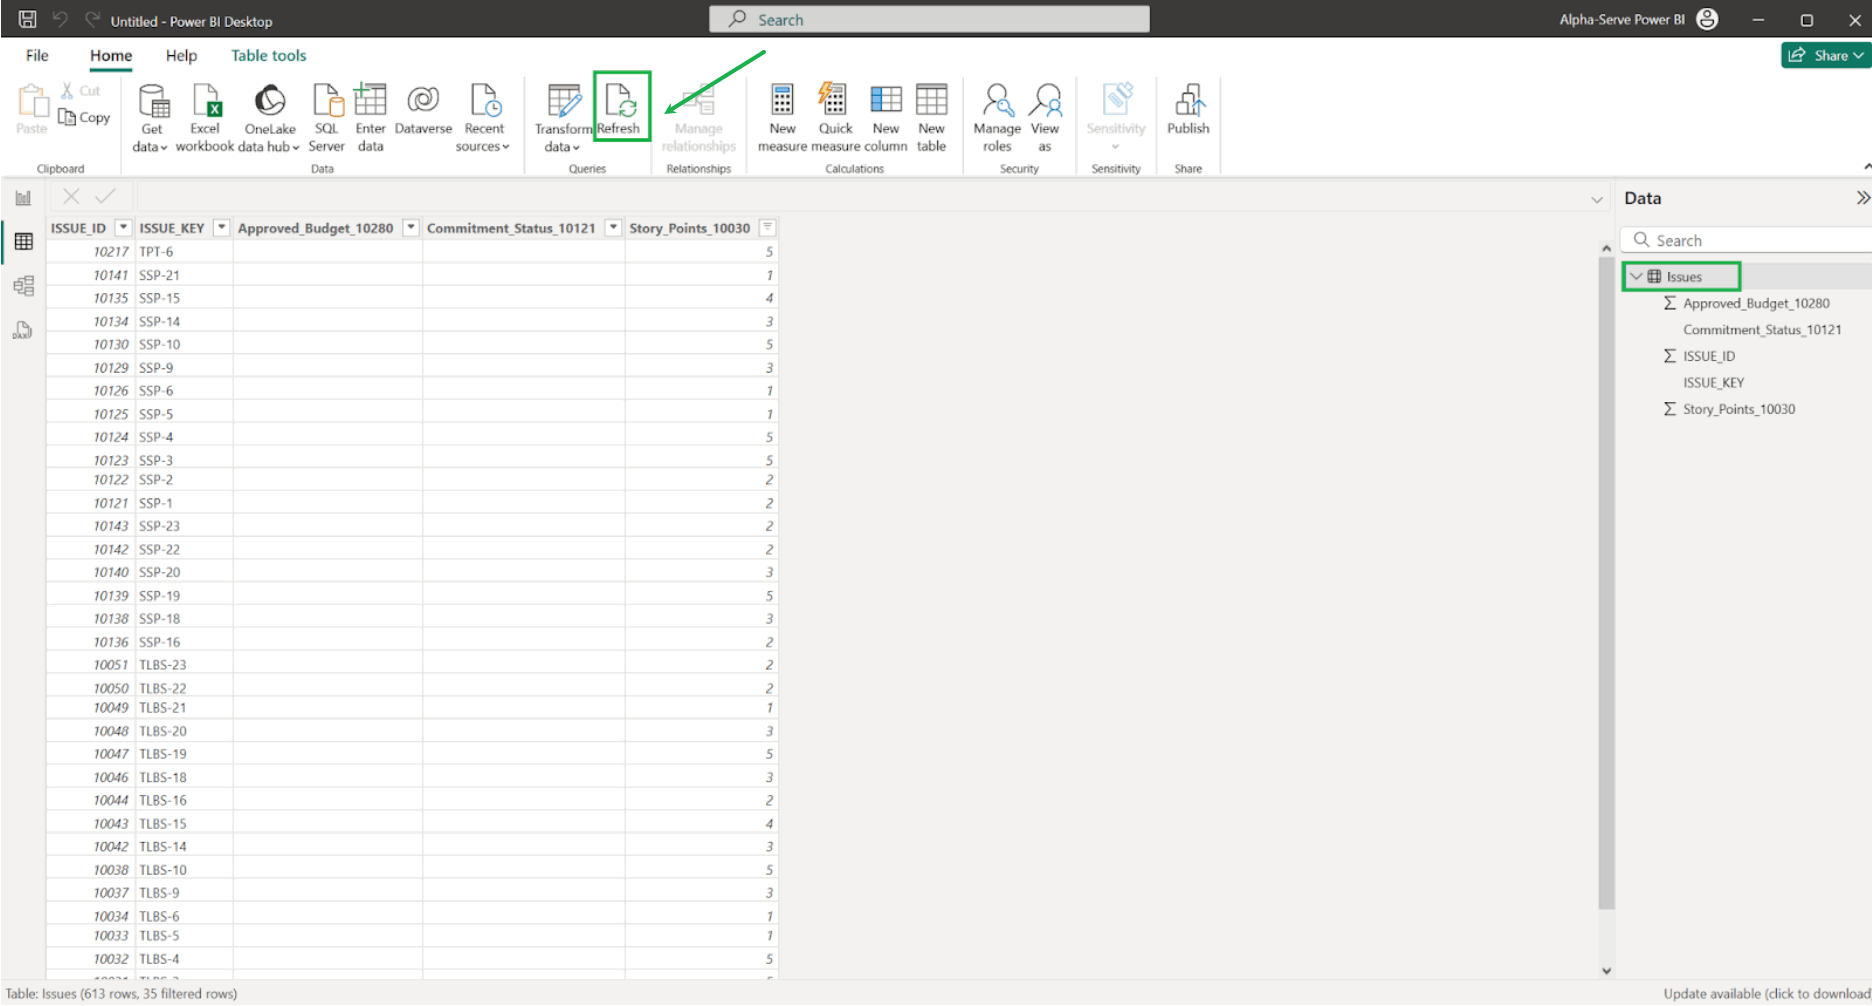
Single-value fields include text, number, and a single-choice select list. These fields are exported as part of the Issues table.
-
If the Issues table already exists in your Power BI data model, simply refresh your data source to make the new field available.
-
-
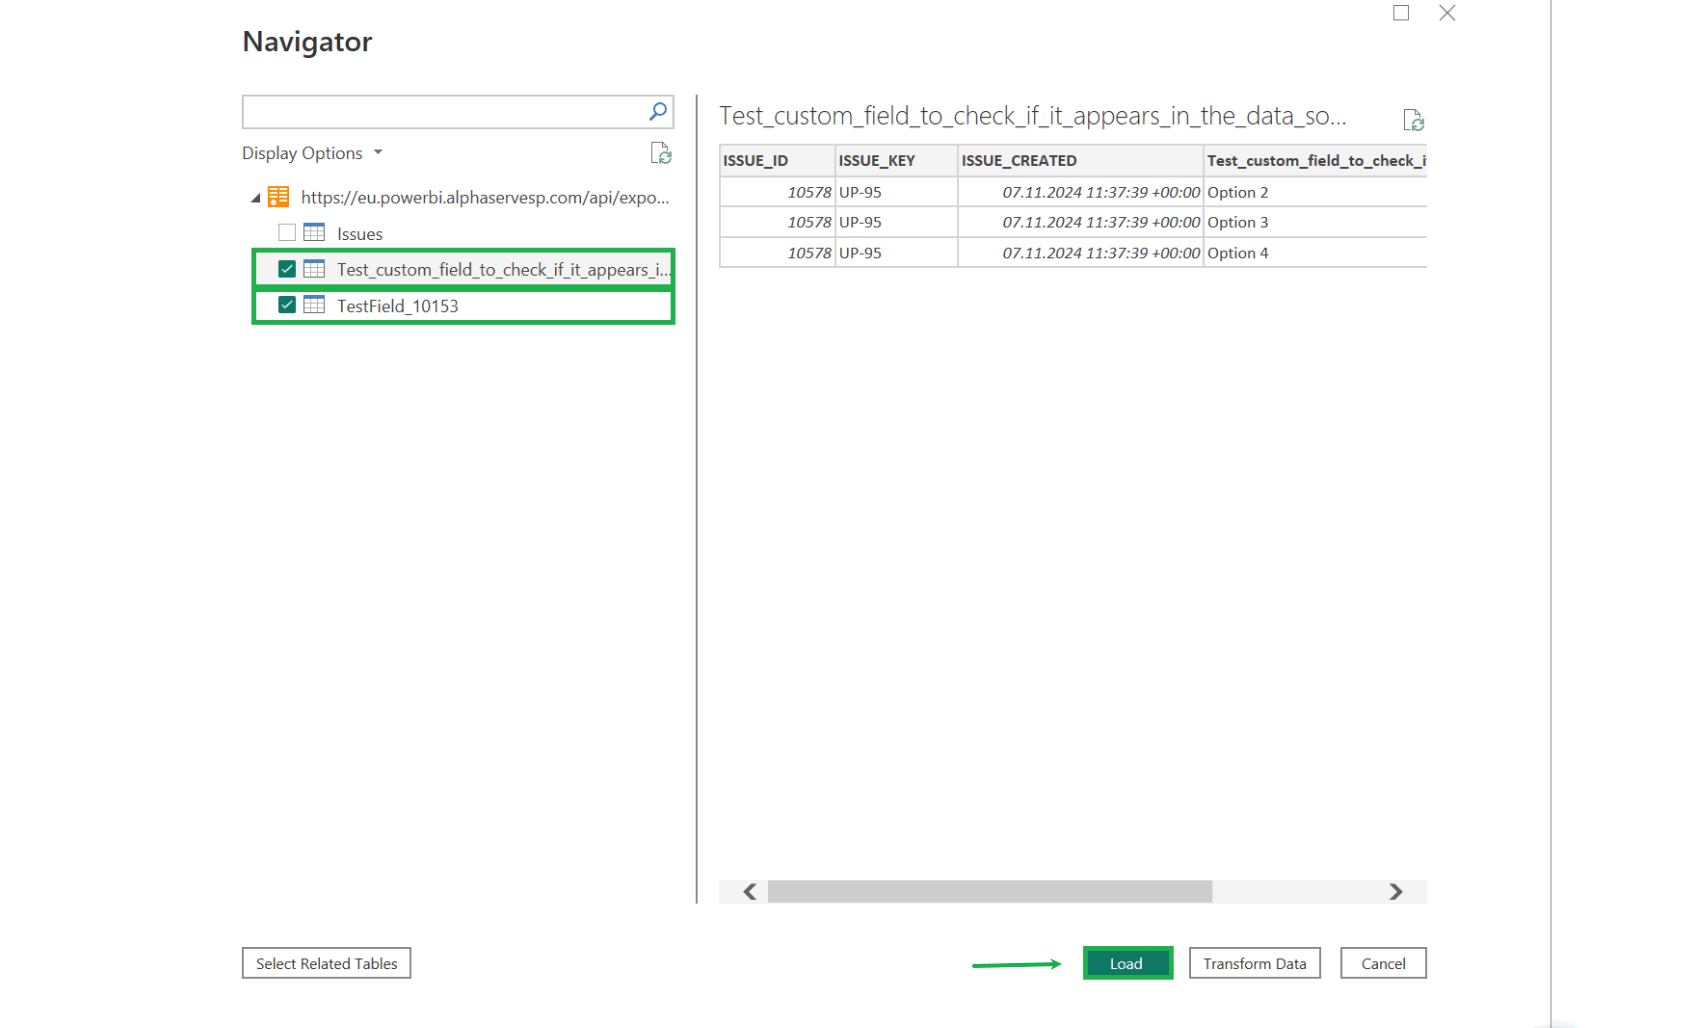
Multiple-value fields include checkboxes and select lists that allow multiple choices. These fields are exported as a separate table.
-
To make this table visible in your data model, fetch it as a new table in Power BI.
-
NOTE: You don’t have to re-export tables that were previously imported (such as Issues).
-
-
Useful Tip: Use the Entity Relationship Diagram (ERD) to see how each field is exported and whether it becomes part of an existing table or a new table in Power BI.