If you only have Tempo Timesheets installed, you can plan time for yourself and only see your own plans in the calendar. To create or view plans for others, you need to have Tempo Planner installed and the Manage Team Plans/ View Team Plans permission.
The My Work Calendar shows you the agenda for the week at a glance. Here you request time off and organize your own plans. If you also have Tempo Planner installed, all time planned for you by your Team Lead or Resource Manager is displayed in the calendar. At the end of the day you can easily log time against your agenda .
To access the My Work Calendar, select My Work in the sidebar and make sure Calendar is selected at the upper-right.
To plan time for yourself in the calendar:
-
Make sure List view is selected.
-
Move the pointer to the date where you want to plan time and point to the +. Click Plan Time.
-
Fill in the Plan Time dialog box:
-
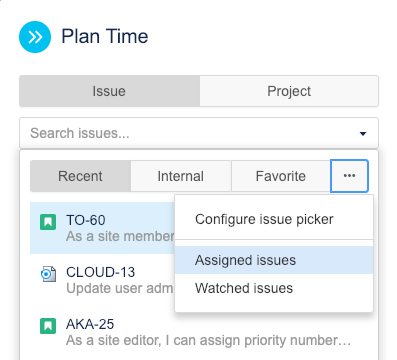
Click Issue or Project, depending on whether you want to plan time on an issue or a project. Type the name or number of the issue or project in the search box, and select the issue from matching results. If you are planning time on an issue, you can also click inside the search box and use the issue lists to help you browse for the issue. By default, you can select between Recent, Assigned, and Favorite issues, but you can click the ellipsis (...) to see more options. Clicking Configure issue picker allows you to decide which issue lists to display in the Issue picker. For more information about how to use the Issue picker, see Using and Configuring the Issues Side Panel.
-
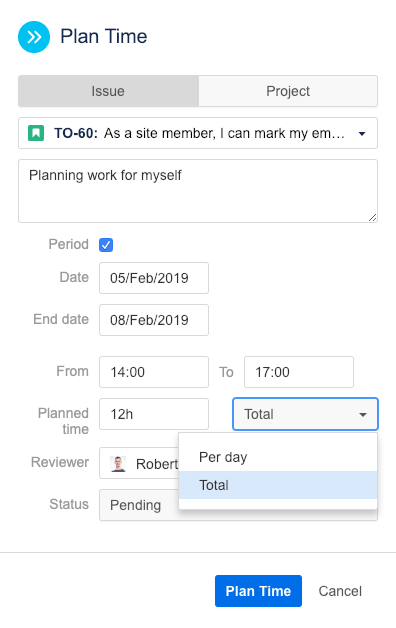
The date you clicked on is selected in the Date box, but you can select a different date.
-
You can also select the Period check-box to plan time for a period that you define. When planning for a period you can opt to include non-working days in your plan. This option appears when you specify a date-range that includes non-working days. You can plan time in hours per day, or based on a total number of hours. When you choose total hours, the total is divided equally by the number of days planned for.
-
If enabled by your administrator, you can also specify start and end times for your planned time. This is especially useful for time-sensitive tasks, or simply to plan out your day in detail.
-
If you have Tempo Planner installed and Plan Approval is enabled, you will have the option to select a Reviewer, for example, when requesting time-off from work. Tempo sends an email notification to the reviewer. Your pending plan will be displayed with a shaded background and a yellow dot in your calendar.
-
-
Fill in the remaining details for the plan, and then click Plan Time.
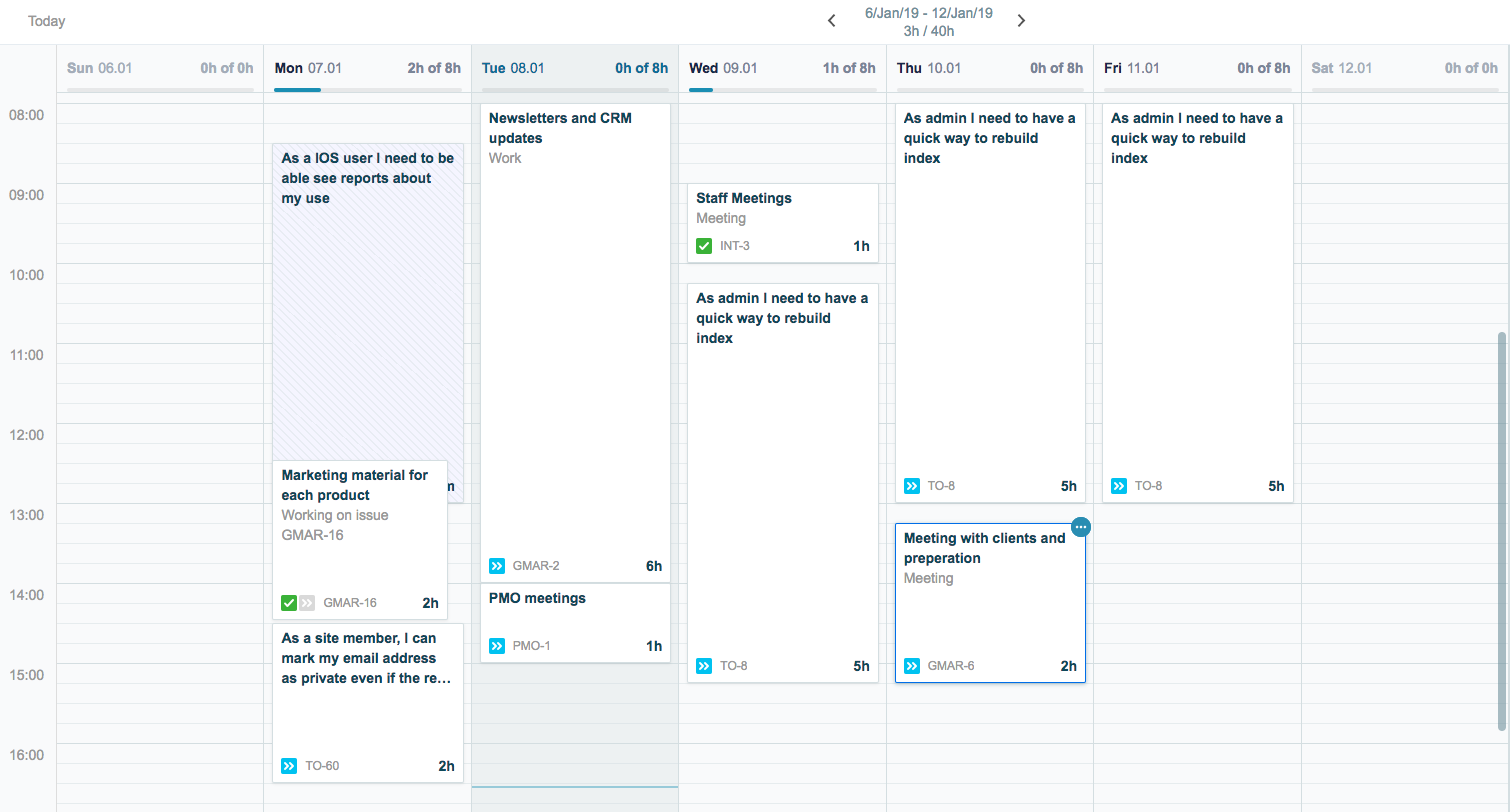
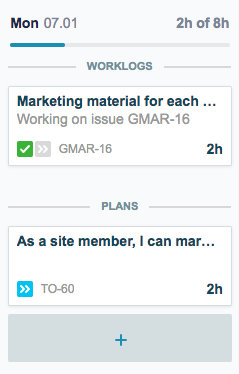
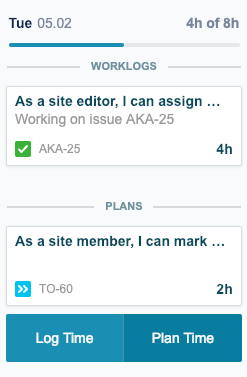
The Calendar Time view - Cards are displayed in chronological order. The cards are resizeable and show the duration visually. All-day events are displayed in a shelf at the bottom.
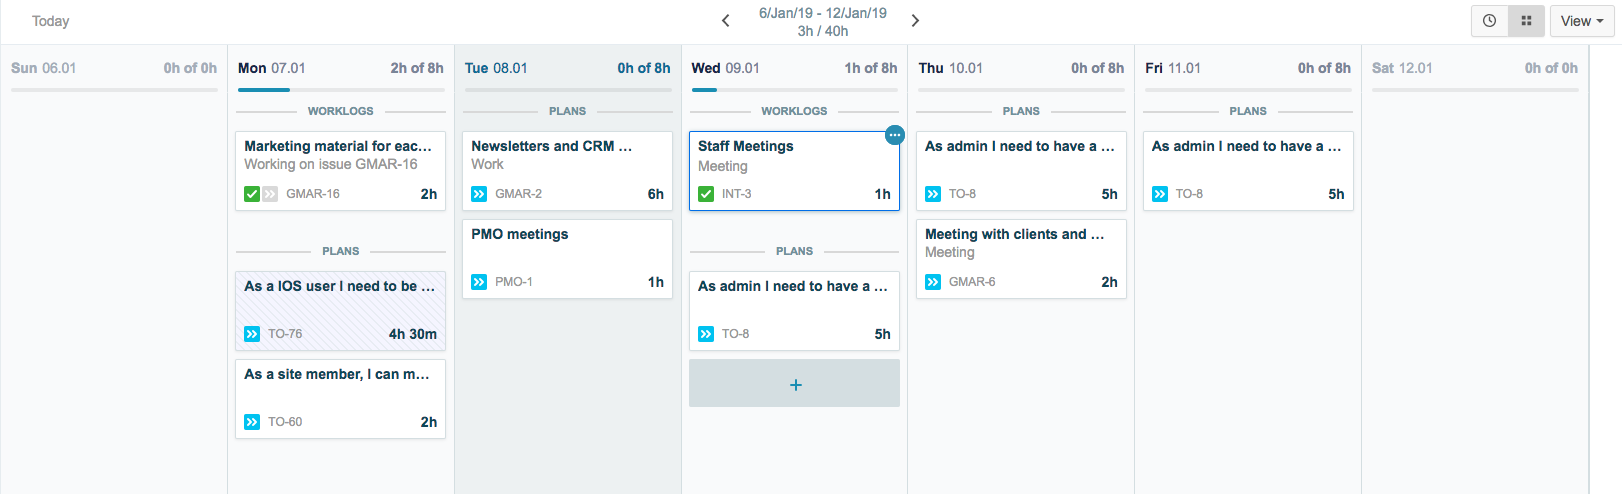
The Calendar List view - Cards do not show start and end time. By default, the cards are grouped together by type, but you can click View at the top-right and select to sort the cards by start time.
Related Topics