Working Teams support high-level project planning by allowing you to forecast project schedules based on team availability, time off, and overall capacity. Unlike individual task assignments, Working Teams are used to plan at a broader level, helping project managers focus on timelines, priorities, and resource distribution before breaking work into detailed tasks.
Working Teams are available on the Ultimate Plan. Members can belong to multiple Working Teams.
While Working Teams can be created from Administrative Groups, they are independent entities. Learn how to clone or convert Teams from Administrative Groups.
1
|
Navigate Working Teams
|
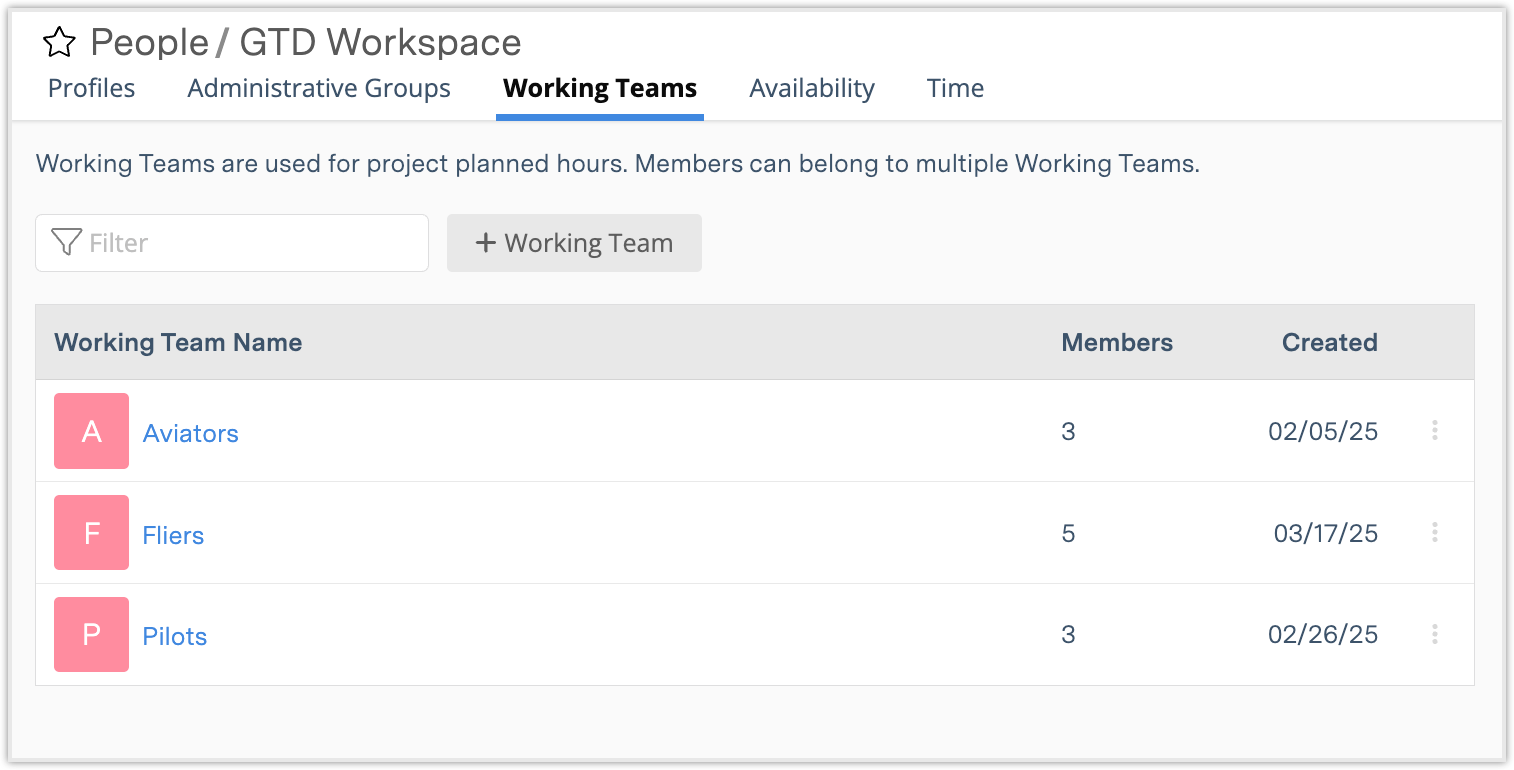
Working Teams are managed under People in the left-side navigation, within the Working Teams tab. In the Working Teams table, each row represents a team and displays:
-
Team name and icon
-
Number of members
-
Created date
Use the + Working Team button to create a new team.
Workspace members can belong to multiple Working Teams at the same time, depending on their roles or needs within the workspace.
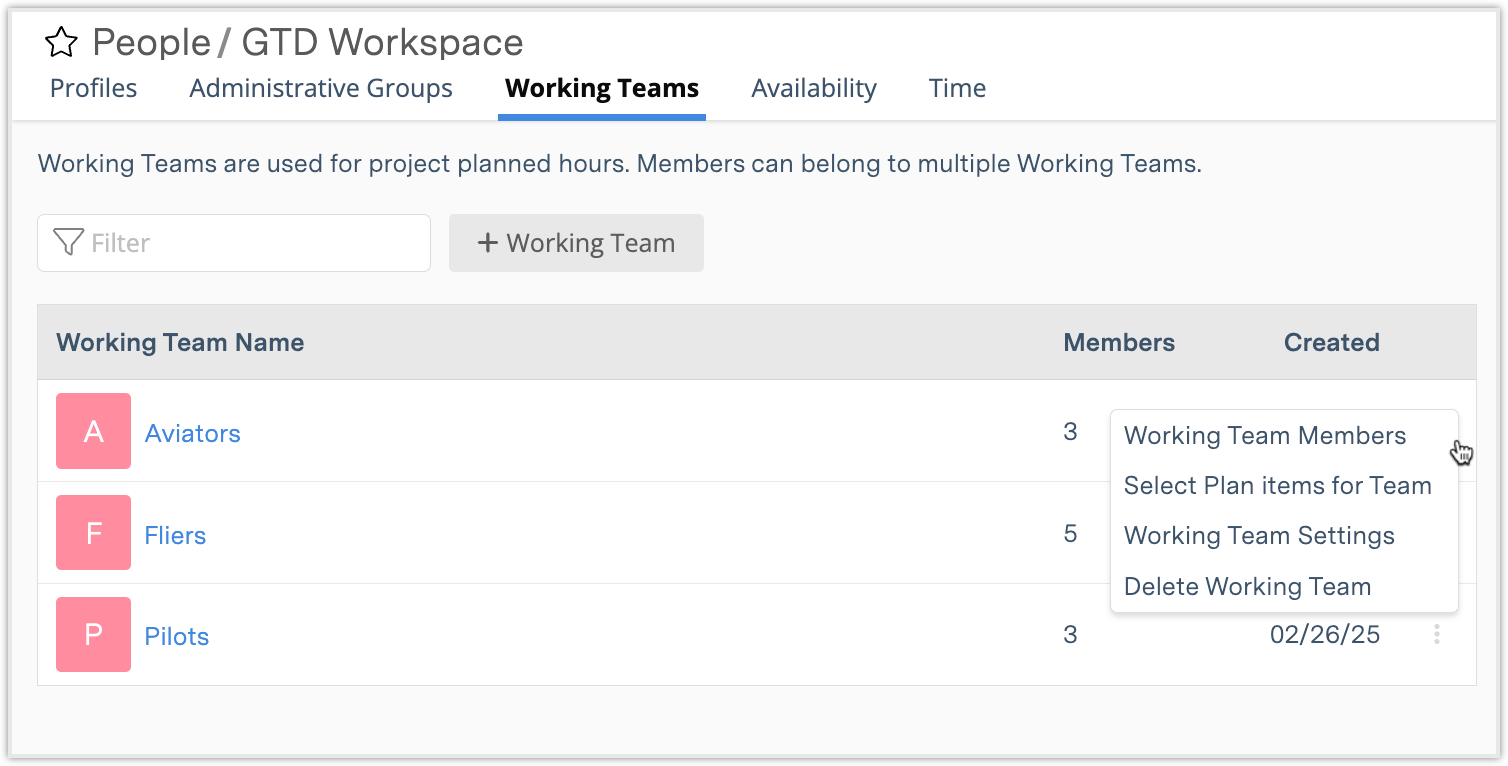
Each row in the table has a menu (three-dot icon) with the following options:
-
Working Team Members: View or edit the members of the team.
-
Select Plan Items for Team: Associate the team with packages, projects, or subfolders for scheduling.
-
Working Team Settings: Change the name, color, and icon for the team. (The default color is "Pink Drink.")
-
Delete Working Team: Remove the team from the workspace. This does not affect the team members or their work.
2
|
Working Team Views
|
Each team has five views: Members, Workload, Board, Plan Items, and Time.
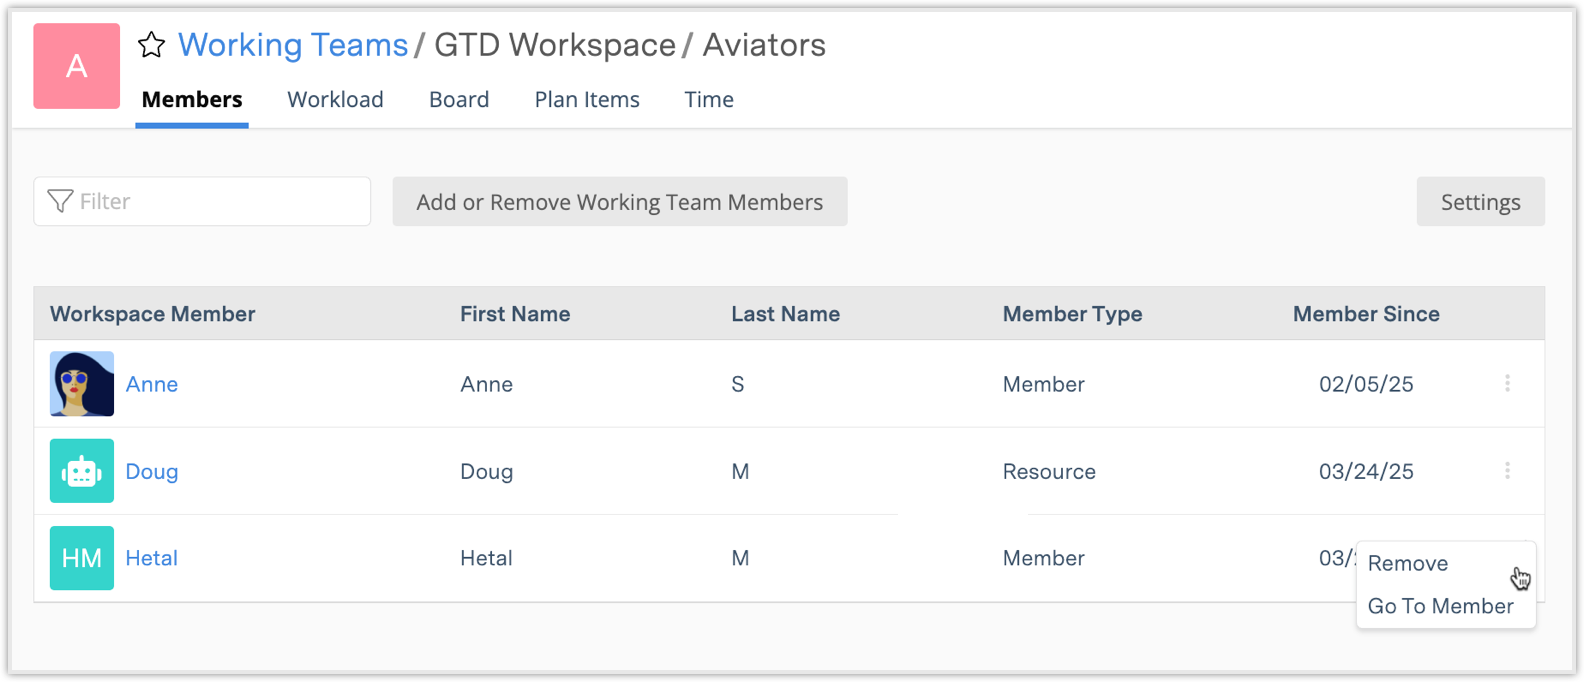
Members View
-
View and Manage Members:
-
View all members listed with first/last name, member type (Member, Resource, or Placeholder), and join date.
-
Select a member's name or use the three-dot menu to Remove or Go To Member profile.
-
-
Add or Remove Members:
-
Use the Add or Remove Working Team Members button.
-
-
Edit Team Settings:
-
Select Settings to change the team's name, color, or icon.
-
Workload View

-
Visualize Team Workload:
-
View all tasks assigned to team members across a chosen time window.
-
-
Filter Options:
-
Narrow by team member, project, or task.
-
-
Planned vs. Active Work:
-
Outlined blocks indicate planned (future) work.
-
Use "Hide Planned Hours" to focus only on active, scheduled work.
-
This view includes all work assigned to the Working Team and work assigned to individual members, even if that work is from other projects.
Board View
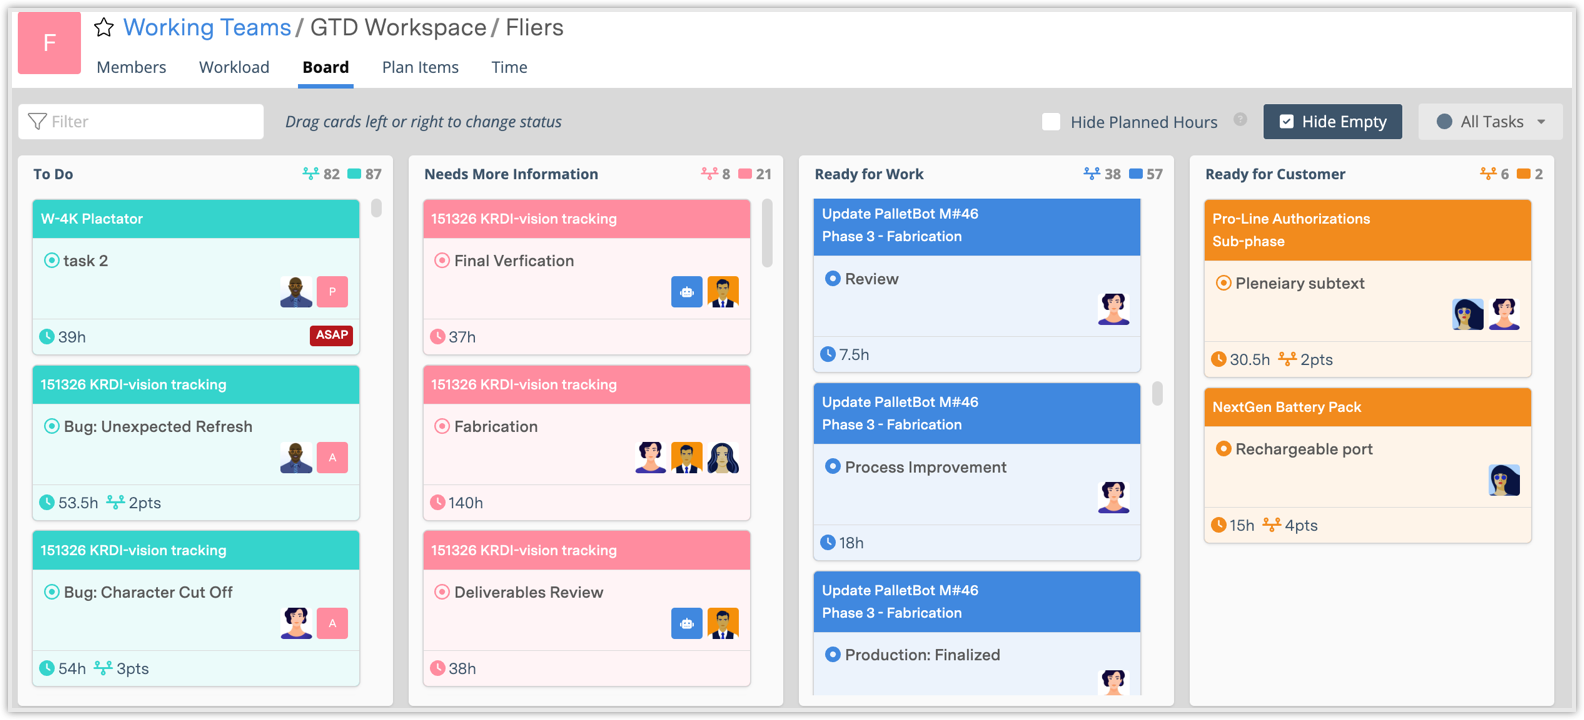
-
Task Status Management:
-
View all tasks assigned to the team's members organized by task status.
-
Drag and drop tasks between columns to update statuses.
-
-
Working Team Assignment:
-
Tasks assigned directly to the Working Team display the team icon on the card.
-
-
Hide Empty Columns:
-
Use "Hide Empty" to keep the board clean and focused.
-
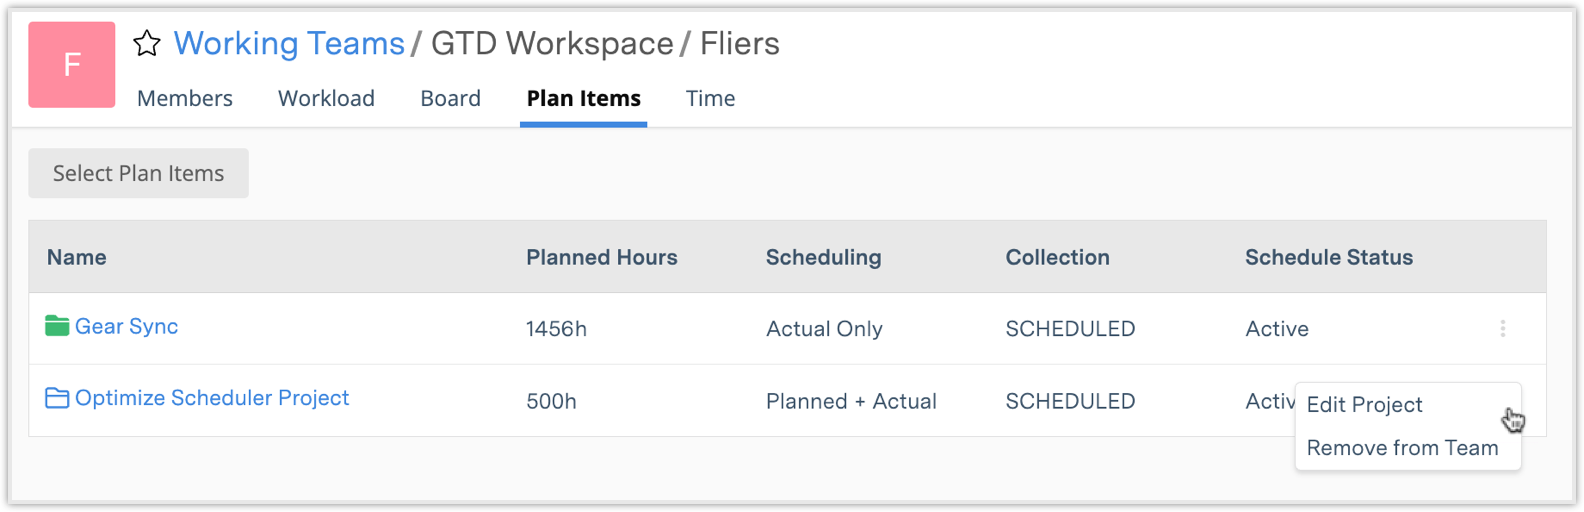
Plan Items View
-
View Associated Plan Items:
-
Lists all packages, projects, and subfolders associated with the team.
-
Columns include:
-
Name (hyperlink)
-
Planned Hours
-
Scheduling ("Planned + Actual" or "Actual Only")
-
Collection (Scheduled, Pending, Archived, Templates)
-
Schedule Status (Active, On Hold, Done)
-
-
Columns can be sorted. The default order is plan item priority, select once for A-Z, select again for Z-A and then a third time to return to the default/priority.
-
-
Plan Item Icons:
-
An outlined folder or project icon indicates the item is in planning mode ("Planned + Actual").
-
-
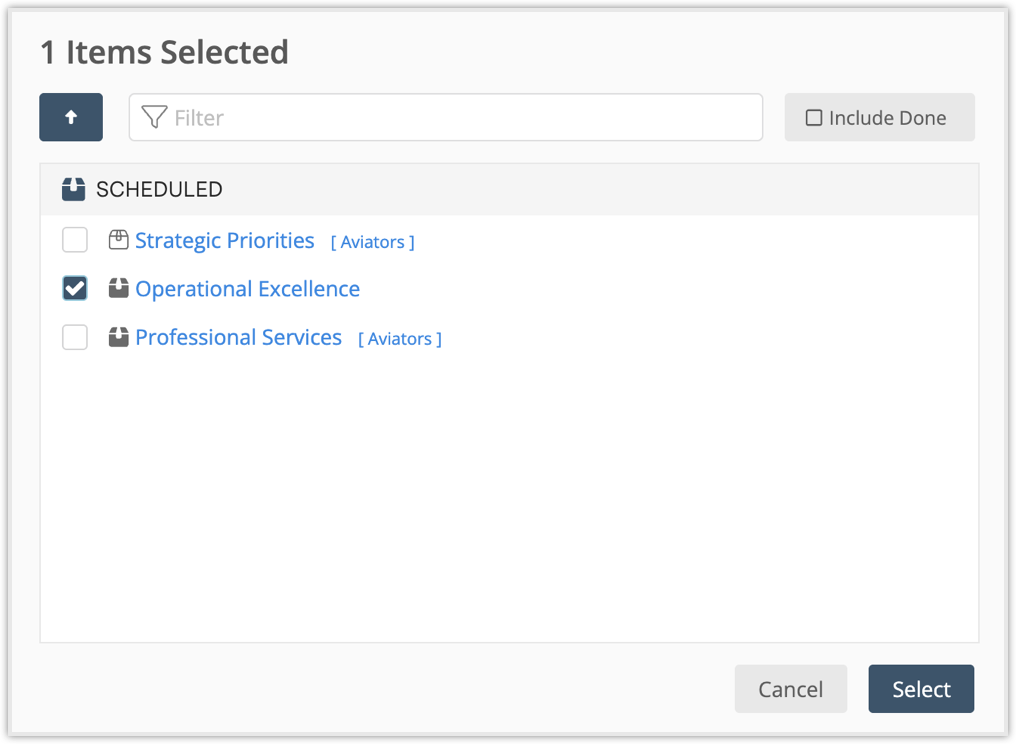
Select Plan Items:
-
Use Select Plan Items to open a modal and choose which packages, projects, or subfolders to associate with the team.
-
-
Three-dot Menu:
-
Edit Project: Open the edit panel to change project details.
-
Remove from Team: Disassociate the plan item from the team. The plan item and its tasks remain unchanged.
-
Time View
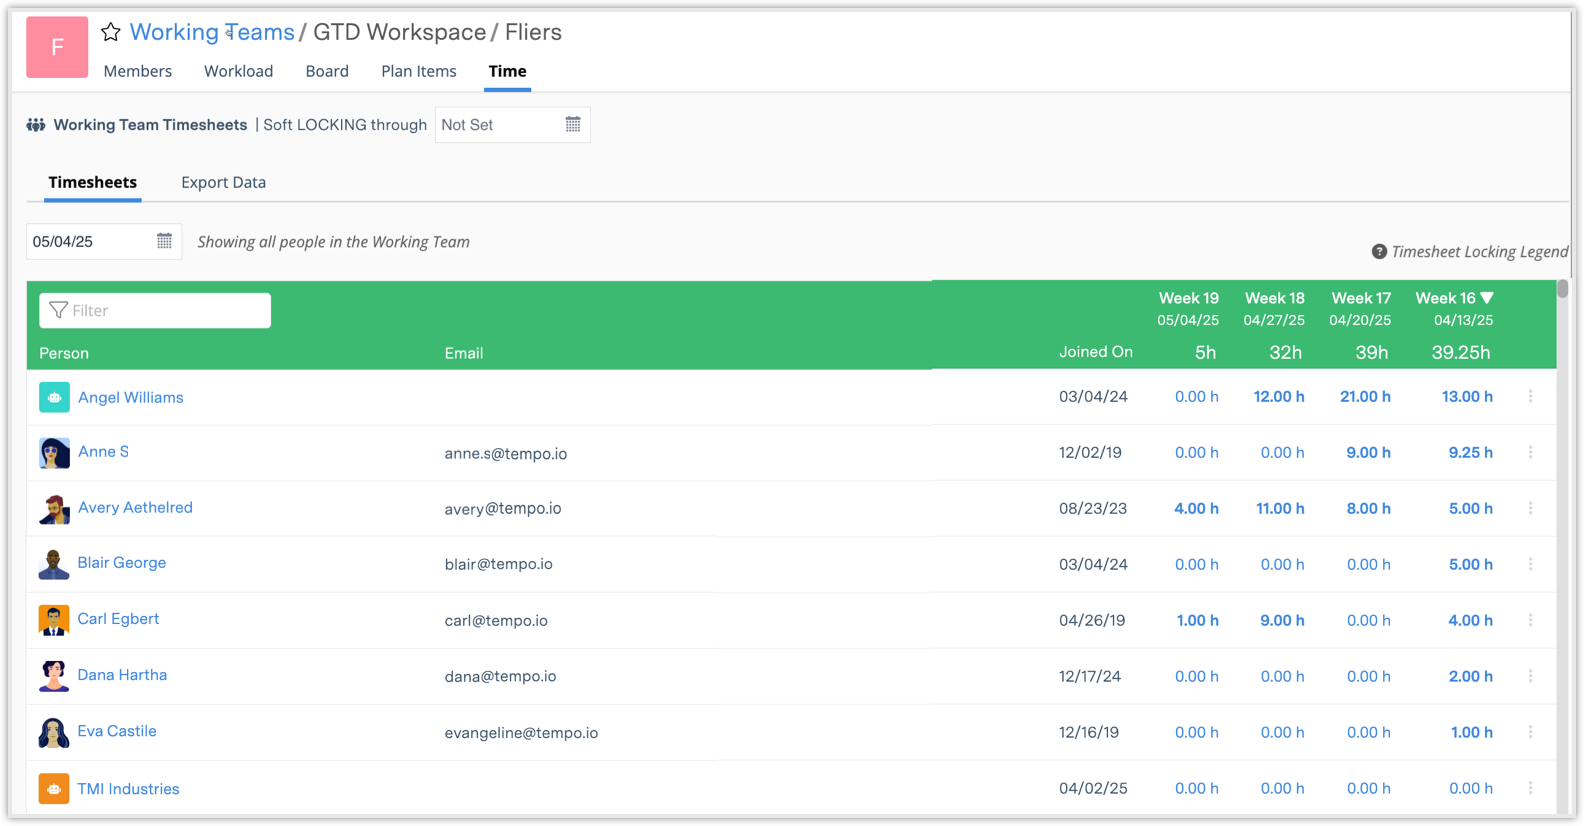
(Visible only to users with Timesheet Reviewer or Timesheet Exporter & Cost Viewer permissions)
-
Timesheets Tab:
-
Review, lock, or unlock timesheets for all team members.
-
View weekly hours logged.
-
Export Data Tab:
-
Export team timesheet data by selecting a date range and applying filters.
-
Customize columns and download in Excel format.
-
-
Note: If a user does not have Timesheet Exporter or Reviewer permissions, they will not view the Time tab, they will only view Members, Workload, Board, and Plan Items.
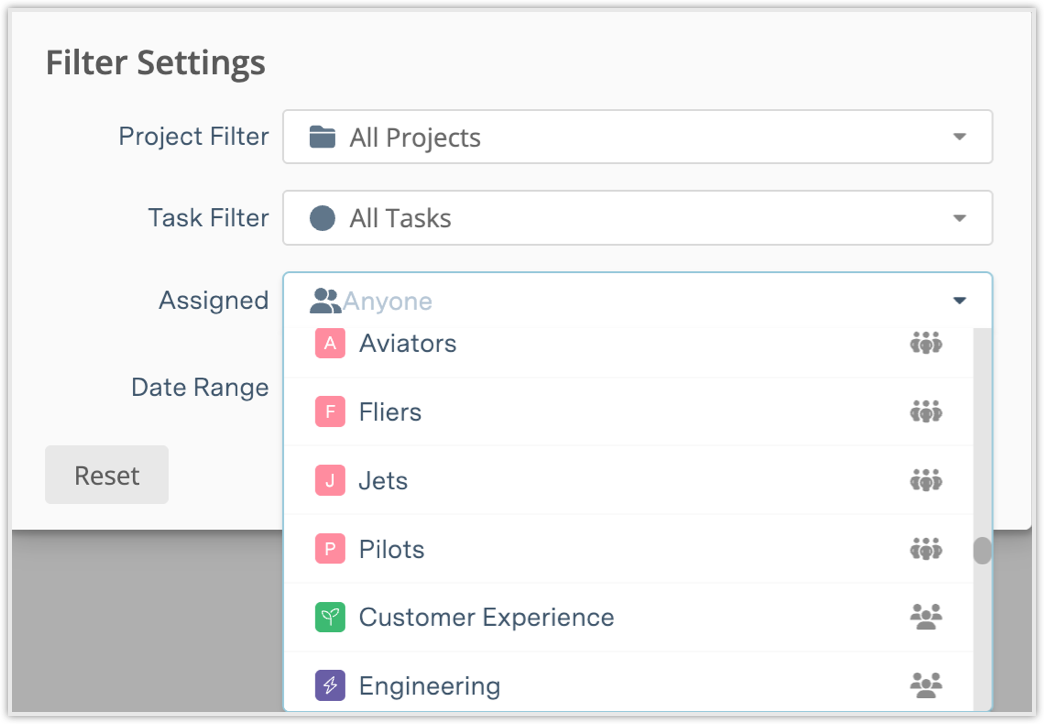
Filter by Team Type
After you have created a Working Team or Administrative Group, use the Person Assigned Filter in dashboards, workload views, and reports to filter by either type. Team icons help differentiate the types.
For more on creating or converting teams, continue to Administrative Groups.