Viewing resources in the Resource Planning view requires the View Team Plans permission for the teams to which the resources belong.
In Resource Planning you get a high-level view of all your resources and how they are allocated. You can see how much time is available in total for the selected period as well as time available for each resource. You can sort the resource list and expand it to view plan details for each resource. You also have other view options, such as selecting to focus on the daily details in the Days view or viewing a longer-term overview of availability in the Weeks view.
To access Resource Planning, select Planning in the Tempo sidebar.
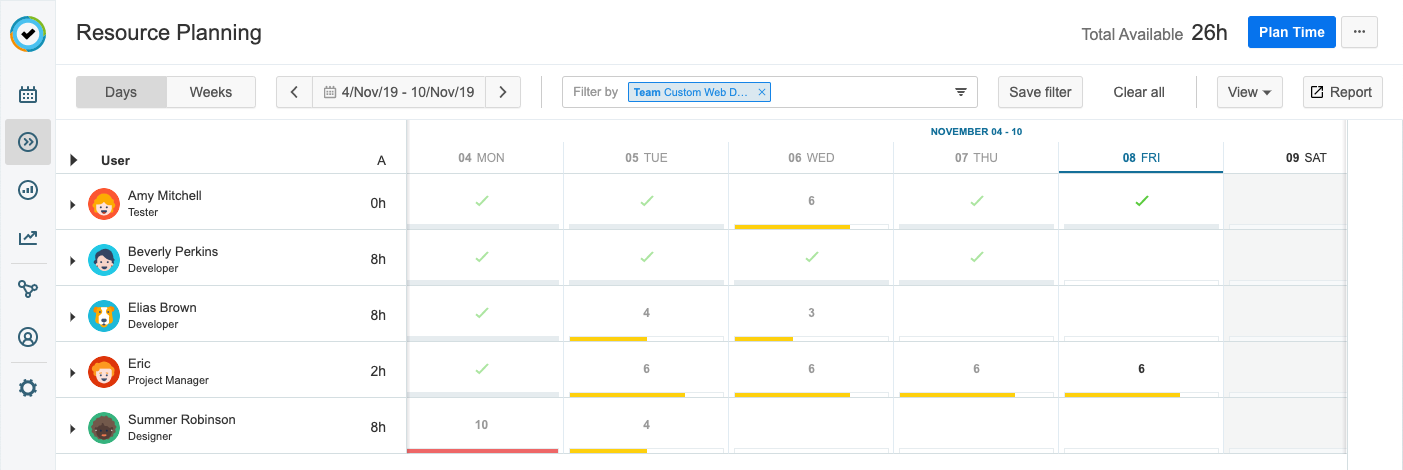
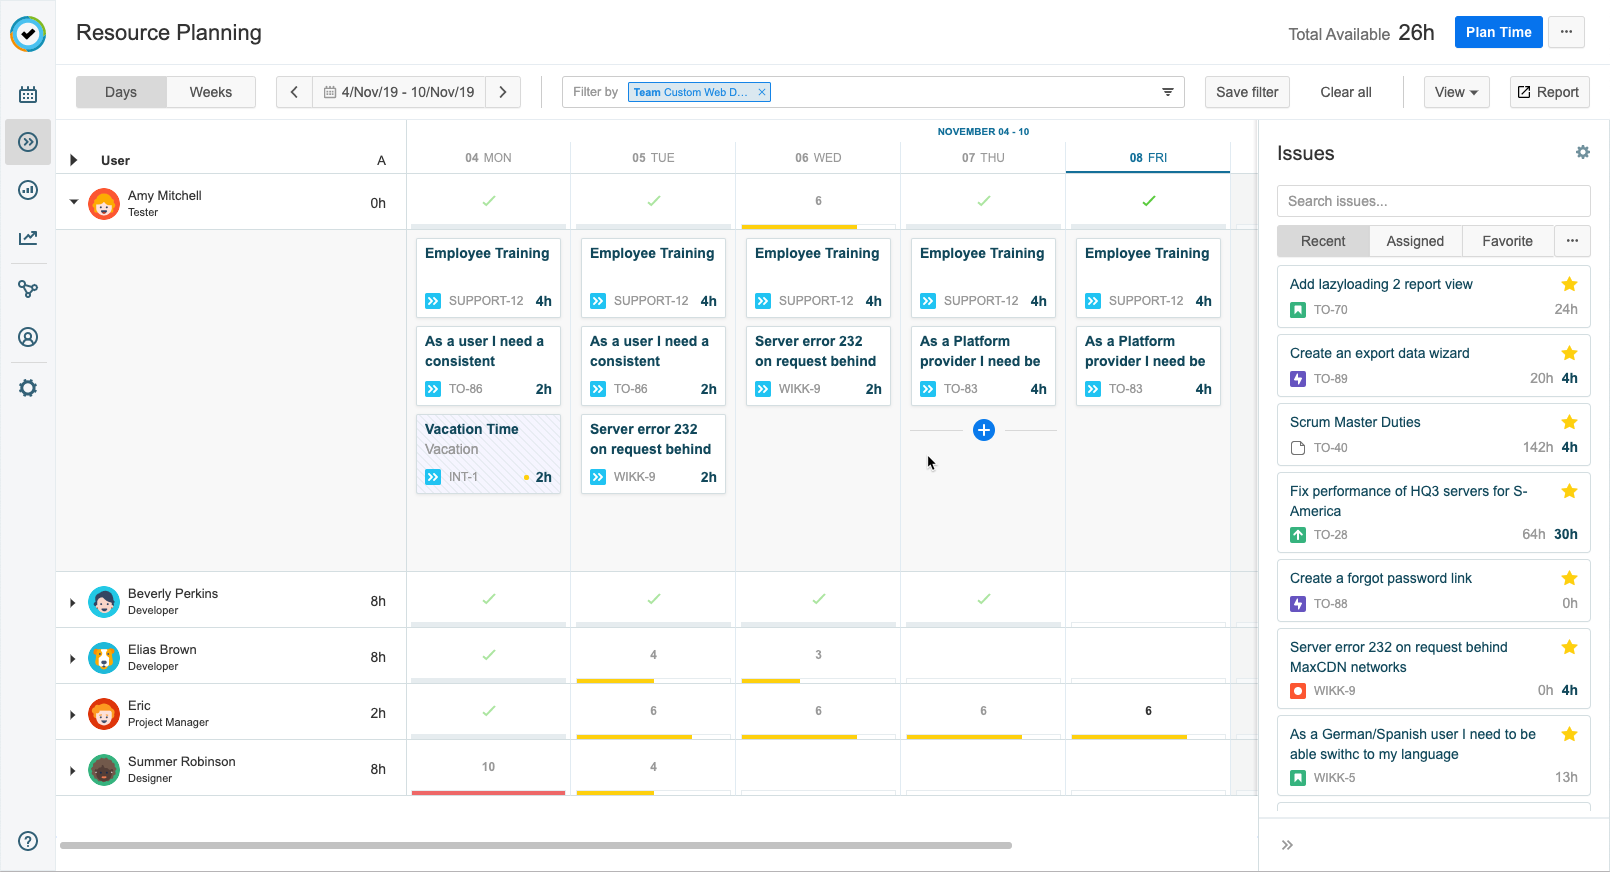
Resource Planning - Days view
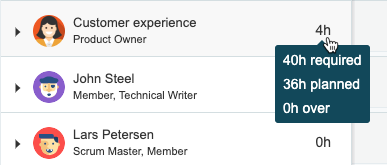
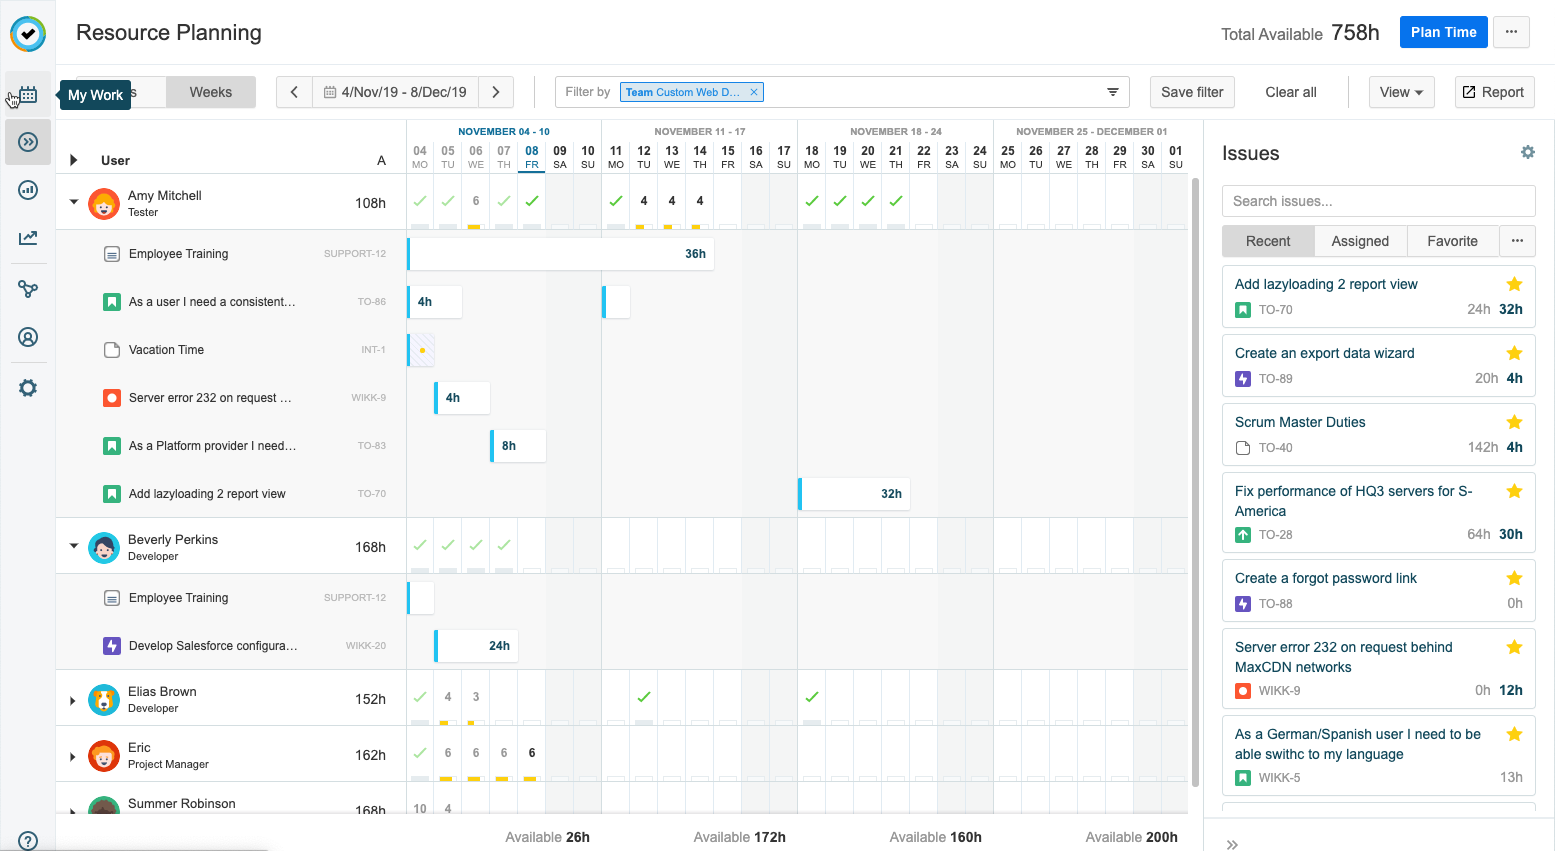
Resources are displayed on the left-hand side, followed by their remaining available hours for the selected period. When you hover over the available hours, a tooltip shows the number of hours required, planned, and overbooked.
On the right-hand side you see a schedule with the total number of hours that each individual is scheduled to work on each day. At the top-right of the view you see how many hours are available in total for all resources displayed in the view.
-
A green check mark indicates that a resource is fully allocated.
-
A yellow "progress" bar shows you the relative amount of available hours allocated.
-
A red bar indicates that a resource is fully allocated or overallocated.
Availability indicates how much free time users have in the remaining days of the period:
-
Only days with available hours are included in this count
-
Fully allocated and overallocated days are calculated as '0'
-
Only the current date and future dates are included
Switching Between the Days and Weeks View
You can select between a Days view focusing on daily plans and a Weeks view focusing on long-term planning. Use the buttons at the top of the view to switch between the views.
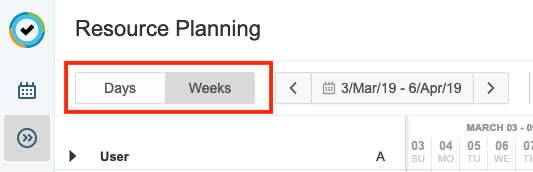
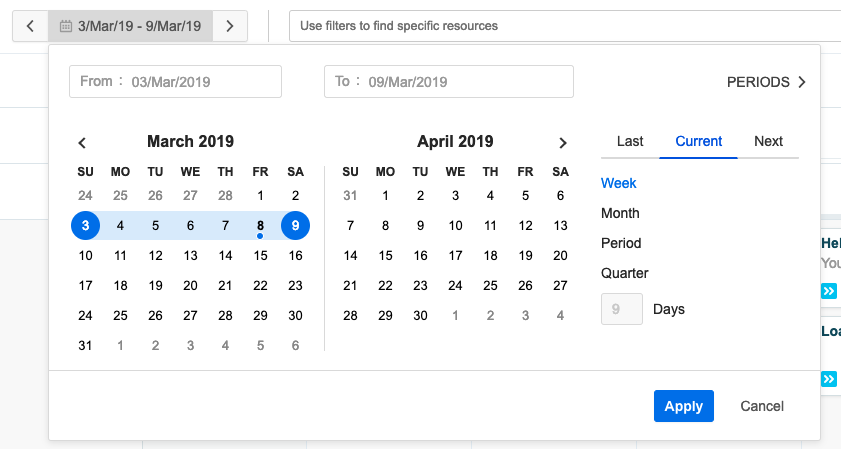
Use the navigation arrows to jump forward or backward one week or month at a time.
You can also click the period selector and modify the date range for which data is displayed in the view.
Days View
The Days view displays information by week and is optimized for managing single-day plans. Planned tasks are displayed as cards ordered by start time. By default, the Days view displays the current week from the start of the week.
Weeks View
The Weeks view provides a longer-term overview of availability and is optimized for managing longer-running plans (a few days up to a few weeks). The Weeks view displays 5 weeks from the start of the current week. The view gives a high-level daily overview of resource allocation and displays fewer details on each day than the Days view. Planned time is displayed as a timeline and plans with a start or end date extending out of the displayed scope are indicated with an arrowed edge. Hover over a timeline to see how many hours are planned for the task. You can easily navigate from the Weeks view to the Days view by clicking the week you want to focus on in the schedule's header.
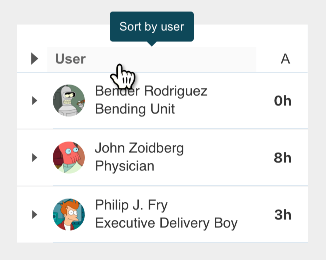
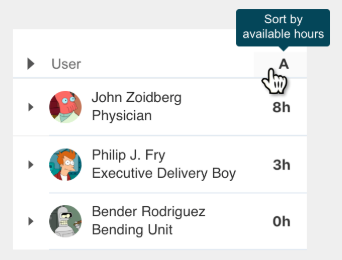
Sorting the Resource List
By default, the resource list is sorted by user name in alphabetical order. You can also sort your resources by availability.
-
Click User to sort the resource list in alphabetical order. Clicking User when the list is ordered in alphabetical order will reverse the order.
-
Click A to sort by availability. Click again to sort in descending order.
Viewing Plans
Clicking the triangle to the left of a team member allows you to view all of their planned tasks and make changes to their schedule. You can also expand all resources at once by clicking the triangle next to User at the top of the resource list.
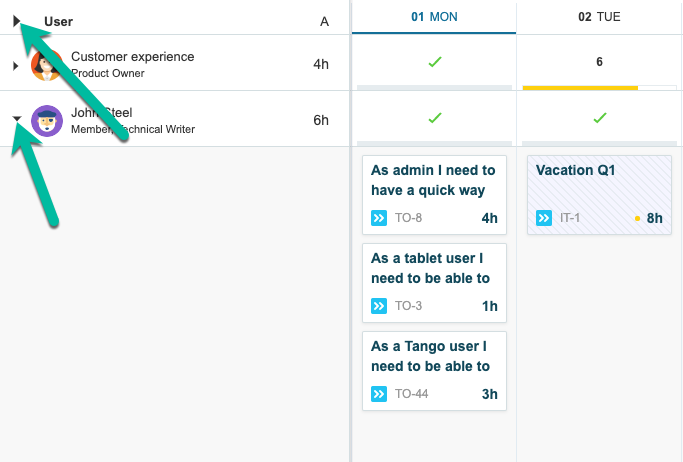
Plans are ordered by their start time, show the hours planned, and approval status:
-
a white background indicates that a plan is approved.
-
a grey background indicates a plan that is in review.
-
a shaded plan with gray text indicates a plan that has been rejected.

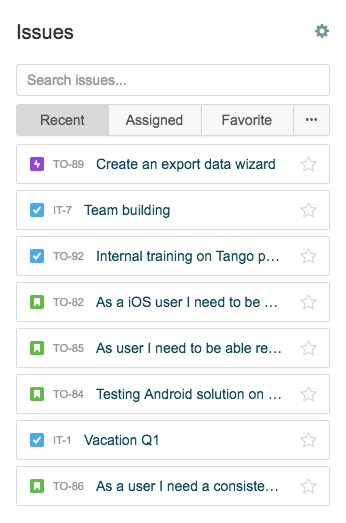
Expanding and Collapsing the Issues Side Panel
The Issues side panel is displayed on the right-hand side of view showing Jira issues from predefined JQL searches. You can drag issues from the side panel directly onto the view. The Plan Time dialog box opens where you can enter plan details. To expand the side panel, click :side_panel: at the right. You can also access the side panel on the View menu at the top right.
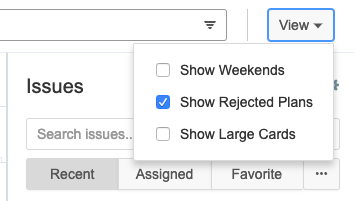
Selecting View Options
At the top-right of the view, the View menu allows you to show or hide weekends and rejected plans in the view. In the Days view you can also select to display the planned tasks as Large Cards.
Related Topics