Copy to Jira allows you to write the values from Structure fields to Jira fields - making that data available to teammates who don’t use Structure, or even other apps.
Currently, Copy to Jira works with the following fields:
Data will only be copied for work items that are visible in the structure. If you have filters applied, work items that have been removed by the filters will not be updated.
Run Copy to Jira
To copy data from a formula or Structure column to a Jira field:
-
Add the formula or column to the structure.

-
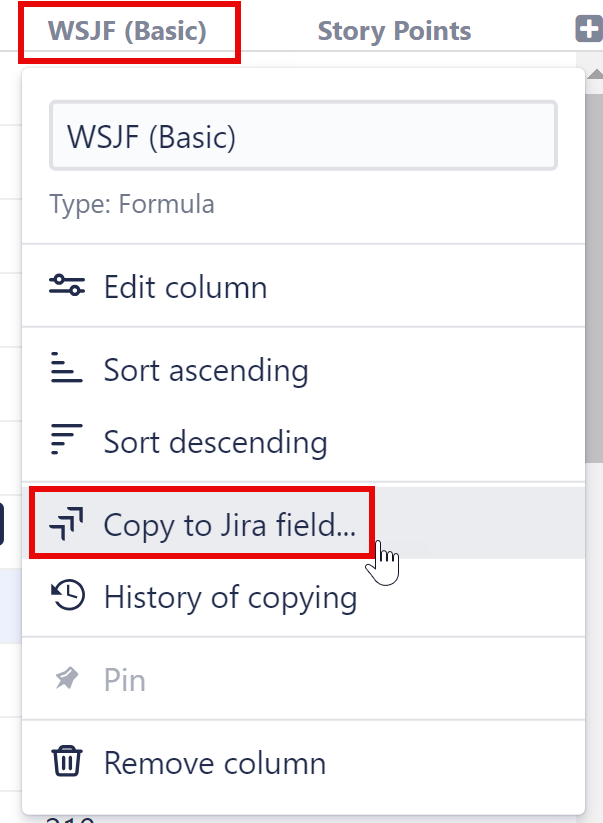
Select the new column’s menu, and choose Copy to Jira field…
-
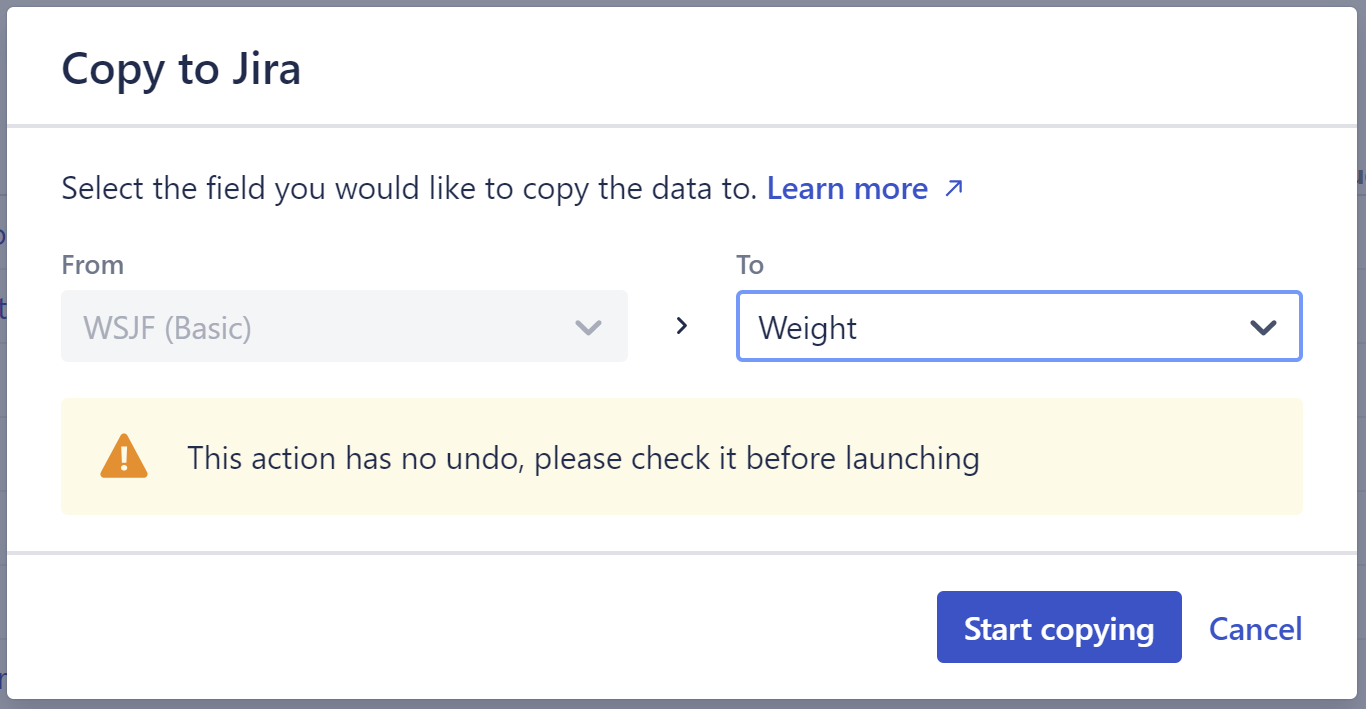
Select the destination Jira field.
-
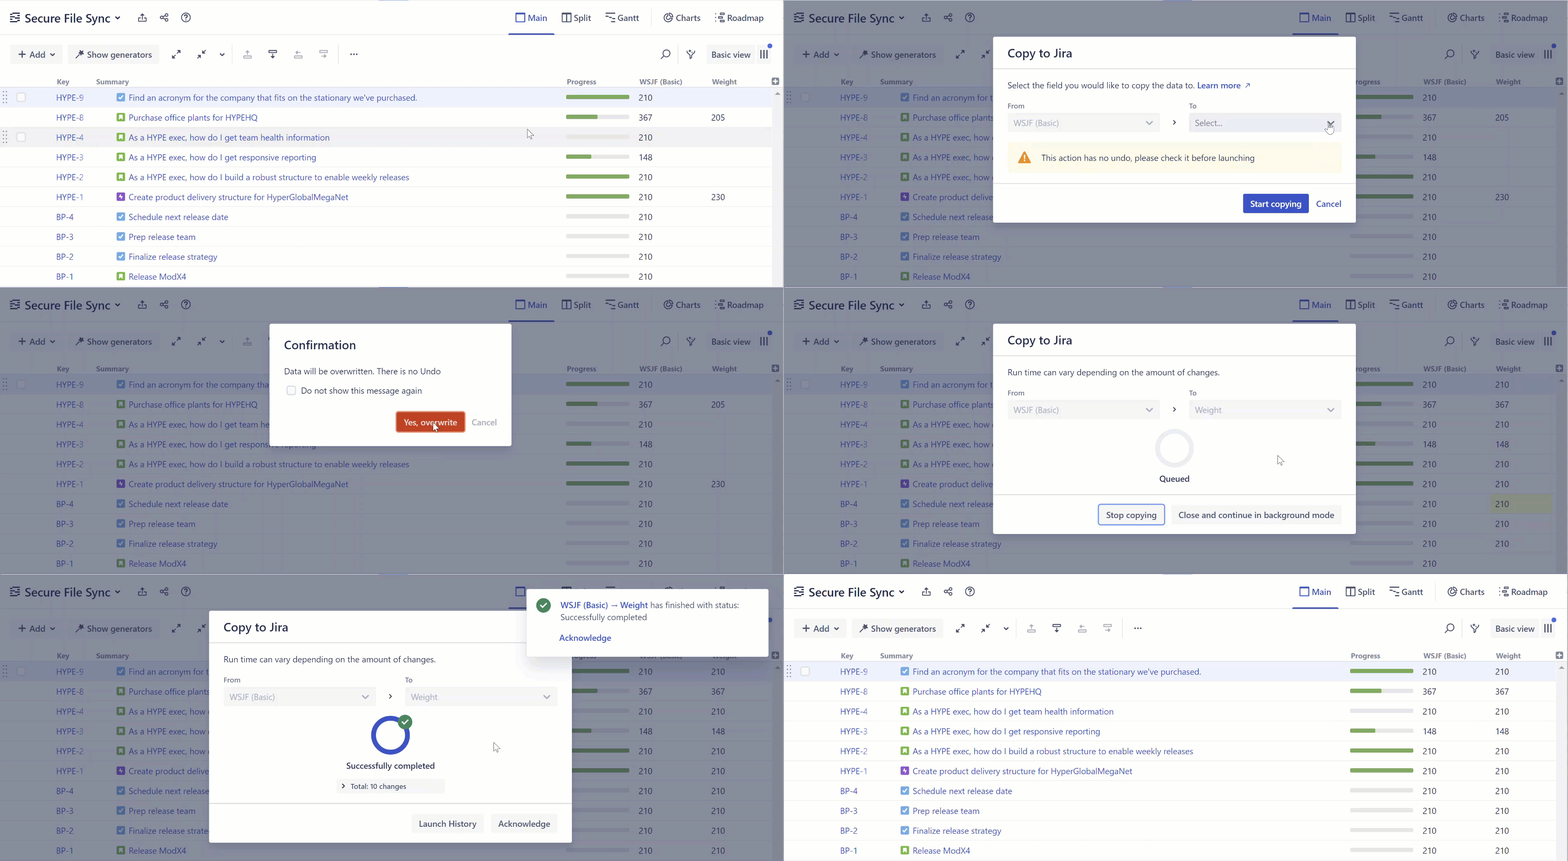
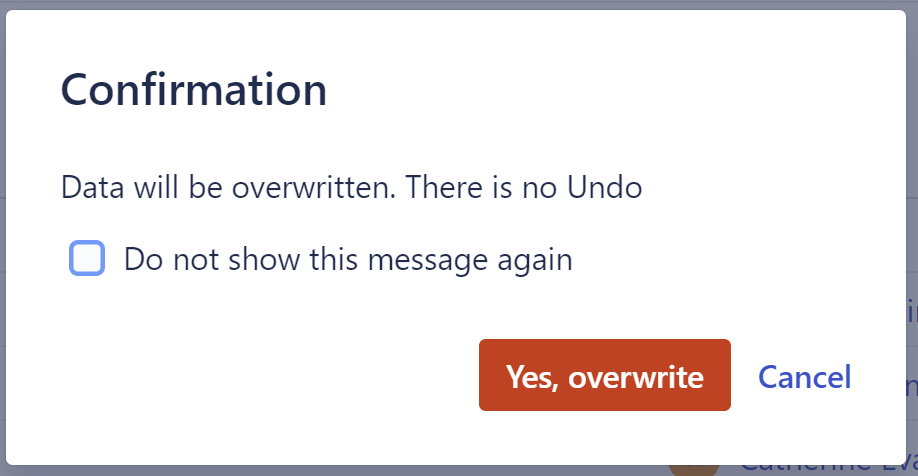
Select Start copying. Note: This action will overwrite any existing data in the Jira field. You will be asked to confirm the operation before proceeding.
The data from your Structure column will now be written to the Jira field. If the data does not copy, make sure you have permission to edit the Jira field, and that the Jira Field has been added to the appropriate screen.
If you’re copying a lot of data, this process may take some time. You can continue working in Structure/Jira by selecting Close and continue in background mode. The status of the copy will be available in the Structure footer.
Each Copy to Jira run only occurs once. If something changes with your original Structure data, you will need to run Copy to Jira again to update the destination Jira field.
Reviewing a Copy to Jira Run
Once Copy to Jira has been run, to review the operation:
-
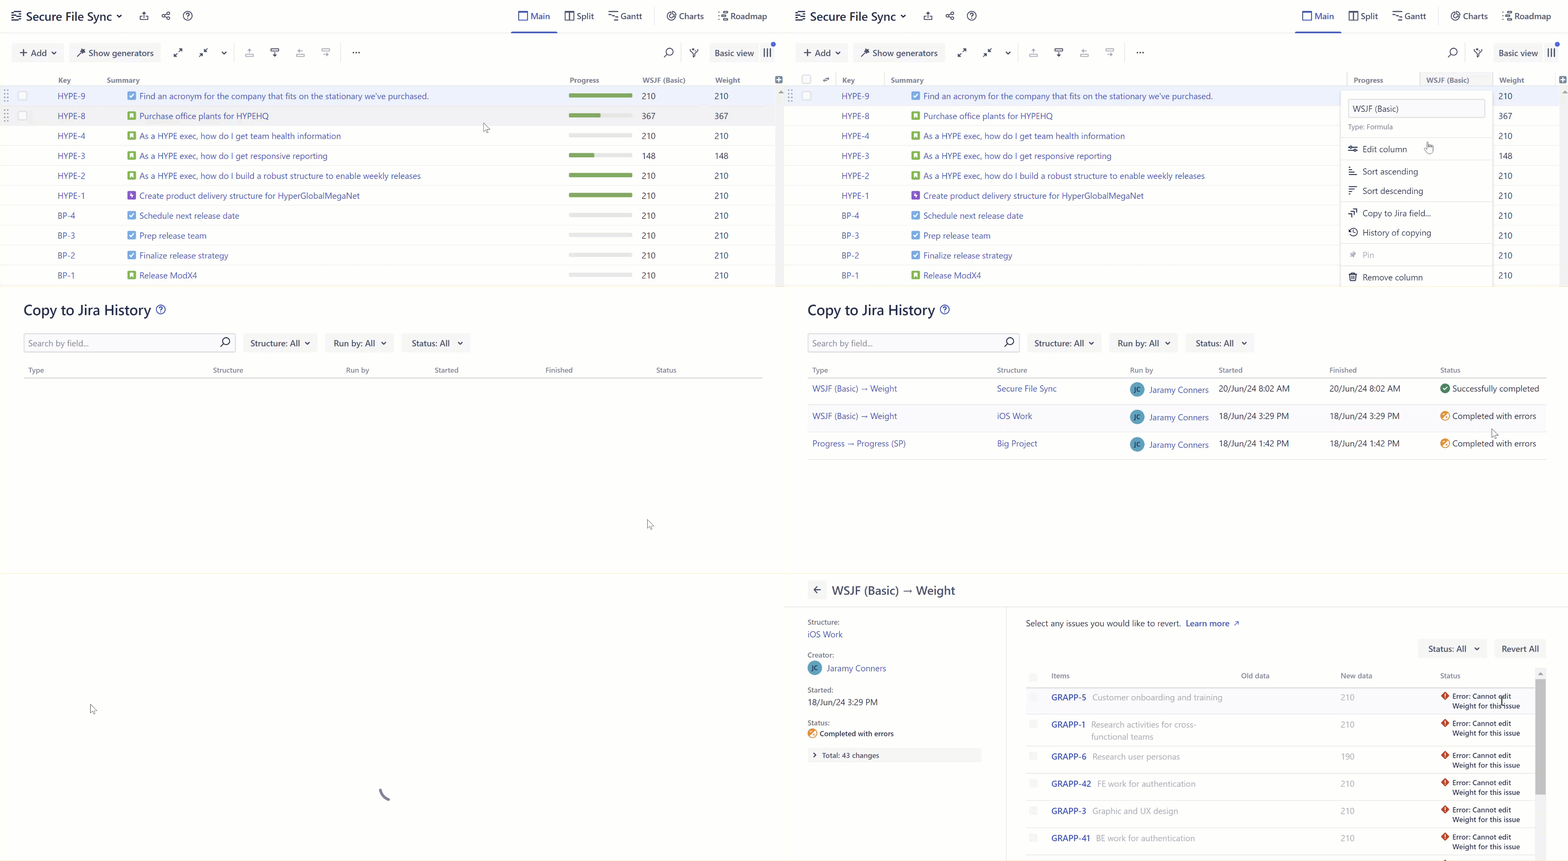
Select the original column header and choose History of copying…
-
On the Copy to Jira History page, locate the run and check the Status to the right of the table.
-
If the run was completed with errors, select the run’s Type for more details.
Reverting Copy to Jira Changes
To revert changes made by a Copy to Jira run:
-
Return to the Copy to Jira History screen (see above).
-
Locate the run you want to change.
-
Select the run’s Type.
-
Select Revert All to undo all changes, or choose the changes you want to revert and select Revert Selected.
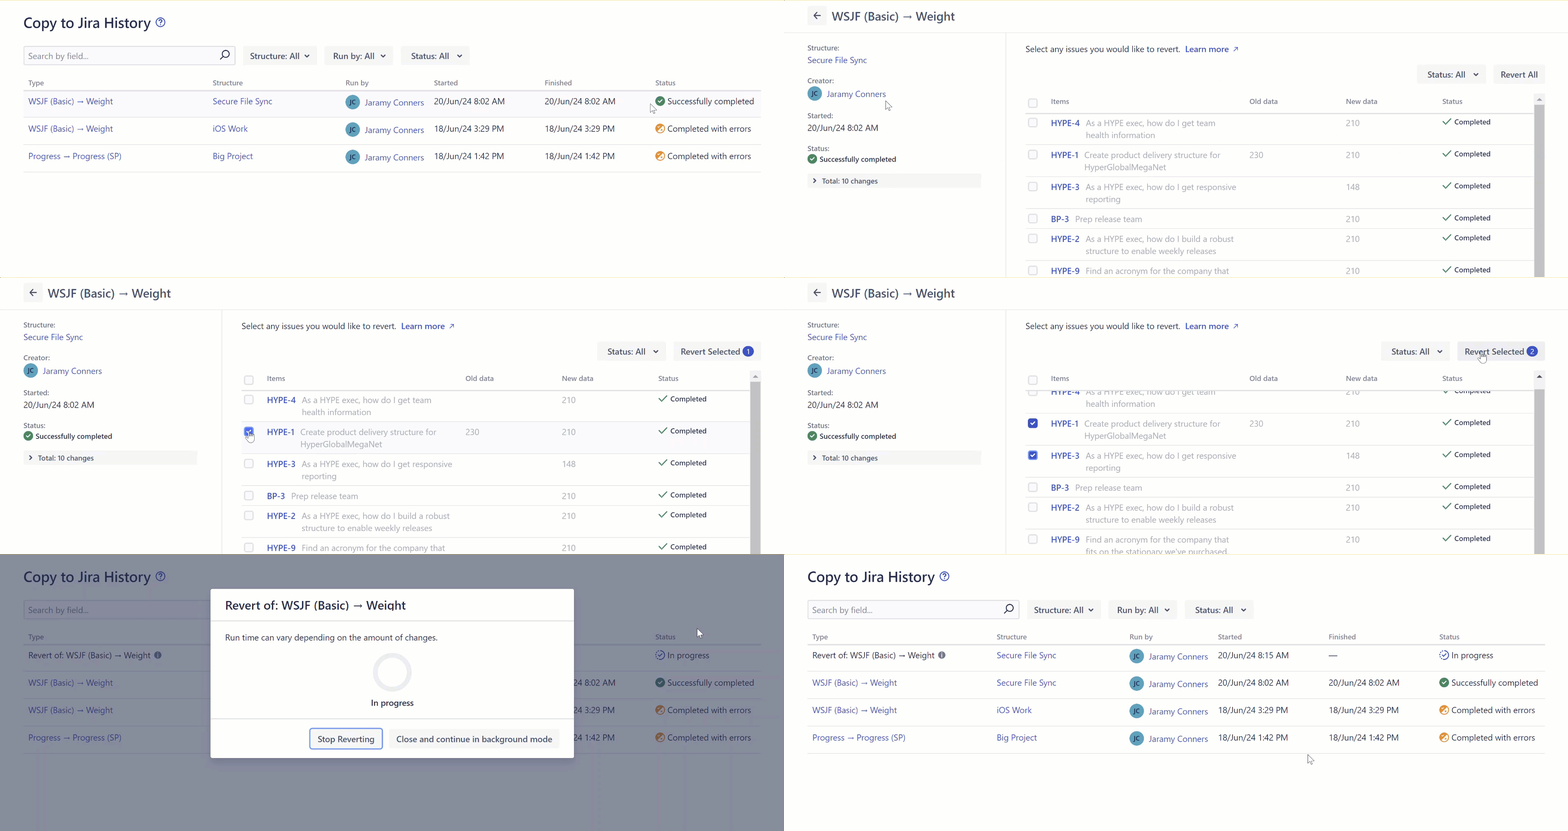
Reverting is only available for 7 days.
It is not possible to revert to older data, since it is too outdated.
Only the run’s creator can revert changes.
You can locate the creator on the Copy to Jira History screen in the Run by column, or on the run’s details page under Creator.
