This article is for Cloud and Data Center.
The Tempo Scheduler helps teams stay on track by automating email reminders based on time-tracking requirements. There are two primary types of notifications available:
1. Status Reminders
This email is sent to all active users within the scope of the scheduler. It provides a summary of their individual progress, comparing hours logged against the hours required for the period.
2. Late Reminders
This notification is specifically targeted at users who have not completed their required hours at the time the scheduler performs its check. The timing of this reminder depends on your specific Scheduler configuration.
Requirements for Receiving Notifications
To ensure users receive these automated emails, the following criteria must be met:
-
Workload Settings: Users must either have hours already logged for the period or be assigned to a Workload Scheme requiring more than zero hours.
-
Project Permissions: Users must have the "Work on Issues" permission for at least one active project.
⚠️ Important Configuration Note
For the Tempo Scheduler to successfully identify and message users, the "Work on Issues" permission must be granted to specific users, roles, or groups.
Note: Granting this permission to "Any logged-in user" is insufficient for the Scheduler's indexing; ensure your permission schemes explicitly define the target groups.
Managed Timesheet Closures and Grace Periods
When the "Make Scheduler Close" option is enabled, an additional configuration field appears in the Scheduler settings. This field defines the number of days after the period end date that the Scheduler will officially lock timesheets for editing.
Note: The "end date" is determined by the specific Period Type (e.g., Weekly, Bi-weekly, or Monthly) selected in your Scheduler configuration.
How to Edit After a Closure
Once the Scheduler has locked a period, users can no longer add or modify worklogs without intervention. To allow a user to make changes, the following three conditions must be met:
-
Grace Period: A Team Lead must grant the user a manual Grace Period.
-
Approval Status: The individual Timesheet must be in an editable state (it cannot be currently Submitted or Approved).
-
Period Management: The global period must still be marked as Open within Tempo’s Period Management settings.
When selecting to Close 0 days after the end date, no Status reminders to late users can be sent. It is not possible to send late reminders before, or at the same time, as the status reminders.
Cloud:
Tempo Scheduler Configuration and Timing
To configure the Tempo Scheduler in Jira Cloud, navigate to Tempo > Settings > Scheduler Configuration.
1. Scheduler Frequency
The Scheduler can be configured to run on three different frequencies. The "End Date" for each period is determined by these settings:
-
Monthly: Aligns with the dates defined in your Period Configuration.
-
Weekly: Runs on a 7-day cycle.
-
Bi-weekly: Runs on a 14-day cycle.
2. Execution Timing
The Scheduler service runs a background check once every 24 hours. During this daily check, the system evaluates whether the current date matches a trigger requirement (such as a notification deadline or a closure date) and executes the necessary actions.
Scheduler Deadlines and Closure Logic
Type set to Monthly:
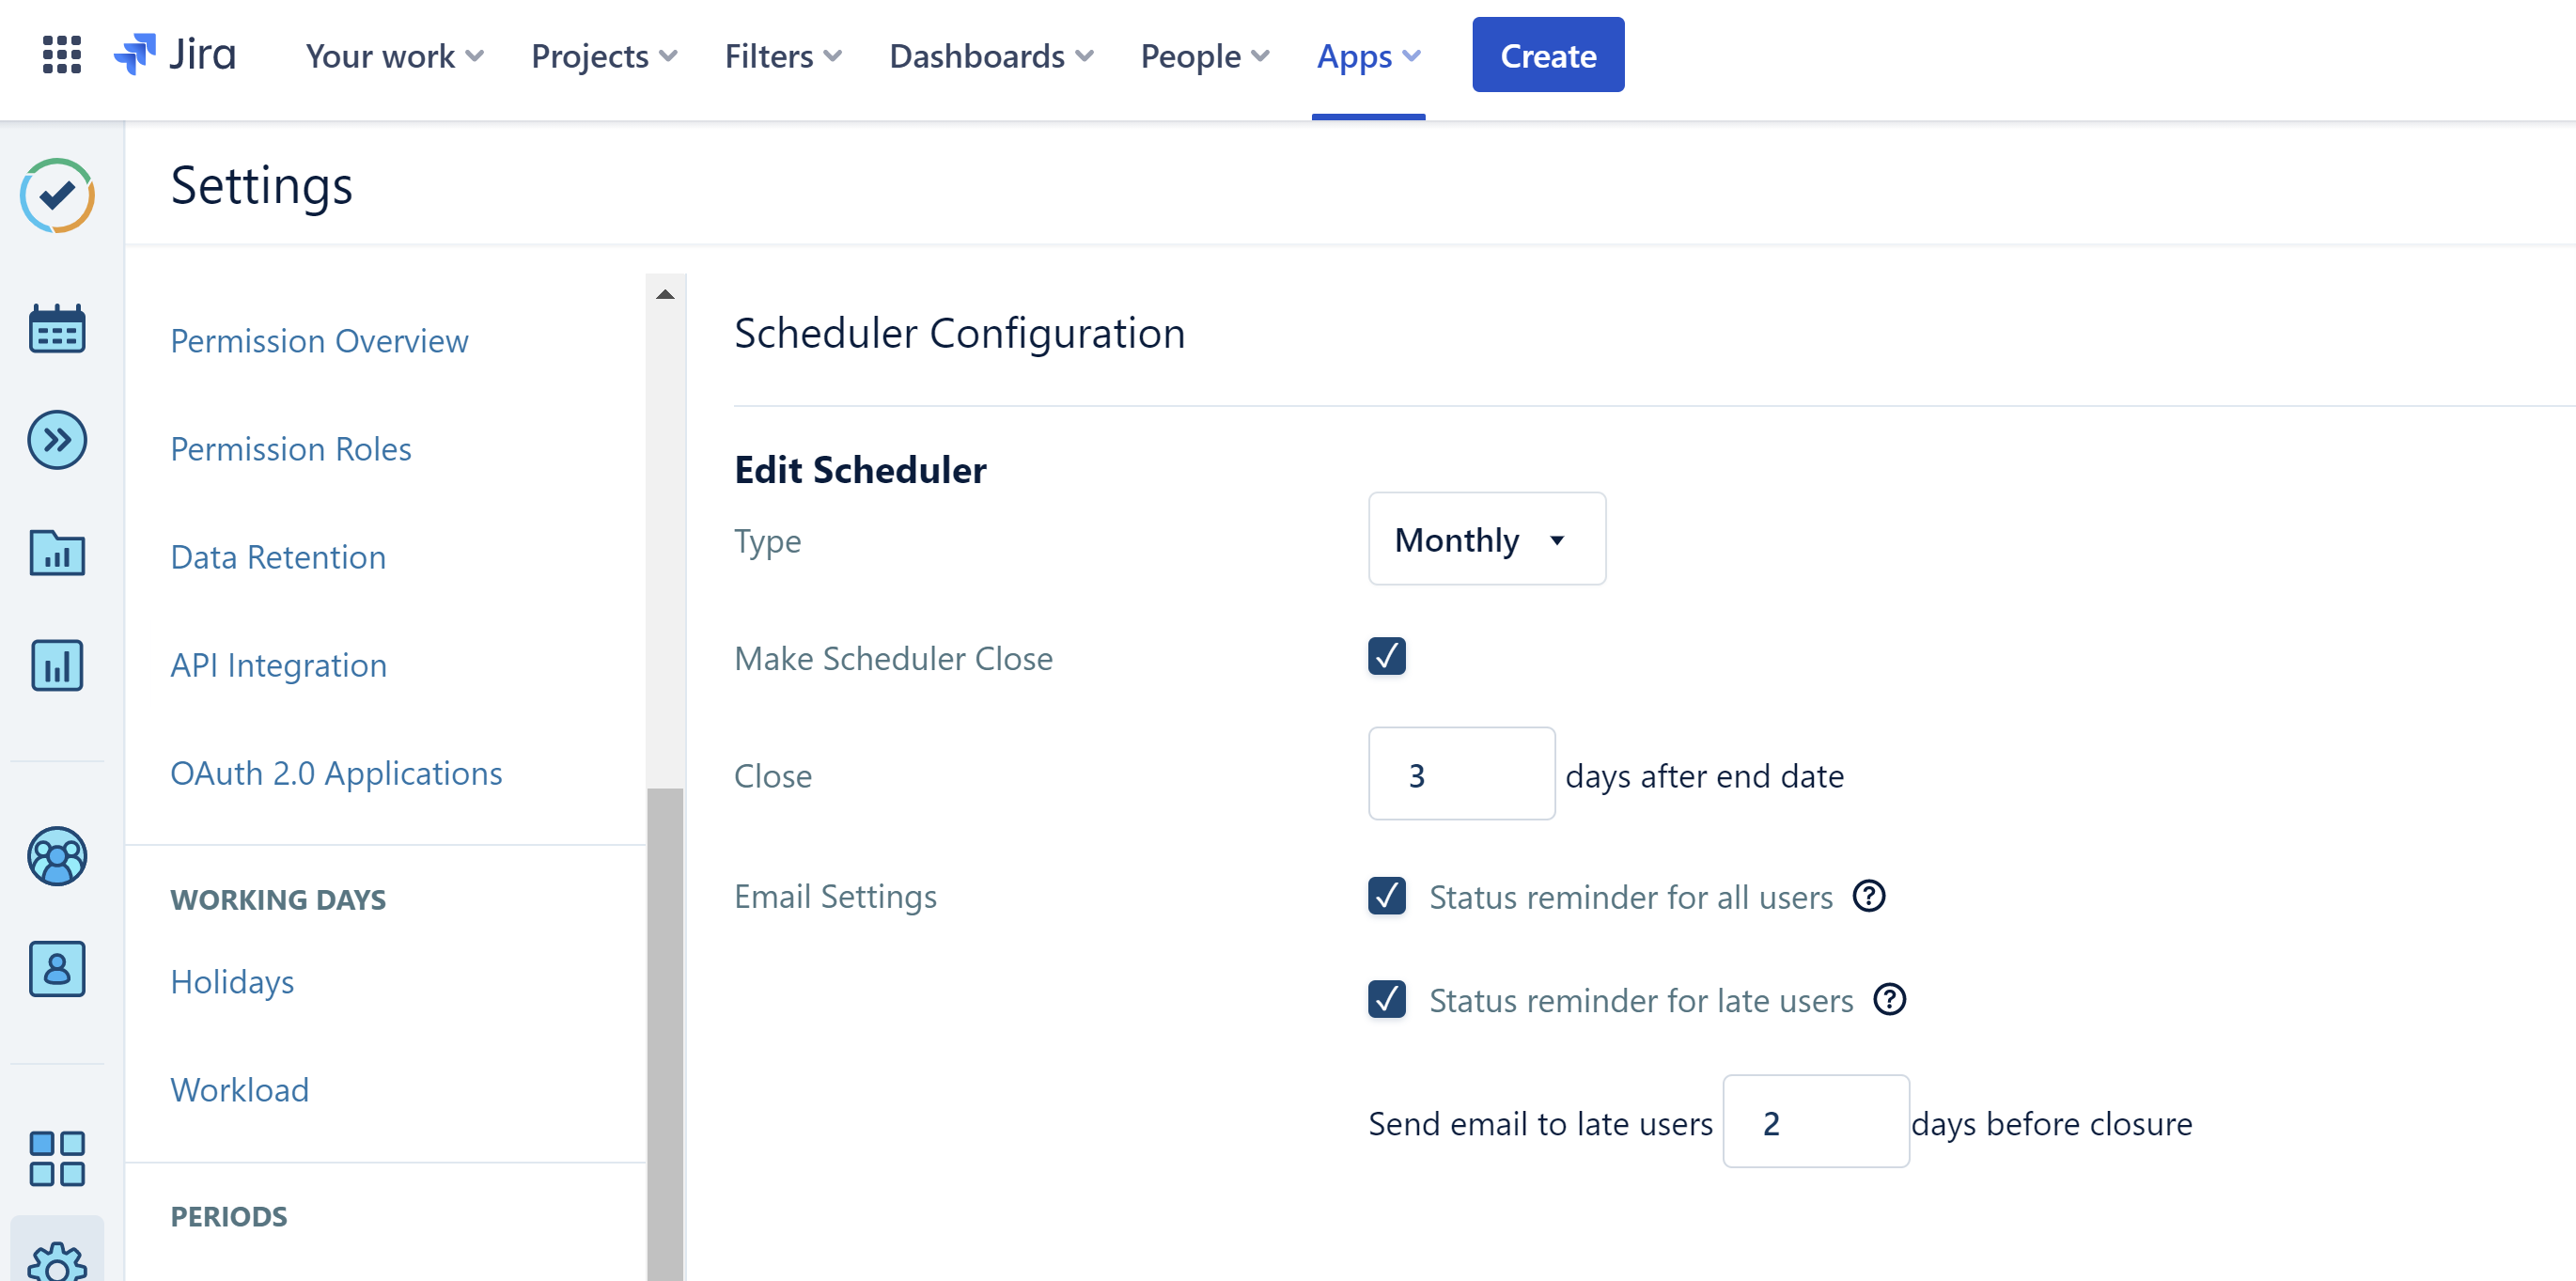
The End Date used by the Scheduler is defined by the final day of your Monthly Period Configuration. Understanding how the "Close" field interacts with this date is key to managing your timesheet lifecycle.
Timesheet Closure Limits
-
Maximum Closure Window: The "Close" field can be set for a maximum of 28 days after the period end date.
-
Execution Time: The Scheduler officially locks timesheets for editing at 11:59 PM UTC (23:59) on the calculated closure date.
Notification Timing
When these options are enabled, the Scheduler automates email delivery at 11:59 PM UTC (23:59) based on the following logic:
-
Status Reminder (All Users): Dispatched exactly on the Period End Date.
-
Late Reminders: The delivery date for this reminder shifts depending on your closure settings:
-
If "Make Scheduler Close" is UNCHECKED: The reminder is sent X days after the Period End Date.
-
If "Make Scheduler Close" is CHECKED: The reminder is sent X days before the scheduled closure date.
-
⚠️ Technical Note: The value for X must be greater than 0. While the interface may allow you to save the configuration with a zero or negative value without triggering an error message, the notification will not function as intended.
Scheduler Deadlines and Closure Logic
Type set to Weekly or Bi-Weekly:
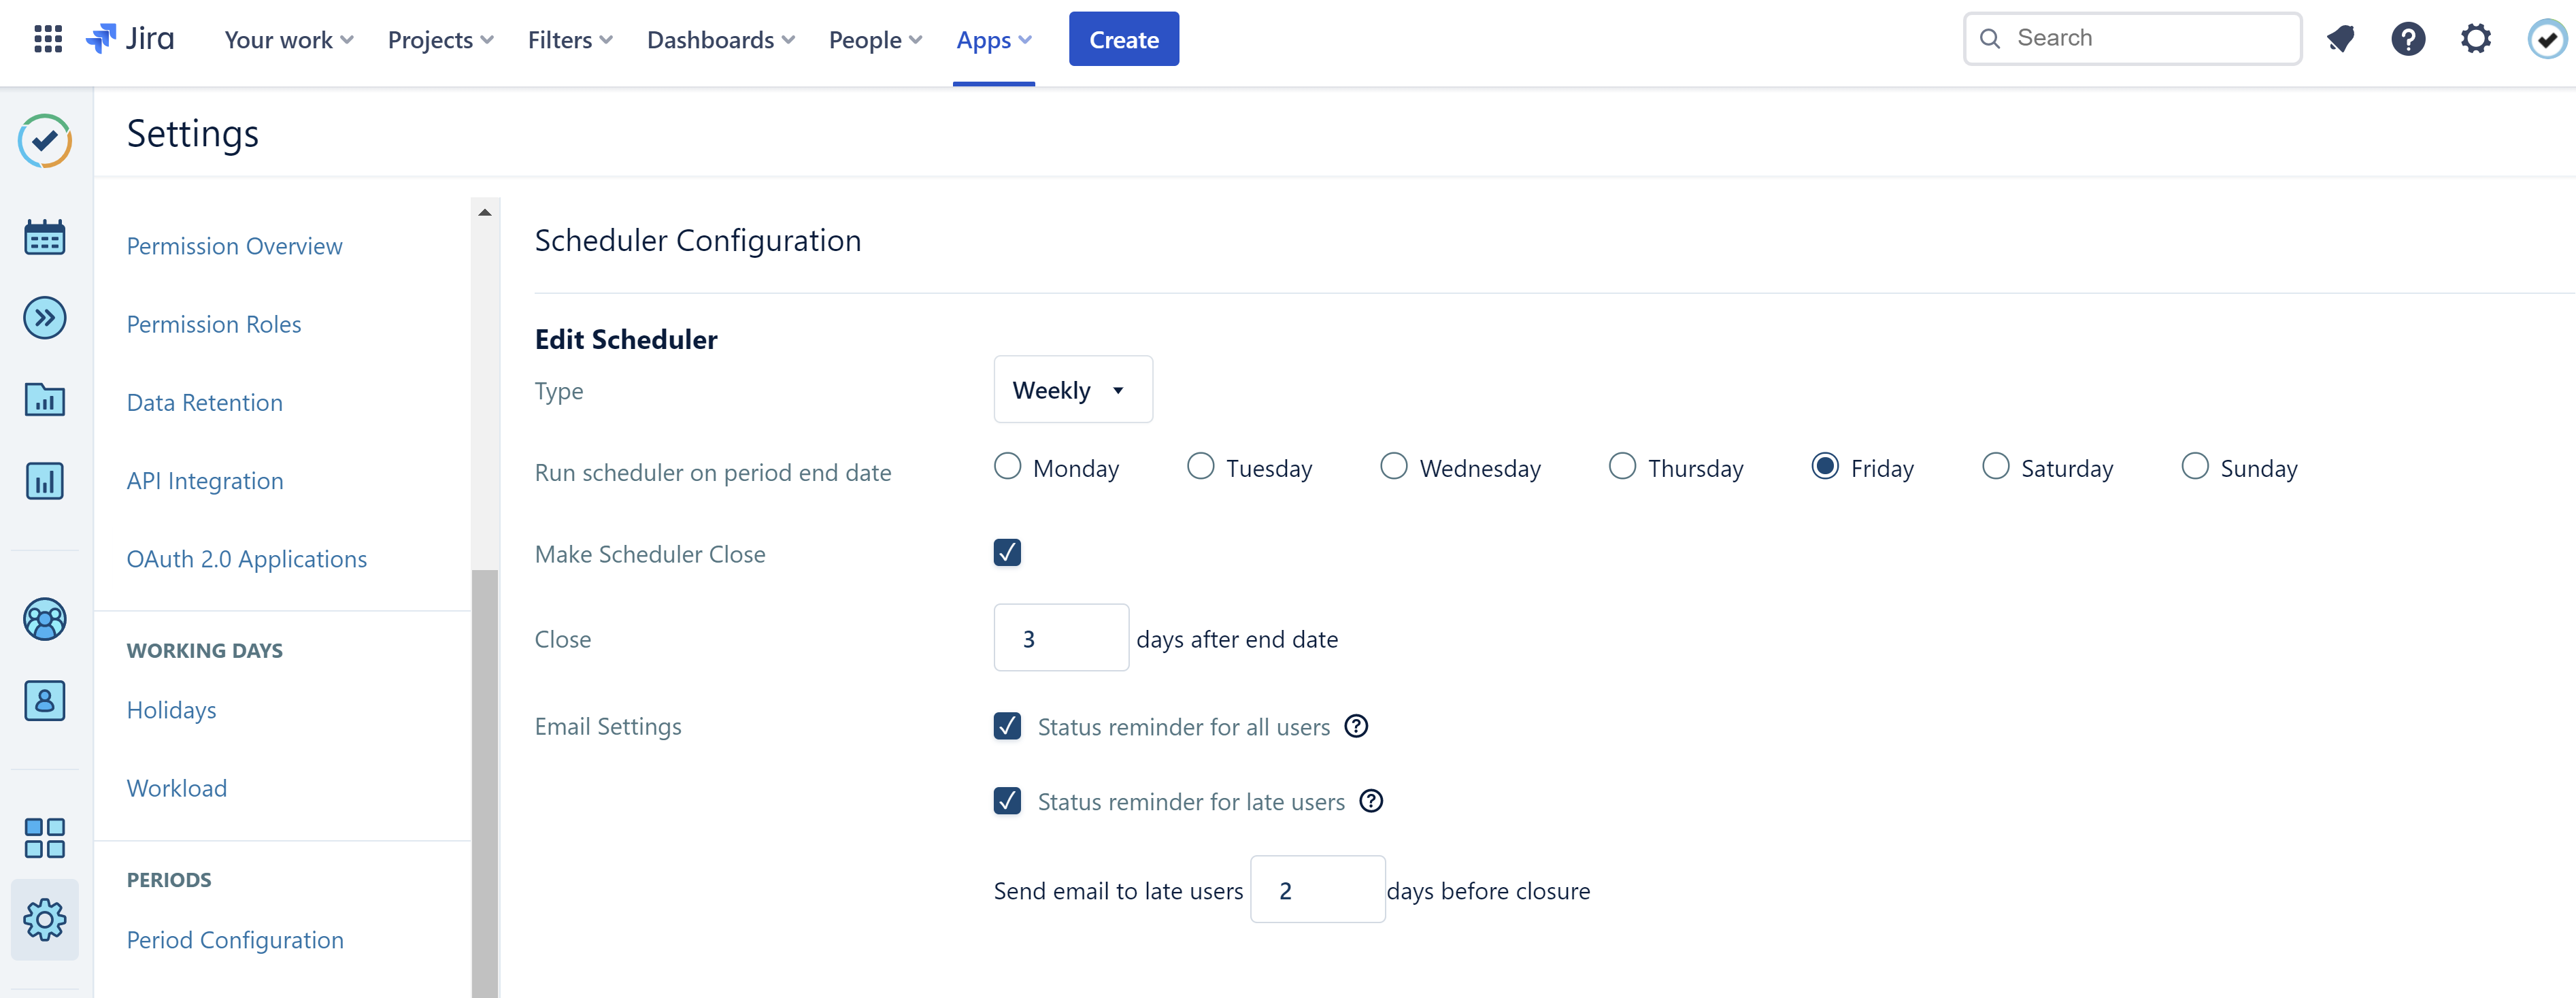
When using the Weekly or Bi-weekly frequency, the End Date is defined by the specific weekday selected in the "Run scheduler on period end date" field.
⚠️ Configuration Note: Be aware that the Bi-weekly setting does not explicitly label which week of the cycle is the "active" one in the interface. This can occasionally cause confusion for users regarding exactly which week the Scheduler last executed.
Timesheet Closure and Deadlines
The Close field determines when the Scheduler will officially lock timesheets for editing at 11:59 PM UTC (23:59). The maximum allowable window for this closure is limited by your selected frequency:
-
Weekly: Maximum of 7 days after the period end date.
-
Bi-weekly: Maximum of 14 days after the period end date.
Notification Delivery Timing
Email notifications are dispatched at 11:59 PM UTC (23:59) according to the following rules:
-
Status Reminder (All Users): Sent to the entire team exactly on the Period End Date.
-
Late Reminders: The delivery date for this reminder depends on your closure configuration:
-
If "Make Scheduler Close" is UNCHECKED: The reminder is sent X days after the Period End Date.
-
If "Make Scheduler Close" is CHECKED: The reminder is sent X days before the scheduled closure date.
-
Testing and Monitoring Limitations (Cloud)
Testing the Tempo Scheduler in a Cloud environment presents unique challenges, primarily due to the platform's automated nature.
-
Time Manipulation: Unlike local or server-hosted environments, Cloud users cannot manually adjust system time settings. This makes it difficult to "fast-forward" through a period to verify that closures or notifications trigger exactly as expected.
-
Visibility and Monitoring: Currently, there is no native monitoring dashboard within the Jira interface to track the Scheduler’s real-time status or execution history.
Because the Scheduler operates as a background service, validation typically requires waiting for the naturally occurring cycle to complete to confirm that all settings were applied correctly.
Data Center:
For those using Jira Data Center, the Tempo Scheduler is managed through the central administration panel. You can locate these settings by navigating to Jira Administration > Manage apps > Scheduler.
1. Scheduler Frequency
The Data Center version allows you to configure the Scheduler to run based on three distinct cycles:
-
Period: This follows the Default Period as defined in your global Tempo settings. To modify this, navigate to Tempo > Settings > Period Configuration.
-
Weekly: Runs on a standard 7-day cycle.
-
Bi-weekly: Runs on a 14-day cycle.
2. Execution Timing and Precision
Unlike the Cloud version, the Data Center Scheduler operates with higher frequency. The service performs a system check every 10 minutes to determine if any pending actions—such as dispatching notifications or closing timesheets—need to be executed.
Scheduler Deadlines and Closure Logic
Type set to Period
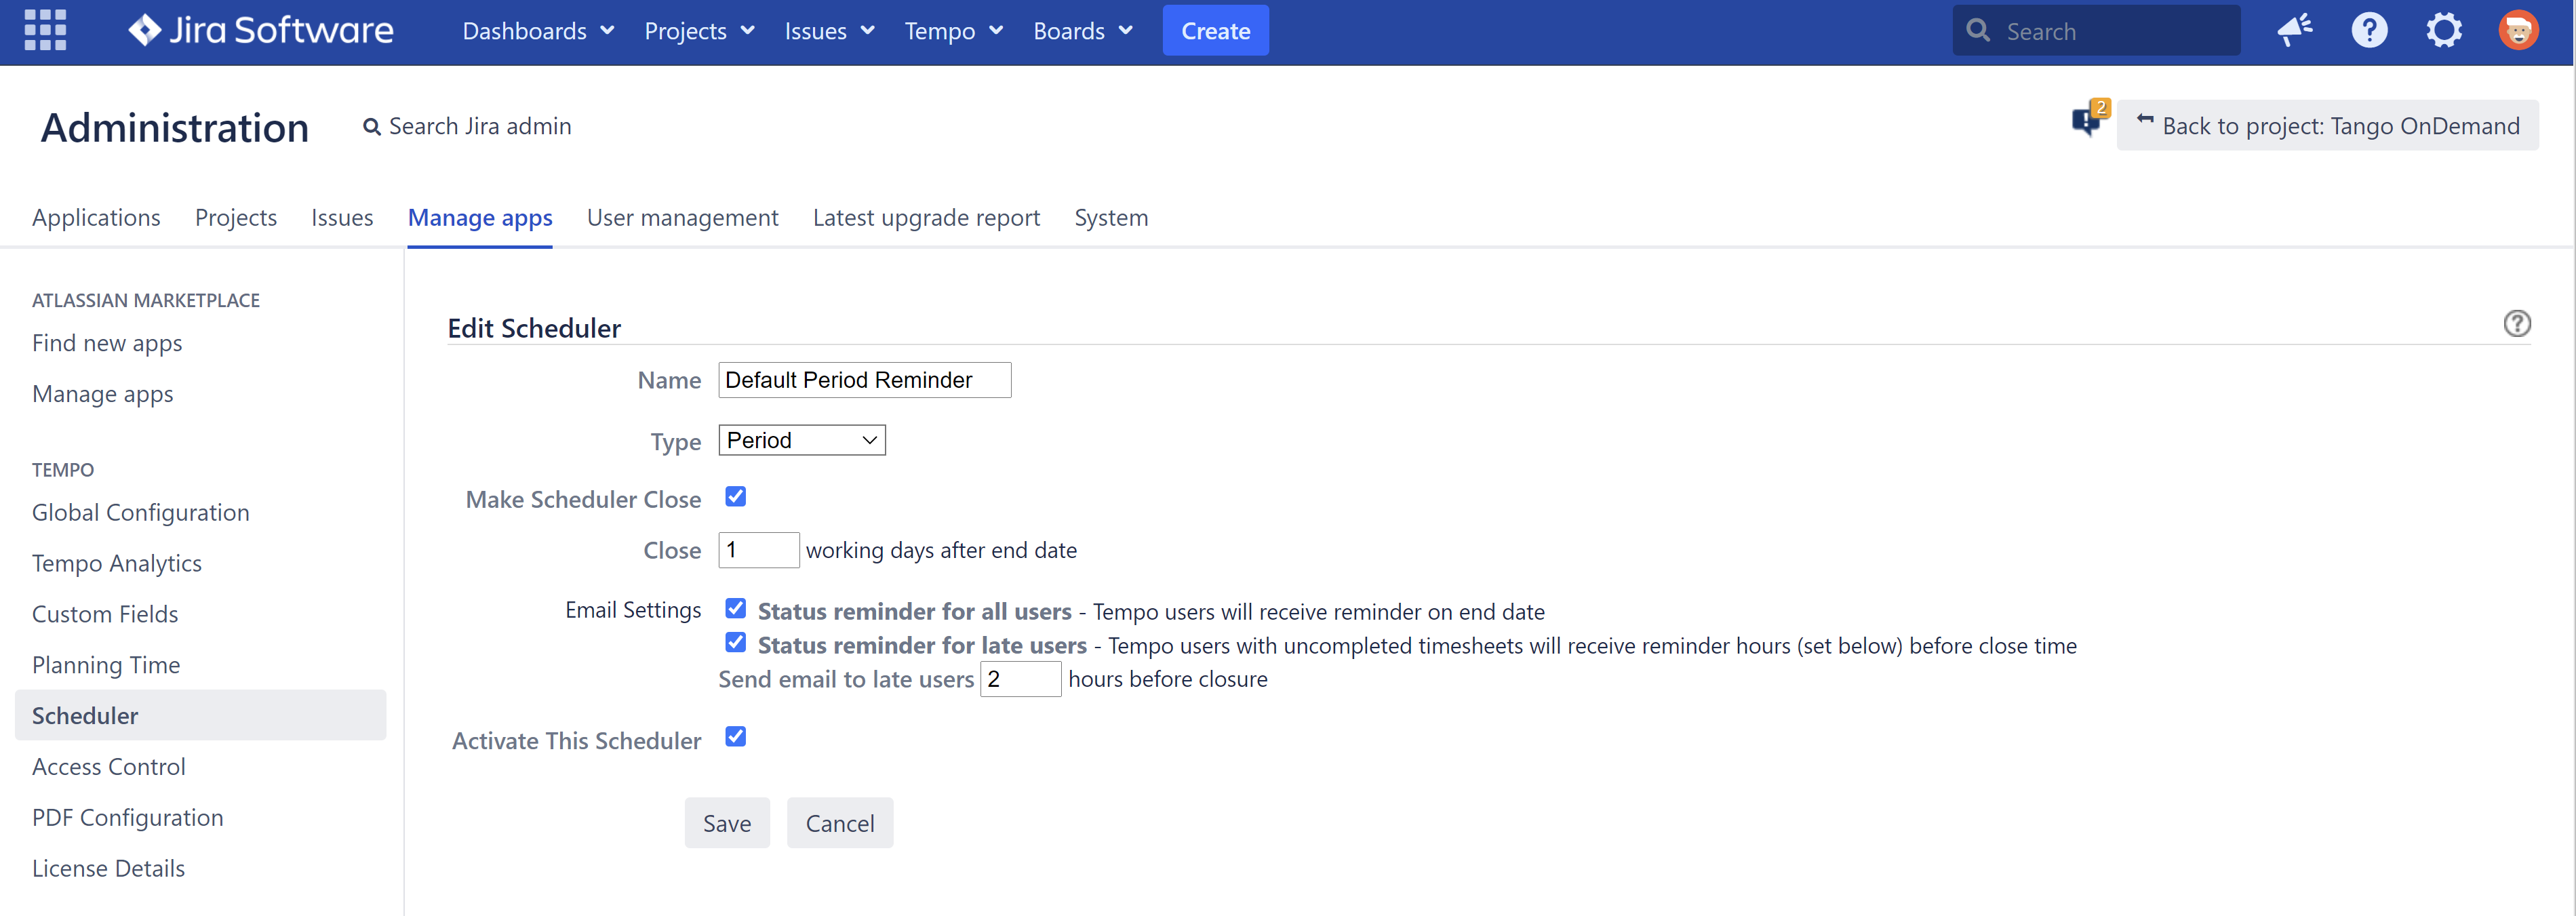
When the Scheduler is set to run by Period, the End Date is pulled directly from the final day of your Default Monthly Period, as defined in the Global Period Configuration.
Working-Day Based Closures
In the Data Center environment, the Close field is intelligently calculated based on your team's actual availability:
-
Calculation: The closure window can be set for a maximum of 5 working days.
-
Exclusions: The Scheduler automatically excludes Saturdays and Sundays, as well as any Holidays defined in your Default Holiday Scheme.
-
Execution Time: Timesheets are locked for editing at 11:59 PM (23:59) according to your Jira System Timezone.
Notification Delivery Timing
Email notifications are dispatched at 11:59 PM (23:59) Jira System Time based on the following logic:
-
Status Reminder (All Users): Dispatched to the entire team exactly on the Period End Date.
-
Late Reminders: These notifications are scheduled using an hourly offset:
-
If "Make Scheduler Close" is UNCHECKED: The reminder is sent X hours after the Period End Date.
-
If "Make Scheduler Close" is CHECKED: The reminder is sent X hours before the scheduled closure date (with a maximum allowable offset of 24 hours).
-
Scheduler Deadlines and Closure Logic
Type set to Weekly or Bi-Weekly
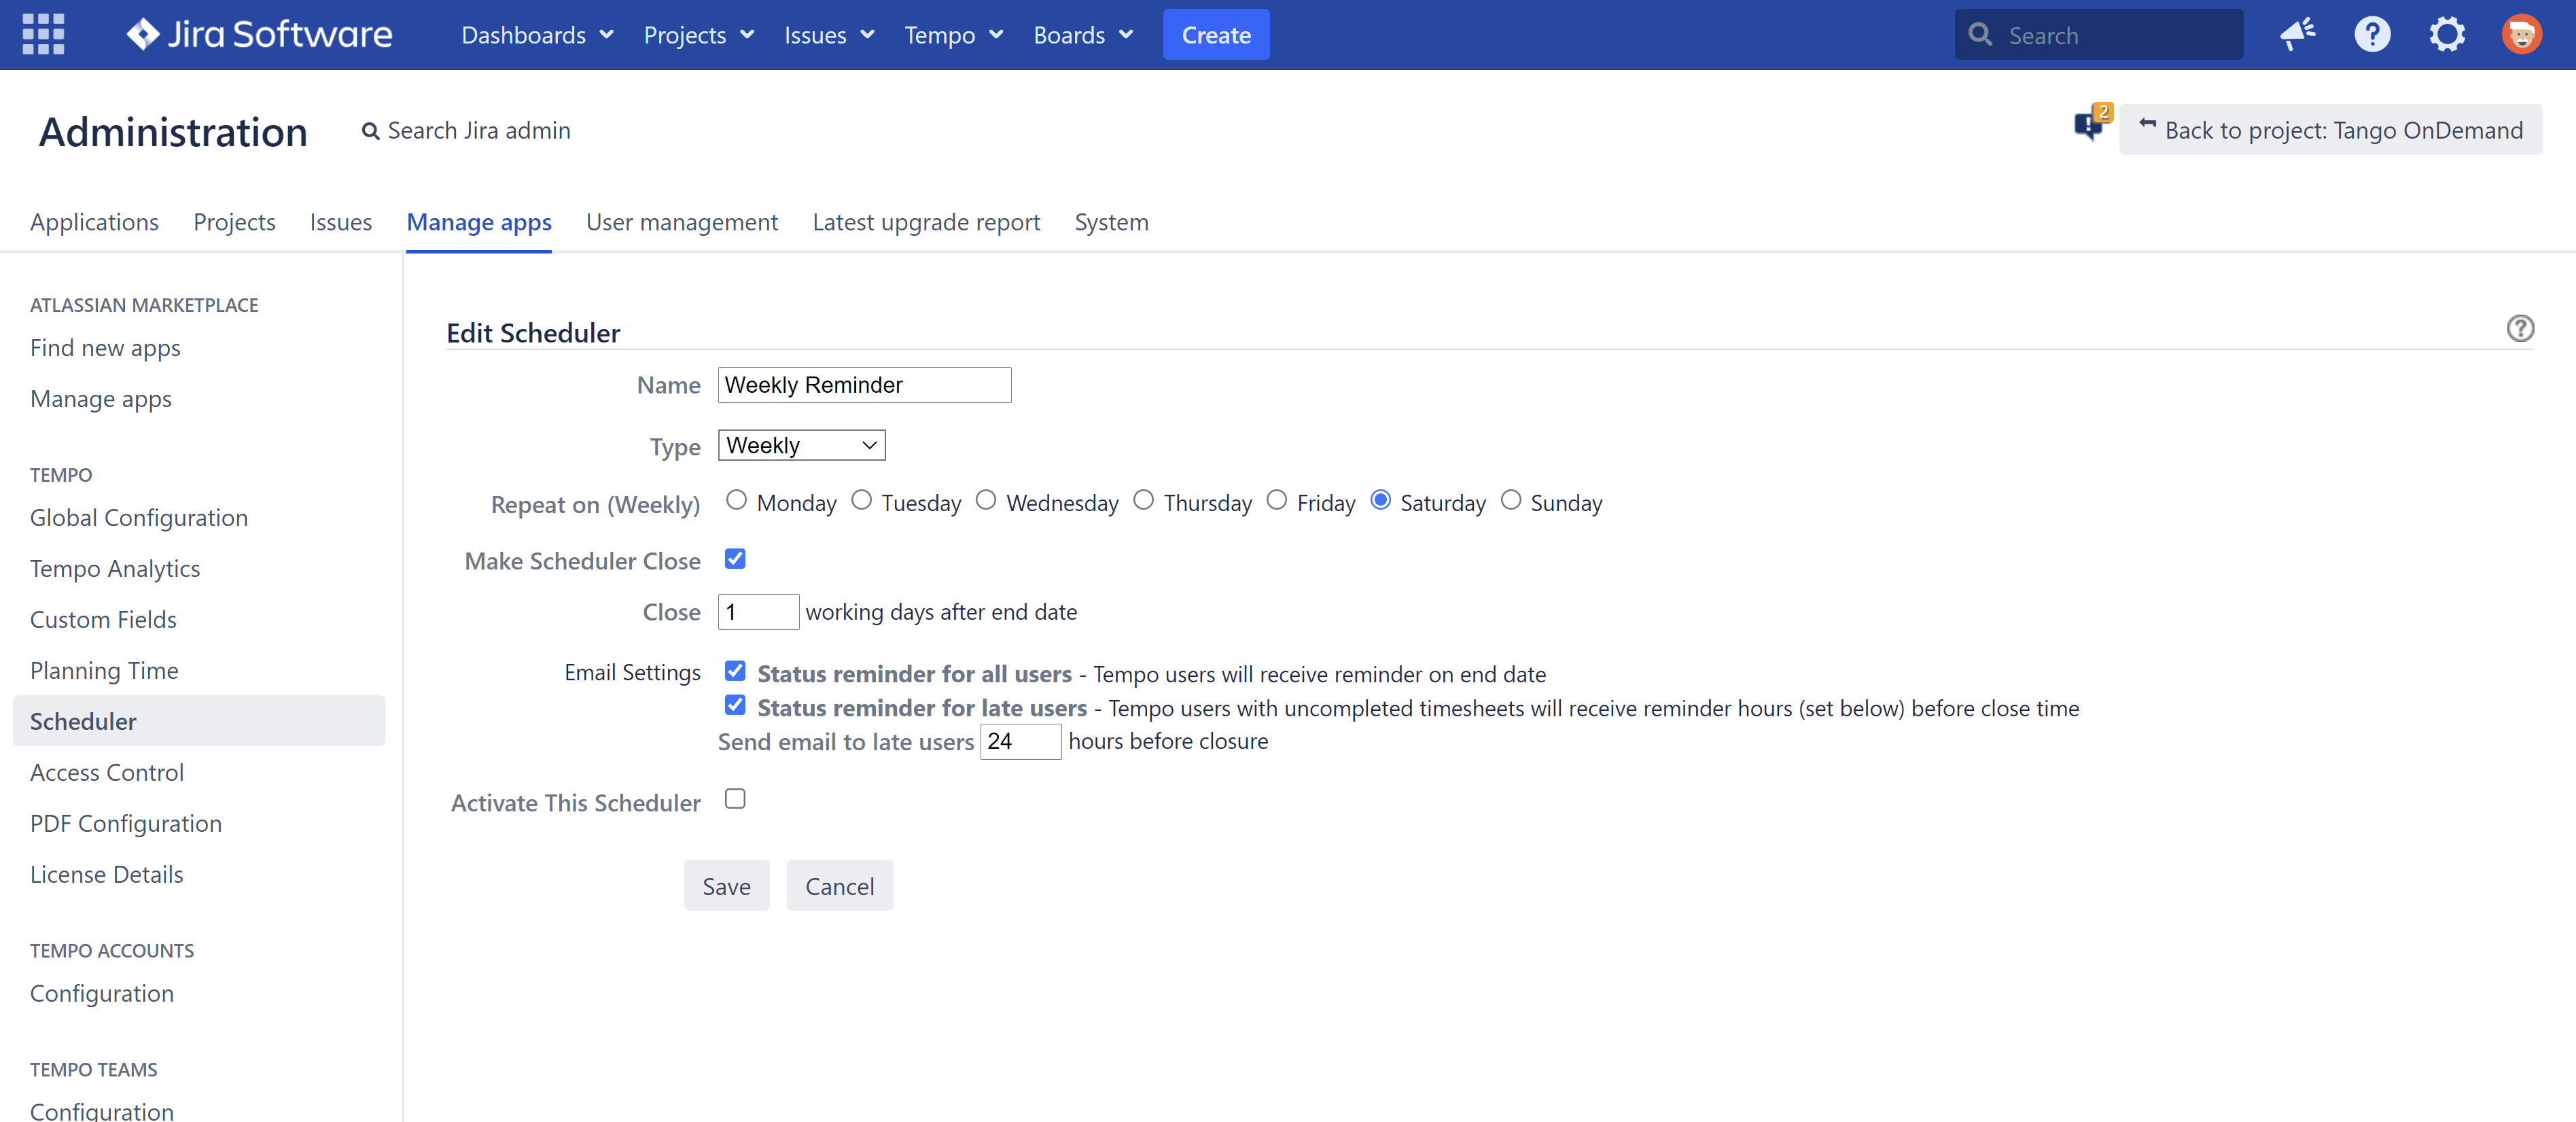
When configuring the Scheduler for a Weekly or Bi-weekly frequency, the End Date is determined by the specific weekday selected in the "Repeat on" setting.
⚠️ Configuration Note: For Bi-weekly cycles, the interface does not explicitly label which week of the rotation is currently active. To confirm if you are in the first or second week of the period, you must verify the "Next run" date displayed for the automated emails.
Timesheet Closure and Deadlines
The Close field determines when the Scheduler will officially lock timesheets for editing at 11:59 PM (23:59) in the Jira System Timezone.
-
Maximum Closure Window: For both Weekly and Bi-weekly frequencies, the closure can be set for a maximum of 5 days after the period end date.
Notification Delivery Timing
Email notifications are dispatched at 11:59 PM (23:59) Jira System Time according to the following rules:
-
Status Reminder (All Users): Sent to the entire team exactly on the Period End Date.
-
Late Reminders: These notifications utilize an hourly offset for precise delivery:
-
If "Make Scheduler Close" is UNCHECKED: The reminder is sent X hours after the Period End Date.
-
If "Make Scheduler Close" is CHECKED: The reminder is sent X hours before the scheduled closure date.
-
Testing and Monitoring (Data Center)
Testing the Tempo Scheduler in a Data Center environment is more flexible than in the Cloud, as you can simulate time-sensitive events by adjusting the system clock.
Simulating Scheduled Events
To "fast-forward" the Scheduler for testing purposes:
-
Modify Timezone: Adjust the timezone settings on your Jira server or local computer.
-
Restart Instance: It is highly recommended to restart your Jira instance after a timezone change to ensure the shift is fully recognized.
-
Verify System Time: Confirm the new setting by navigating to Jira Administration > System > System Info and checking the System Time field.
Monitoring Scheduler Execution
You can gain visibility into the Scheduler's background processes through the Jira internal job logs:
-
Navigate to Jira Administration > System > Scheduler Details.
-
Locate the job entry:
CompatibilityPluginScheduler.JobRunnerKey.com.tempoplugin.scheduler.job.TempoJobRunner. -
Select "Show more" to view the execution history, including when the job last ran and when the next check is scheduled.
Understanding Trigger Precision
Because the Scheduler checks for pending tasks every 10 minutes, there is a slight "offset" in execution. For example, if you have configured a Status Reminder for 23:59, the emails will be triggered by the first scheduler check that occurs after that timestamp has passed.
Advanced Troubleshooting: Enabling Debug Logs (Data Center)
If you require deeper insight into the Scheduler’s activities—such as exactly when it performs checks or dispatches emails—you can increase the logging verbosity.
Configuring Debug Logging
To capture detailed Scheduler events in your Jira logs:
-
Navigate to Jira Administration > System > Logging and Profiling.
-
Locate the Default Loggers section and click the "Configure" link.
-
In the Package Name field, enter:
com.tempoplugin.scheduler -
Set the Logging Level to DEBUG and click Add.
Best Practices for Log Management
-
Timed Execution: Because DEBUG logging generates a high volume of data and can quickly fill your log files, it is recommended to enable this setting shortly before the Scheduler is expected to run and disable it once the event has passed.
-
Persistence: Please note that this change is temporary. If the Jira service is restarted, the logging level will automatically revert to its default state.
Manual Database Updates for Local Testing (Data Center)
When testing on a localhost environment, you may need to manually adjust the "Time Registration closed until" date to bypass wait times or reset specific conditions. This can be accomplished by modifying the database directly.
Identifying the Closure Property
To locate the specific ID associated with the Scheduler's closure date, execute the following SQL query:
SELECT * from propertystring
WHERE id IN (
SELECT id
FROM propertyentry
WHERE property_key = 'Tempo.ClosedForRegistrationDate'
)
Updating the Closure Date
Once you have retrieved the correct id from the query above, you can update the value to a date that suits your testing scenario.
In the example below, we are updating the record (assuming an id of 52392) to set the closure for July 3rd, 2021.
⚠️ Important: While you can change the calendar date, you should not alter the timestamp format. The Scheduler is hardcoded to recognize closures at 23:59:59.
UPDATE propertystring
SET propertyvalue = '2021-07-03 23:59:59.000000'
WHERE id = 52392