
The Item Types setting screen lets you customize the hierarchy and item types displayed in Loop.
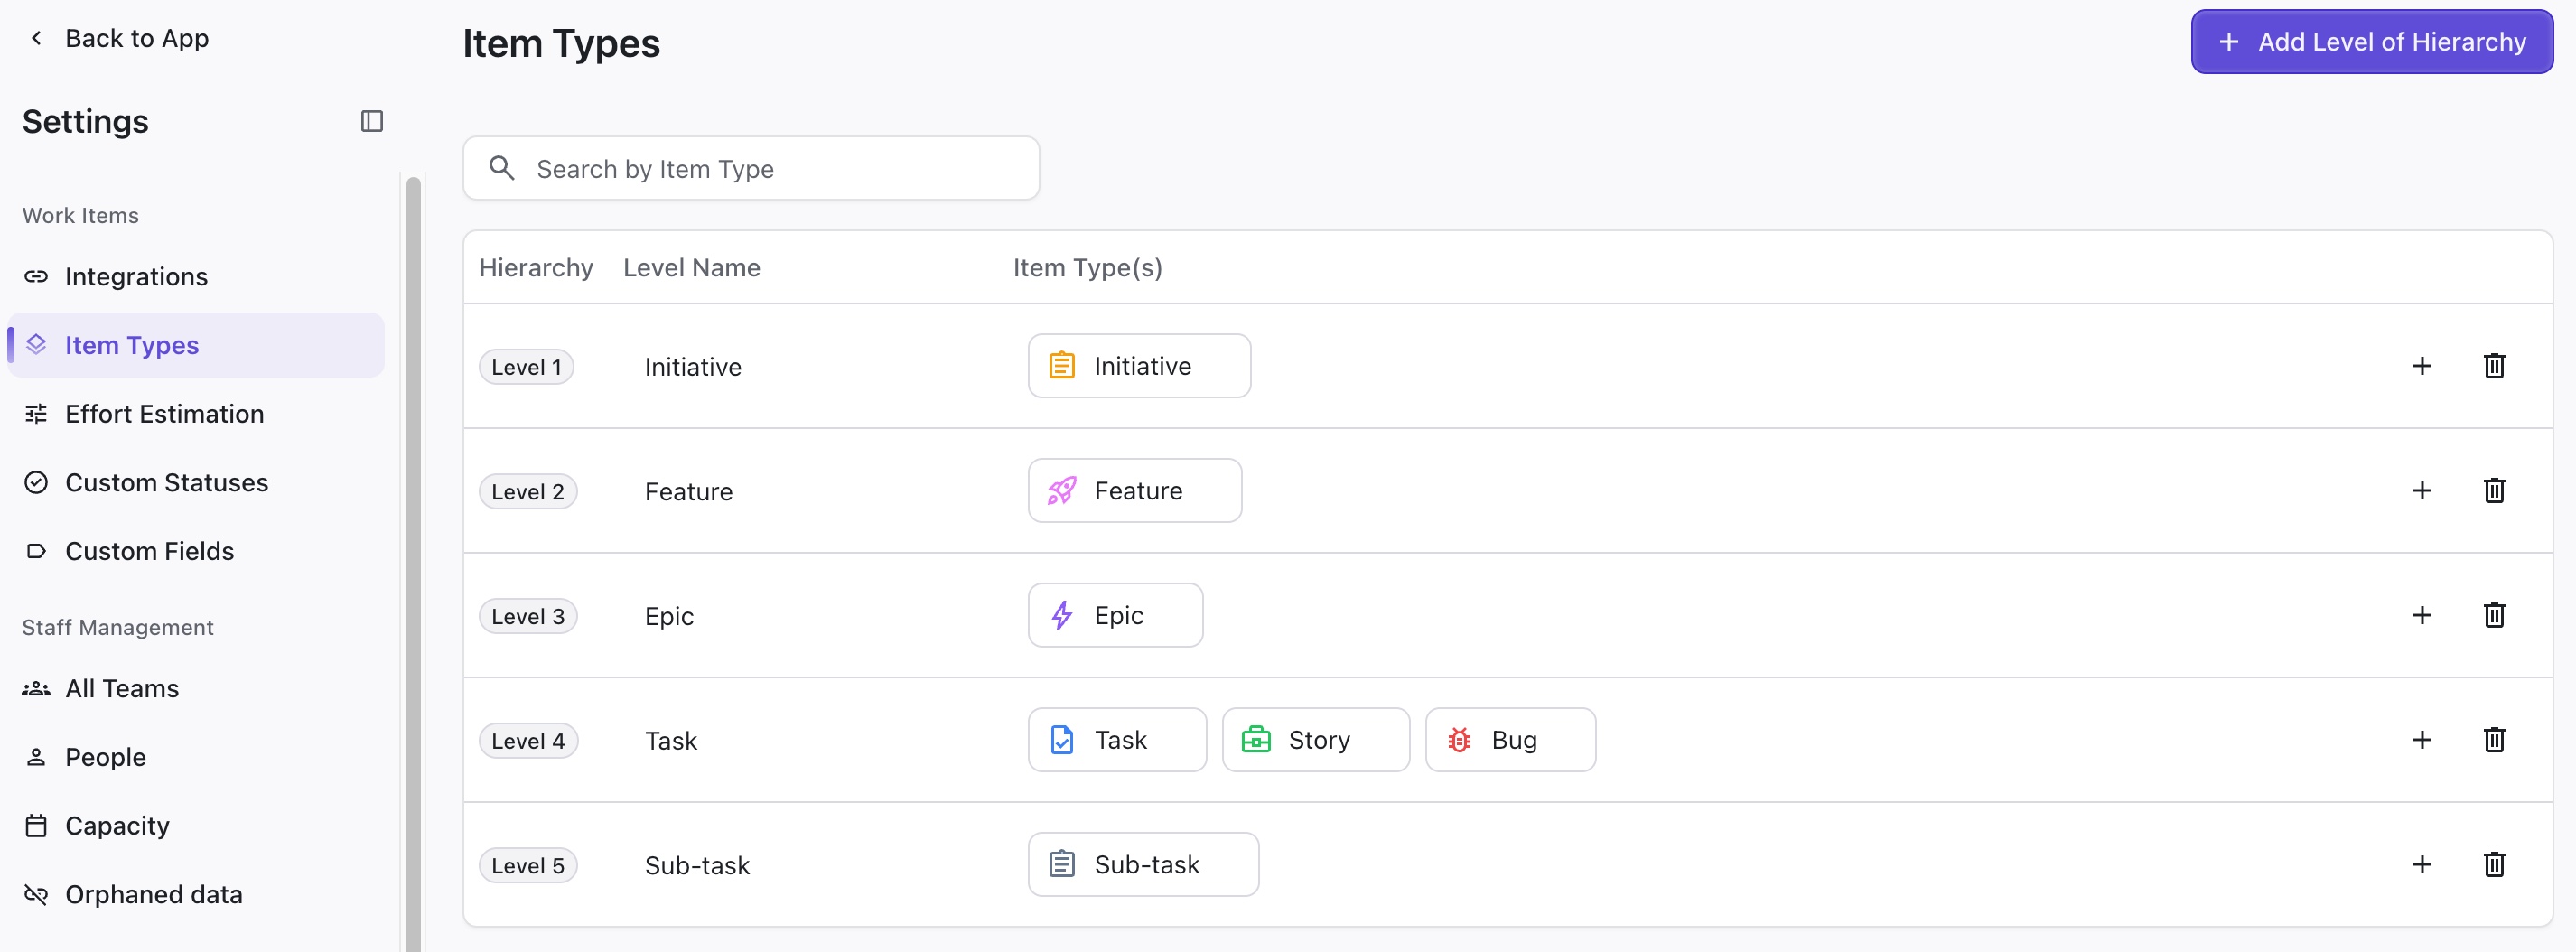
The first time an integration is set up, Loop automatically sets up the item types and hierarchy based on the integrated project.
When you import new projects, you need to map their hierarchy and item types to your existing ones. This way, if some projects use a 3-tier hierarchy while others use a 5-tier hierarchy, you can view them all together in Loop, within a single hierarchy, without having to change the way you work.
You don’t need to use the same levels or item types in Loop that you use in your integrated systems - during the import process, all of your work items will be mapped to the correct levels and item types.
Adjusting Hierarchy Levels
You can adjust hierarchy levels:
-
Add a new hierarchy level - Click the + Add Level of Hierarchy button. This will add a new hierarchy level at the bottom of your list.
-
Rearrange hierarchy levels - Drag and drop levels to adjust where they appear within your hierarchy. Note: Once a hierarchy level has items assigned to it, it will become locked, and you will no longer be able to move it up or down.
-
Change the level name - Click the Level Name field to update the name.
-
Delete hierarchy levels - Click the trash can at the far right of a level’s row to delete the hierarchy level.
You can’t rearrange hierarchy levels that have items assigned to them in the Portfolio.
Adding Item Types
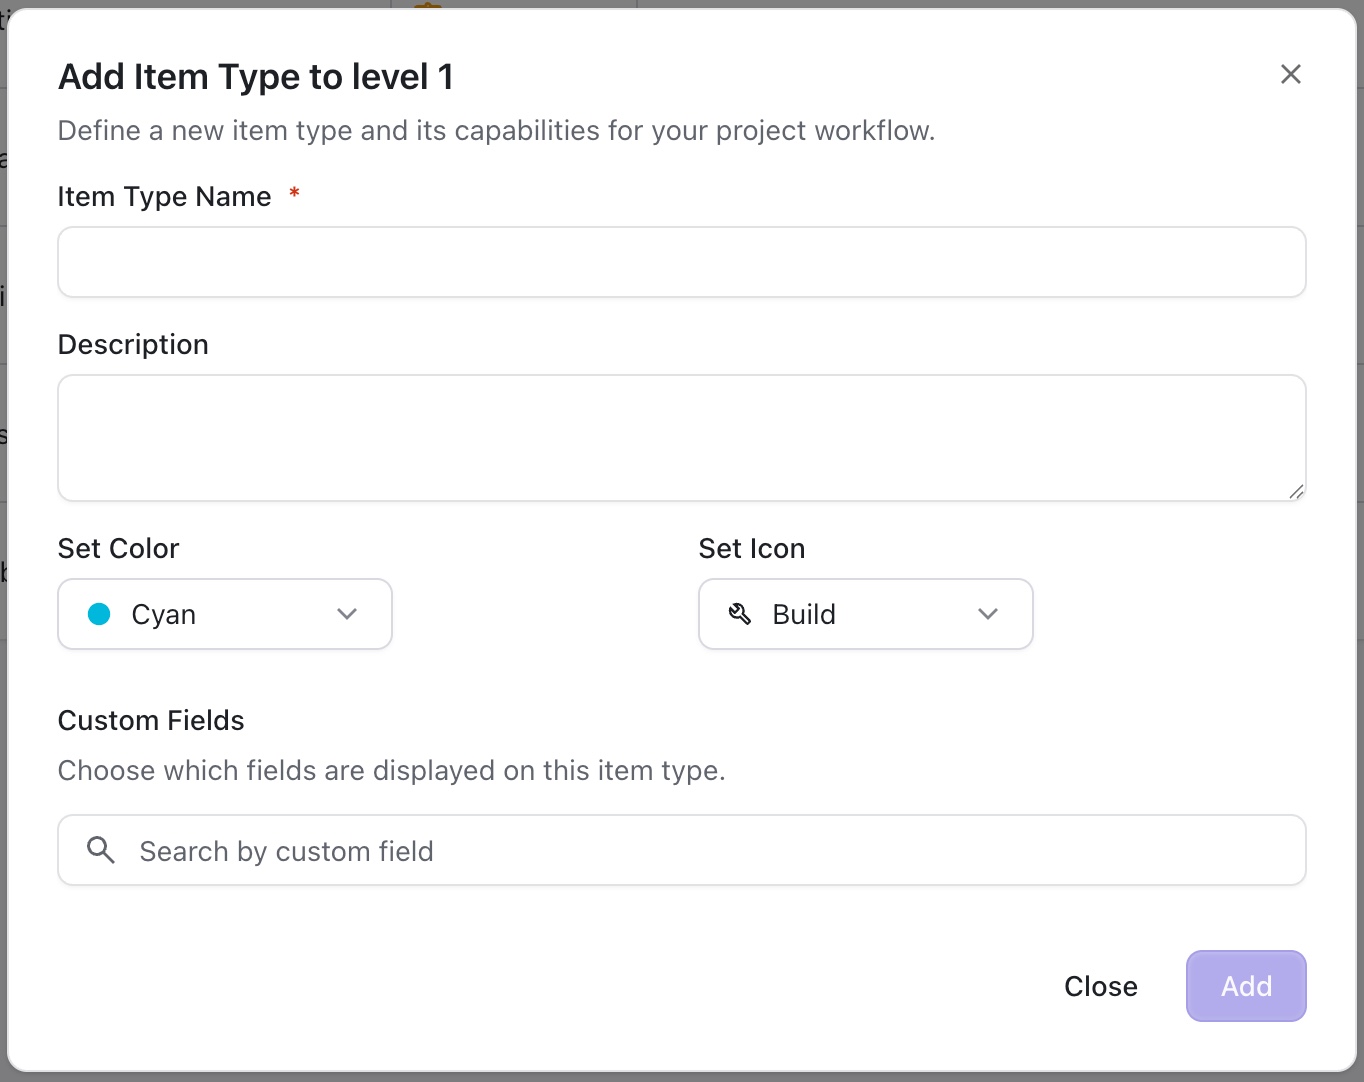
To add a new item type to a hierarchy level, click the + sign at the right of the hierarchy row. This will open the Add Item Type panel, where you can:
-
Name the item type
-
Add a description
-
Set a color for the item type
-
Set an icon for the item type
-
Select which custom fields should be shown for the item type
Editing and Deleting Item Types
To edit or delete an existing item type, hover over the item type until the three dots appear, click the three dots, and select Edit Item.
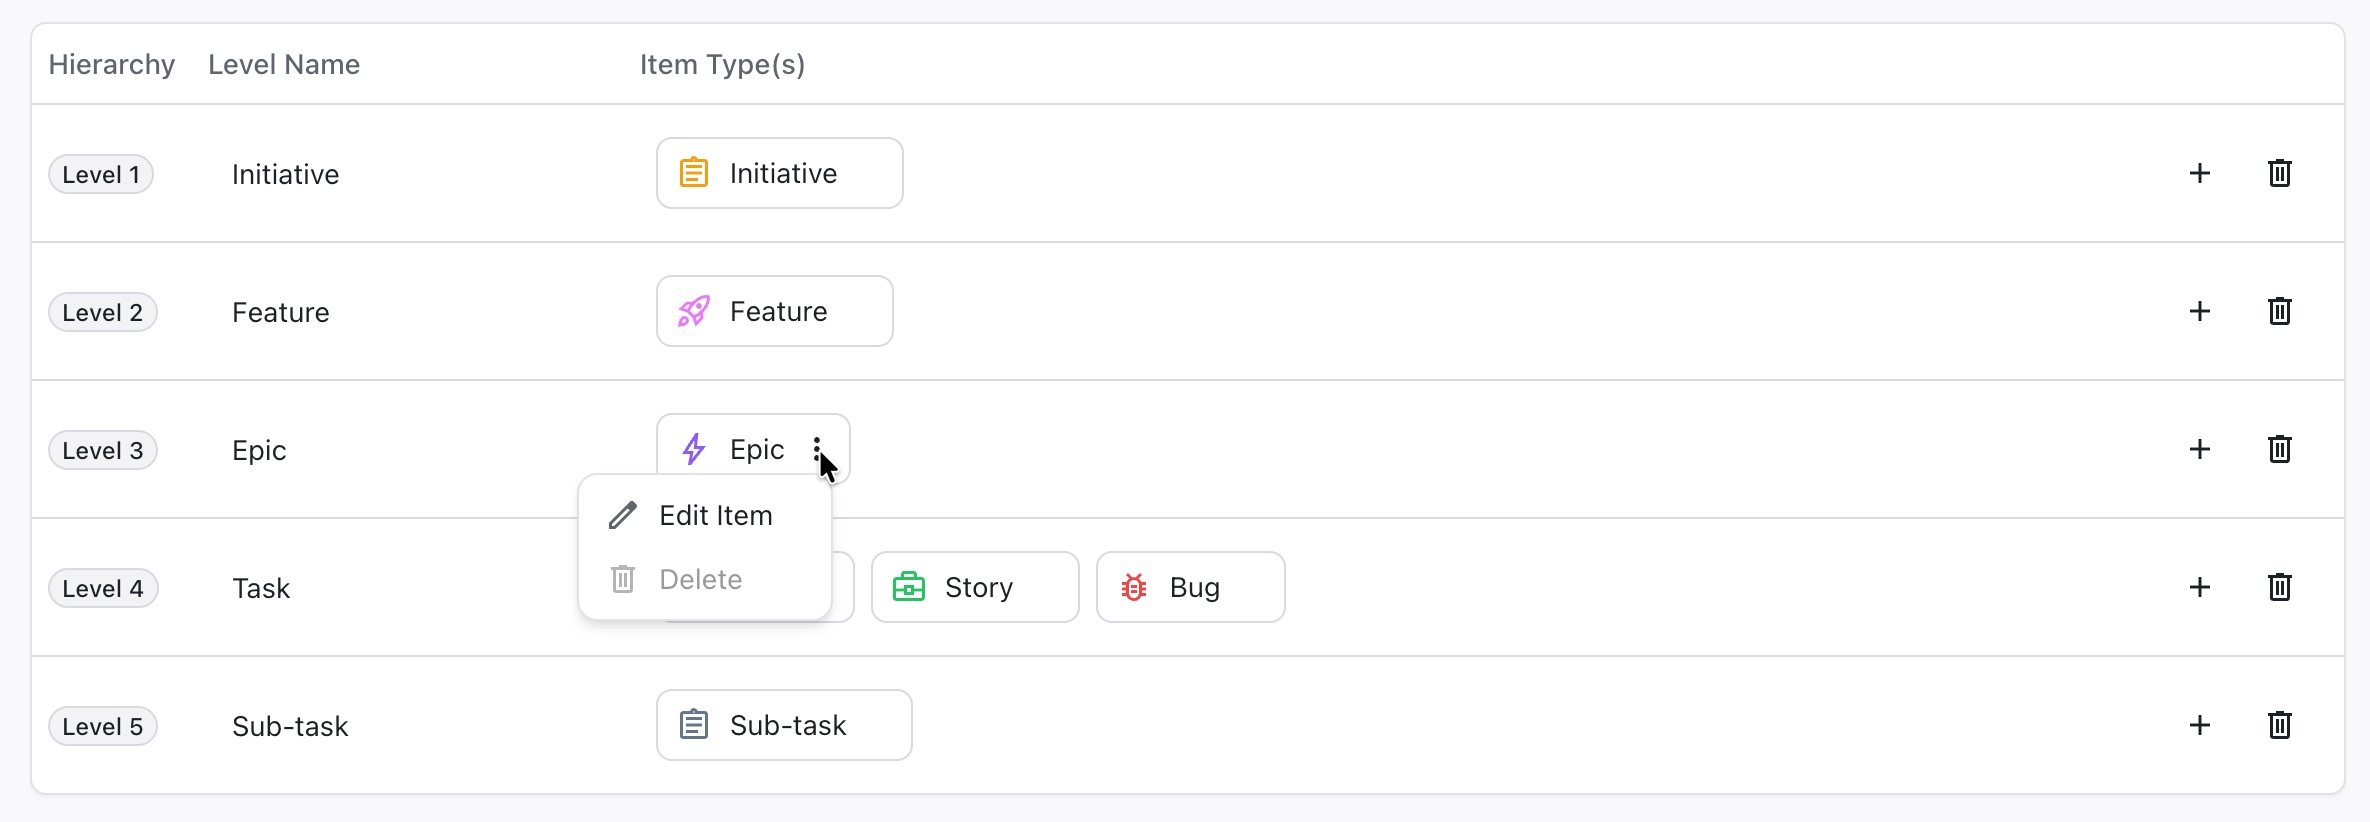
Once items are assigned to an item type, the Delete option becomes unavailable.