
When you create a scenario, the Loop scheduler processes the backlog and creates an initial plan based on known and predicted values.
In this guide, you’ll learn how to test adjustments to that schedule to better align with your goals, priorities, and available resources.
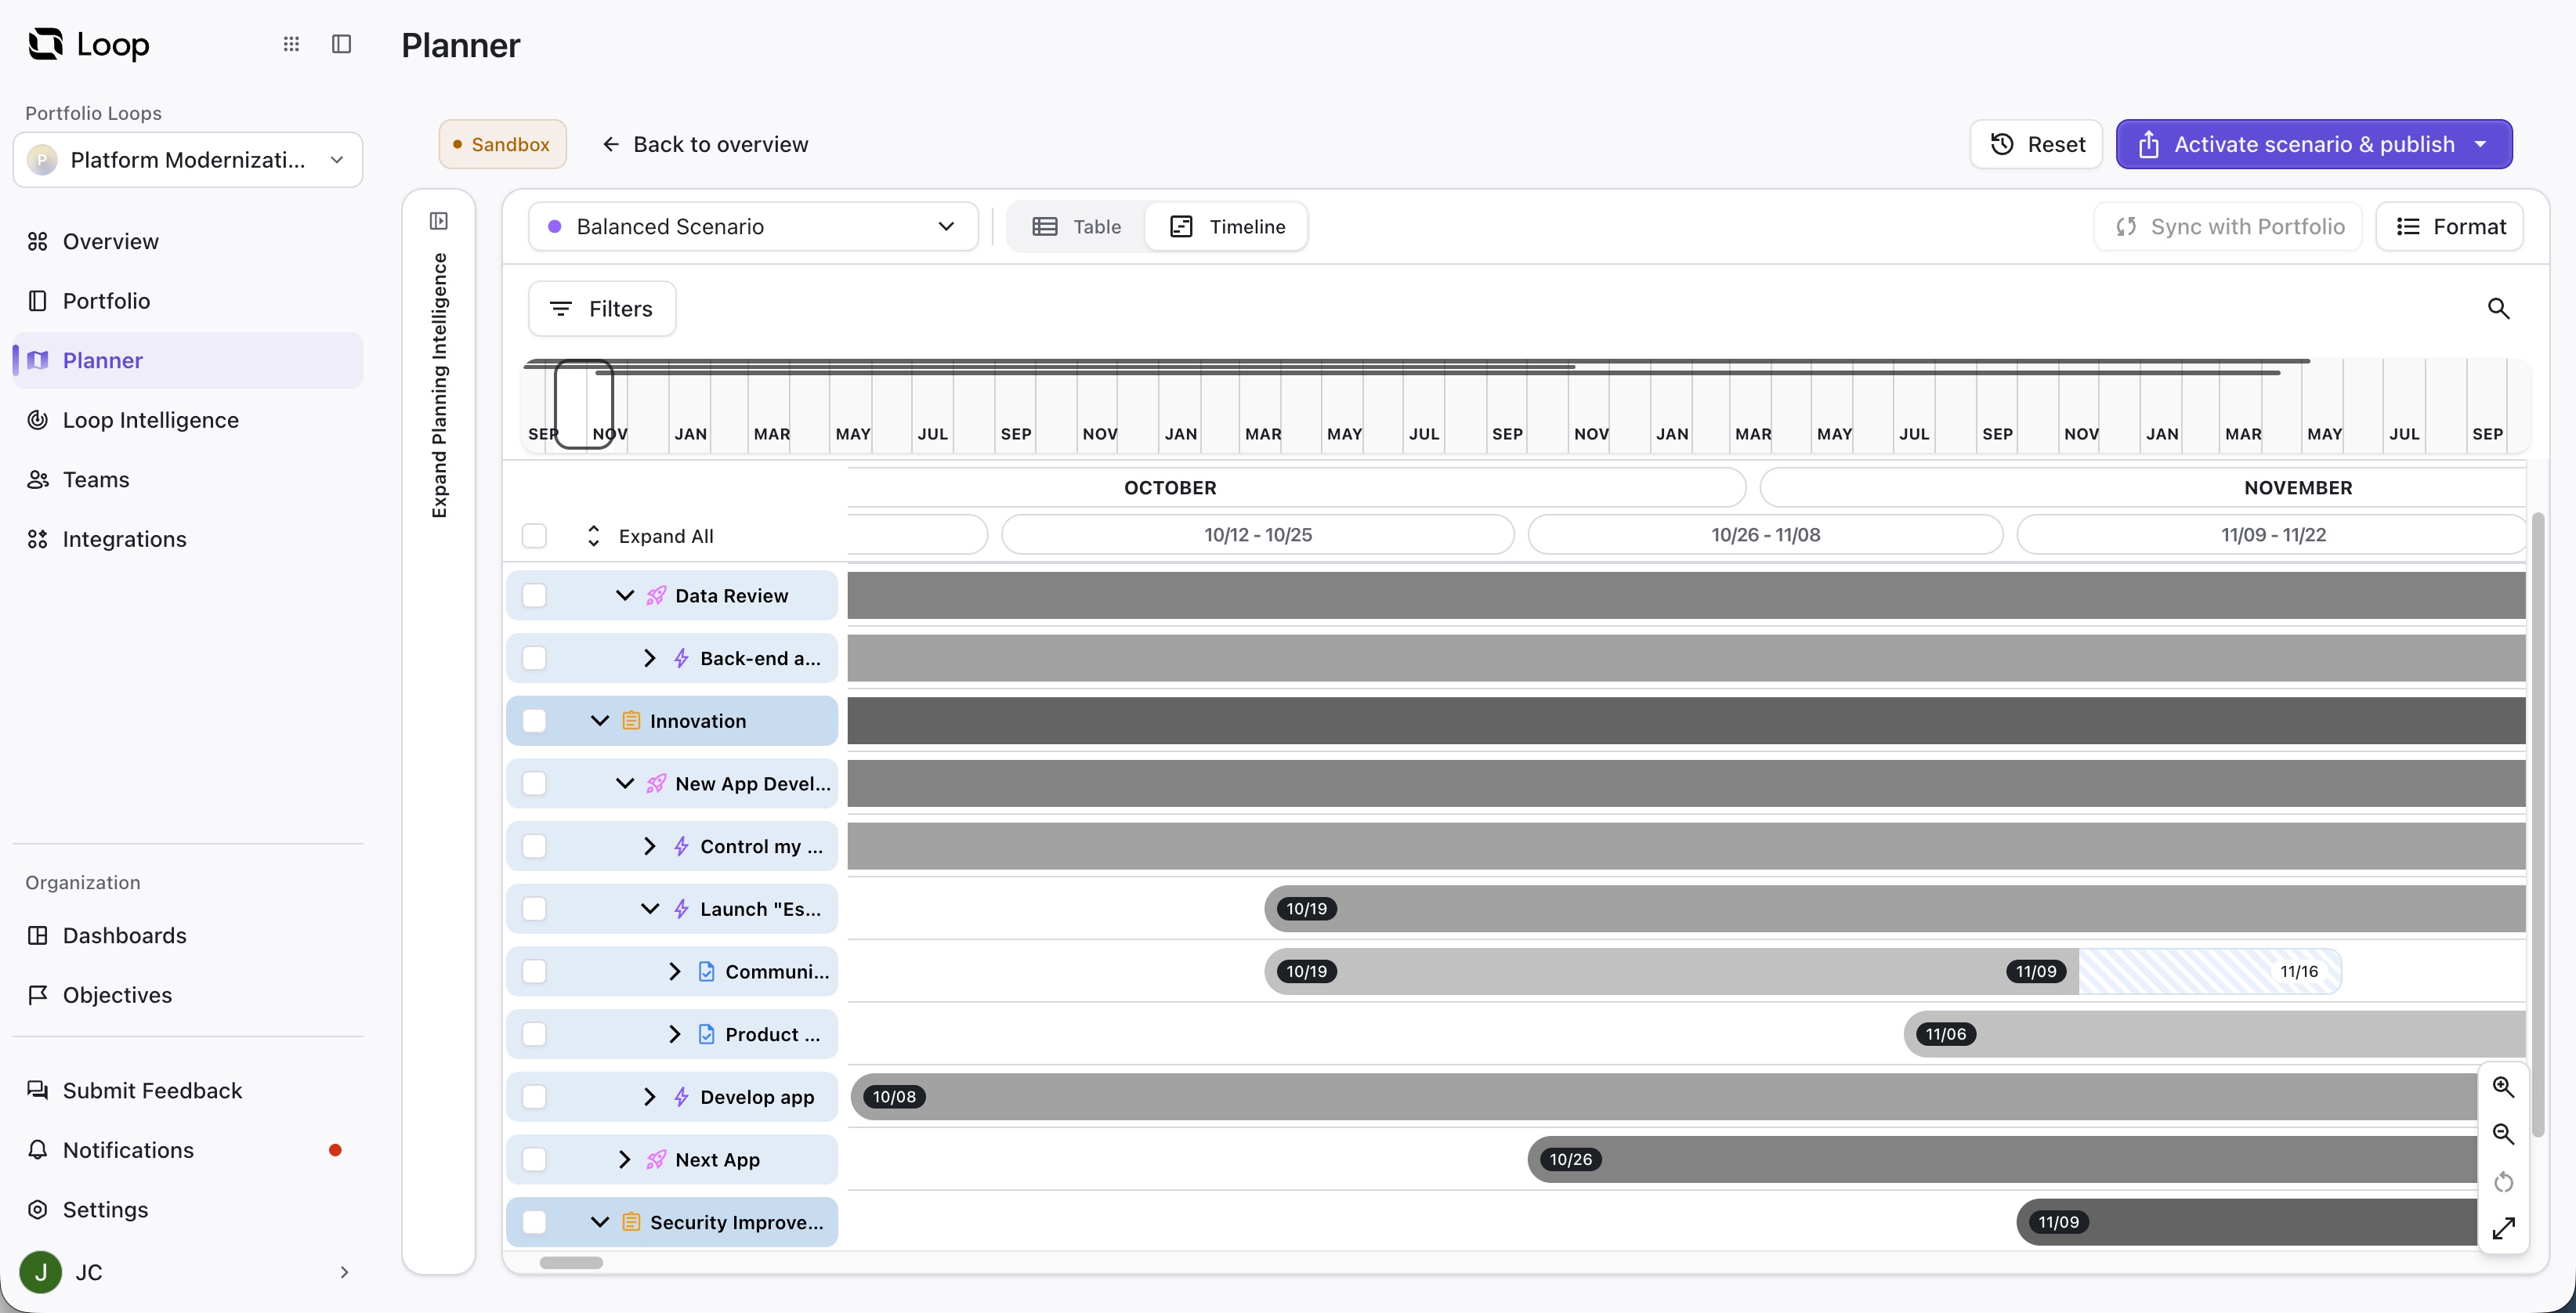
Reprioritize Items in the Timeline
When a plan is created, Planner prioritizes items based on the order they appear in the Portfolio. Reprioritizing items in Planner will shift the order in which work is completed, placing your highest-priority work first whenever possible.
To reprioritize individual items in your plan:
-
Switch to Timeline view.
-
Hover over any row to reveal the drag handle (⠿) on the left.
-
Drag the row up or down to change its priority within its parent item.
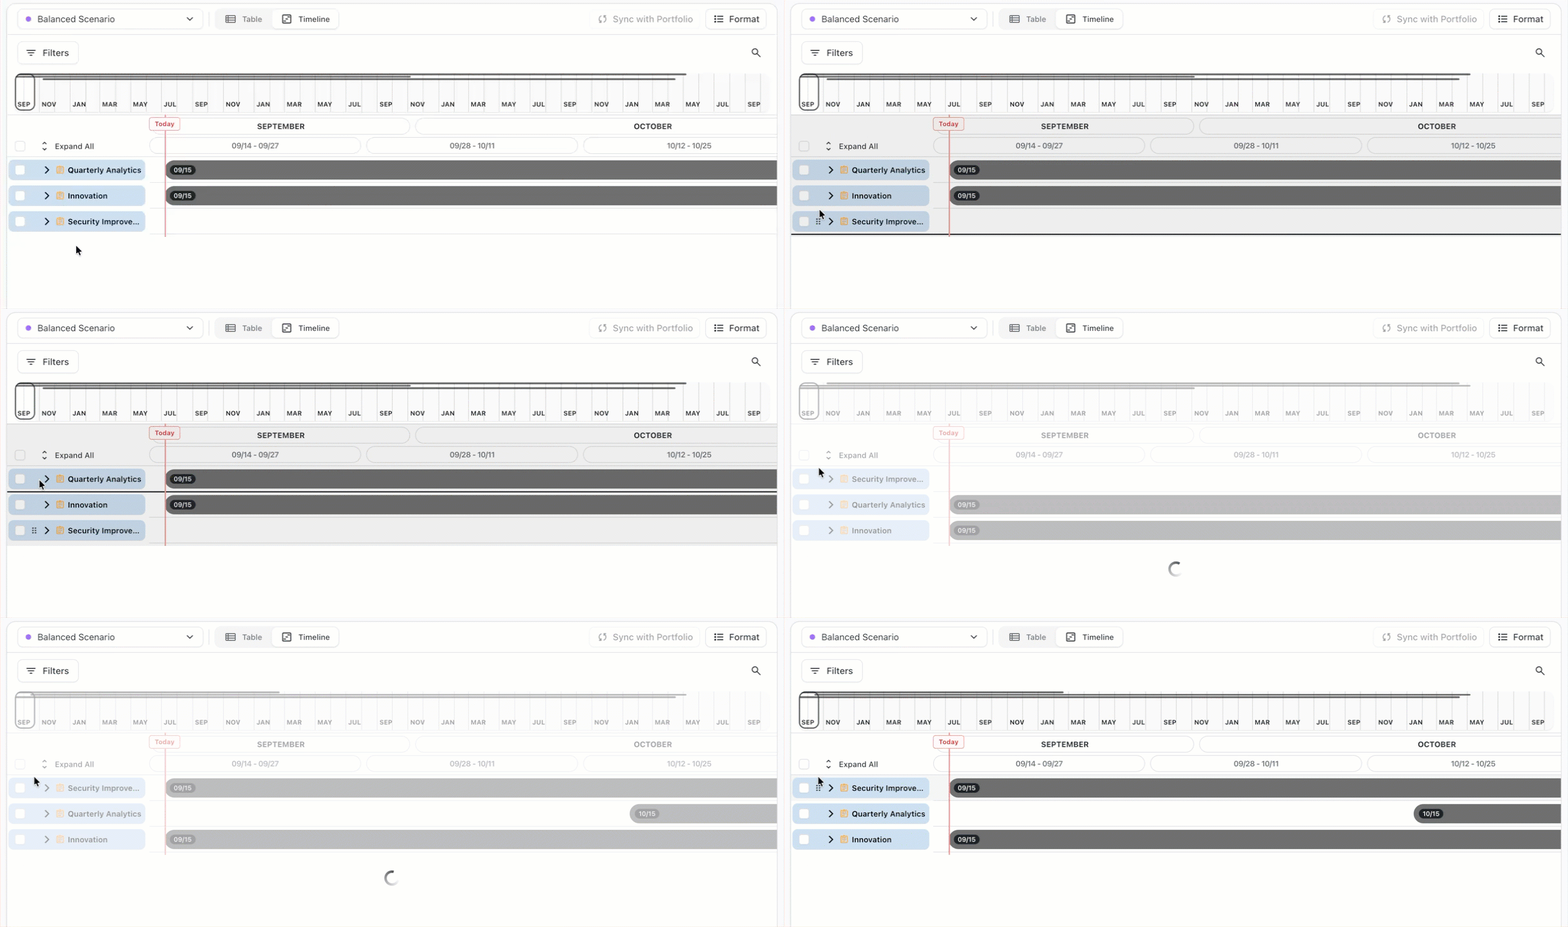
As you adjust move items, the scheduler recalculates automatically based on the new priority.
AI Suggestions
If any of your items are missing work estimates or team assignments, Planner can automatically suggest values for these, based on adjacent and similar work items.
To generate AI suggestions, click the AI Suggestions button at the top of the window.
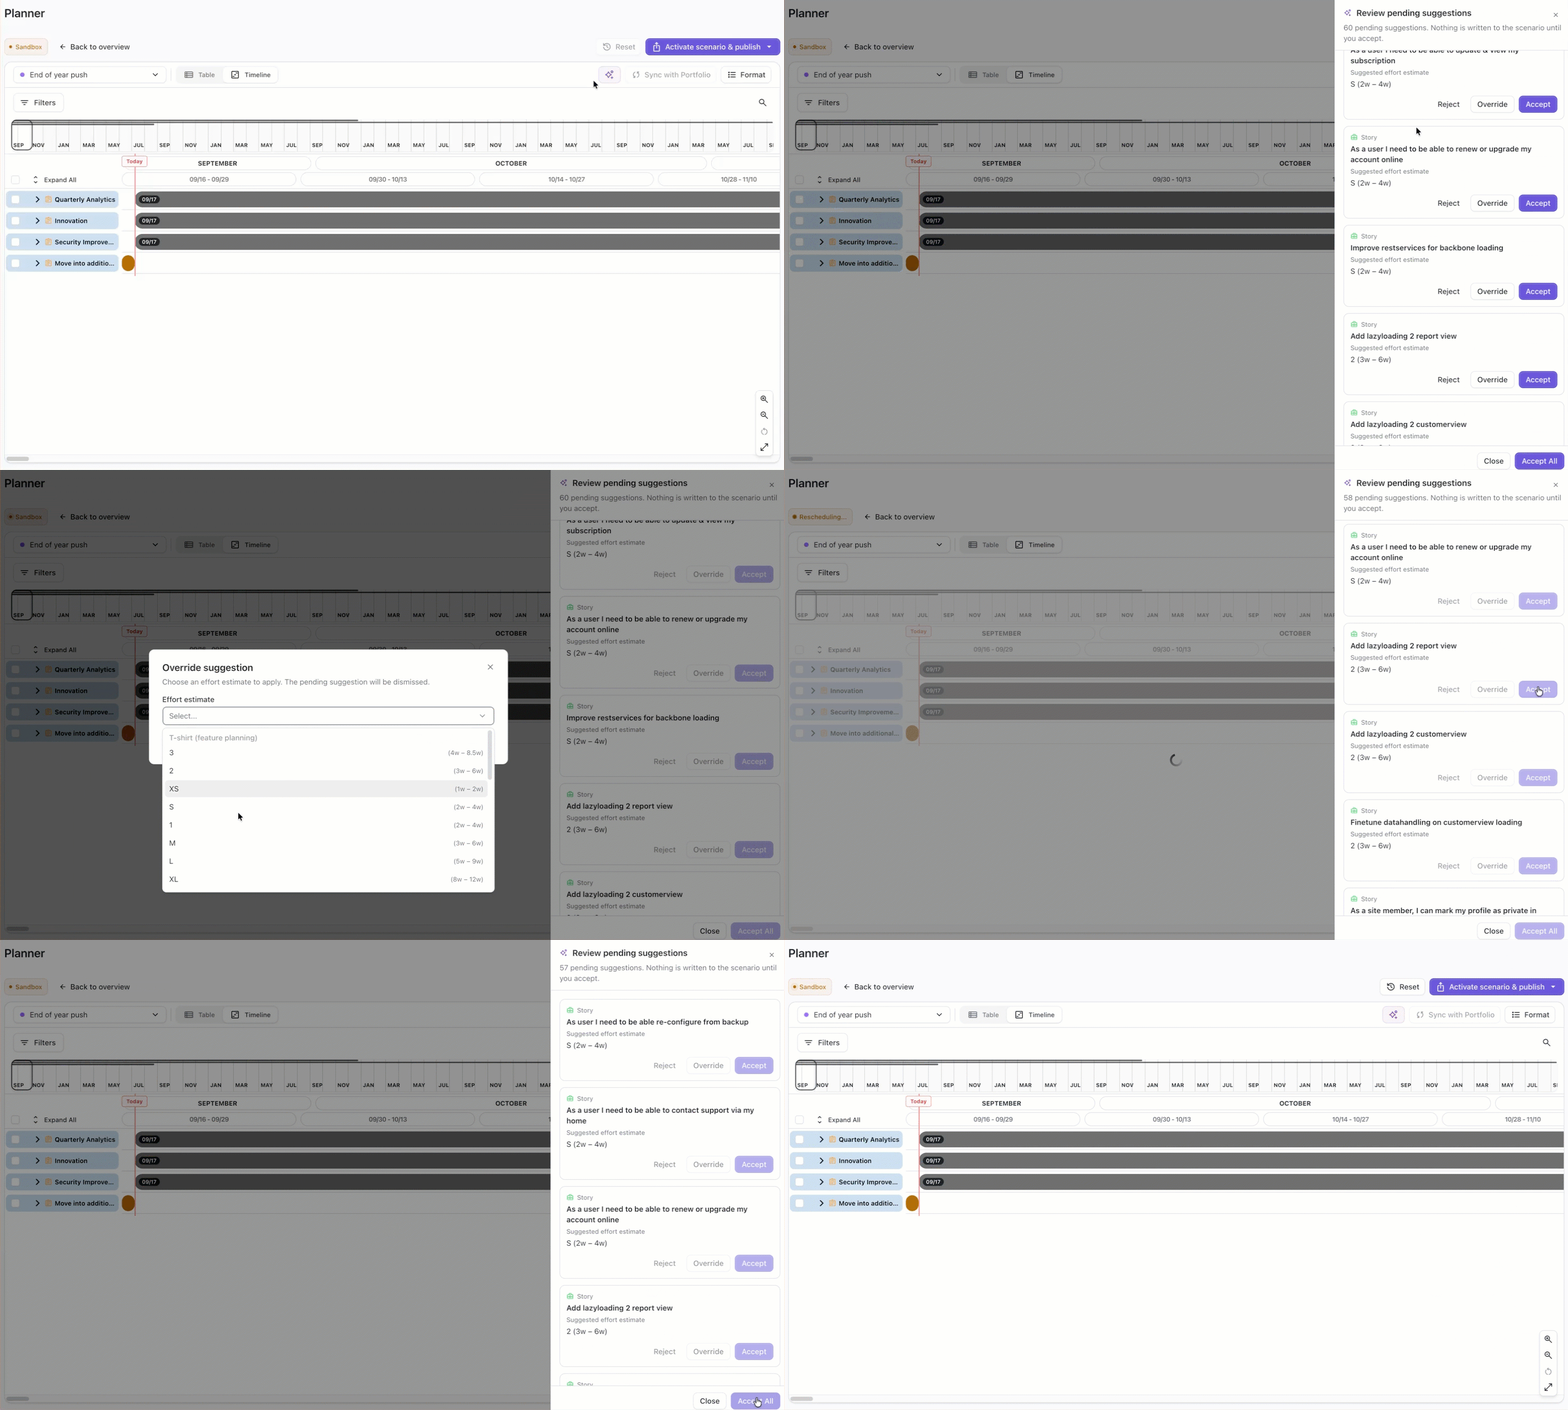
Once Loop AI has reviewed your items and made suggestions, you can review those suggestions and choose how to proceed:
-
Reject - reject the AI suggestion and make no changes to the item
-
Override - replace the AI suggestion with another value
-
Accept - apply the AI suggestion
-
Accept all - apply all remaining AI suggestions
Once you have accepted the AI suggestions, you need to publish the scenario before the changes are pushed to the Portfolio and your integrated platform(s).
Reviewing the Impact
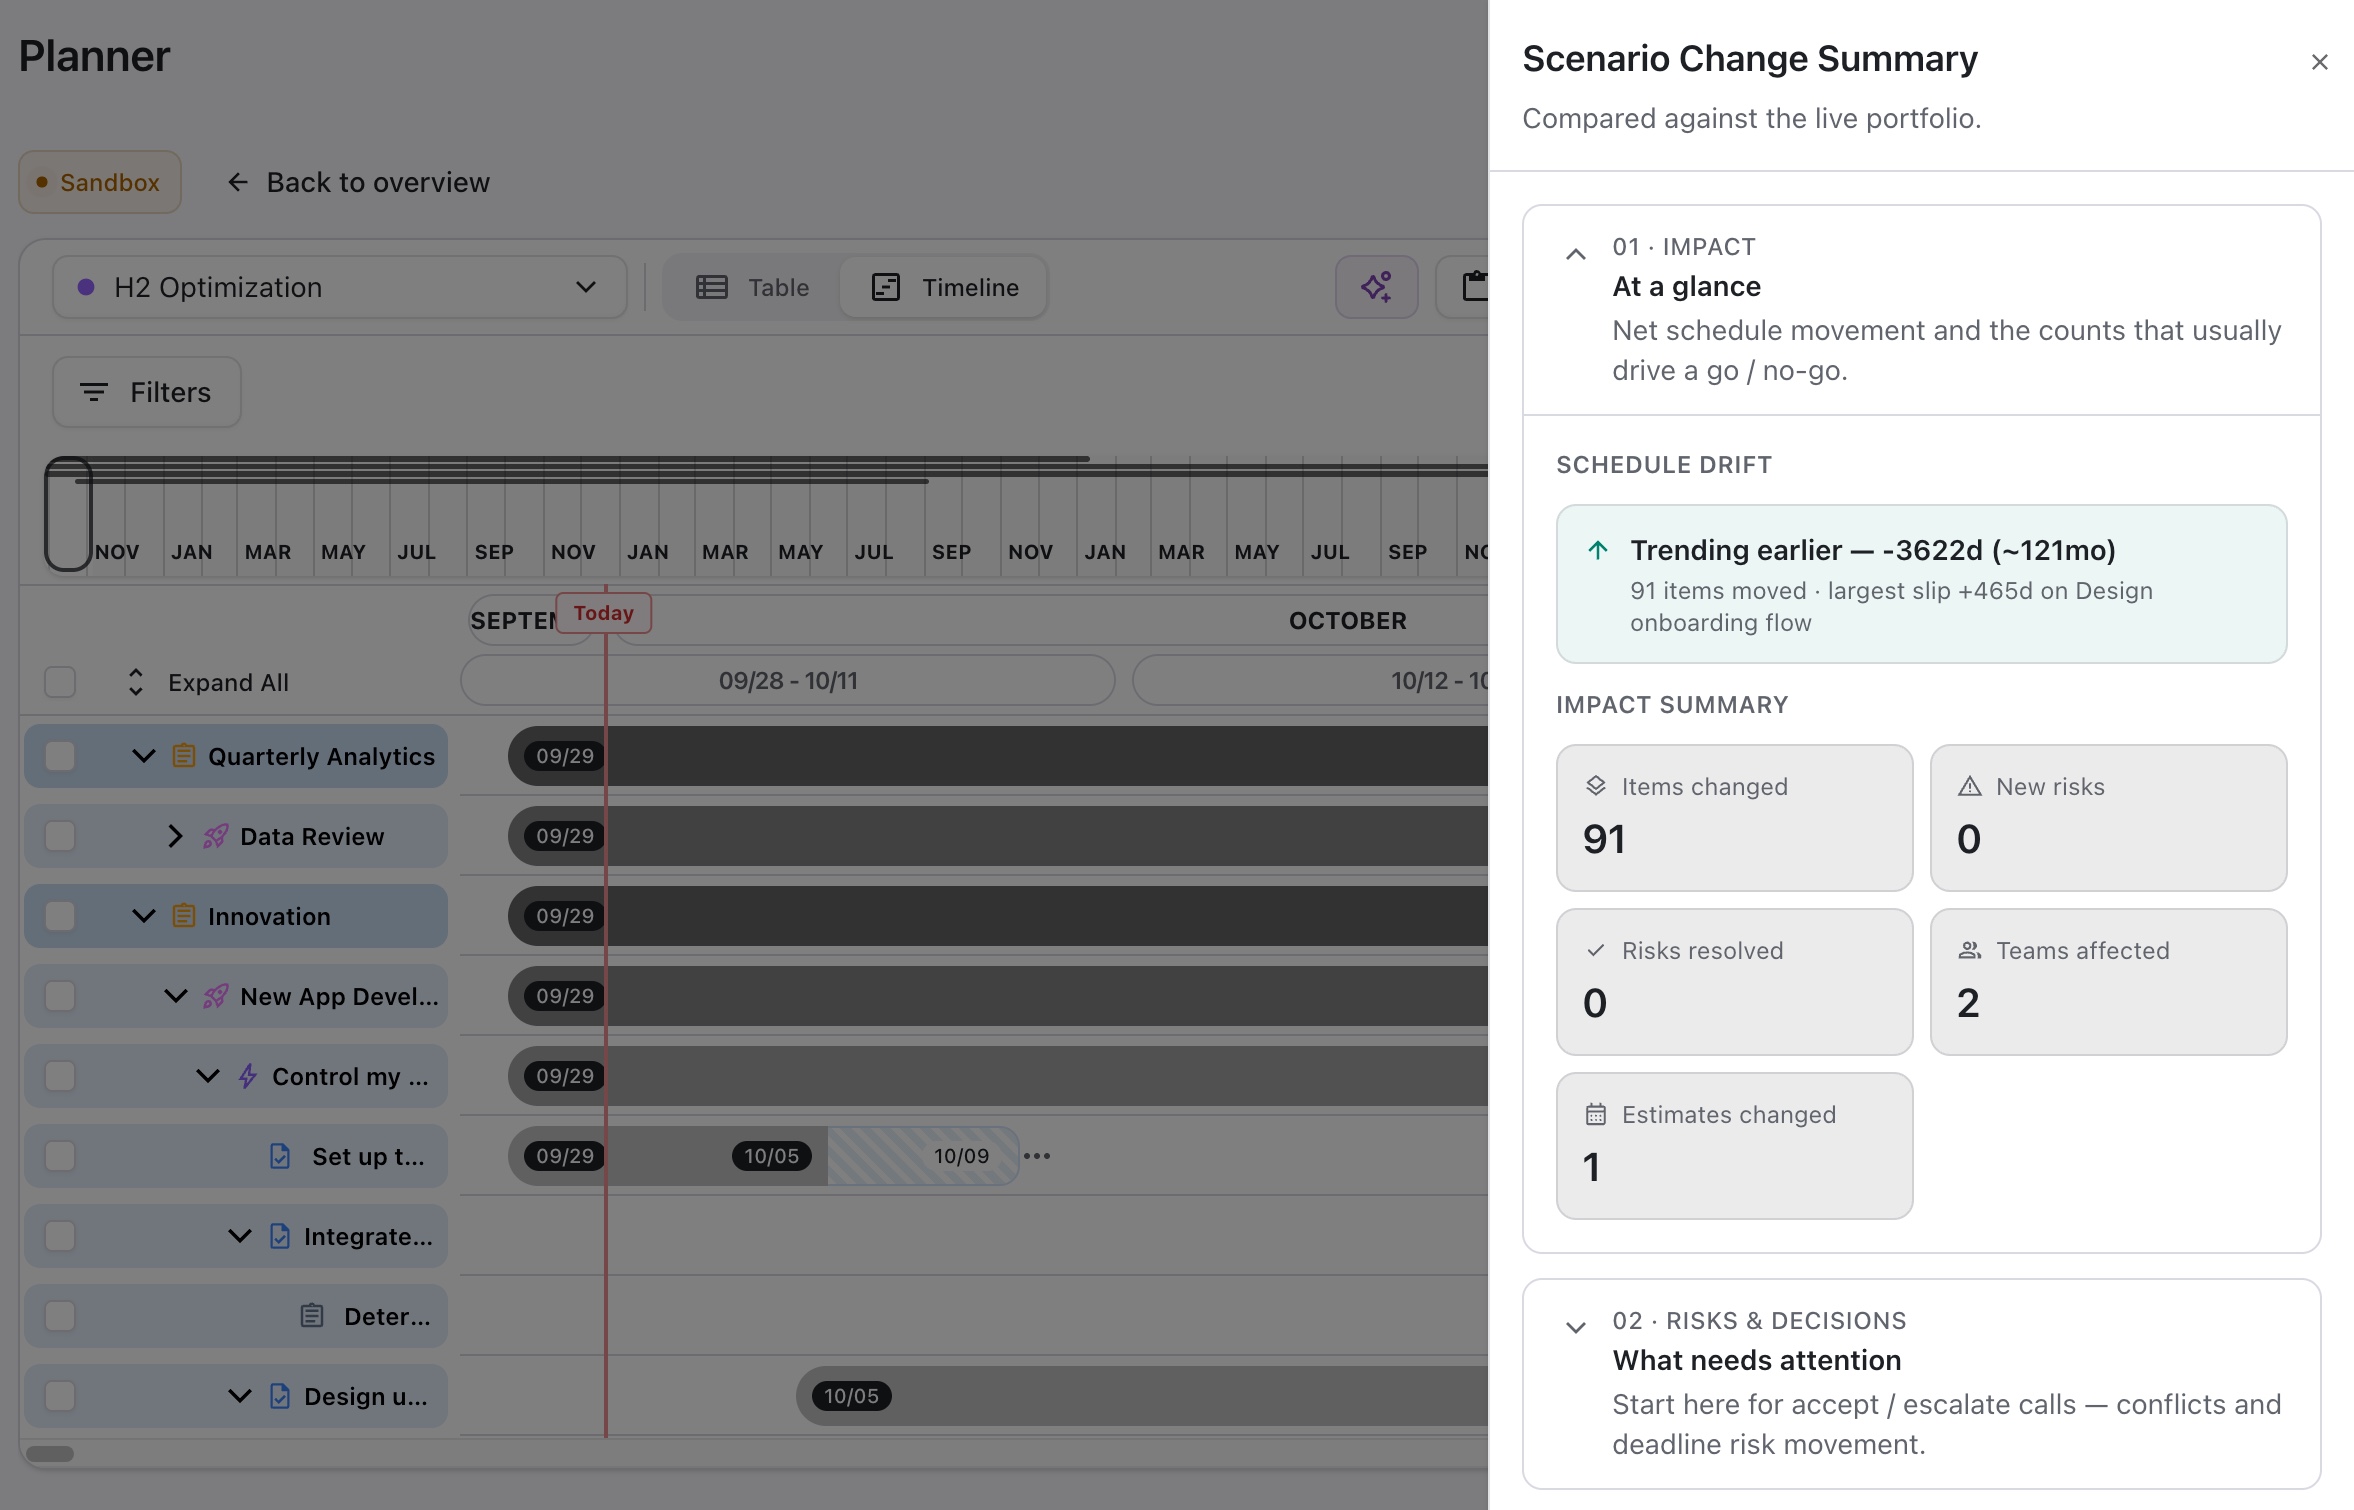
Once you have customized your scenario, open the Impact Summary panel to see how these changes would impact your current portfolio.
Activating a Scenario
Once you have a schedule that aligns with your parameters and priorities, you can update your Portfolio and integrated platforms to reflect the dates on your Timeline.
To activate a scenario, click the Activate Scenario & publish button.
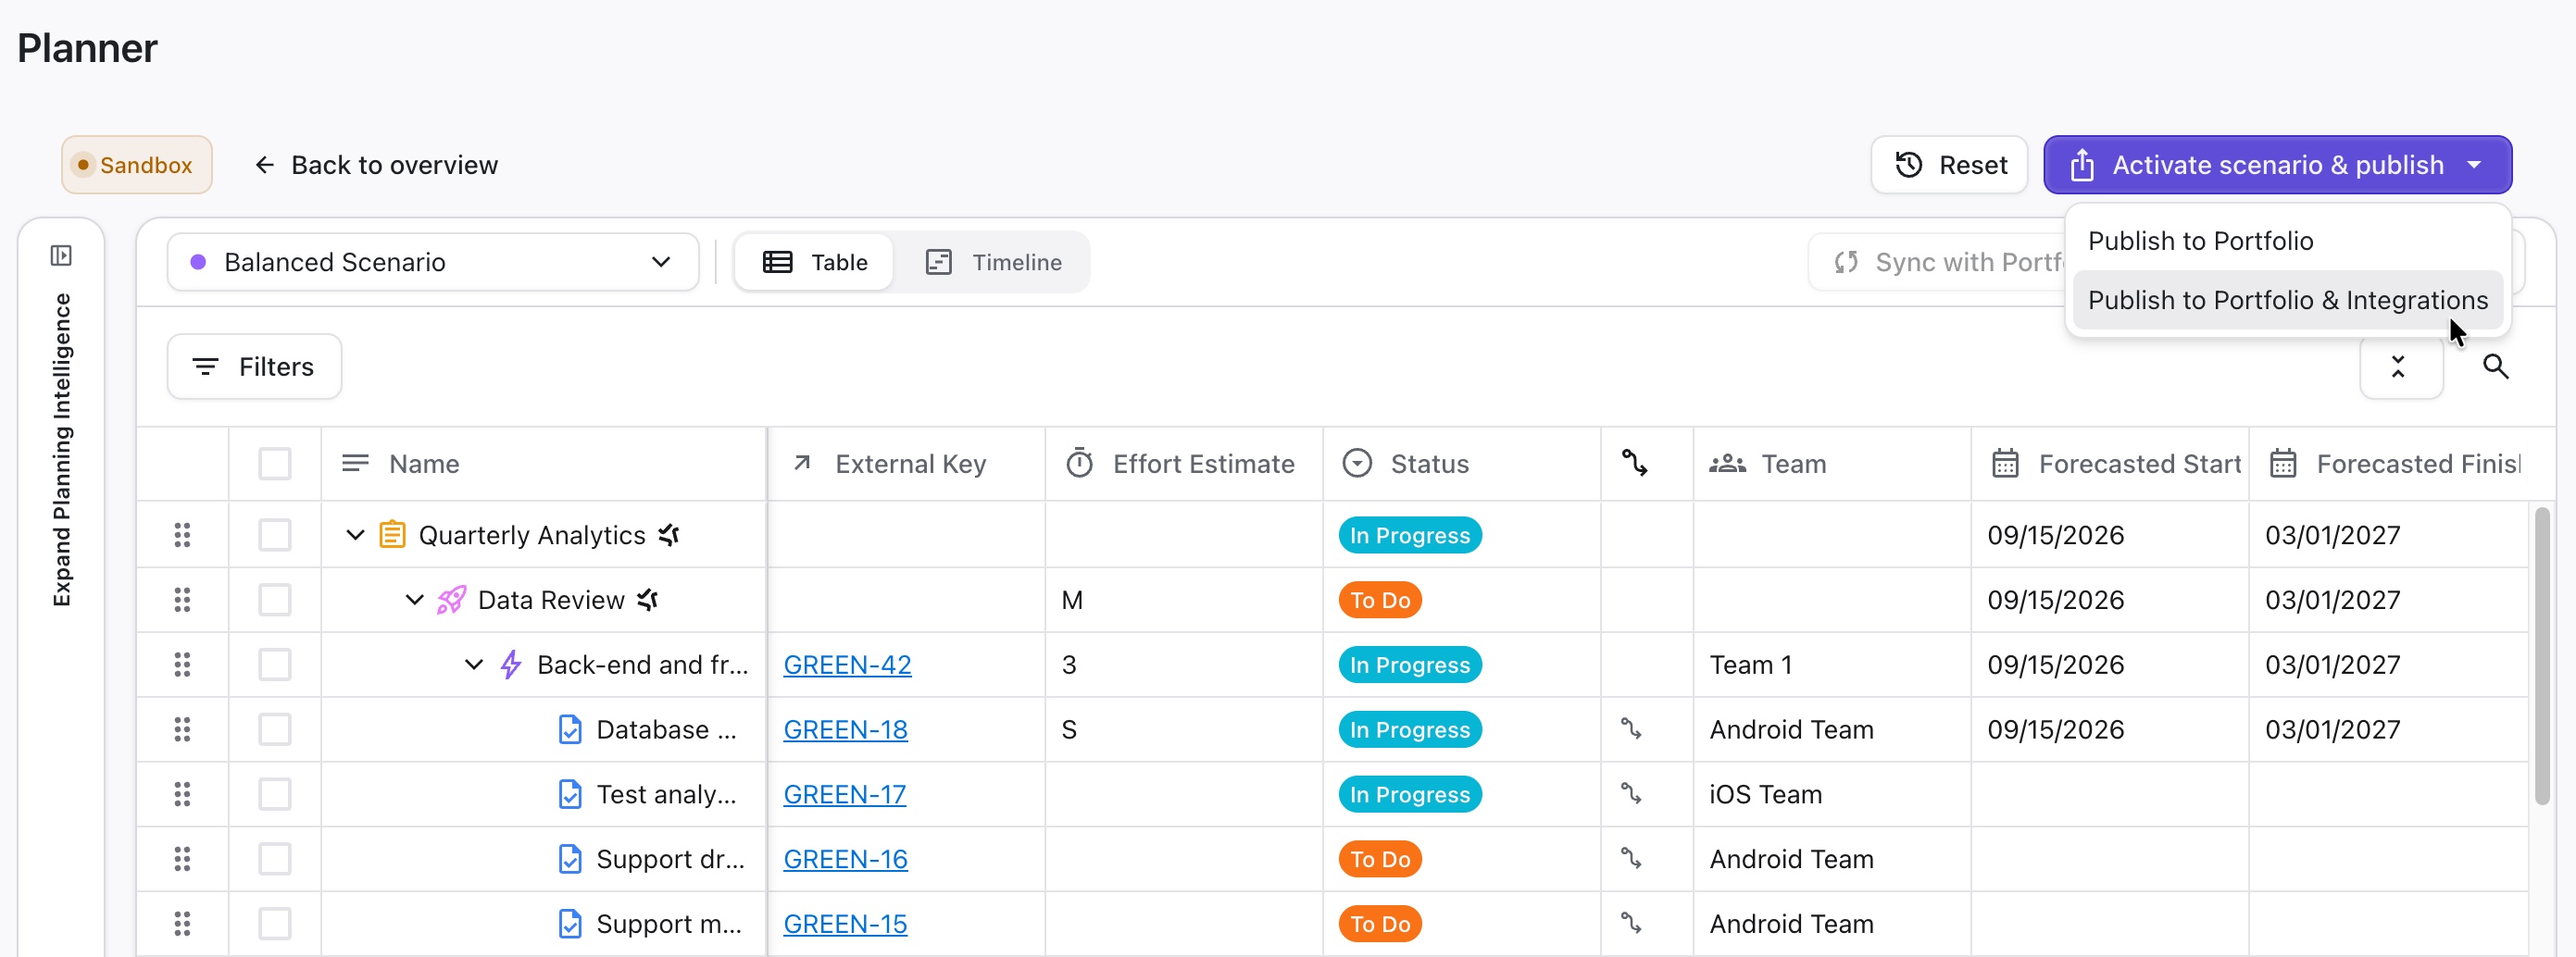
You have two publish options:
-
Publish to Portfolio - updates changes in your Portfolio. This will not overwrite any data in your integrated platforms. You can push these changes later using the Sync with Integrations option in Portfolio, but if you pull items from your integration first, you might lose these changes.
-
Publish to Portfolio & integrations - overwrite existing data in the Portfolio and your integrated platforms.
After you activate a scenario, you can return to it to make any necessary updates, then reactivate it as needed.
Activating a scenario overwrites existing values in the Portfolio and integrated platforms. These changes cannot be undone.
Resetting a Scenario
To reset adjustments you’ve made to the planning scenario, click the Reset button.
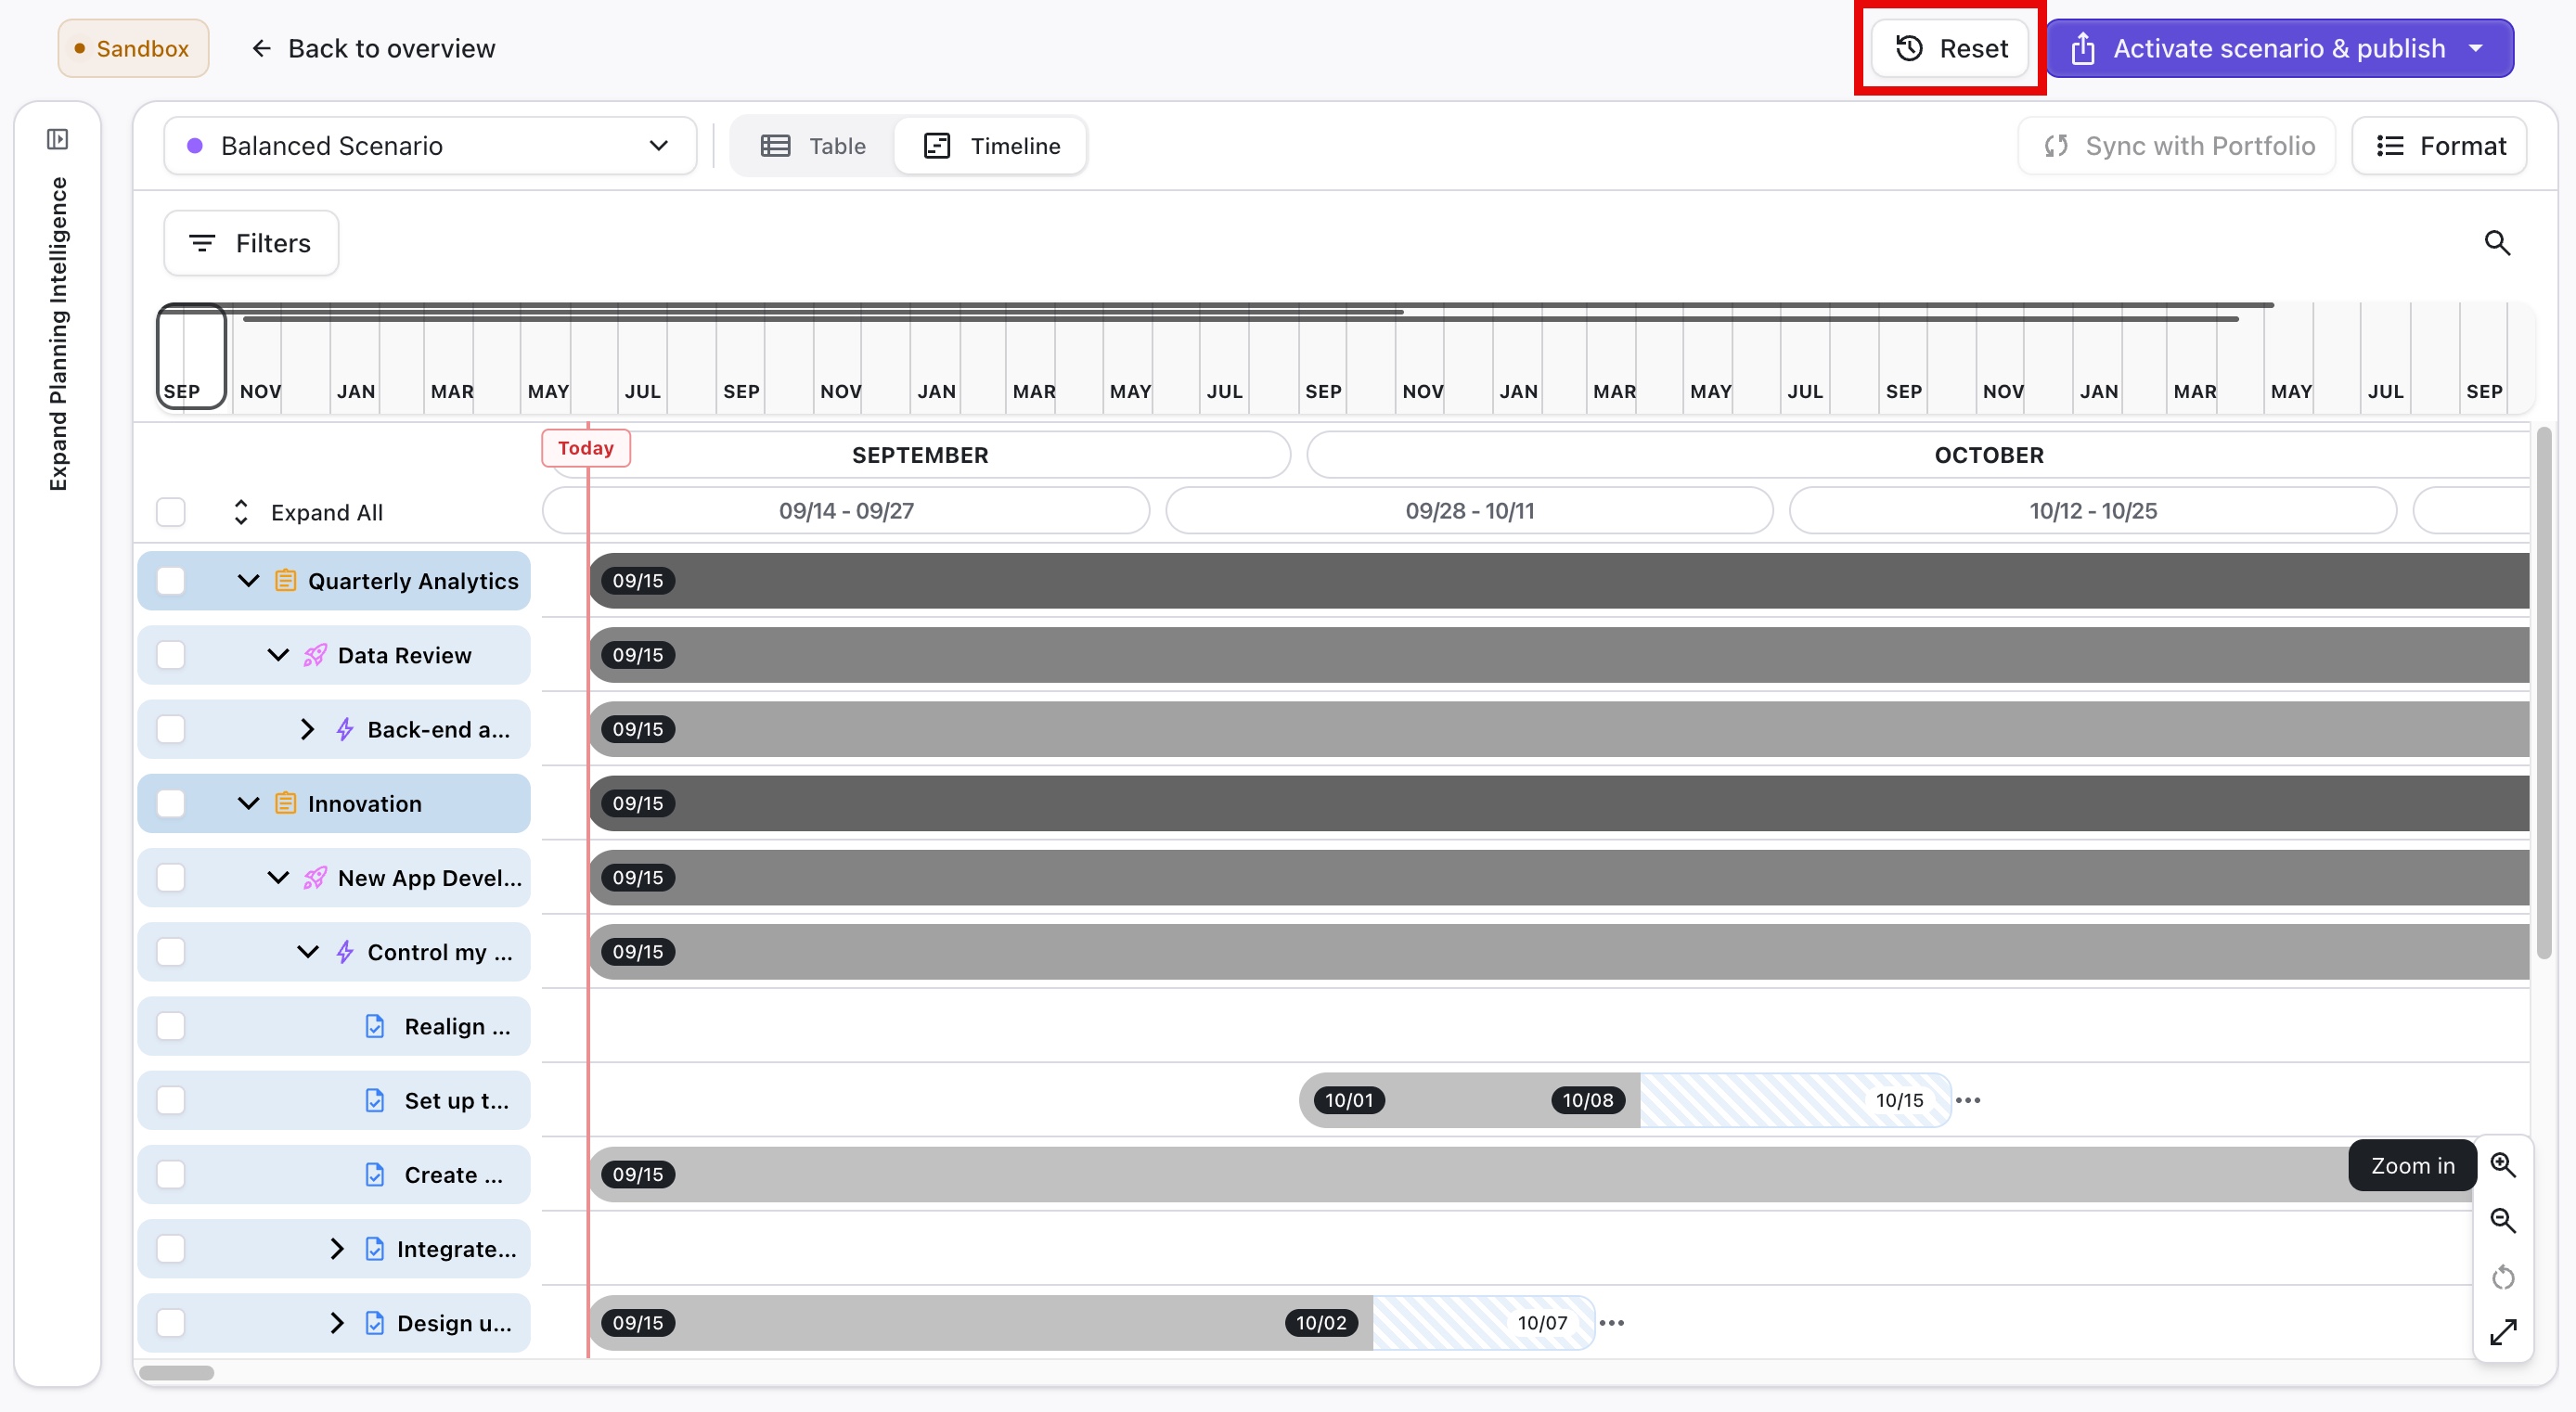
Resetting a scenario will remove any changes you’ve made since the scenario was last published, and the scenario will be recreated based on the current Portfolio state. Resetting cannot undo published changes.
Reset cannot be undone.
Reset only affects the current scenario.