
This approach is best for users who already have existing work in Jira, but want to begin with their strategy items in Loop and import their work specifically for those strategy items.
What you'll do:
-
Build a portfolio with hierarchy and a custom status workflow
-
Create Loop-native Initiatives and Features to establish the portfolio structure
-
Connect to Jira and import Epics
-
Assign imported Epics to the Loop-native structure
Before beginning this tutorial, make sure:
-
An org has been created for your loop
-
You have been added as a user with the Orchestrator role
-
You are already logged into the Jira instance you want to connect to
Step 1 — Configure Item Types and Custom Statuses
-
Open Loop and click the settings icon in the upper-right corner.
-
Open the Item Types settings and create your hierarchy. Ex. Initiatives > Features > Epics > Tasks
-
Open the Custom Statuses settings and create the workflow you want to use.
Step 2 — Create a New Portfolio Loop
-
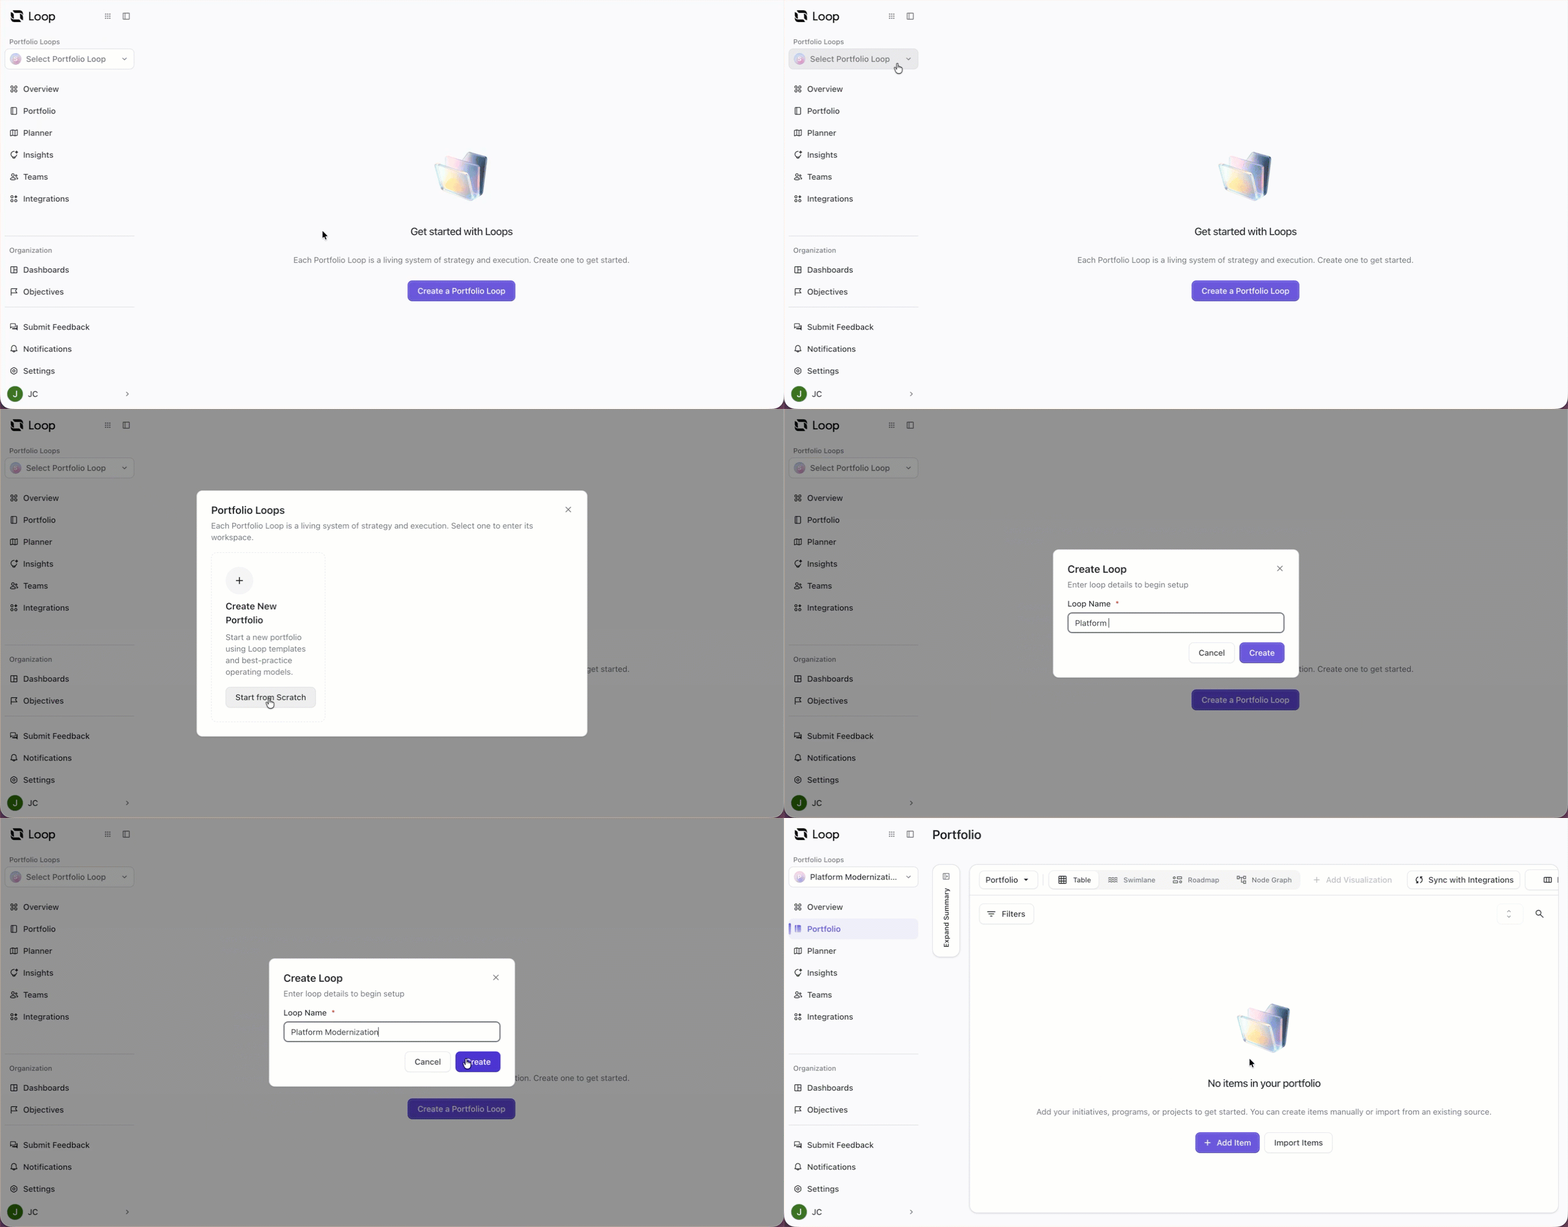
If this is your first time using Loop, click Create a Portfolio Loop on the Get Started screen.
-
You can also click Select Portfolio Loop at the top of the navigation panel.
-
Note: If you’ve already created a Portfolio Loop, this box will display the name of the current Portfolio Loop - click it to create a new one.
-
-
In the Portfolio Loops window, click Start from Scratch.
-
Name the Portfolio Loop (e.g., "Platform Modernization") and click Create.
Step 3 — Create a Loop-Native Initiative
Next, we’re going to create our higher-level hierarchy items in Loop.
-
Return to the Portfolio and select +Add Item.
-
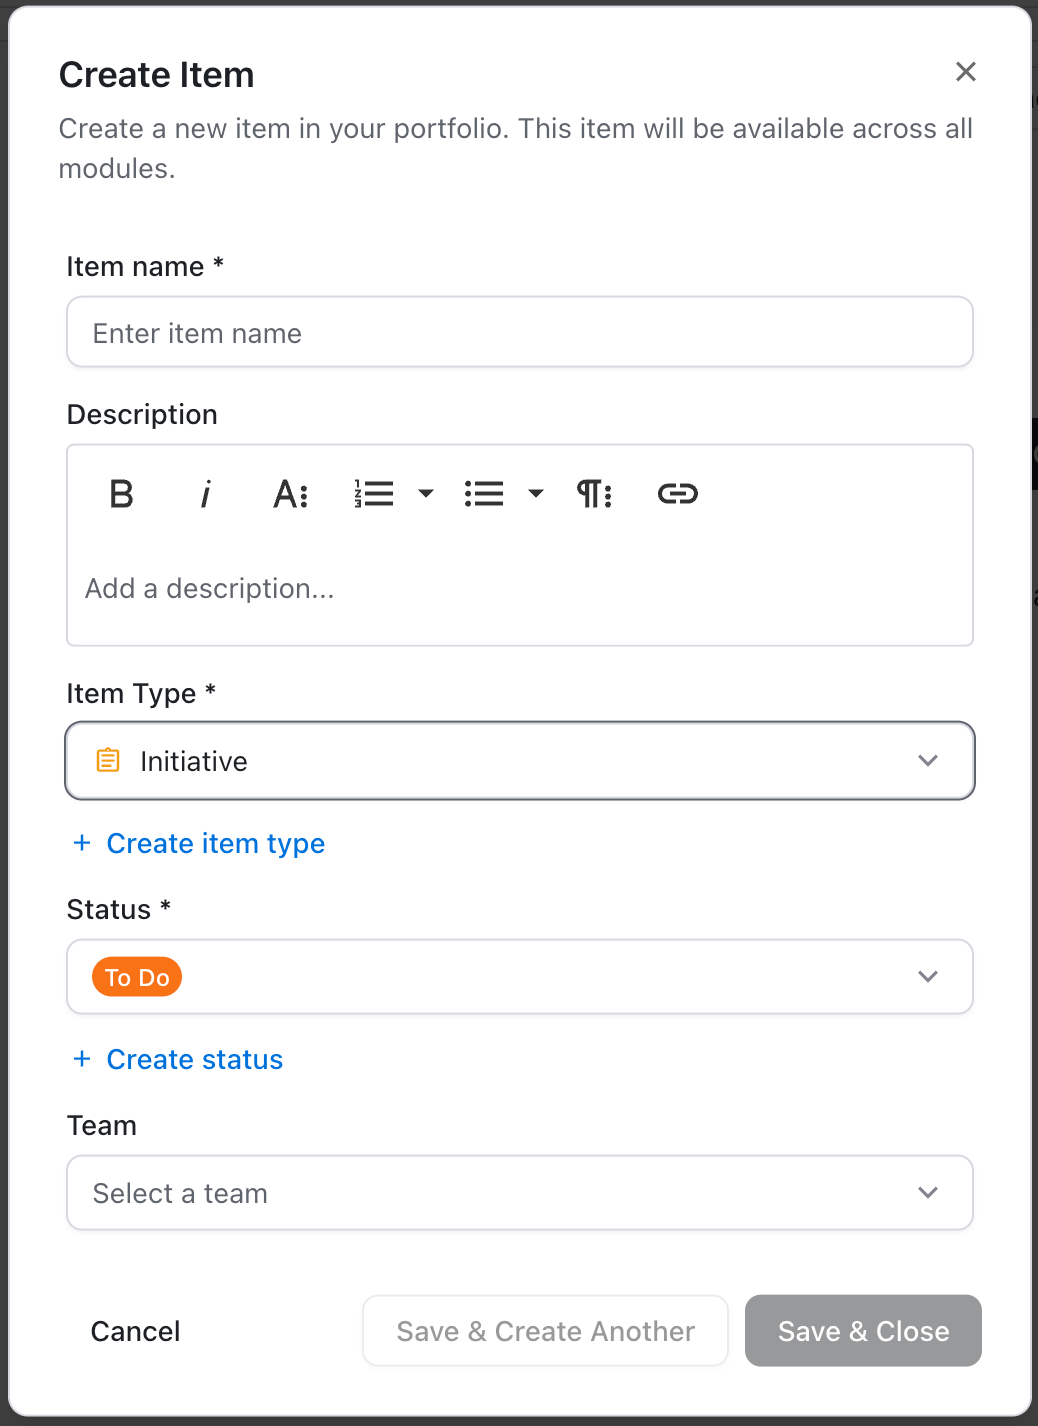
In the Create Item panel:
-
Enter a name for the item.
-
Set Item Type to Initiative.
-
Select a Status for the item.
-
Click Save & Close.
-
-
Create additional Initiatives as needed. Arrange them in the Portfolio using Drag and Drop.
See Adding New Items to the Portfolio to learn more.
Step 4 — Create Feature Under the Initiatives
-
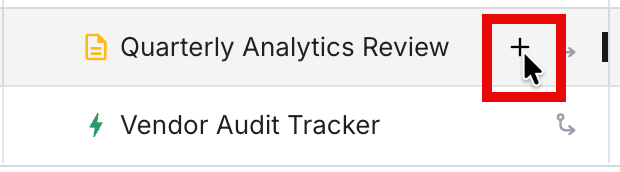
Hover over an Initiative row to reveal the + button next to the name. Click the + button.
-
Beneath the initiative, a new line will appear:
-
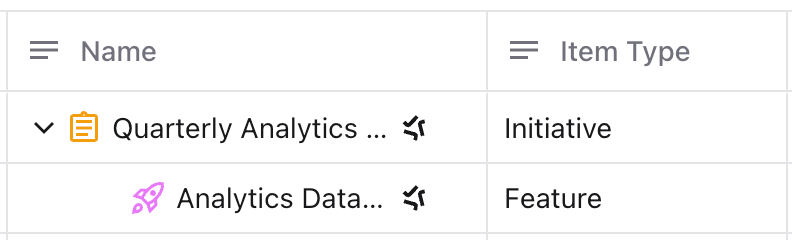
Select Feature as the item type.
-
Enter a name for the new item.
-
After you hit enter, the Feature will be nested under the Portfolio.
Step 5 - Connect to Jira
Open the Integrations screen.
-
If the Jira instance you want to connect to has already been configured, it will be listed here. Click + Add Integration to get started. (Skip to Setting Up a Jira Integration)
-
Otherwise, click the + Create Instance button to set up a Jira instance.
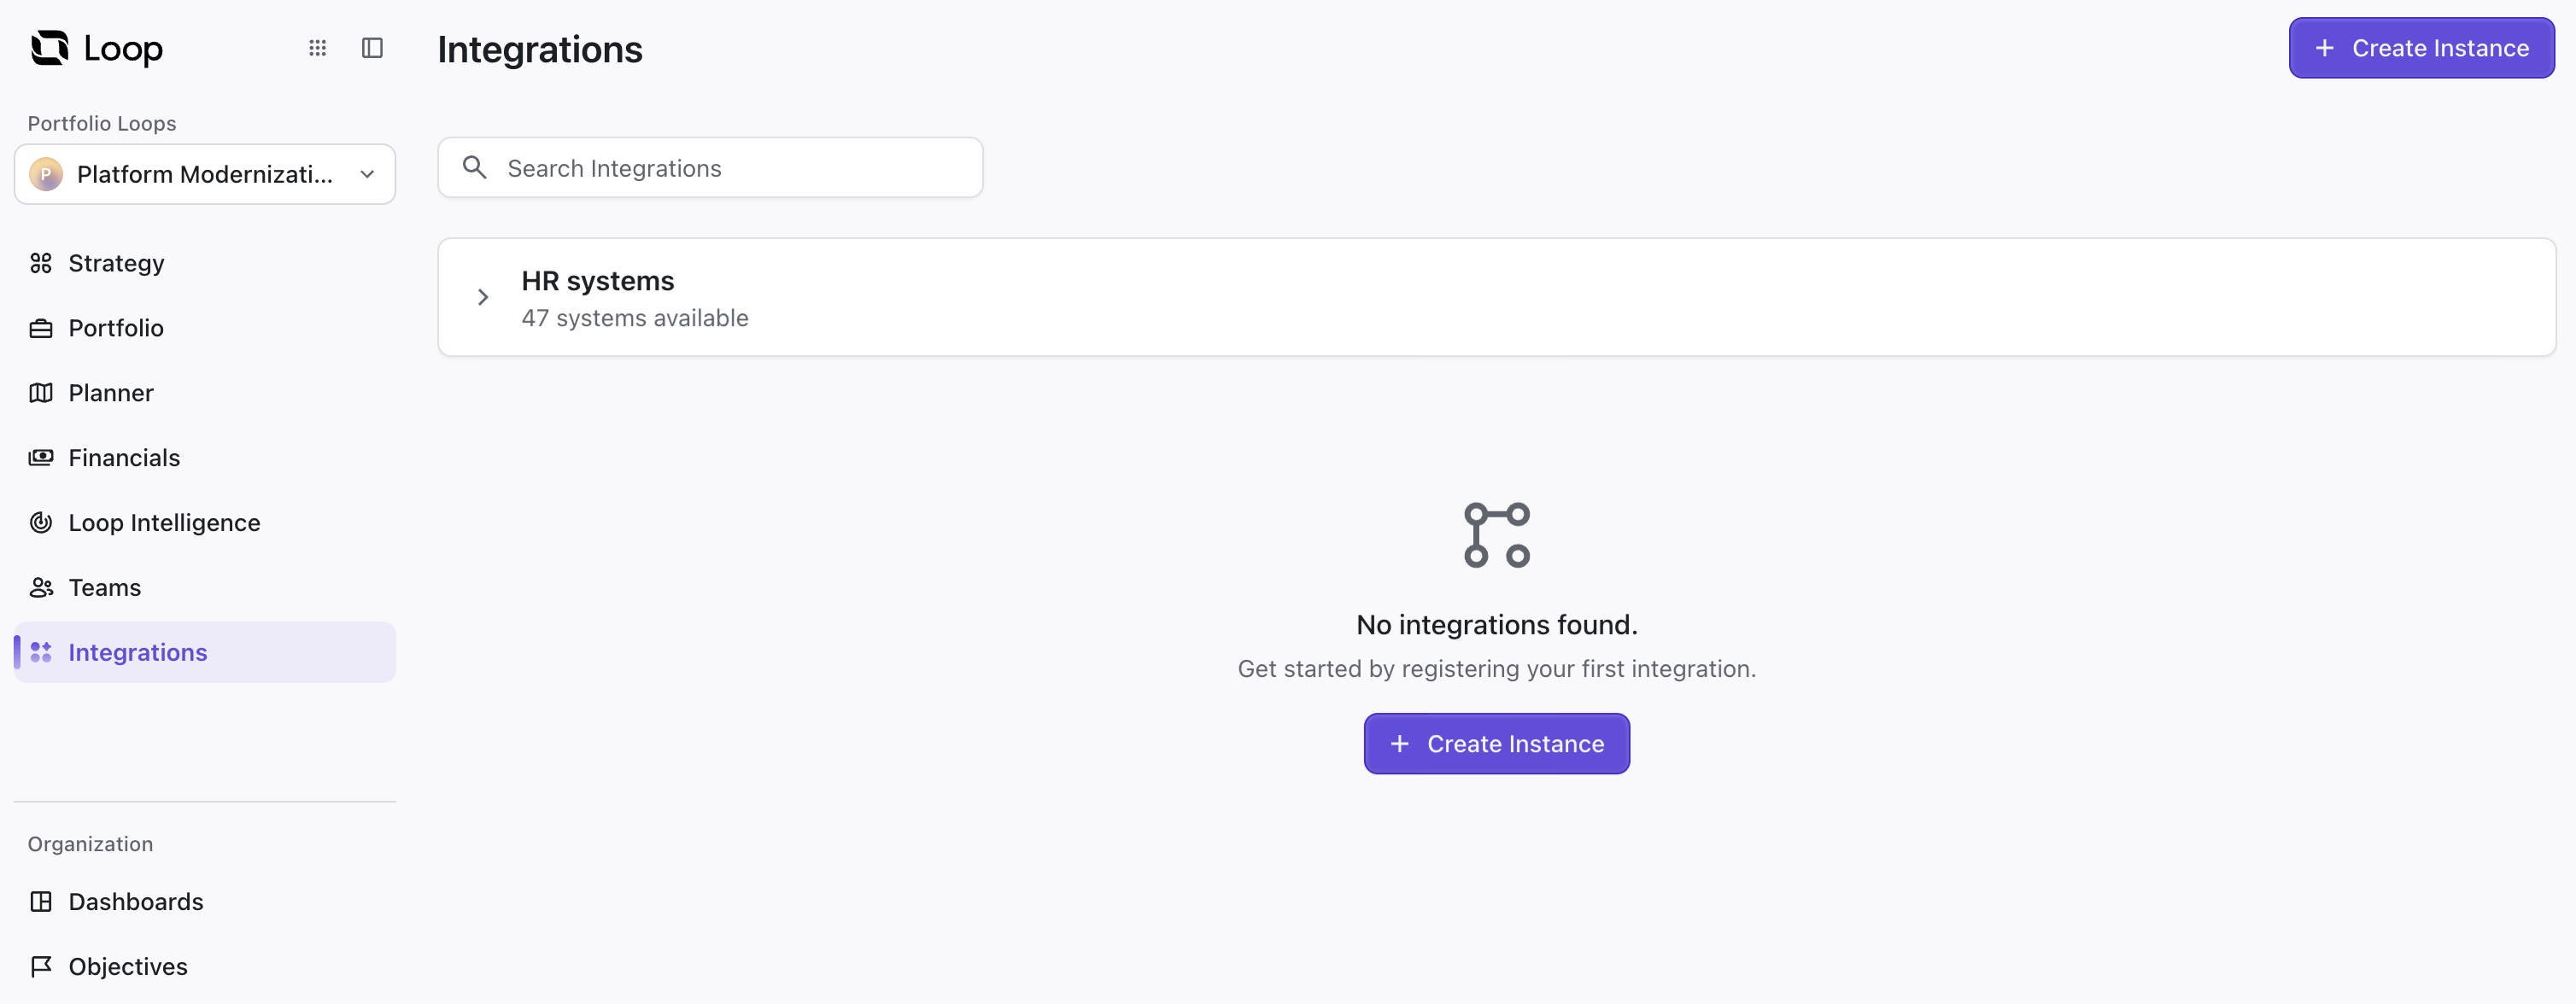
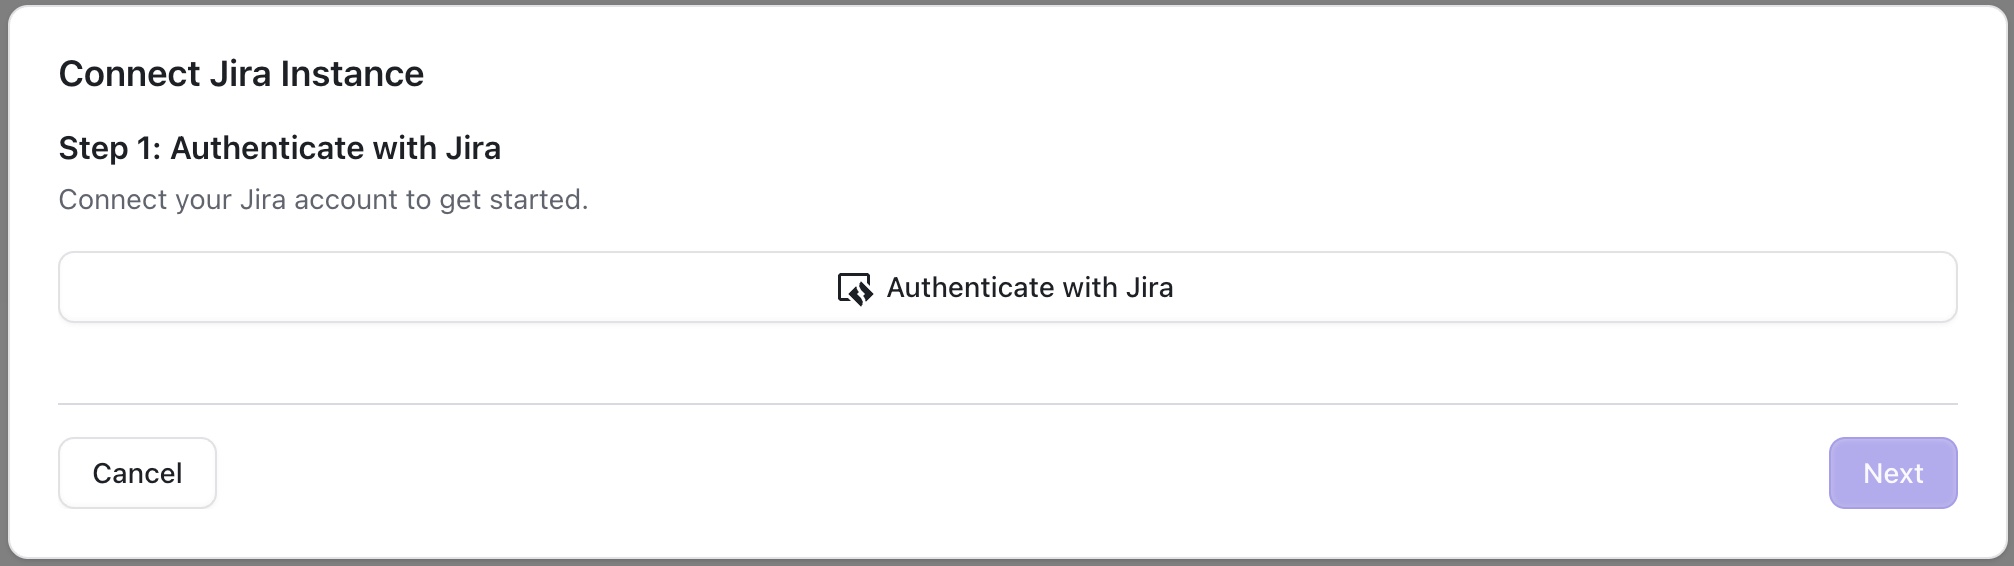
This will launch the Connect Jira Instance wizard. To get started, click Authenticate with Jira.
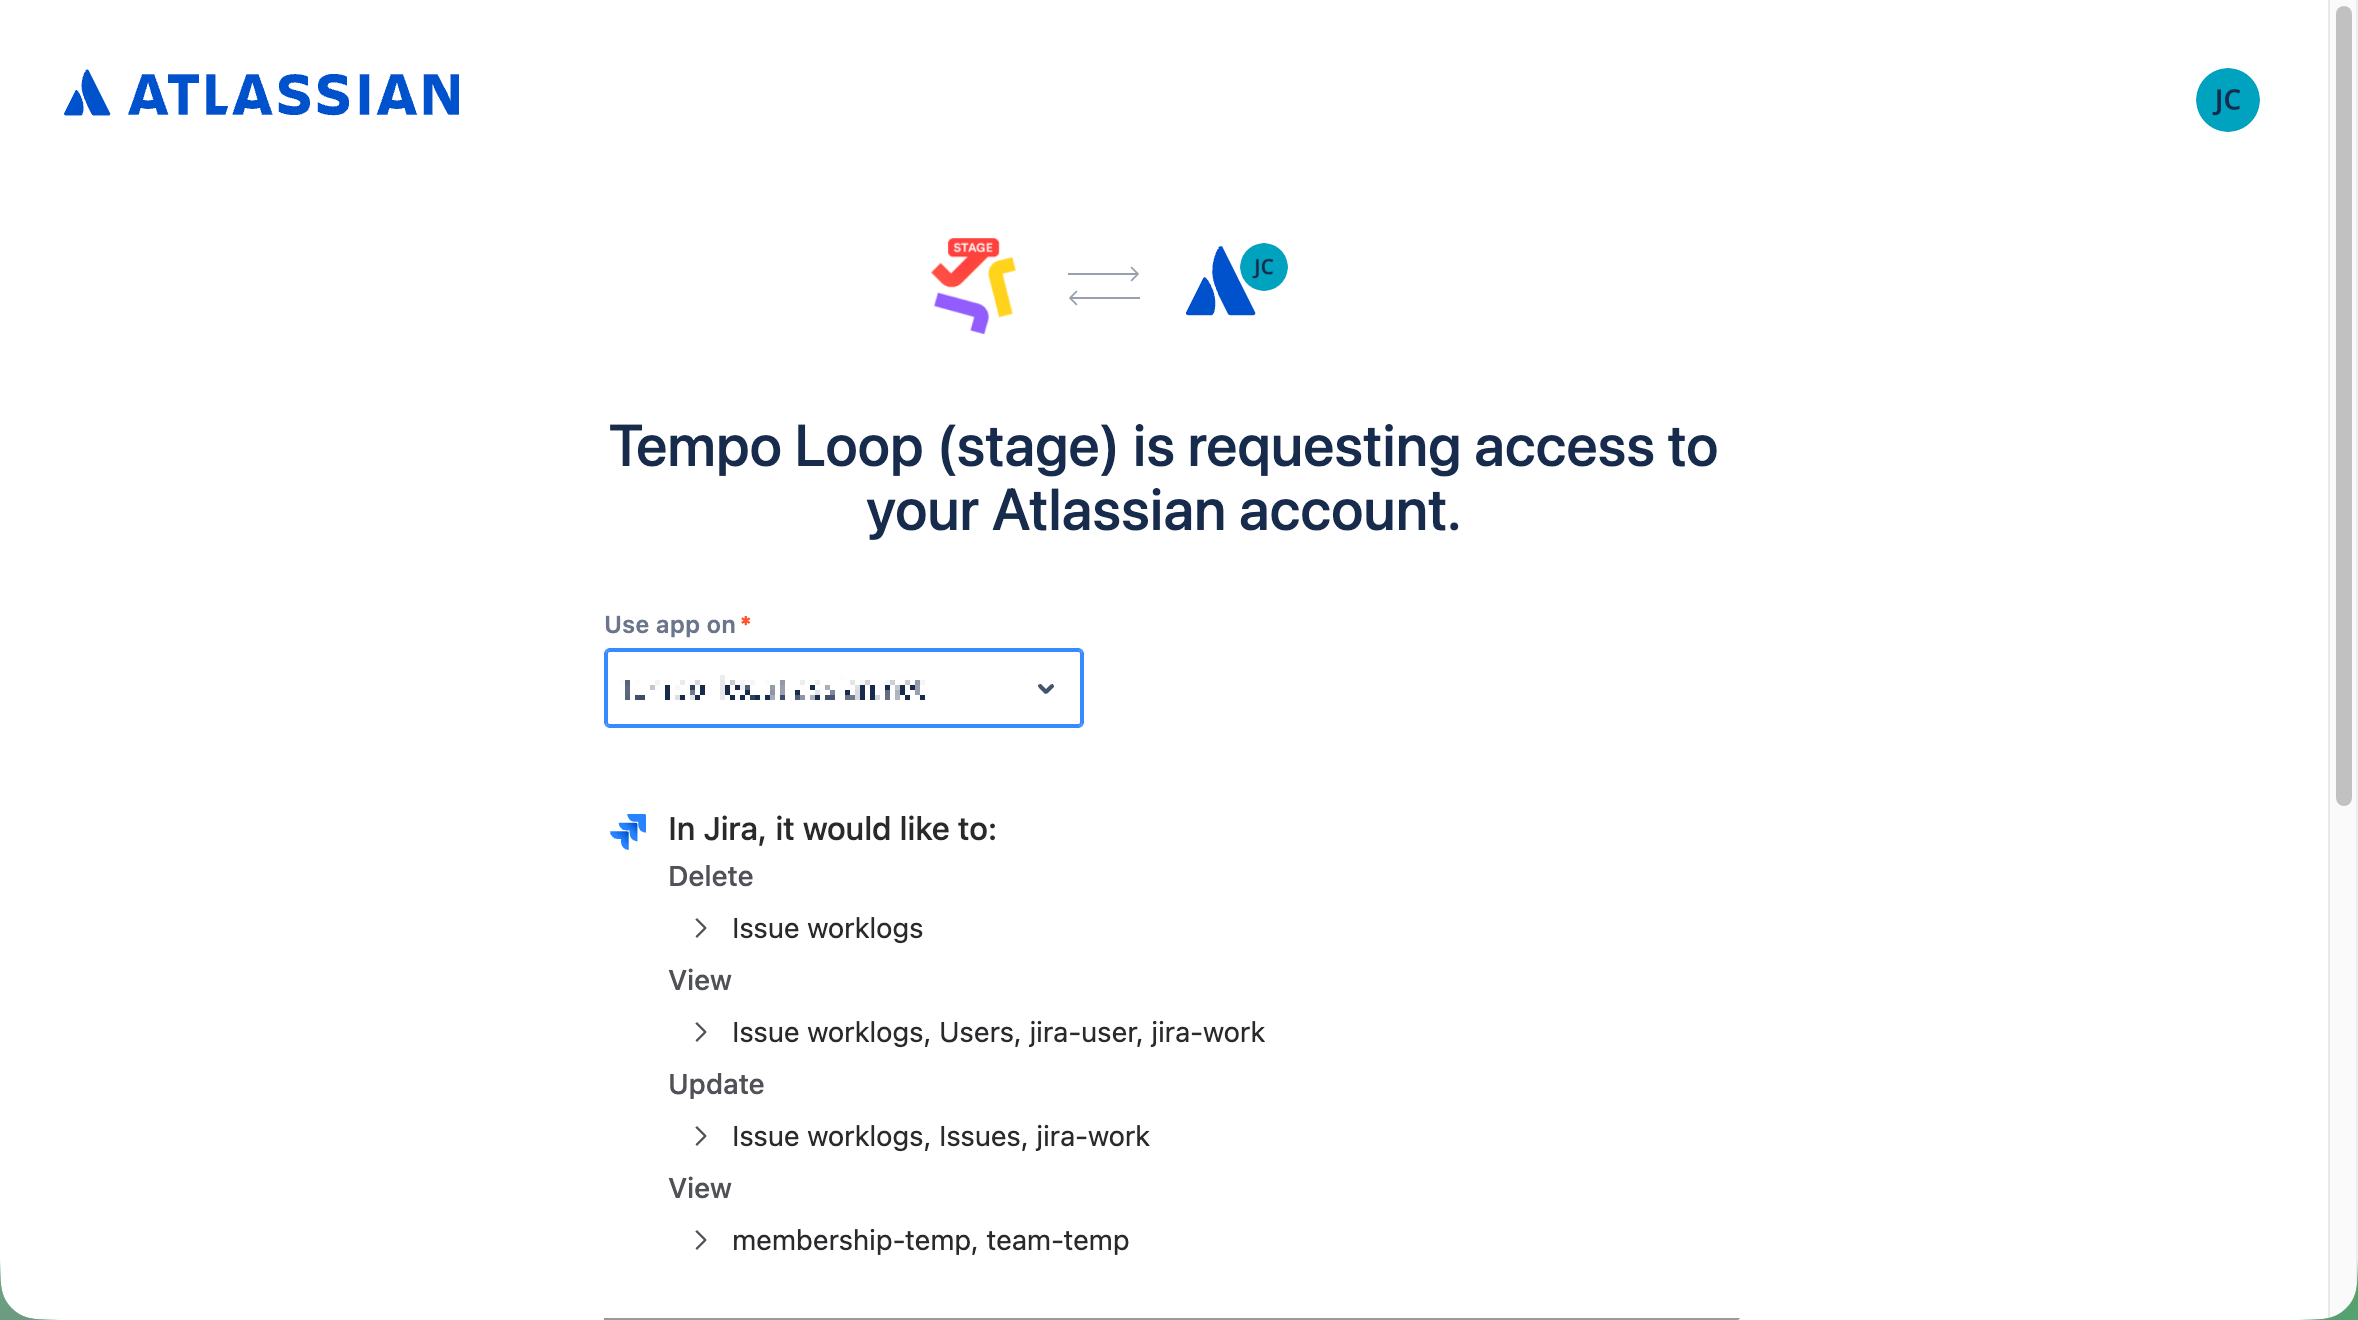
On the Atlassian page, choose your Jira site from the "Use app on" dropdown. At the bottom of the page, accept the terms.
Next, select the Jira instance you want to connect to from the dropdown list of available Jira instances. Click Next.
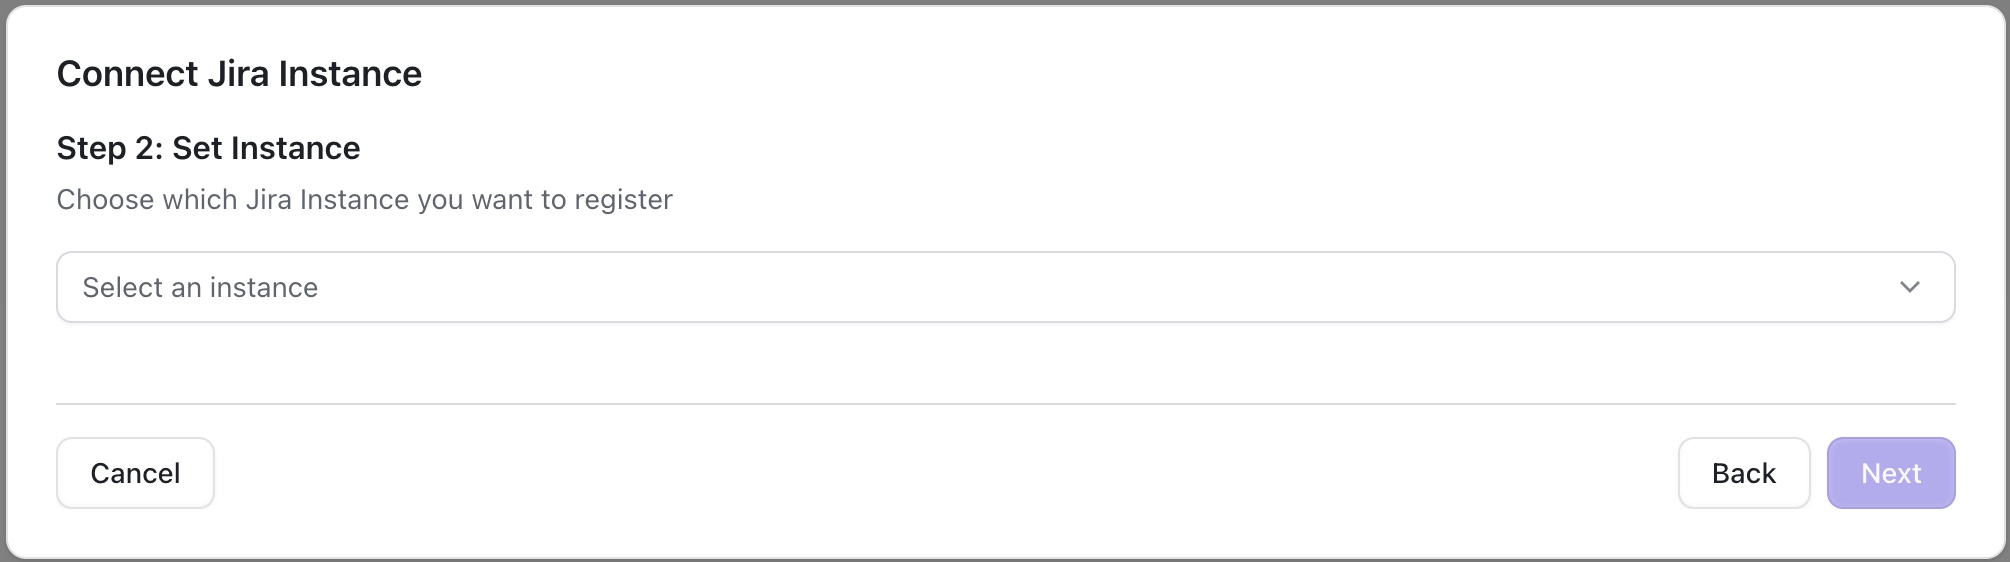
The dropdown does not auto-select the site you chose on the Atlassian page, so if you have multiple instances, confirm you are selecting the correct one before continuing.
Step 6 - Configuring the Jira Integration
Select a Jira Project/Space
Open the dropdown, select the Jira space you want to import items from, then click Next.
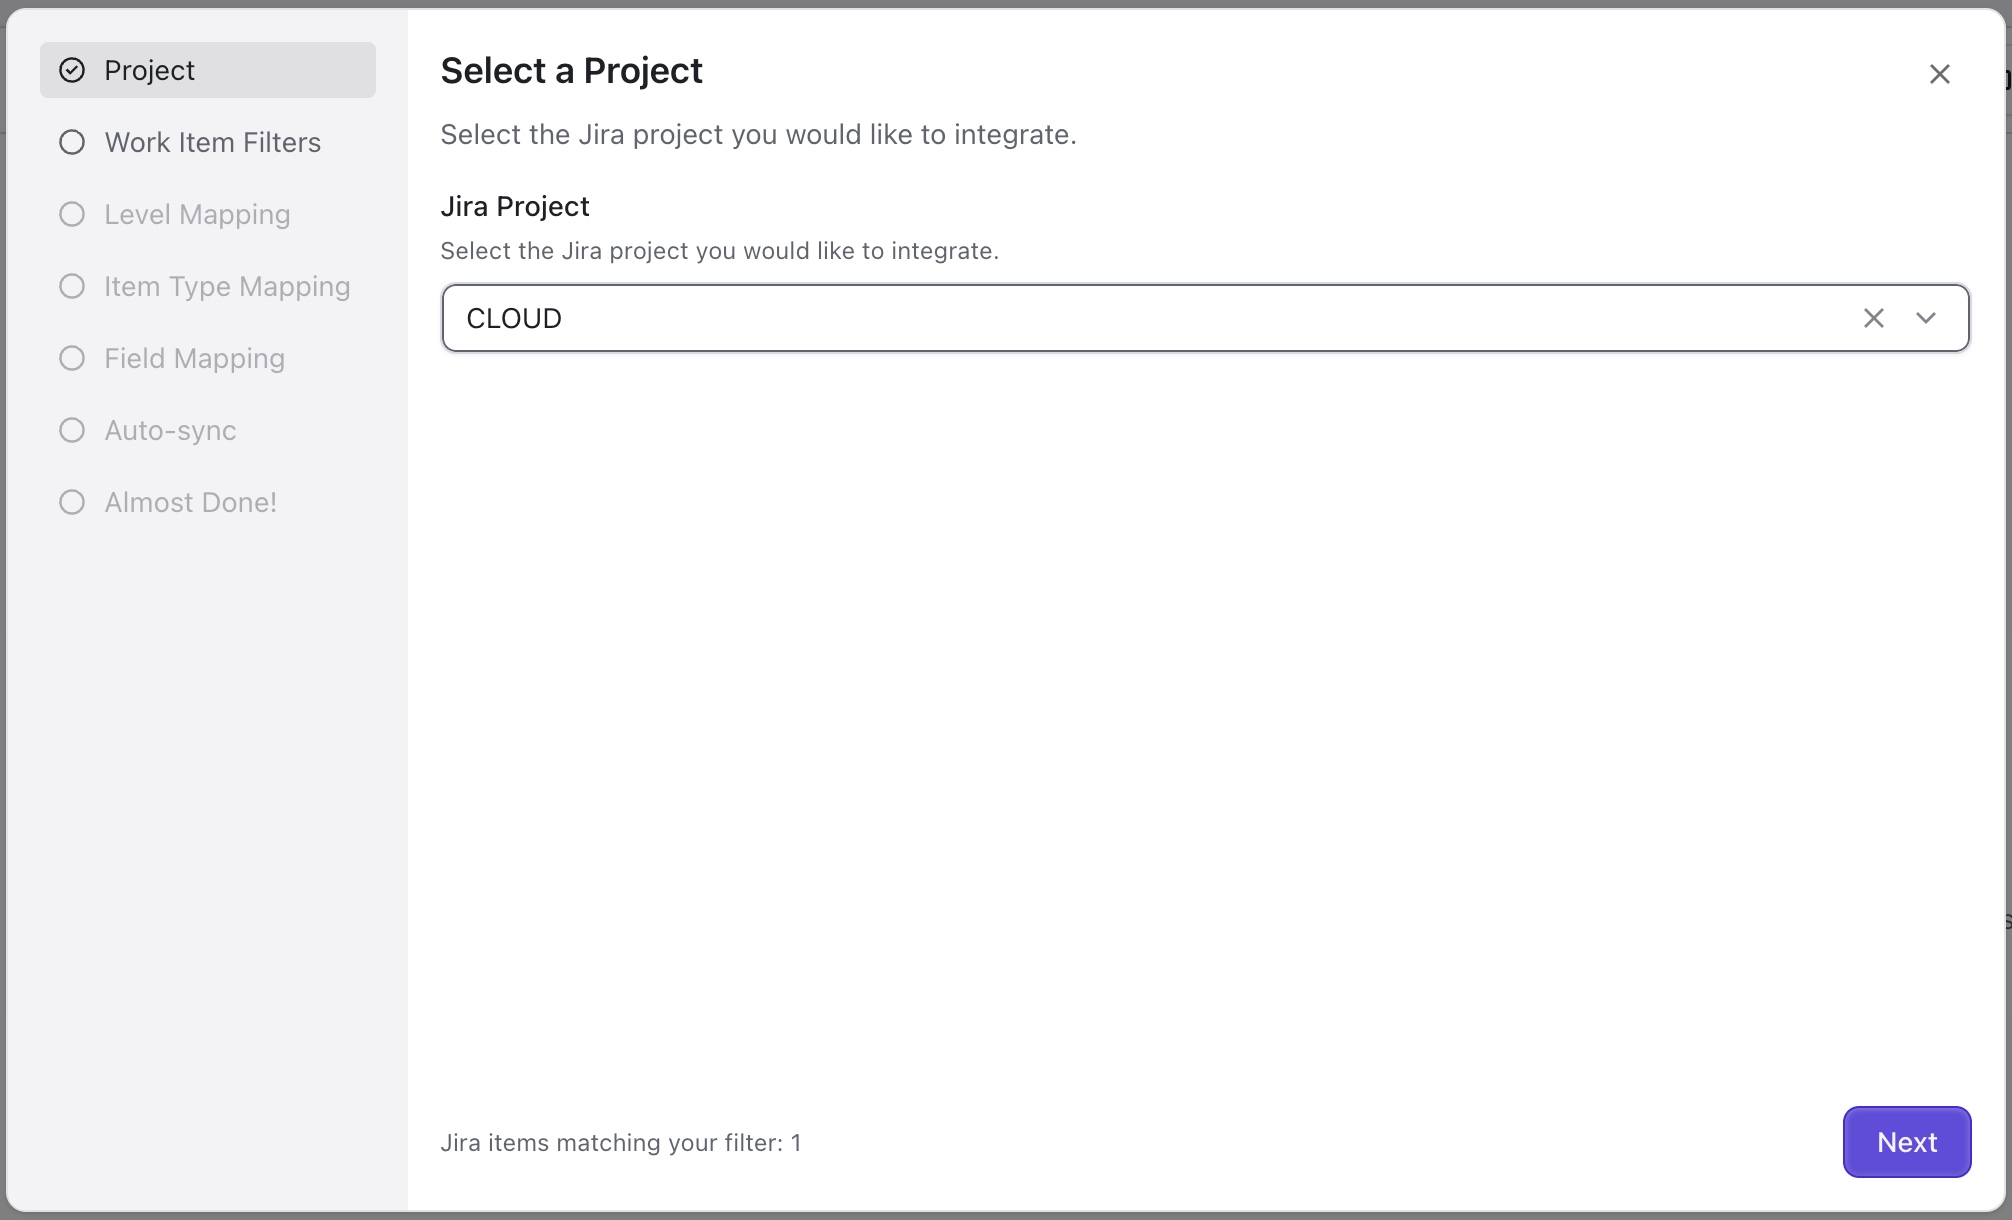
Each integration can connect to one Jira space. To add items from additional spaces, you can create more integrations later.
Apply Filters
Filters allow you to limit the number of work items imported to the portfolio:
-
Use Basic Filter to select items based on Jira field values.
-
For more advanced filtering, use a JQL Filter.
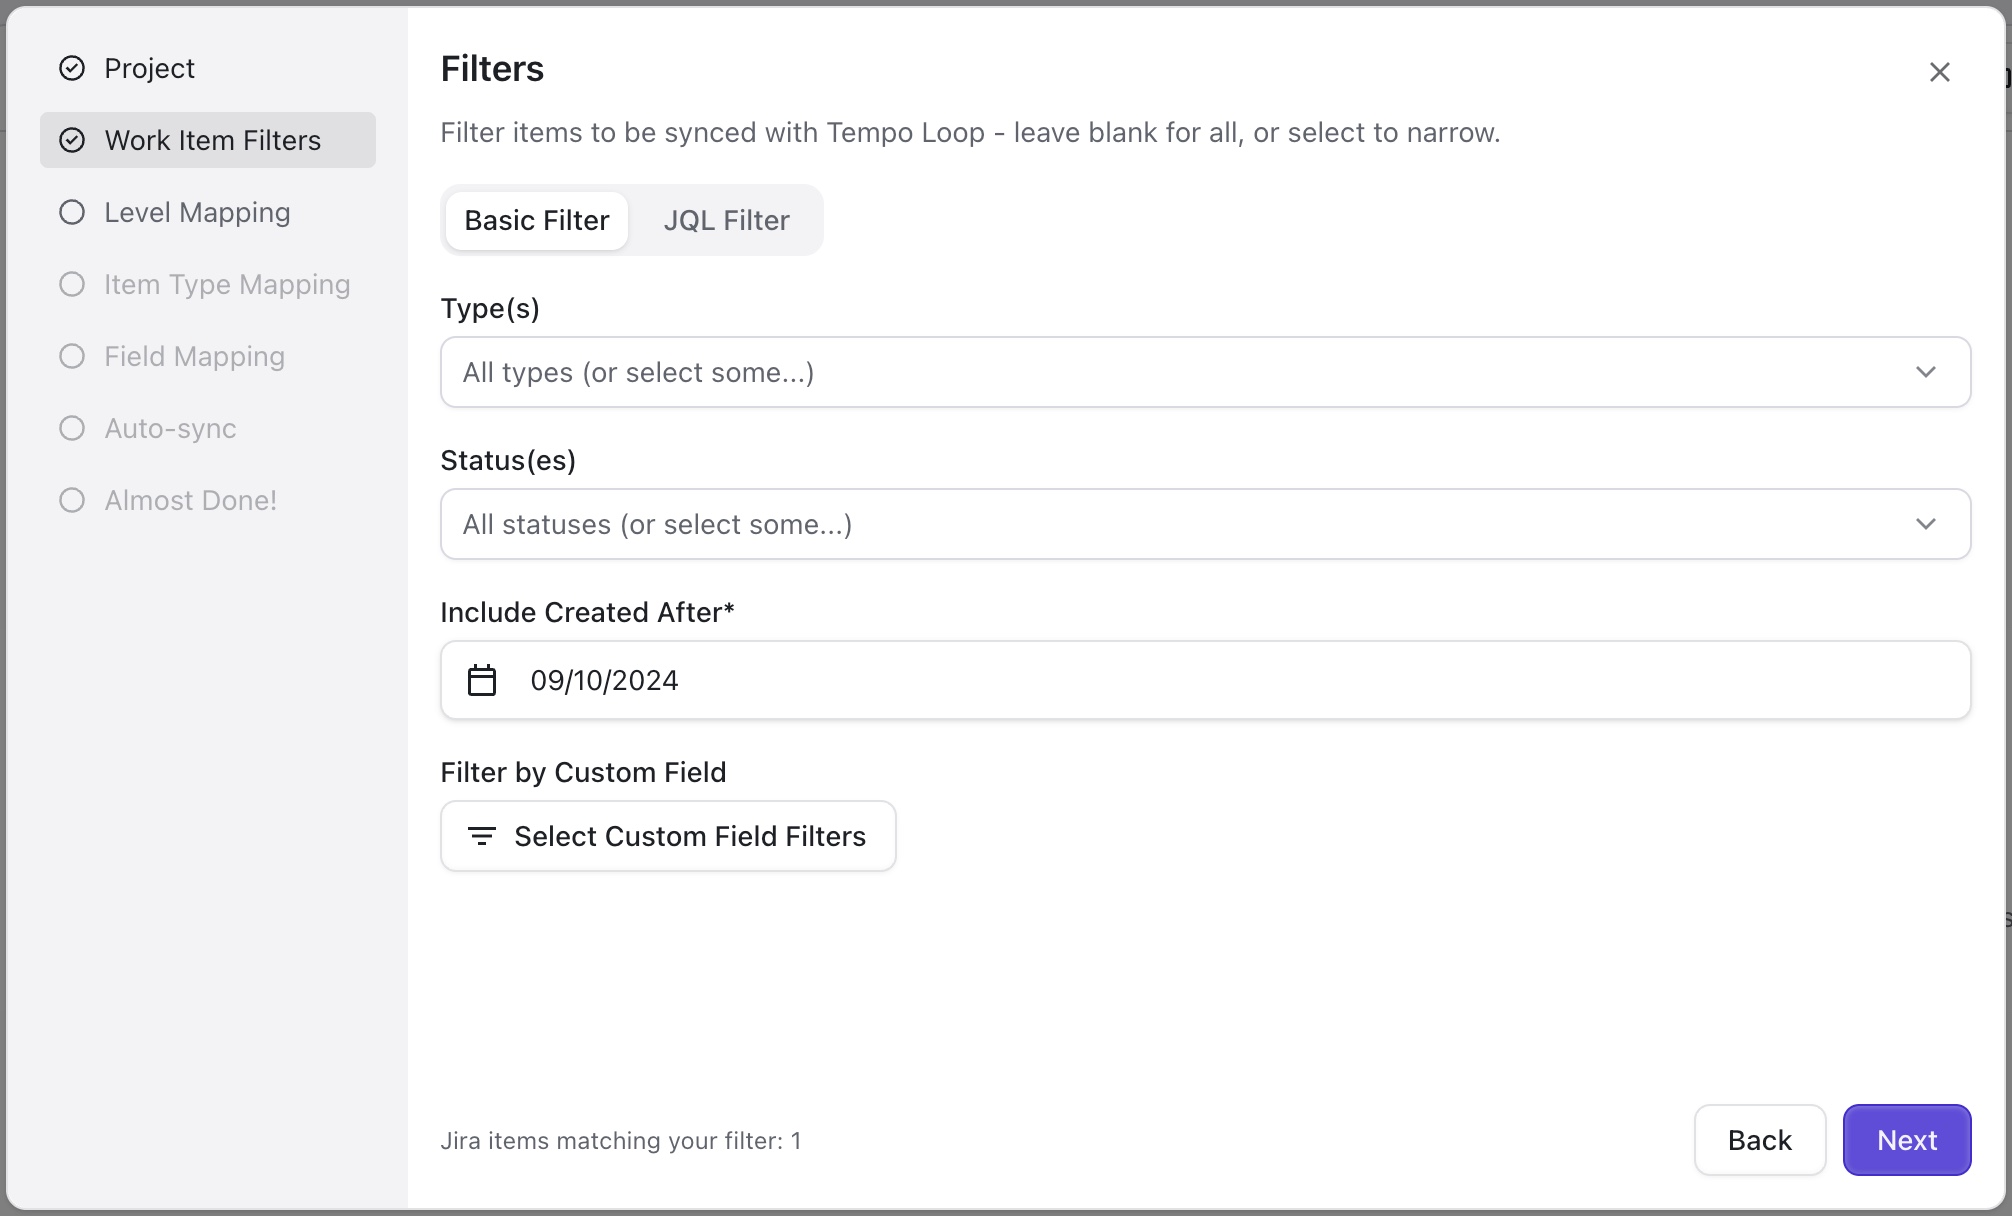
Map the Loop Hierarchy Levels with Jira Levels
Tempo Loop organizes your work items into a hierarchy based on your Hierarchy Level settings. The first time a Jira integration is set up, the Jira hierarchy is automatically mapped to the Tempo Loop hierarchy.
On subsequent integrations, you may be asked to map your hierarchy if the Jira project hierarchy differs from the original integration. In this case, you need to select the appropriate level in the Tempo hierarchy for each item type within the Jira space.
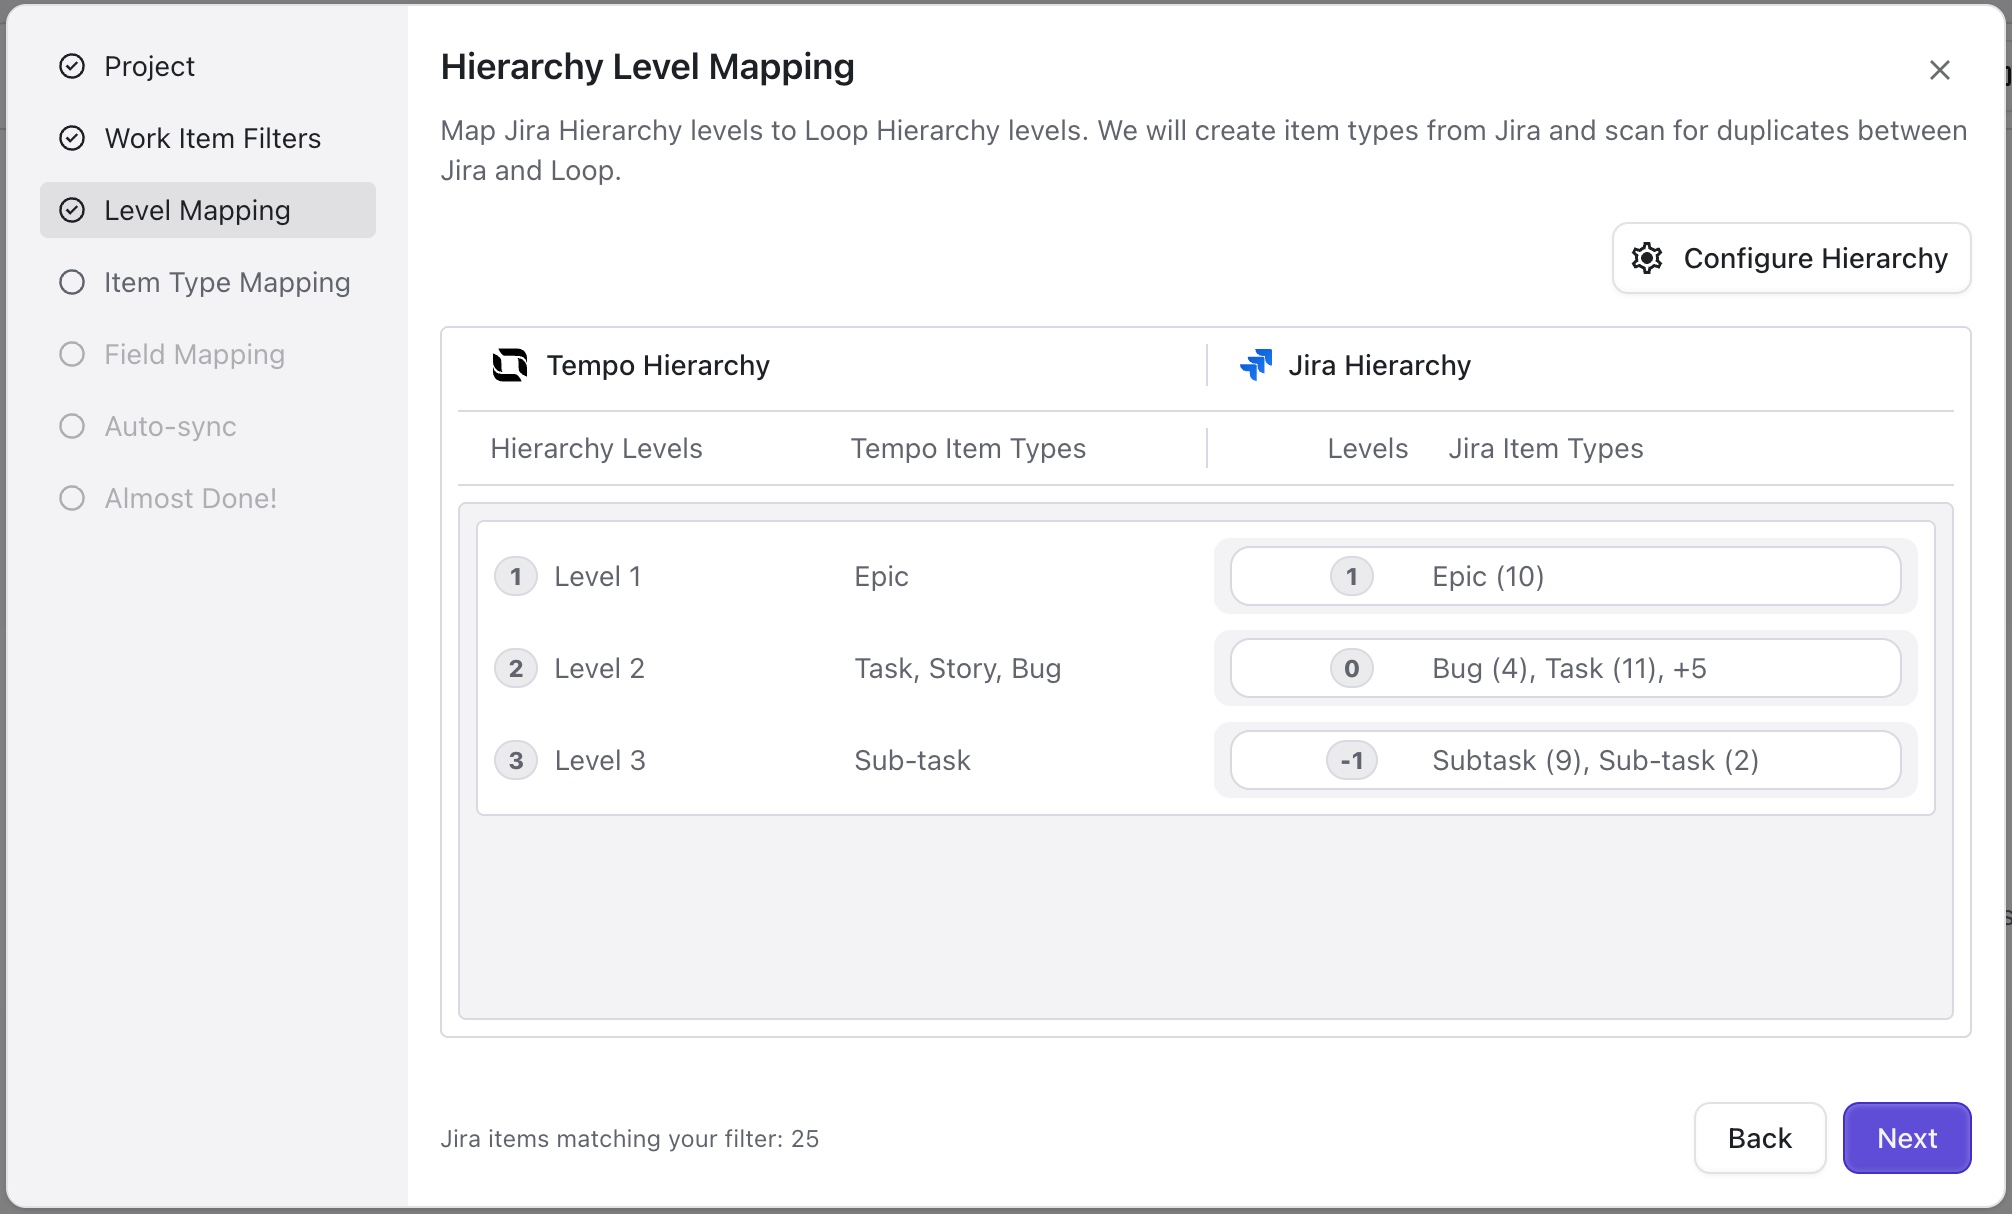
In this example, our Tempo item types have the same names as our Jira item types. Don’t worry if you use different names for Tempo or Jira - as long as you map them to the correct level, they’ll be treated the same in both systems.
Map Work Item Types Between Loop and Jira
Select the Loop item type that should be used to represent each item type used in your Jira project.
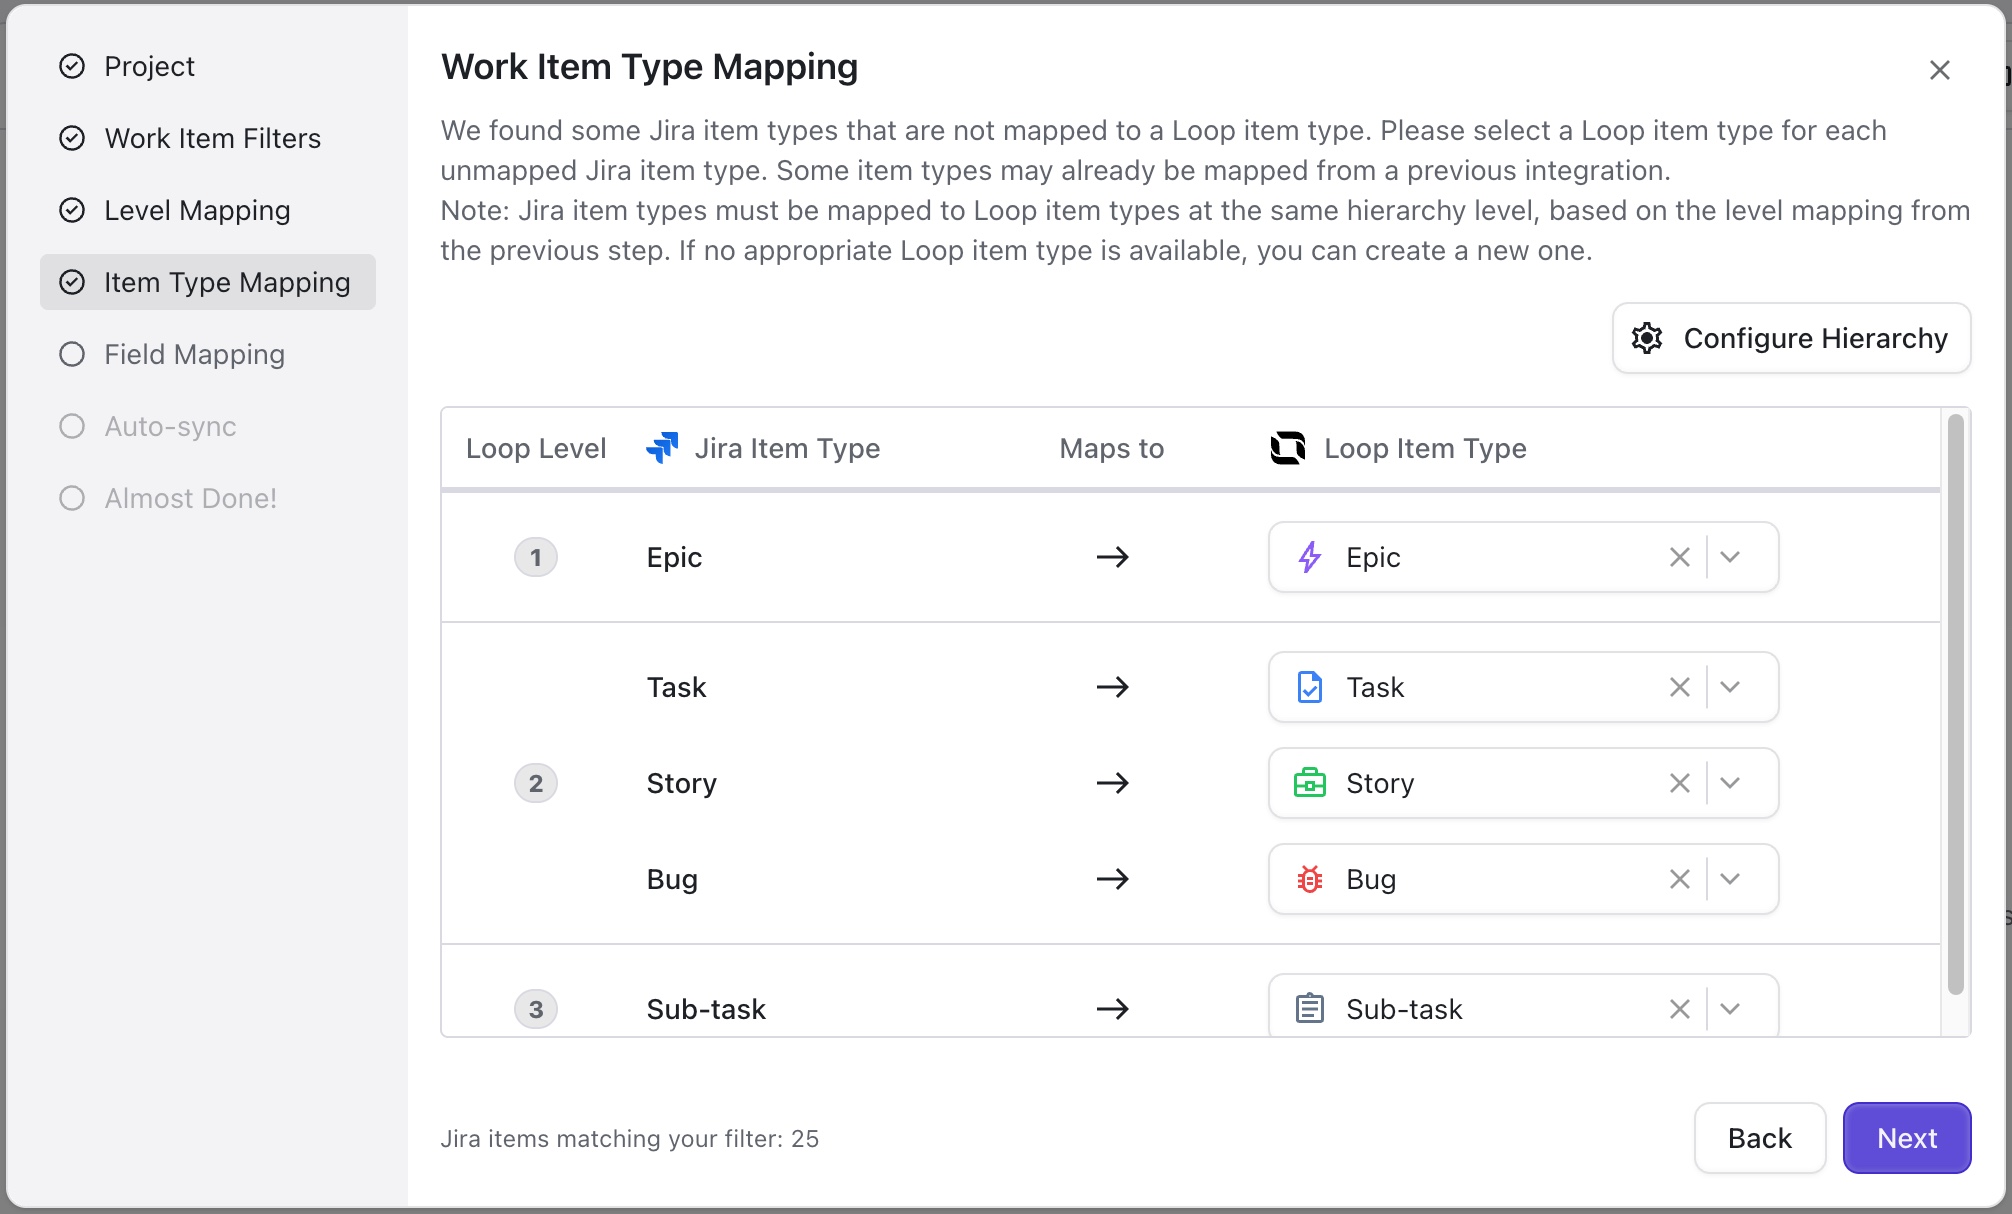
You can select any Loop item type, as long as it’s at the same hierarchy level. You can also map multiple Jira item types to the same Loop item type.
To edit your Loop item types, click Configure Hierarchy.
Map Jira Fields to Loop Fields
-
Estimate Field - Select the estimate field used in the Jira space to determine how much work is required to complete a work item.
-
Team Field - Select the field used to assign teams to work in the Jira space. The import will identify the Jira or Tempo teams associated with items being imported and import those teams and their members. Note: If you’re importing Tempo Teams, make sure:
-
The Tempo Team visibility is set to everyone, or
-
You have View Team access for that team
-
-
Expected Start Date Field - Loop calculates an expected start date for each task based on dependencies, work estimates, and more. Select a custom Jira field where this information can be sent to Jira.
-
Expected Finish Date Field - Loop calculates an expected finish date for each task based on dependencies, work estimates, and more. Select a Jira date field where this information can be sent to Jira.
-
Custom Loop Fields - You can import additional field values from Jira and link them to custom Loop fields. To set up custom Loop fields, visit Settings | Custom Fields.
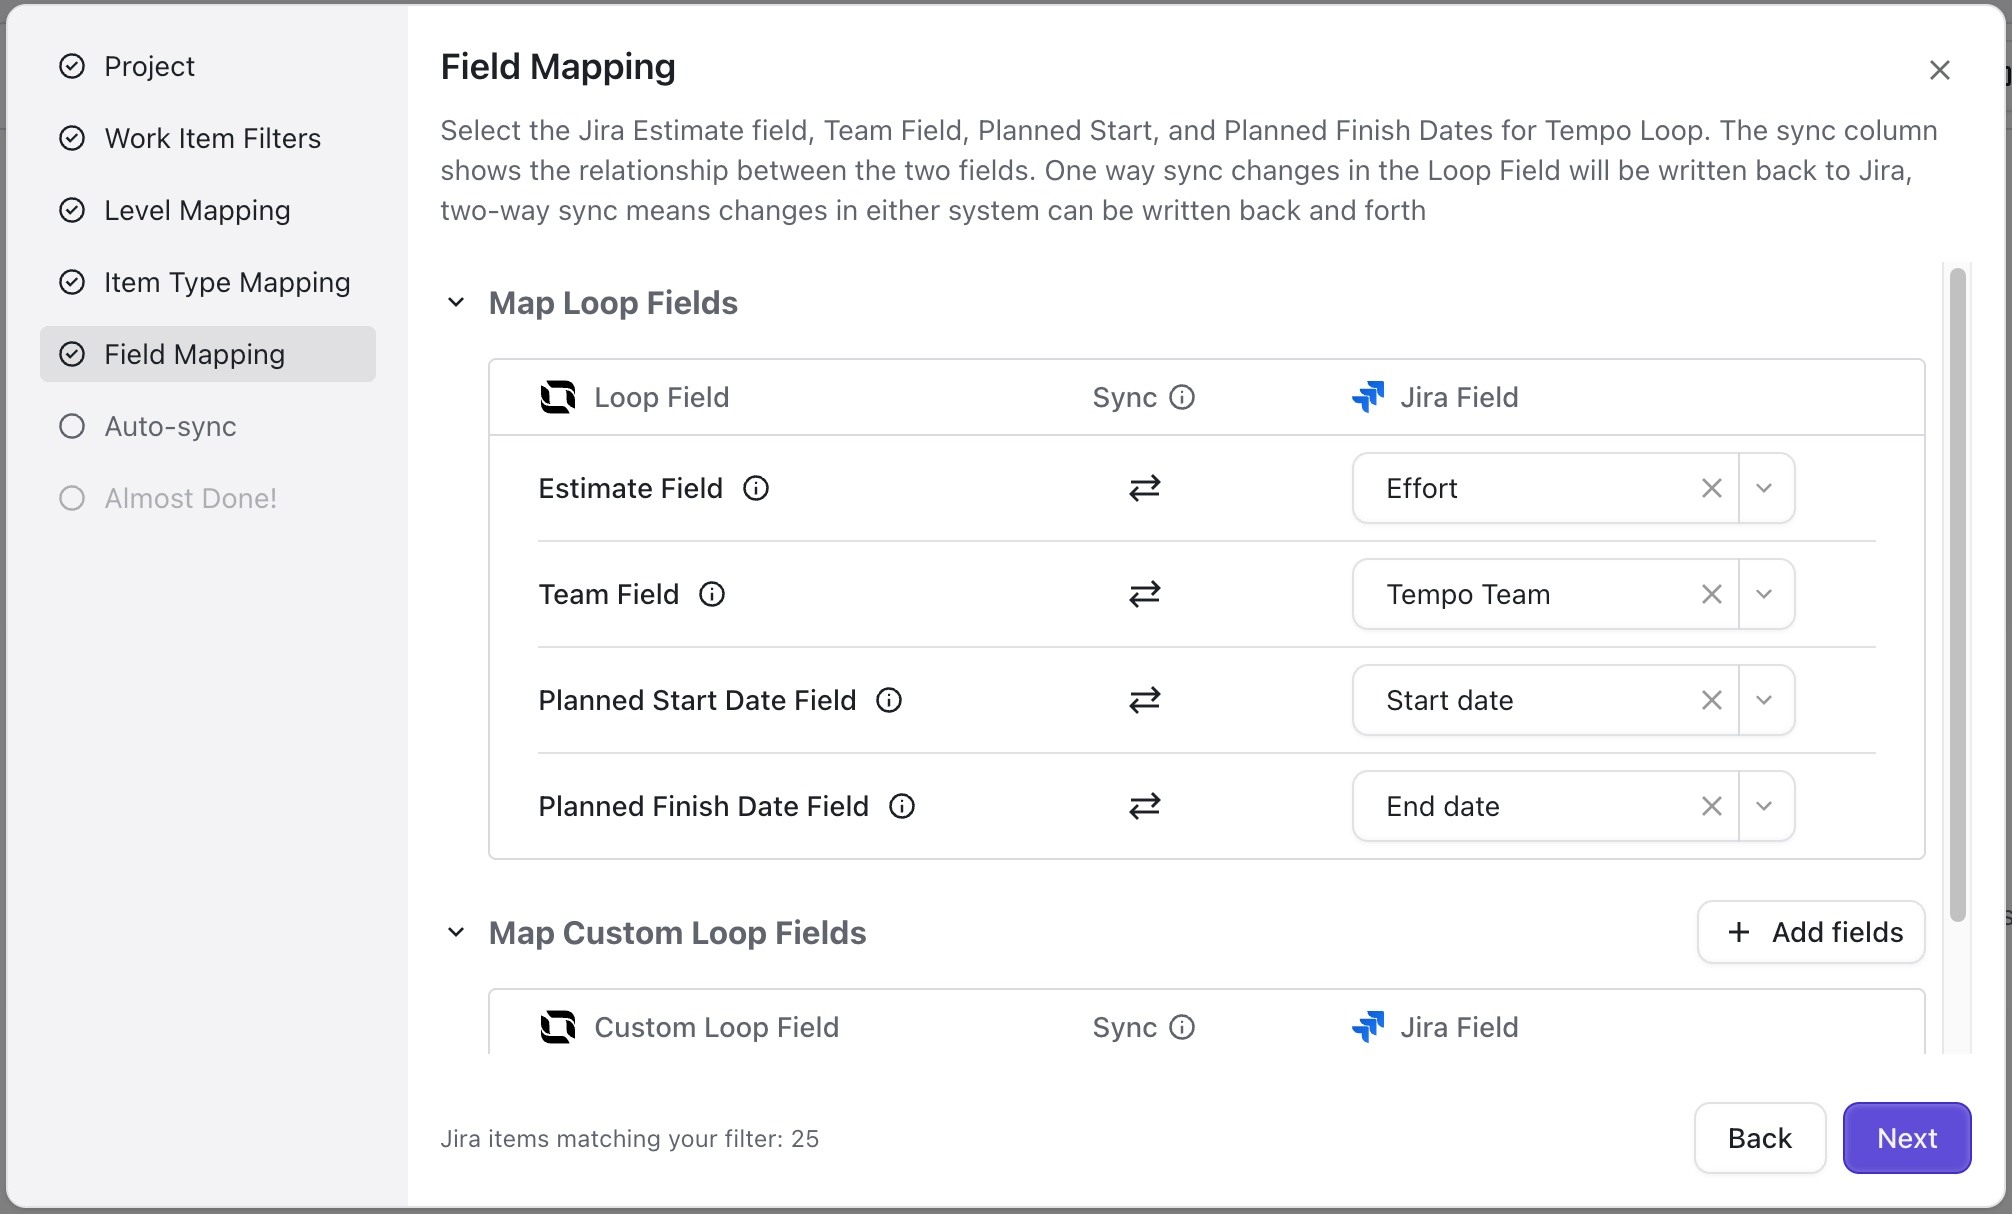
While it is possible to skip some fields, mapping all fields will provide the most accurate plan estimates and ensure you can send your plan data back to Jira!
Configure Auto-sync (optional)
To schedule automatic, one-way syncs between Jira and Loop, enable auto-sync, select the sync direction, and choose the sync frequency.
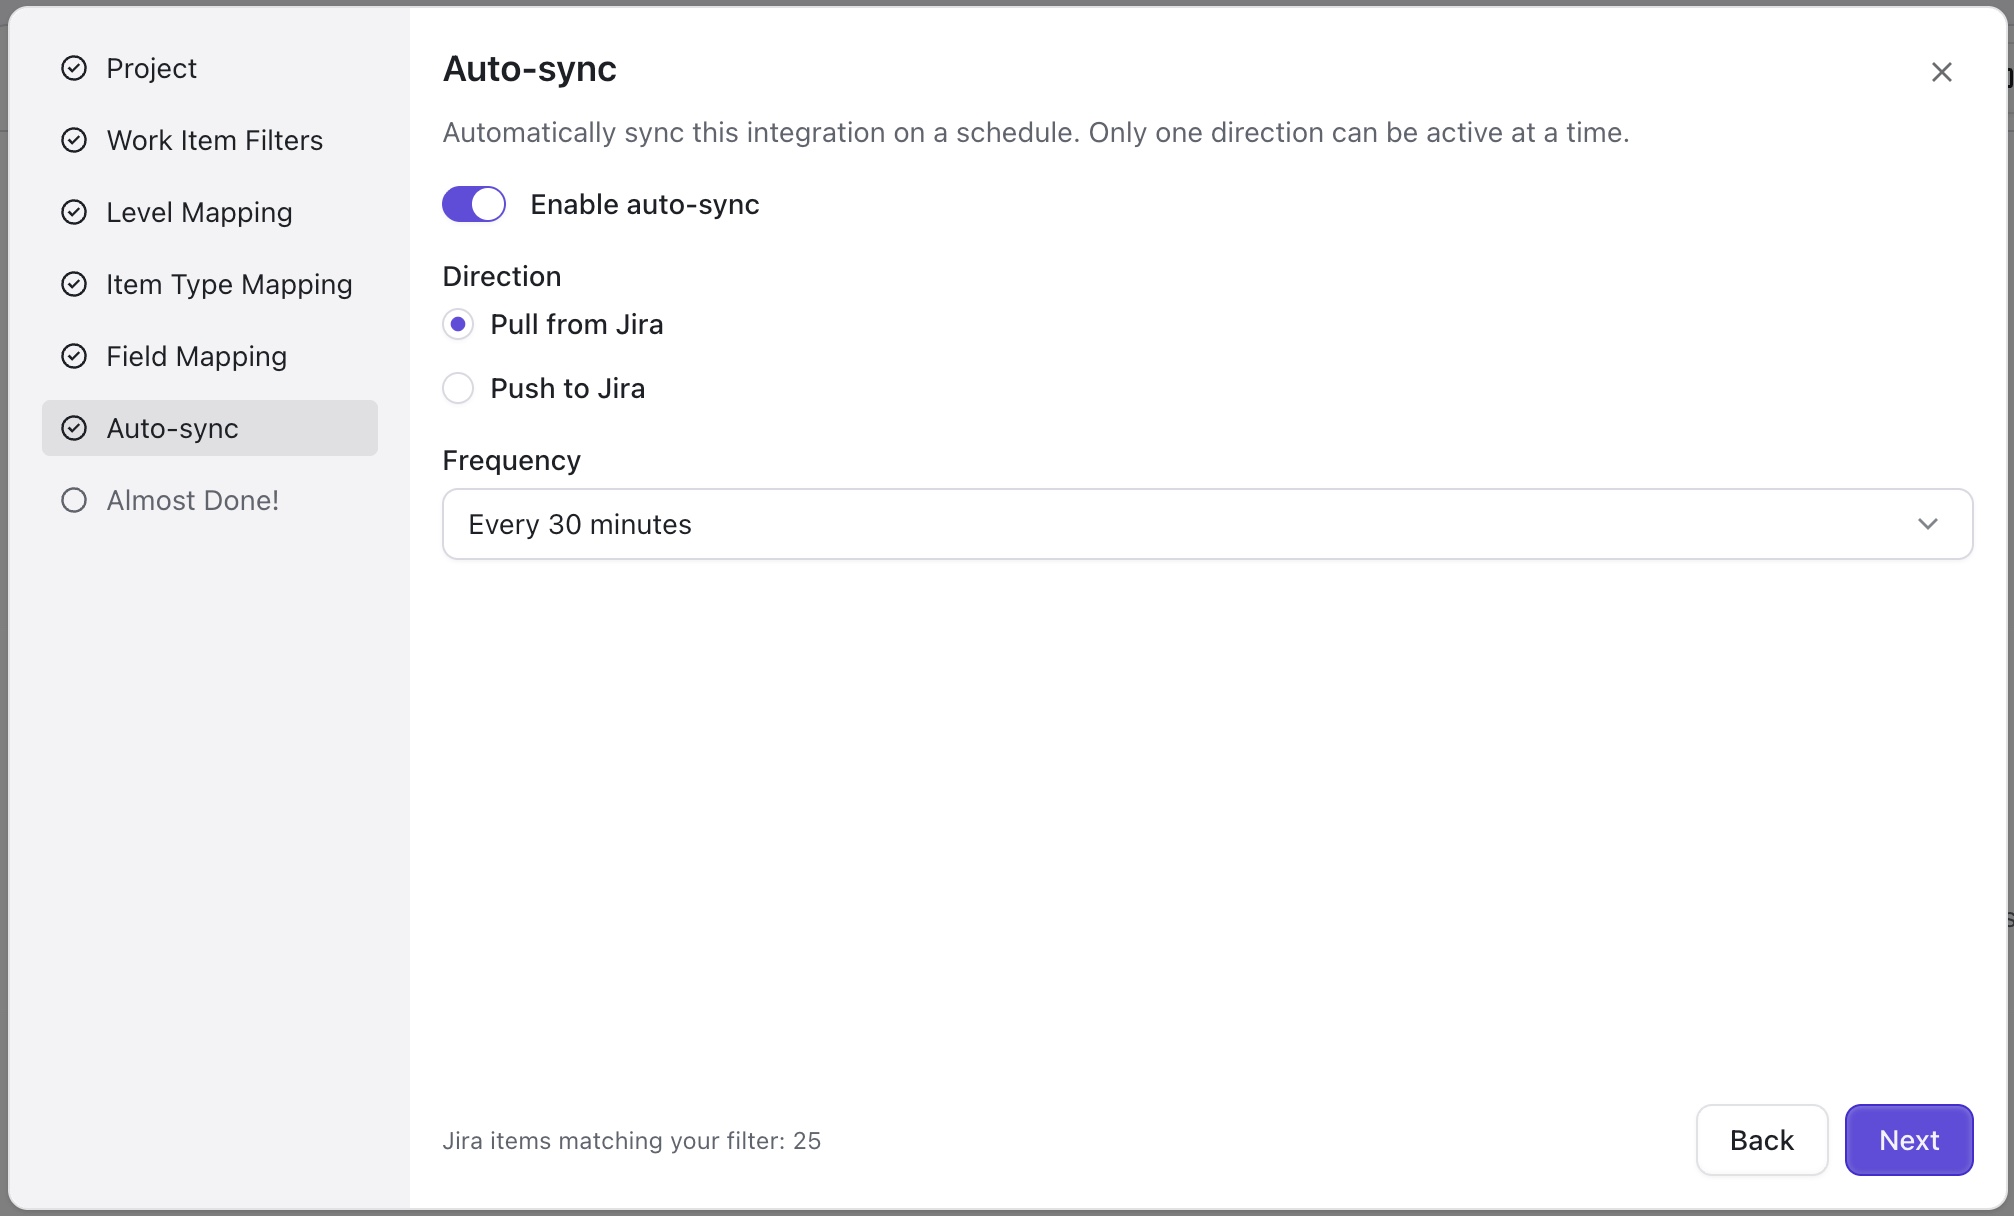
You can also manually update Jira or Loop at any time.
Confirm the Import
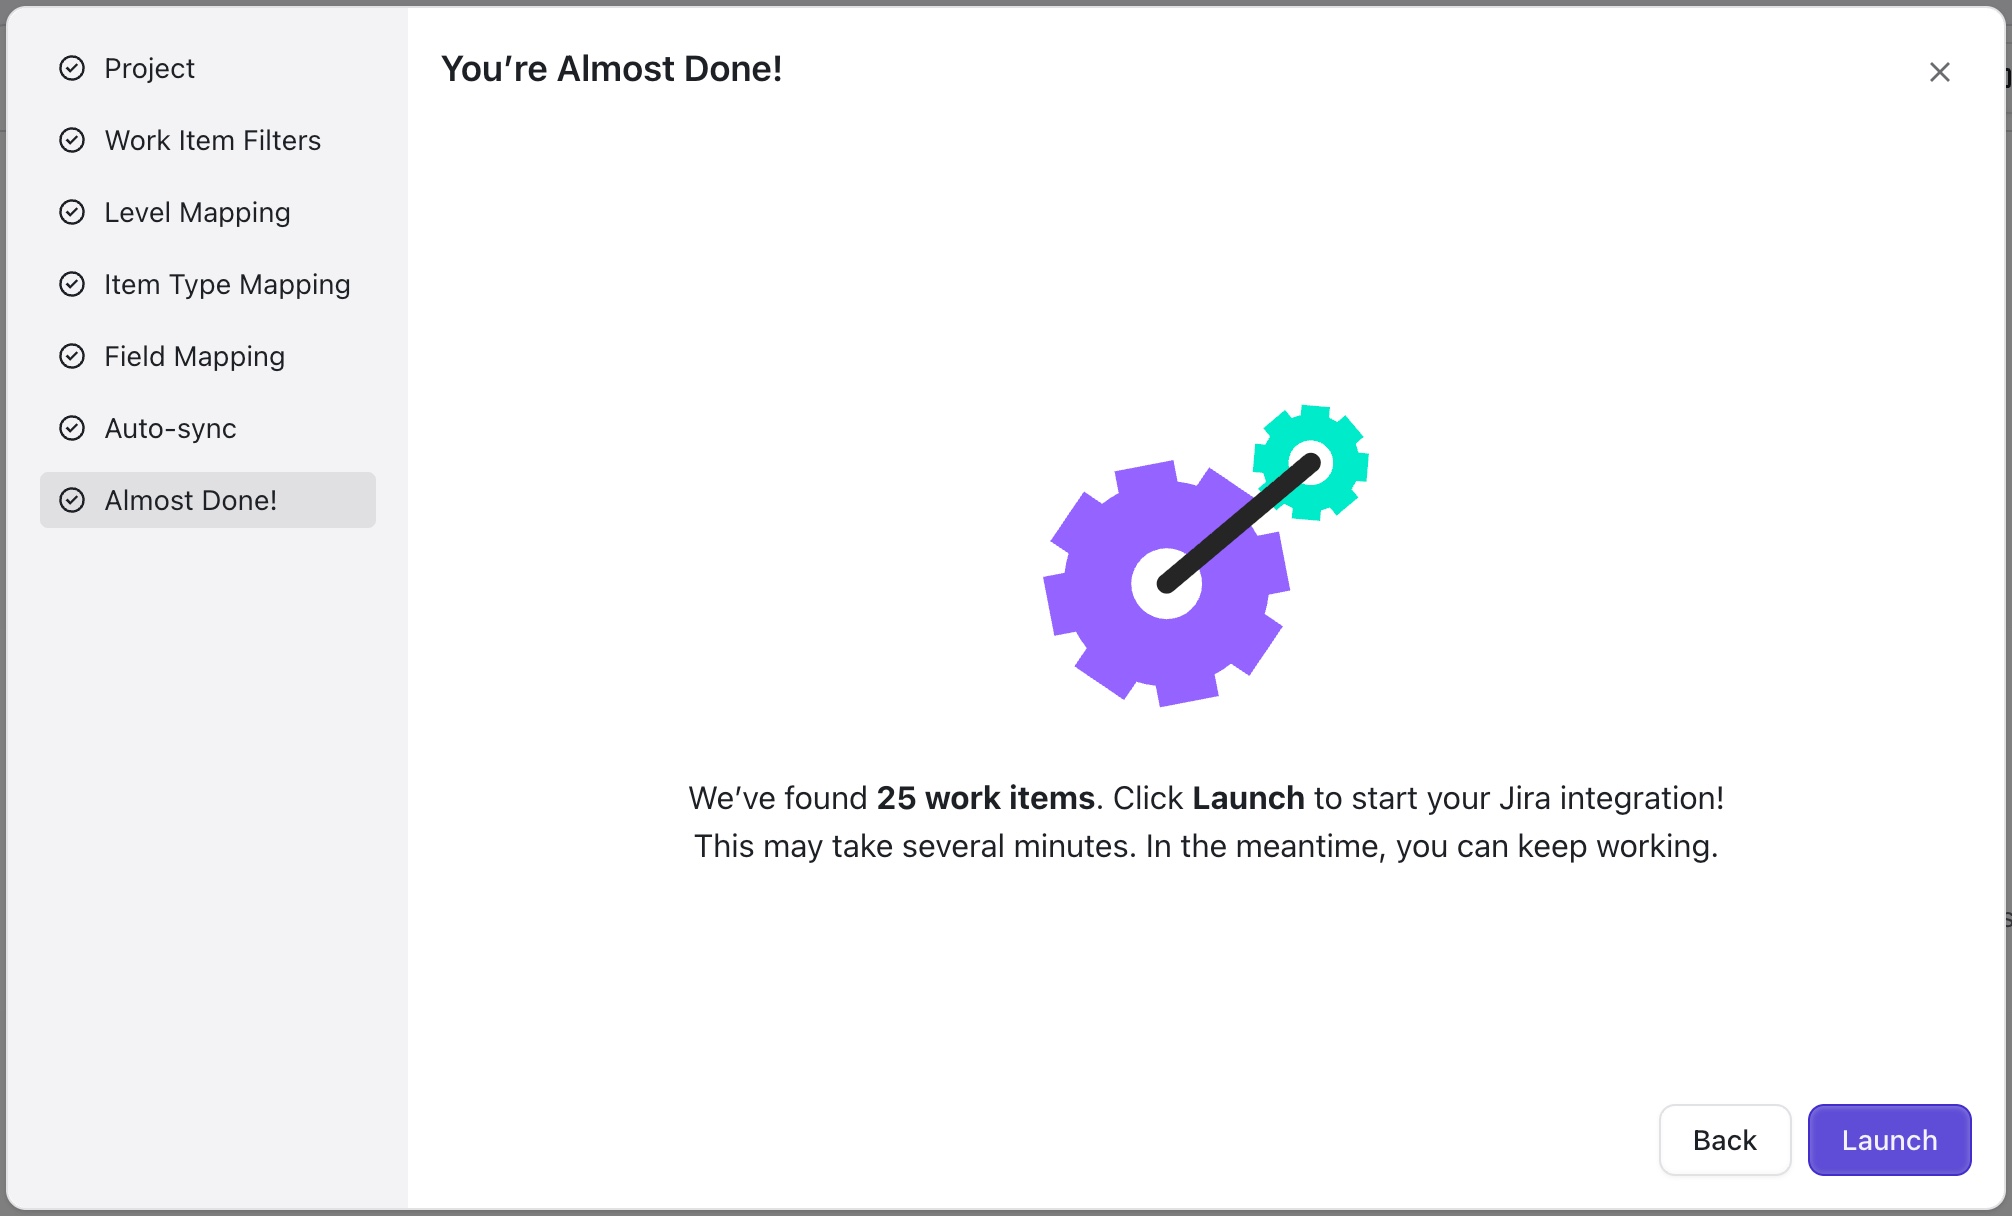
The final screen shows how many items were found within the Jira space that matched the information you selected above.
-
If you expected more, click Back and check your settings, particularly on the Filters screen.
-
If everything looks good, click Launch.
Once the information from Jira has been imported to Loop, you can:
-
Add additional Jira spaces to Loop: Go to Settings | Integrations, locate the instance you want to import additional items from, and select +Add Integration.
-
Add items in Loop: See steps 3 and 4 above.
-
Adjust the hierarchy: We’ll cover this in Step 8.
Step 7 — Review the Imported Items
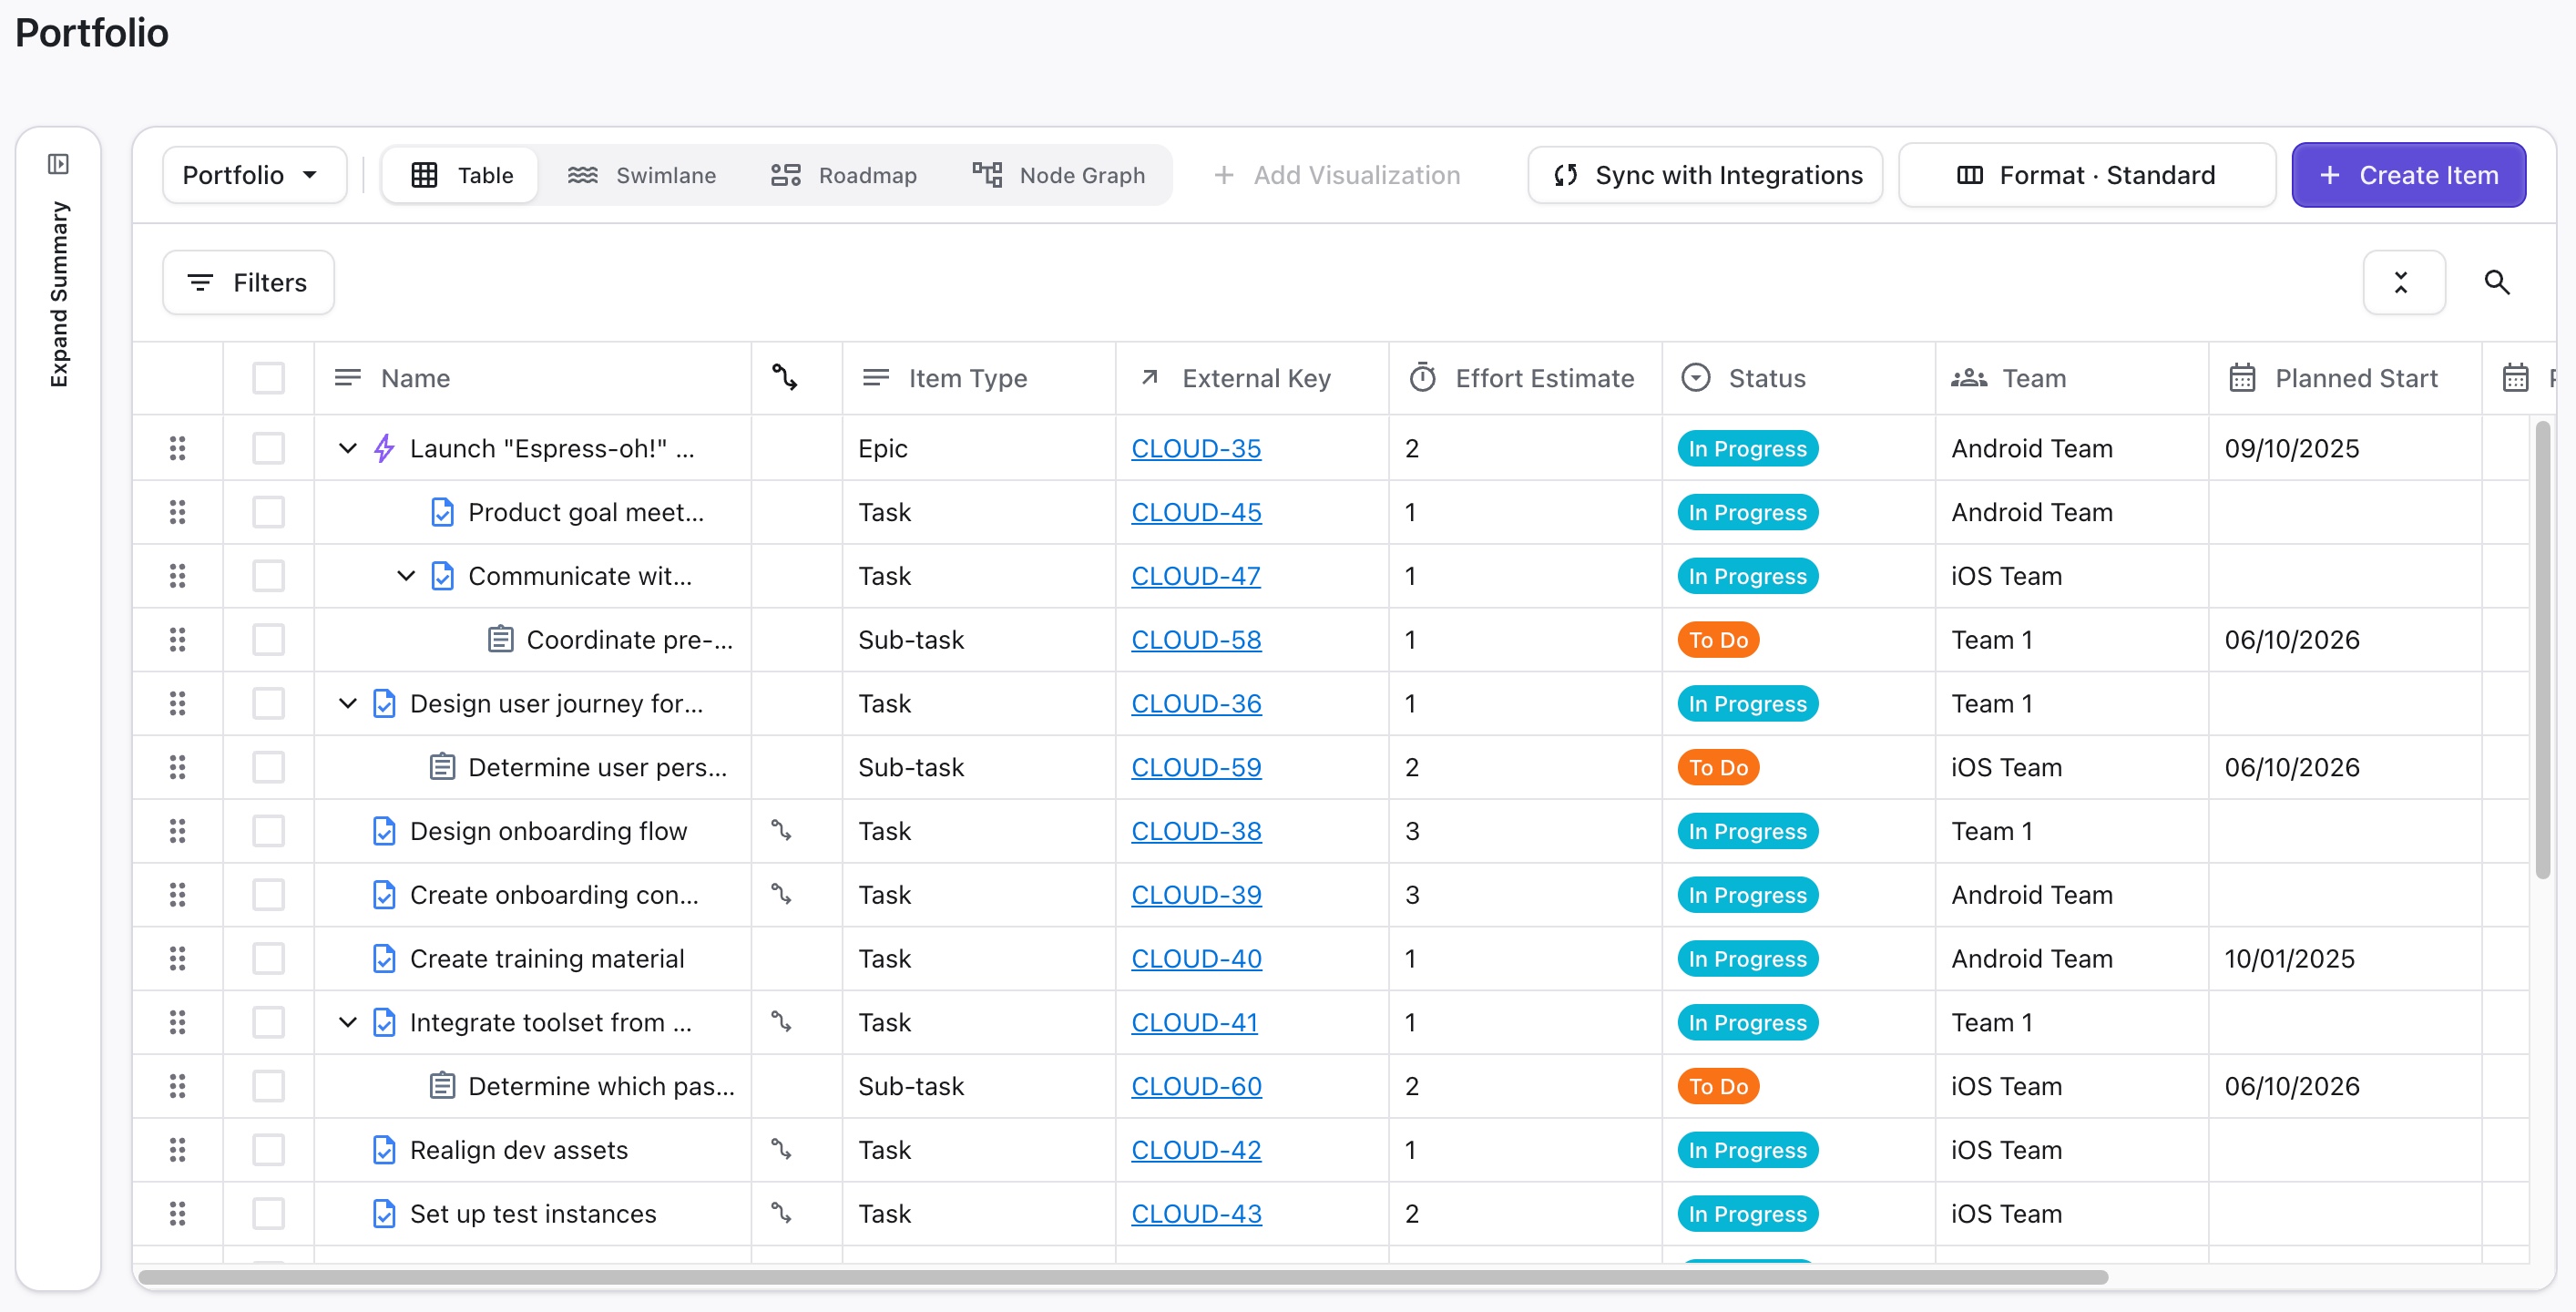
Your imported work items will appear on the Portfolio tab. Review the information to make sure all the items you expected have been imported.
-
Click any External Key to open the item in Jira.
-
Click any item name to open its detail panel in Loop.
Step 8 — Move Jira Epics Under Their Features
To move Jira epics under their corresponding features:
-
Select the checkboxes next to the epics you want to move. As soon as more than one item is selected, the Bulk Edit bar appears at the top of the table.
-
Select the Parent dropdown in the Bulk Edit bar.
-
Search for and select the parent feature.
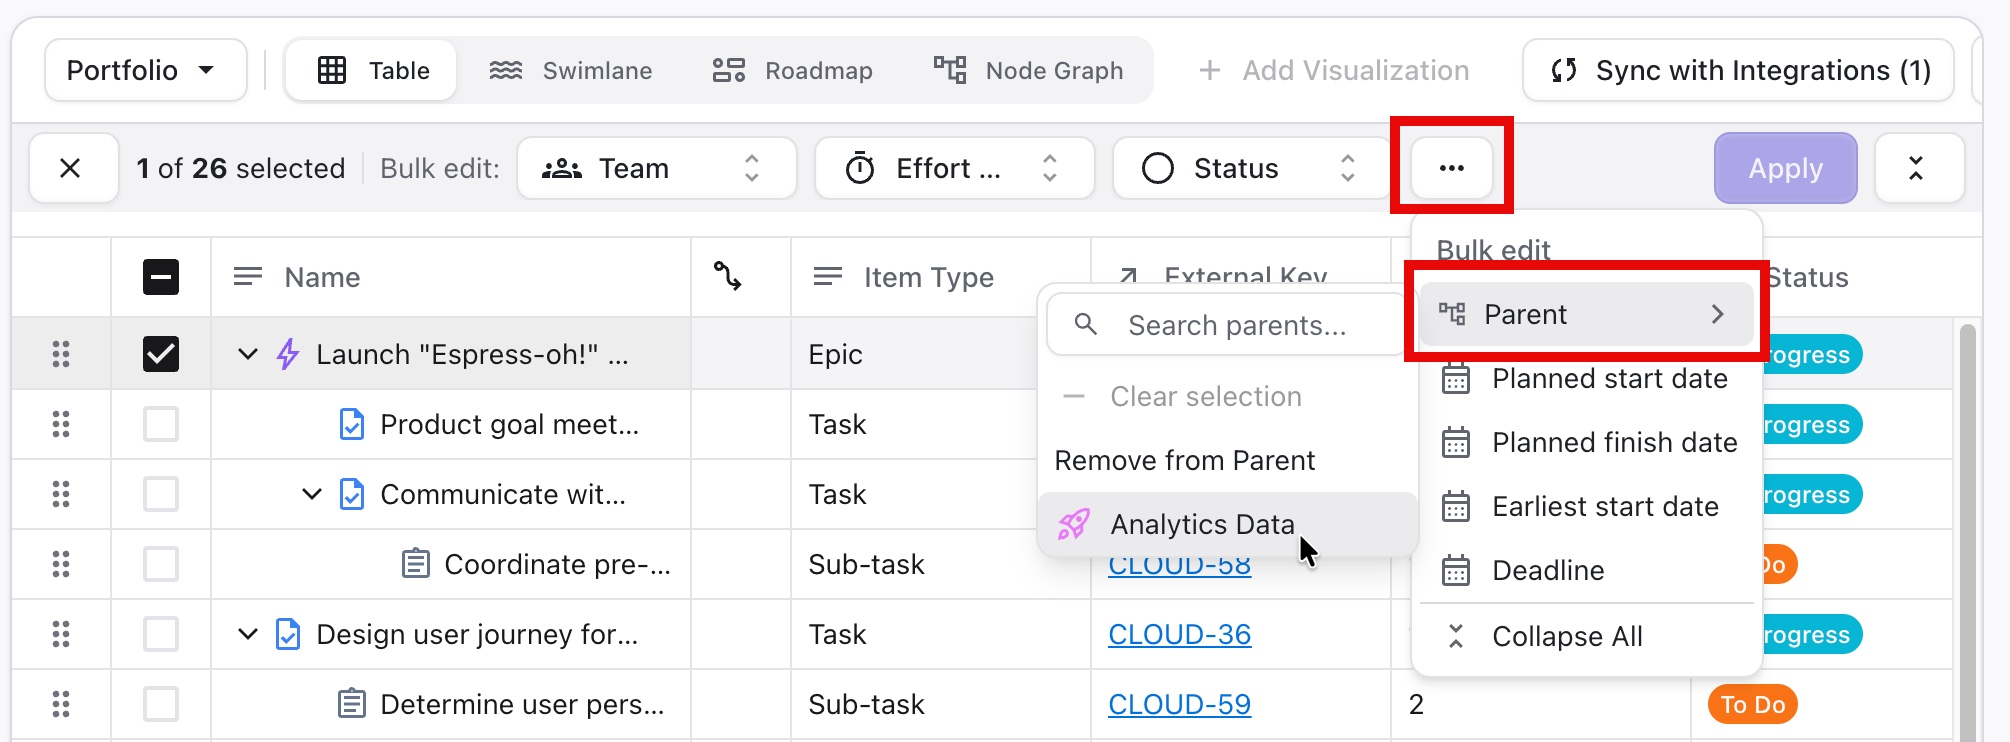
You can also move epics using drag-and-drop.
Congratulations! You’ve now created your first portfolio, starting with Loop-native initiatives and features, and then importing Jira epics.
Next Step
Build your first plan - see Creating Your First Scenario