Creating and Managing Items in Roadmunk
This article is for the Legacy Table View. This feature is currently undergoing a phased rollout to users across all deployments and may not reflect the behaviour of the version you see in Roadmunk. For more details on the Modern Table View, check out our article on Getting Started in the Table View.
Create Roadmap Items
There are two main ways of creating and adding roadmap items: creating them from scratch or importing them from a CSV. In this article, learn how to create items from scratch using the Items Table and drag-and-drop new items onto a Timeline or Swimlane.
Creating items in the Items Table
The Items Table is a tabular view of the items in a roadmap. Each row in the table is an item, and each item is made up of Fields, one Field per column in the table. With every item you create, a new row is added to the table.
Every roadmap created from scratch starts out with two default Fields: Items and Dates. Although you can create a new item just by filling in the Items field, you won't get much out of your roadmap if you don't at least enter Dates.
To go to a roadmap's Items Table, click the Items icon on the View navbar.
Create an Item
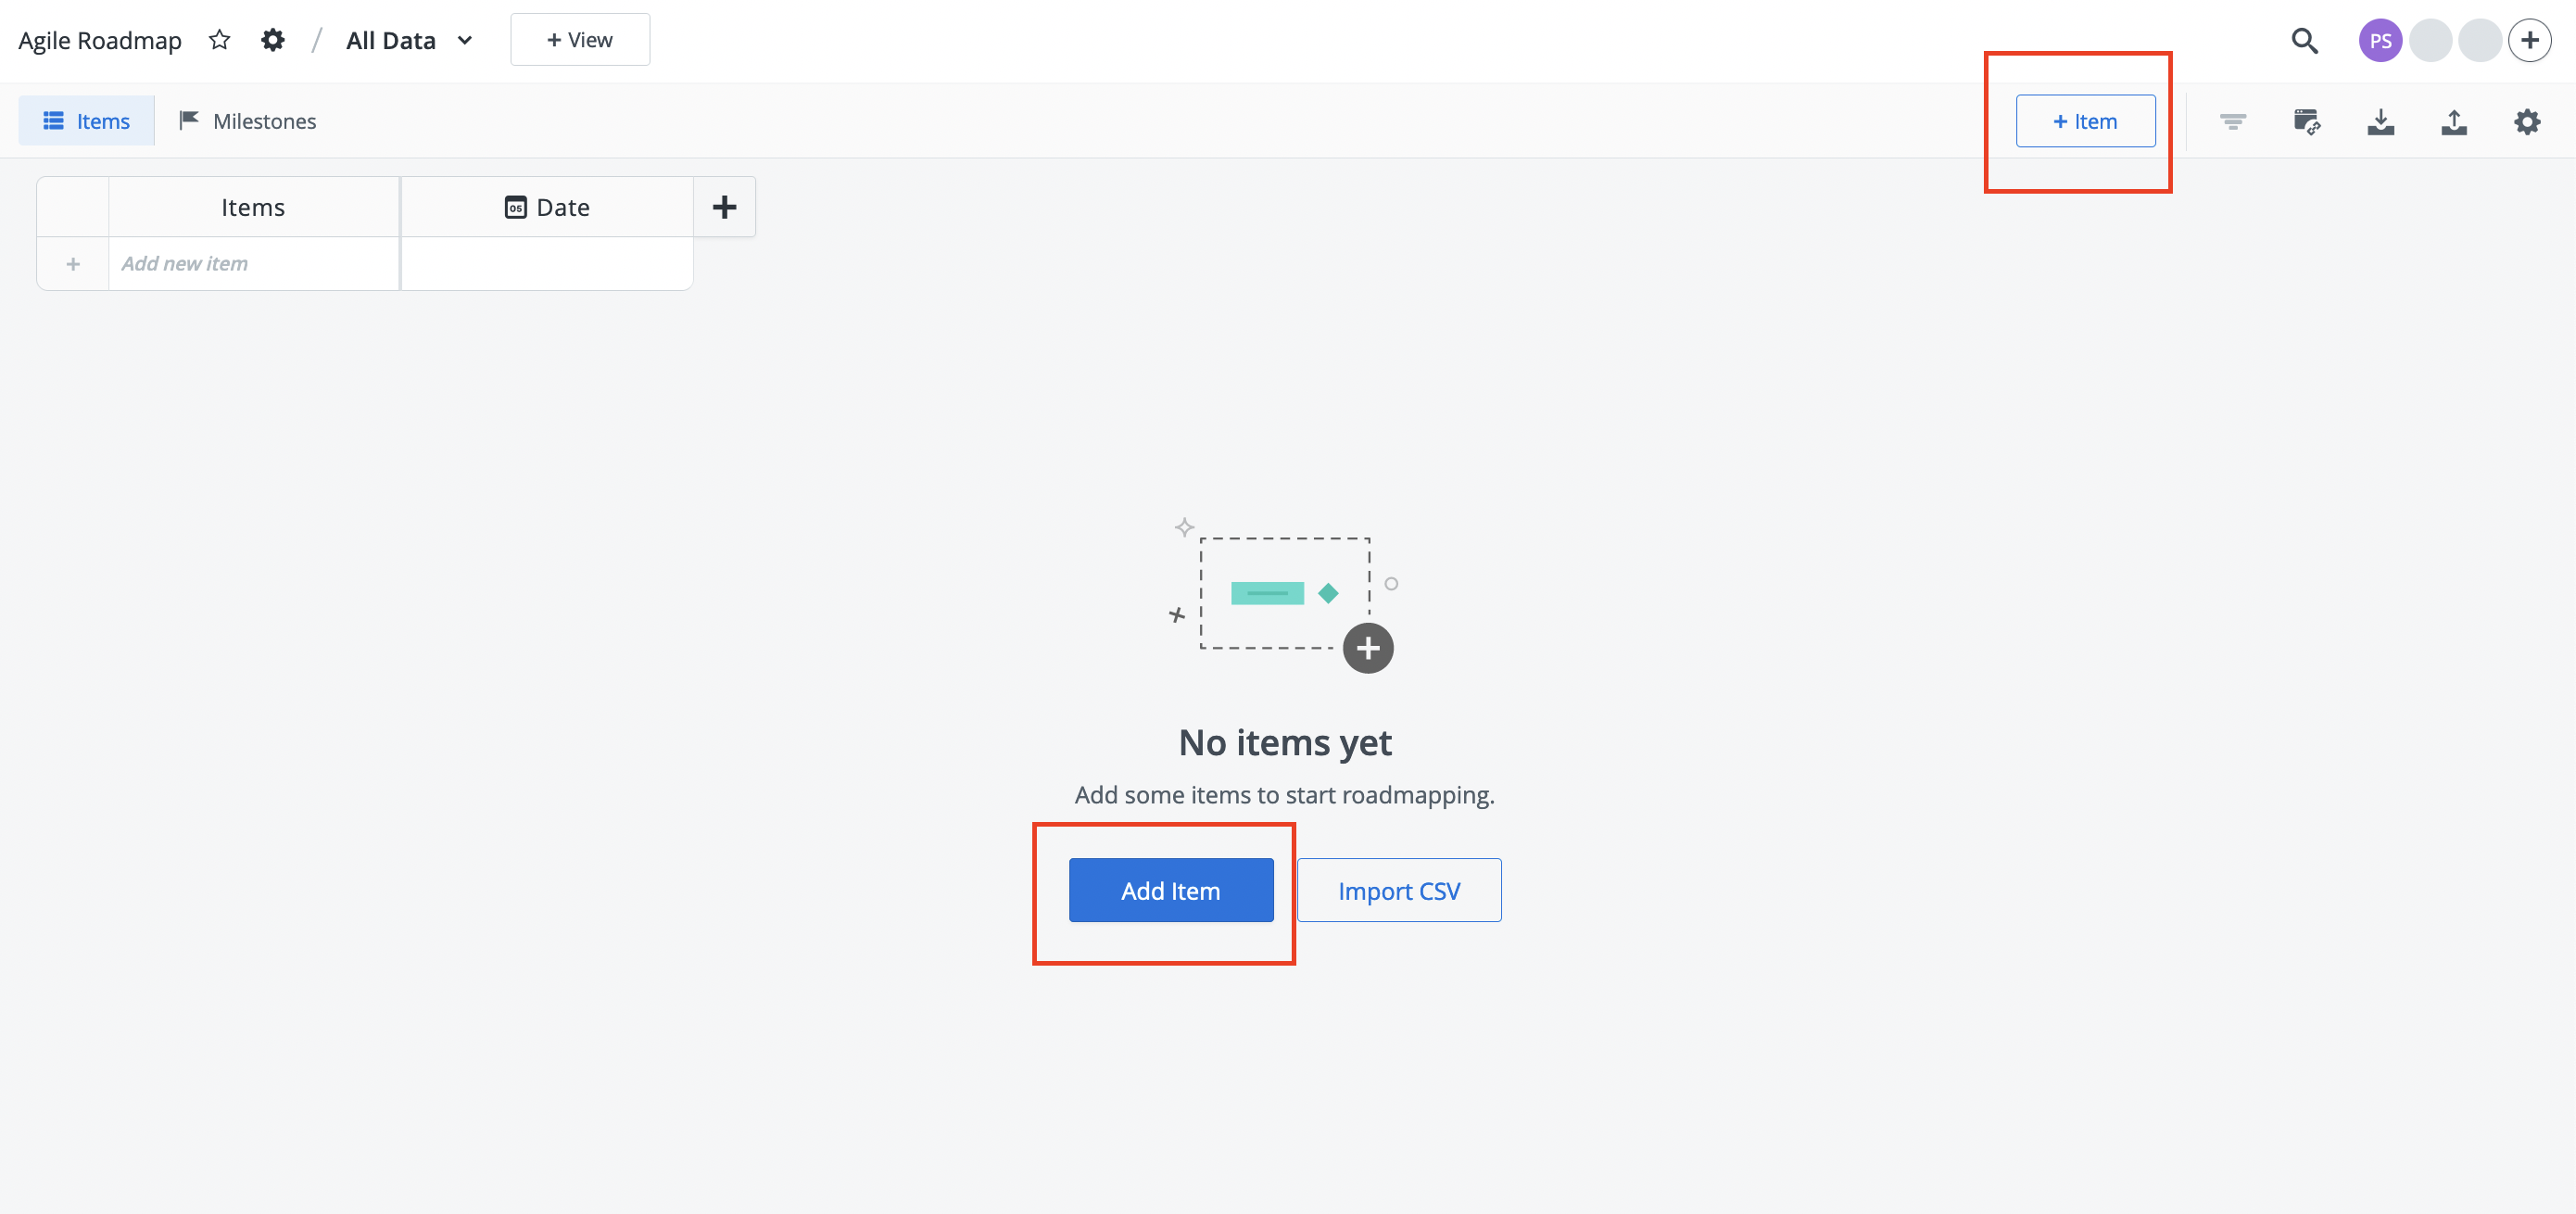
1. Click the Create New Item button (only appears when the roadmap has no items).
OR
2. On the View navbar, click the + Item button.
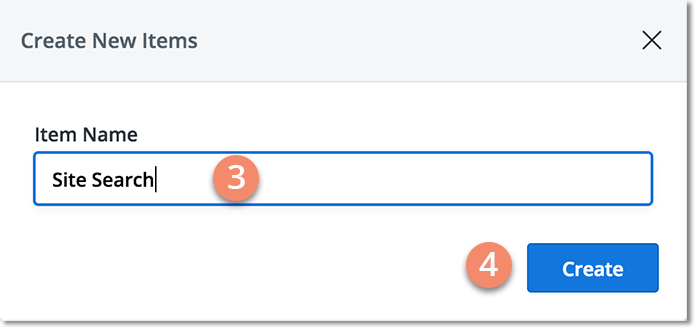
3. In the Create New Items dialogue, enter an Item Name. This is what appears in the Items field
4. Click Create and then click X to close the dialogue.
The dialogue stays open until you close it so you can continue to add more items, one after another.
Create another item from the item card
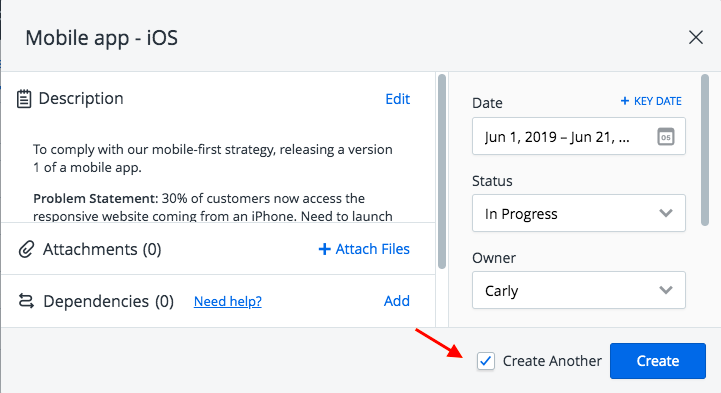
When creating multiple items that share the same fields, you can create another item by checking the "Create another" option in the item card.
This will replicate all the same fields as the previous item created except for the item's description.
Inline item creation
The Items Table also has support for inline item creation, letting you quickly add items to your roadmap.
Navigate to the Items Table.
Hover your cursor between two rows and click the green + symbol to create a new item.
Input your item name and press Enter when done. You can add consecutive items without interruption.
Set the item's date
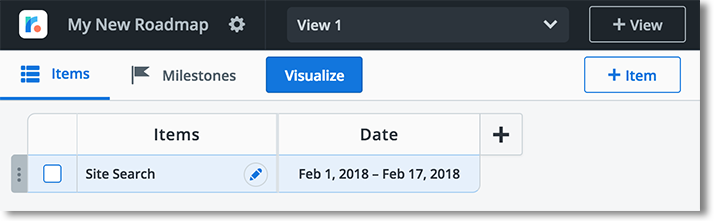
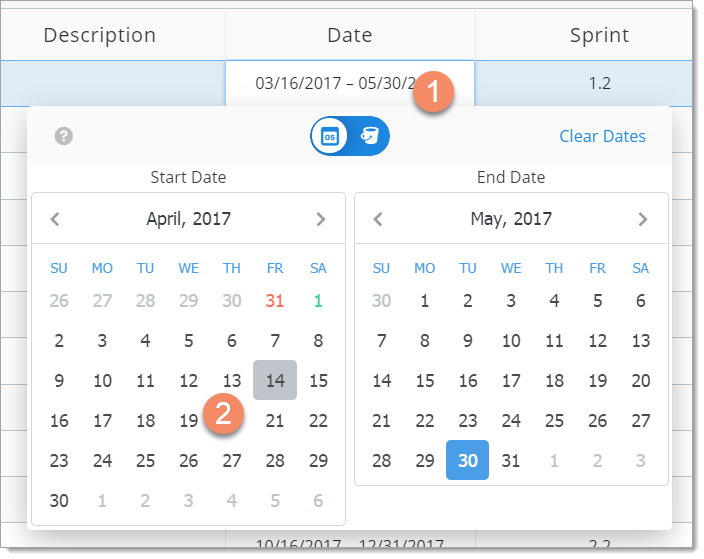
An item's date can be a range of dates or a specific date.
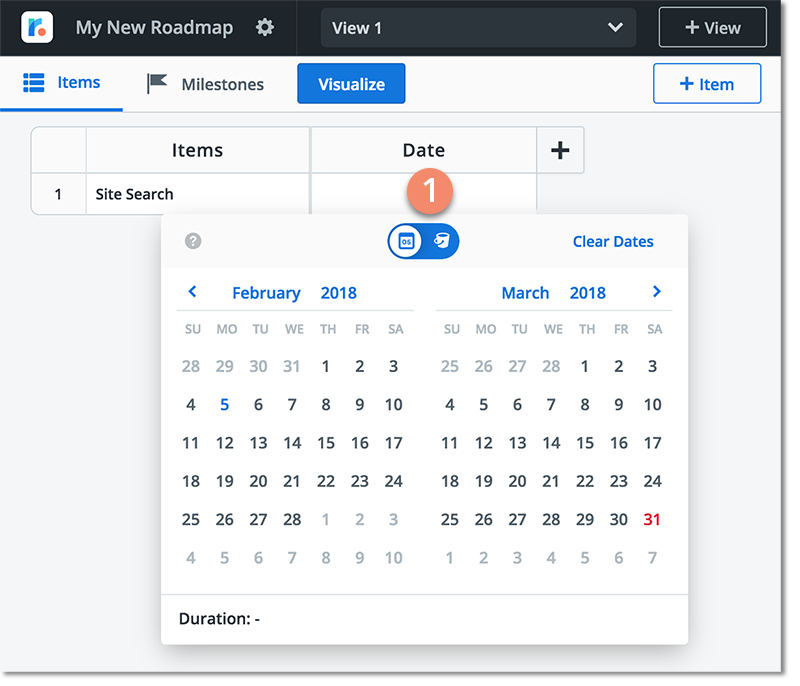
Click inside the item's Date field in the table to open the date picker.
To set a date range, select the Start Date and the End Date. To set a specific date, select it as the Start Date. The End Date is automatically set to the same date.
Click anywhere off the date picker to close it.
You can also set the date(s) in the item card.
Add the item to a time Bucket instead
If you don't have fixed dates for an item yet, or you're adding the item to a "no-dates" roadmap or a more agile roadmap that can be pivoted on flexible or "fuzzy" time in a Swimlane visualization, you can add the item to a time Bucket such as Soon or Future. Time Buckets are used instead of dates.
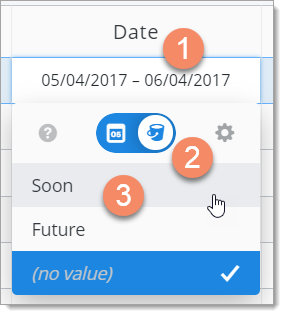
Click inside the item's Date field to open the date picker.
Use the toggle to switch to the Bucket dropdown.
Select the time Bucket you want to assign the item to (e.g., Soon or Future).
If you don't see the Bucket you want, click the Cogwheel icon to open the Bucket field card and add a new value to the list. You can also open the card by clicking the Cogwheel icon on the Date header.
If you can't add a new value to the list, it means you don't have the permissions required to edit the Bucket field.
Drag-and-dropping a new item onto a Timeline or Swimlane
The Items Table is not the only place you can add items to a roadmap. You can also add an item by creating and drag-and-dropping it onto a Timeline or Swimlane. Here's how in a Timeline.
On the View navbar, click the + Item button.
In the dialogue, make sure the toggle is set to Items.
Enter an Item Name.
Click to set the item's duration in days. The default is 90.
Click the item's Move handle and start dragging the item onto the Timeline.
When the Start and End Dates you want for the item appear, drop the item ont the Timeline.
If your Timeline has pivot headers set up for one or more fields, drop the item onto a stream that aligns with the pivot field values you want to add to the new item.
For example, if your Timeline is grouped by Category and then by Status, and you want the item to have a Category of Scalability and a Status of In Progress, drop the item onto a stream that aligns with those headers.
Dragging a new item onto a Swimlane is similar, except that the Swimlane has both vertical and horizontal pivot headers, and the horizontal header may be non-time-based.
If you need to refresh your memory on how Timelines and Swimlanes work and are created, go to Visualizations: Timelines vs. Swimlanes, Create a Timeline visualization, and Create a Swimlane visualization.
Who can add items to a roadmap?
To add an item to a roadmap, you must be the roadmap's Owner OR the roadmap must be shared with you as an Editor.
If a roadmap has been shared with you as a Viewer, you have view-only access to the roadmap and can't add items to it. As a Viewer, the + Item button on the View navbar will be grayed out and you will see a View Only icon on the Roadmap navbar.
View Items in the Items Table View
The Items Table provides a tabular view of a roadmap's data and makes it easy for you to browse and work with the roadmap's items, including hiding and showing fields, sorting and ranking items, and changing the order of the columns (fields) in the table.
Hiding and showing fields
The hide/show field feature in the Items Table is a great way to get more horizontal screen space so you minimize the need to scroll horizontally.
Hide a field

Mouse over the field you want to hide until the Hide Field (-) icon appears, then mouse over the icon and click it when it turns blue.
Show a hidden field
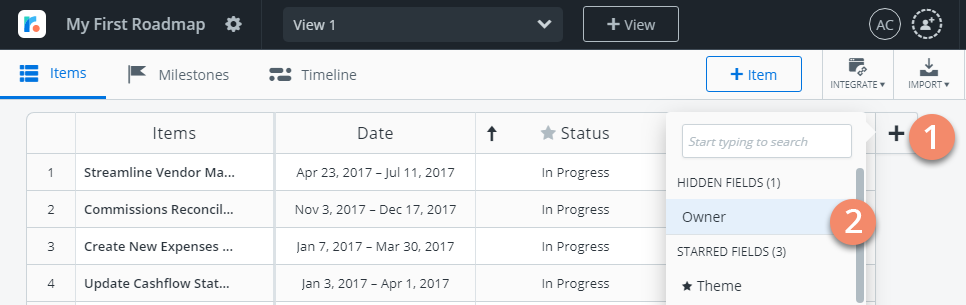
Click the Add Field (+) icon that's at the end of the table header.
In the dropdown's Hidden Fields list, click the field you want to show.
Sorting items
By default, items in the Items Table are ranked in the order they were added (first item at the top). The Items Table's sort feature lets you sort items in alphabetical order by any field in the table.
NOTE: Multi-Select fields do not have sorting ability
Sort items
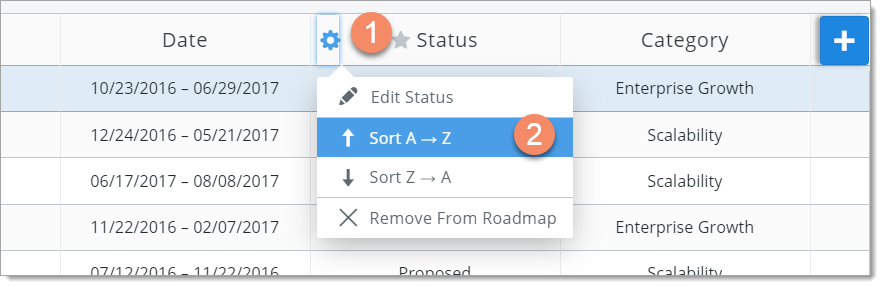
Mouse over the field you want to sort by until the Cogwheel icon appears, then mouse over the icon and click it when it turns blue.
In the dropdown, select Sort A to Z for ascending order or Sort Z to A for descending order.
You'll know which field items are sorted by and in what order by the up or down arrow next to the field's name.
Toggle between ascending and descending, and reset the sort order

You can click the arrow next to the field to toggle between ascending and descending alphabetical order.
To reset the sort order to the default, click Clear Sort.
Ranking items
The ranking feature lets you change the default ranking of items in the Items Table by moving one or more items around on the table so they're ranked in a way that's more logical for you (for example, by level of importance or complexity).
To change an item's ranking in the table, click its Item Ranking column and drag-and-drop the item onto its new location.
IMPORTANT: Unlike sorting, there's no way to automatically reset items back to their original ranking order. Once you move an item to a different place in the table, it stays there until you move it again.
Re-order table columns
You can also change the order of the field columns in the Items Table.
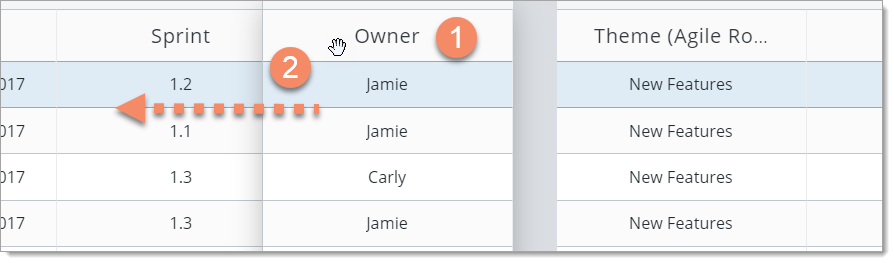
Click the header of the column you want to move.
Drag-and-drop the column onto its new location.
Browsing and finding items
Find the items you’re looking for by either using pages at the bottom of the Items Table and browsing or use the Item search to find a specific item.
Choose between entering the page number you want to see, moving forward or backward a single page, or to the beginning or end of your table.
Bulk updating items
If you hover over the top left of the Items Table, there is a checkbox that will select all items on the page. With Select All clicked, this is a great way to bulk update field values of items or push multiple items to Jira at once.
View All Data
Every roadmap you create in Roadmunk comes with an All Data view in addition to the default View 1. The All Data view displays ALL the items in a roadmap in the Items Table, which makes it a handy, useful reference for when your roadmap has over 100 views!
Opening the All Data view
You open the All Data view the same way you open any other view.
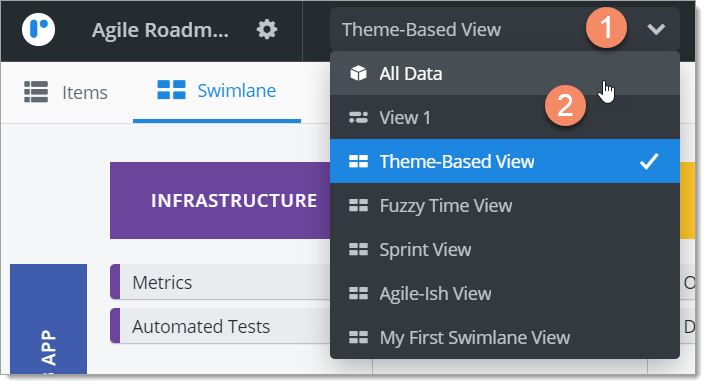
On the Roadmap navbar, click to open the View dropdown.
In the dropdown, select All Data.
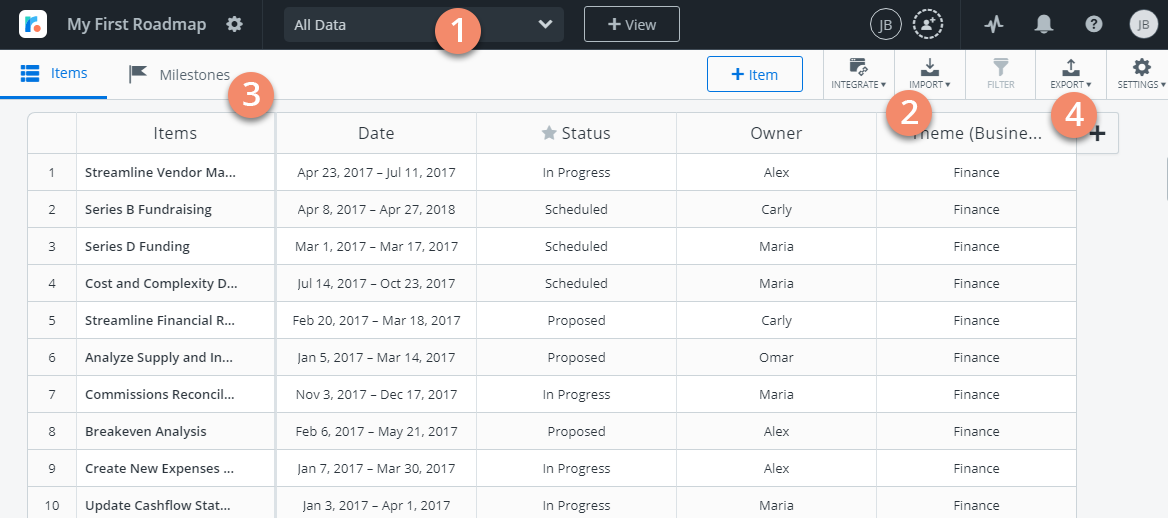
The All Data view looks and works like any other view in the Items Table with a few important differences:
All Data is selected in the View dropdown instead of a roadmap view.
The Filter icon on the View navbar is grayed-out and disabled. That's as it should be, since All Data provides an unfiltered view of the roadmap's items.
The Milestones Table is accessible from the View navbar but the navbar doesn't provide access to a Timeline or Swimlane. To access the roadmap's visualizations, you have to select the corresponding view in the View dropdown.
The Export icon on the View navbar is enabled so you can export ALL the items to a CSV file.
Why do you need the All Data view?
There are a number of reasons why you need the All Data view.
Access the entire, unfiltered data set. Unless you haven't created any visualizations for your roadmap, the All Data view is the only way you can access the roadmap's entire, unfiltered data set.
For more on filtering, go to Filter items in this collection.
Access milestones. If your roadmap has only Swimlane visualizations, the All Data view is the only way you can access the roadmap's Milestones Table. And even if the roadmap does have a Timeline visualization, All Data is still the only way you can access milestones unfiltered.
For more on milestones, go to Milestones in the Quick Guide and Add milestones to a roadmap in this collection.
Export ALL items and ALL milestone to CSV. Although you can export a roadmap's items or milestones to a CSV file from any view, a view's filterset is applied when you do an export, so only the filtered items or milestones are exported. All Data is the only way you can export ALL the items or milestones in the roadmap.
For more on exporting items and milestones, go to Export roadmap items and milestones.
View and Edit Item Details
You can edit an item's individual field values directly in the Items Table. But if you want to view or edit everything associated with a roadmap item in one go, the item card is the better choice.
You can open the item card from any of the roadmap's Timelines or Swimlanes as well as from the Items Table.
Editing item details in the Items Table
Edit individual fields
Other than Description, you can edit any field directly in the Items Table.
To edit an item's name/title (Items field):
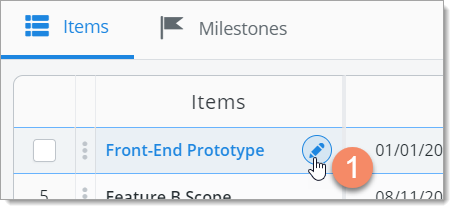
Mouse over the Items field and click the Edit icon.
Edit the text as needed.
Click out of the field to save your changes.
To edit the item's Description field, click the Items field to open the item card (see Viewing and editing item details in the item card further on in the article).
To edit an item's Date:
Click the item's Date to open the date picker.
In the date picker, select a new Start Date and/or End Date. If you want a specific date instead of a date range, select the same date for both.
If the item's Date is a time Bucket, change the value like you would for any List field.
To edit a List field:
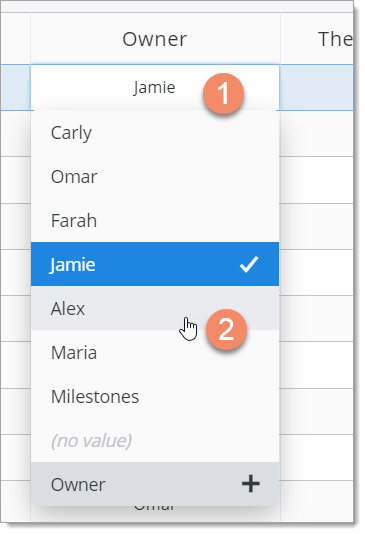
Click in the item's field in the table.
In the field dropdown, select the new value.
If you're editing a Multi-select List field, where you can select more than one value, you can edit the field by adding and/or removing one or more values.
To edit a Free-form Text field:
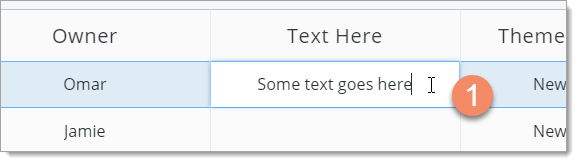
Click inside the field in the table and make your edits.
When you're done, click anywhere outside the field.
Bulk Select and Edit items
If you want to change a field in more than one item to the same value (for example, change Status to Backlog), you can do a bulk edit.
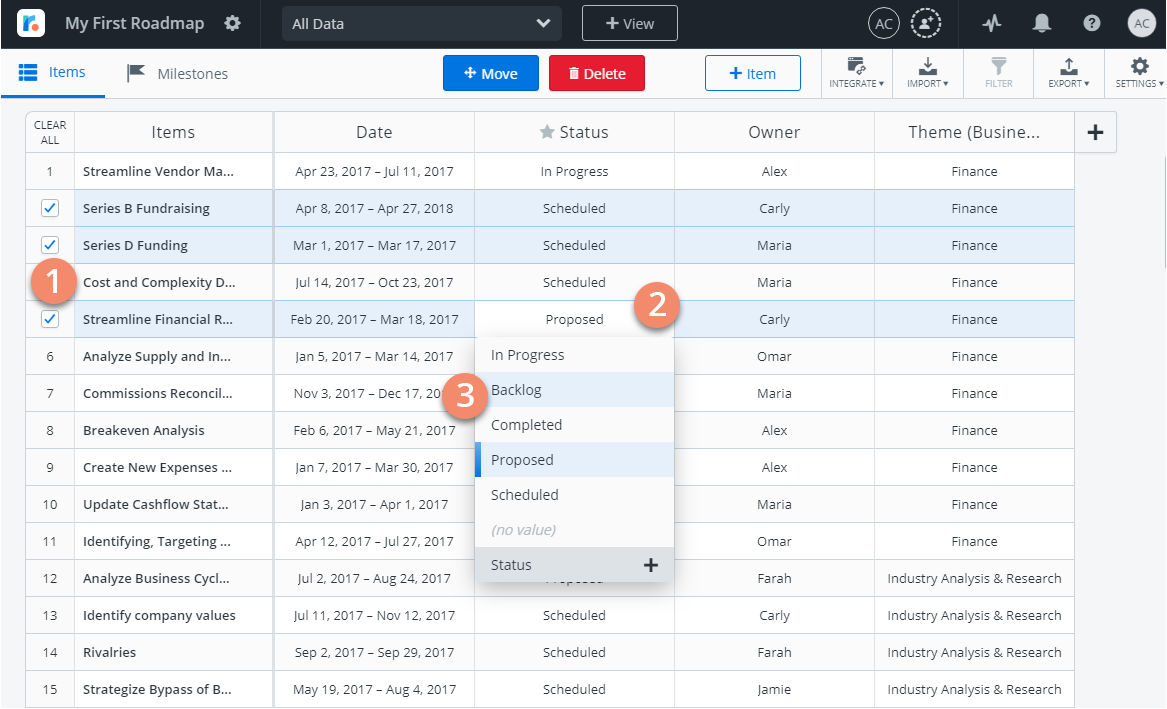
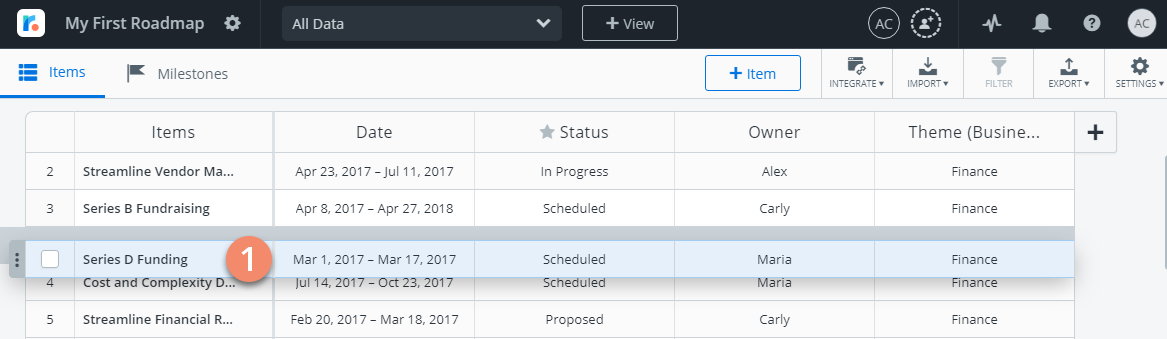
To begin, select the items you would like to edit in the table's first column. This can be done in one of three ways:
Selecting the items manually using the checkboxes on the left-hand rank column.
Clicking and dragging your mouse over the items or fields you would like to edit
Holding Shift + Click to select multiple sequential rows (shown in the screenshot above)
Once the items have been selected, you can easily click into any of the field values or dates to complete a bulk update of those values across multiple items.
A checkmark in the column indicates the item is selected. To unselect an item, click its checkmark. To unselect all items, click Clear All at the top of the column.
Viewing and editing item details in the item card
You can open an item card from any of the roadmap's Timelines or Swimlanes as well as from the Items Table.
Open the item card
From the Items Table:
Click the item's Items field.
From a Timeline or Swimlane:
Click the item on the Timeline or Swimlane.
What can you do in the item card?
The item card is like command central for items, where you can view and edit everything associated with an item.
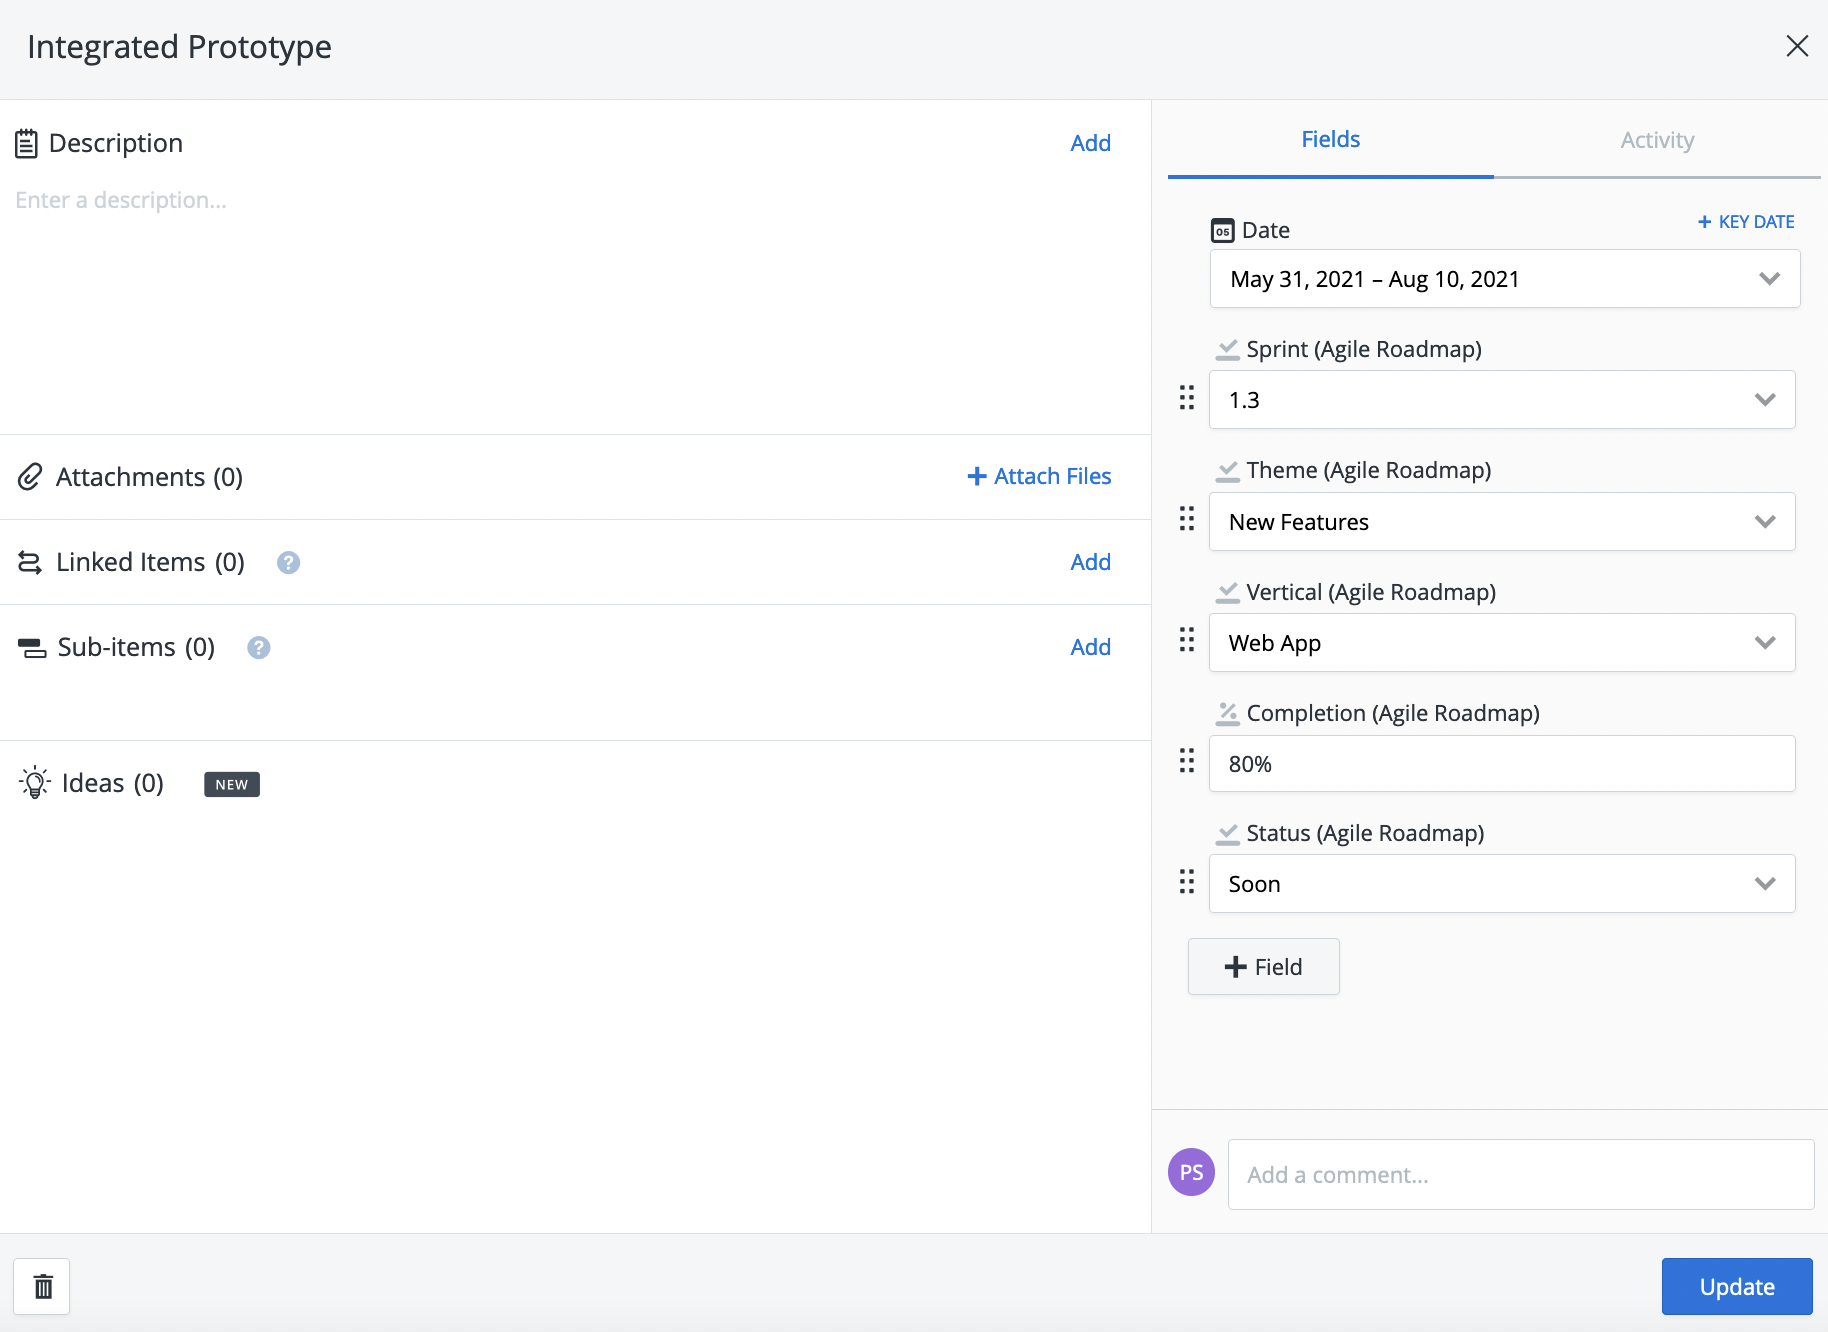
Default fields - Edit the item's default fields: Item/Name/Title, Date, and Description. You can also delete the item by clicking the Garbage can icon.
Activity and Fields tabs - The Activity tab displays the item's Activity Feed. The Activity Feed is a log of all the changes made to an item since it was created, including posted comments and mentions. The Fields tab lets you view and edit the item's custom fields (more about this below).
Item attachments - Upload, view, download, and delete file attachments. To learn more, go to the section below - Add, View and Download Item Attachments.
Linked Items - With Roadmunk and Linked Items, you can create multiple relationships between Items and roadmaps across your organization to allow for better collaboration and strengthened decision making. To learn more, go to Working with Linked Items.
Sub-items - Sub-items allow you to break your initiatives into smaller, more manageable pieces and groups, which allow you and your team to easily visualize the parent & child relationship in both the Items Table and Roadmap views. To learn more, go to Introduction to Sub-items.
Ideas - To ensure visibility into the ideas and feedback that impacted your team's decision-making process when roadmapping, Roadmunk's Idea module allows you to link ideas to roadmap items in your roadmaps and quickly view the ideas from the respective item cards in your roadmap views. To learn more, go to Attaching Ideas to Roadmap Items.
Edit default fields
To edit the item's Name/Title:
Click inside the field and enter the new value.
To edit the item's Date:
Change the item's Date in the date picker (see Editing items in the Items Table above).
To edit the item's Description:
Click inside the field and start typing. You can use Markdown in the description. Click the ... icon below the textbox to get help on Markdown syntax.
Edit custom fields
You can edit all the item's custom fields in the Fields tab, including List, Multi-select List, and Free-form Text fields.
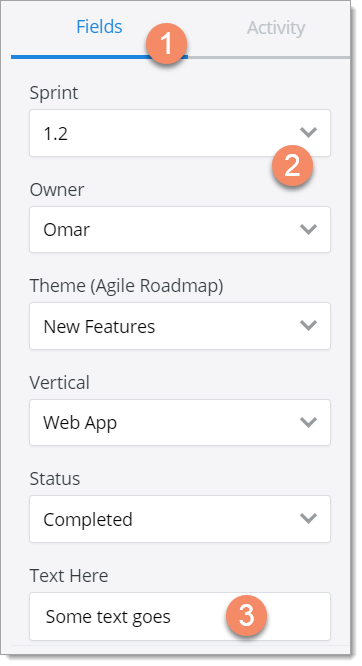
Click Fields to open the Fields tab.
To edit a List field, click to open the field's dropdown and select a new value. If it's a Multi-select List field, edit the field by adding and/or removing one or more values.
To edit a Free-form Text field, click inside the field and start typing.
Editing item details in a Timeline or Swimlane
You can edit an item's details directly in a Timeline or Swimlane (to add an item to a Timeline or Swimlane, see Create roadmap items).
Drag an item on a Timeline to change its Date
To change an item's Start and End Dates directly in a Timeline, drag the item horizontally along its stream until you see the new date range.
Drag an item on a Timeline or Swimlane to edit field values
If you need to edit an item's field values, you don't need to go back to the Items Table. Just drag-and-drop the item vertically and/or horizontally across the pivot headers. The item's pivot field values are automatically updated based on the item's new location in the Timeline or Swimlane.
To lock an item's date on a Timeline as you drag it vertically, press and hold the Shift key. Other items will move out of the and new streams will be added if necessary.
Drag and add new streams in a Timeline
To move a stream on a Timeline, click and drag the stream up or down to its new location. Other streams will move out of the way as needed. To add a new stream, drag an item up or down and drop it onto the newly created stream. You can also add a new item and drag it to the bottom of any header row, then drag the new stream to where you want it in the Timeline.
Who can edit items in a roadmap?
To edit items in a Roadmunk roadmap you must be the roadmap's Owner or the roadmap must be shared with you as an Editor.
If a roadmap has been shared with you as Viewer, you have view-only access to the roadmap. This means you can view items in the Items Table and all roadmap Timelines and Swimlanes, and view item details in the item card (View items in the Items Table). You can also post item comments and mentions in the item card.
Add, view and download item attachments
You can attach files to a roadmap's items through the item card, each item card supports files up to 10MB in size. With that being said, please note that the file attachment allowed per item is different from the total item attachment allowed for your account - you can check out here to see the total item attachment available for your account.
You can also view, download, and delete file attachments.
To open the item card, click the item in a Timeline or Swimlane, or click Description in the Items Table.
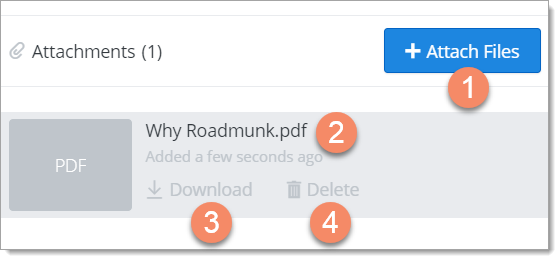
To attach a file to the item, click the + Attach Files button.
To view an attached file, click the file name on the file's panel.
To download an attached file, mouse over the file's panel and click the Download icon that appears.
To delete an attached file, mouse over the file's panel and click the Delete icon when it appears, then click Delete It in the confirmation popup.
Who can add, download, and delete file attachments?
To attach a file to a roadmap item and delete attached files, you must be the roadmap's Owner OR the roadmap must be shared with you as an Editor.
If the roadmap has been shared with you as Viewer, you have view-only access to the roadmap and can only view and download attached files. When you open the item in the item card, only the filename link and the Download icon will be enabled.
Attachments are only visible to Account Admins, Collaborators and Reviewers on your account, and will not be visible to users accessing roadmaps through published URLs.
Move Multiple Items on a Roadmap at Once
To move multiple items in a roadmap, use your mouse to drag and highlight the items that you want to move.
NOTE: You can select individual items to move on a roadmap by holding down the Shift key. If you want to reverse any immediate changes made to items on a roadmap, simply press the Undo button that appears at the bottom left of the screen. A maximum of 30 items can be moved at once.
Timeline View
Swimlane View
The bulk actions menu
Using your mouse to drag and highlight the items that you want to move will bring up the bulk actions menu. This menu will let you:
View how many items are selected
String items
Waterfall items
Move items by a specific date
Delete items
NOTE: You can only string and waterfall items that share the same Header.
String items
Select the items that you want to move.
On bulk actions menu, select the String icon.
All your selected items will be strung in a single stream starting from the location of the top most selected item.
NOTE: The item with the earliest start date will take the first position in the newly formed string of items. Subsequent items are adjusted to have their dates set to be back-to-back.
Waterfall items
Select the items that you want to move.
On bulk actions menu, select the Waterfall icon.
All your selected items will waterfall into their individual streams.
NOTE: Items will waterfall in order of their start dates, the dates of individual items are not changed.
Moving items by date
You can choose to move your selected items forwards, backwards, or by a specific date.
Select the items that you want to move.
On bulk actions menu, select the Move Items By Date icon.
Input the number of Weeks, Months or Years you want to move your items forwards or backwards by.
Inputting a negative number will move your items backwards.
To move selected items to proportionally begin on a specific date, set the toggle to MOVE TO and provide a date. The item with the earliest start date will take the first position in the newly formed placement of items, and everything following will stay preserved.
NOTE: Although you can drag your mouse over items you want to move in both Timeline and Swimlane view, certain actions such as being able to string, waterfall, or move items by a specific date, are only available in the Timeline view.
Who can move, string, or waterfall multiple items on a roadmap?
To move, string, or waterfall multiple items on a roadmap, you must be the roadmap's Owner OR the roadmap must be shared with you as an Editor. If a roadmap has been shared with you as Viewer, you have view-only access to the roadmap and cannot move, string, or waterfall multiple items.
Move items to another roadmap
The Items Table move feature lets you move items from one roadmap to another. You can move items to an existing roadmap or you can create a new roadmap for the items.
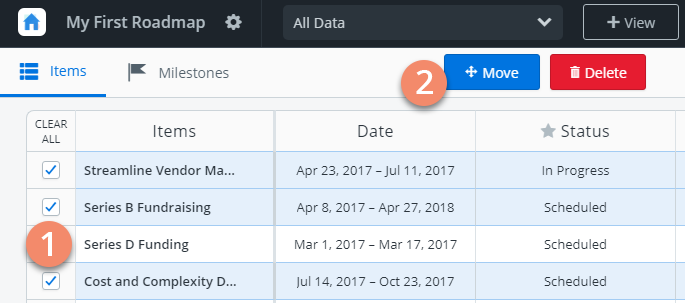
Select the items in the table you want to move.
Click the Move button that appears above the table.
In the Move Items dialog, select the roadmap in the Select a Roadmap dropdown OR click + Create New Roadmap, then click the Next button.
NOTE: If you choose to create a new roadmap for the items, you'll go through the additional step of entering a roadmap Name and Fiscal Year-End, then go through Step 3 again to select the new roadmap.Check the confirmation message and click Move Items.
You cannot move parent items or sub-items to another roadmap together. In order to do this, undo the parent/subitem relationship and move the items. Moving items will also not include field values for roadmap level fields. You are able to move items that have linked items on the current or other roadmap (it will create a cross-roadmap item link)
Items which are linked to Jira cannot be moved
Duplicate Items
From the Items table view, users are able to create exact copies of items by selecting the items that they're looking to duplicate and selecting the Duplicate button in the roadmapping toolbar. This will create an exact duplicate of the items on the roadmap while retaining all dates, field values, and sub-items associated with the original item.
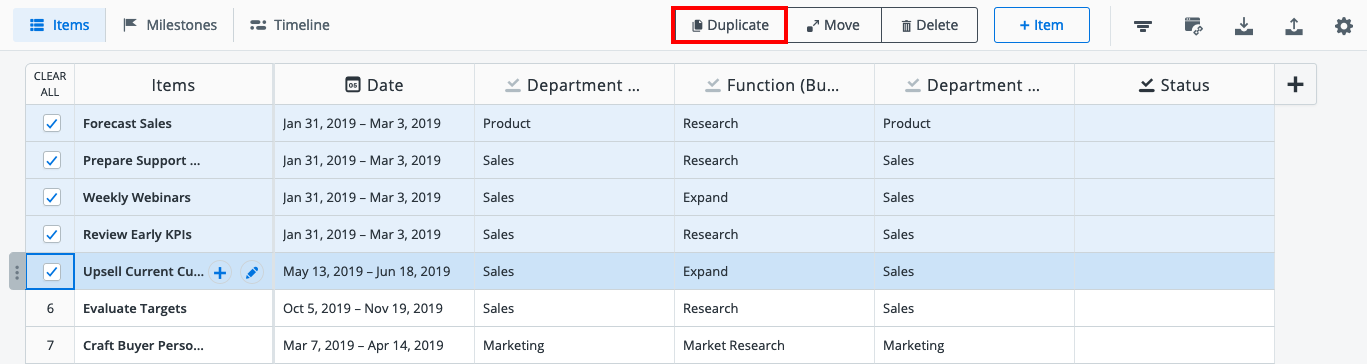
Attachments, linked items, and ideas will not be present in duplicated item. Duplicating sub items will keep them as sub items. Duplicating a parent item is going to also duplicate all the sub items underneath it
Duplicate items are technically copies and not the original items, so comments and item activity will not be carried over to the duplicate and will remain on the original.
Delete Items
There are a number of ways to delete a roadmap's items. You can bulk-delete items in the Items Table. You can delete an item in a Timeline or Swimlane. And you can delete an item in the item card.
Deleting items from a roadmap deletes them from the Roadmunk account. You can't undo an item delete. Once you delete an item, it's gone forever.
Bulk-deleting items in the Items Table
You can bulk-delete items by selecting them in the Items Table.
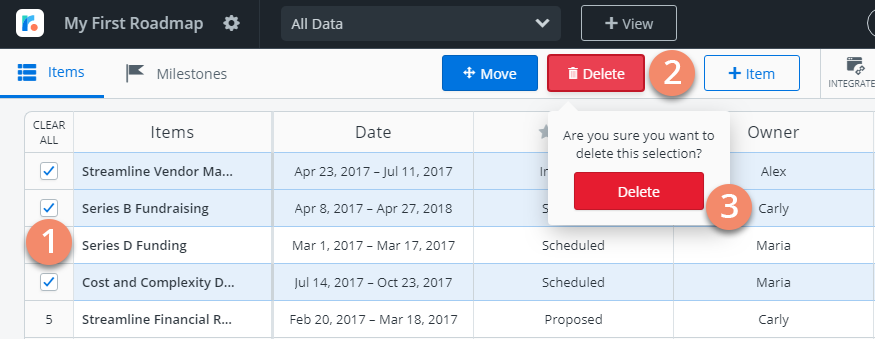
Select the items in the table you want to delete.
Click the Delete button that appears on the View navbar.
Click the Delete button in the dropdown to confirm the deletion.
Deleting items from a roadmap deletes them from the Roadmunk account. You can't undo an item delete. Once you delete an item, it's gone forever.
Deleting an item in a Timeline or a Swimlane
On the Timeline or Swimlane, right-click the item you want to delete, then click the Delete popup that appears.
In the Confirm Deletion dialog, click Delete it.
Deleting an item in the item card
Open the item card
From the Items Table:
Click the item's Description field.
From a Timeline or Swimlane:
Click the item on the Timeline or Swimlane.
Delete the item

In the item card, click the Delete item icon.
In the confirmation popup that appears, click Delete It.
Who can delete roadmap items?
To delete items in a Roadmunk roadmap you must be the roadmap's Owner or the roadmap must be shared with you as an Editor. If a roadmap has been shared with you as Viewer, you have view-only access.
To find out more, go to Sharing and collaboration in the Quick Guide.
WARNING: Deleting items is permanent
Deleting items from a roadmap deletes them from the Roadmunk account. You can't undo an item delete. Once you delete an item, it's gone forever.