Adding Tableau Report Gadget
-
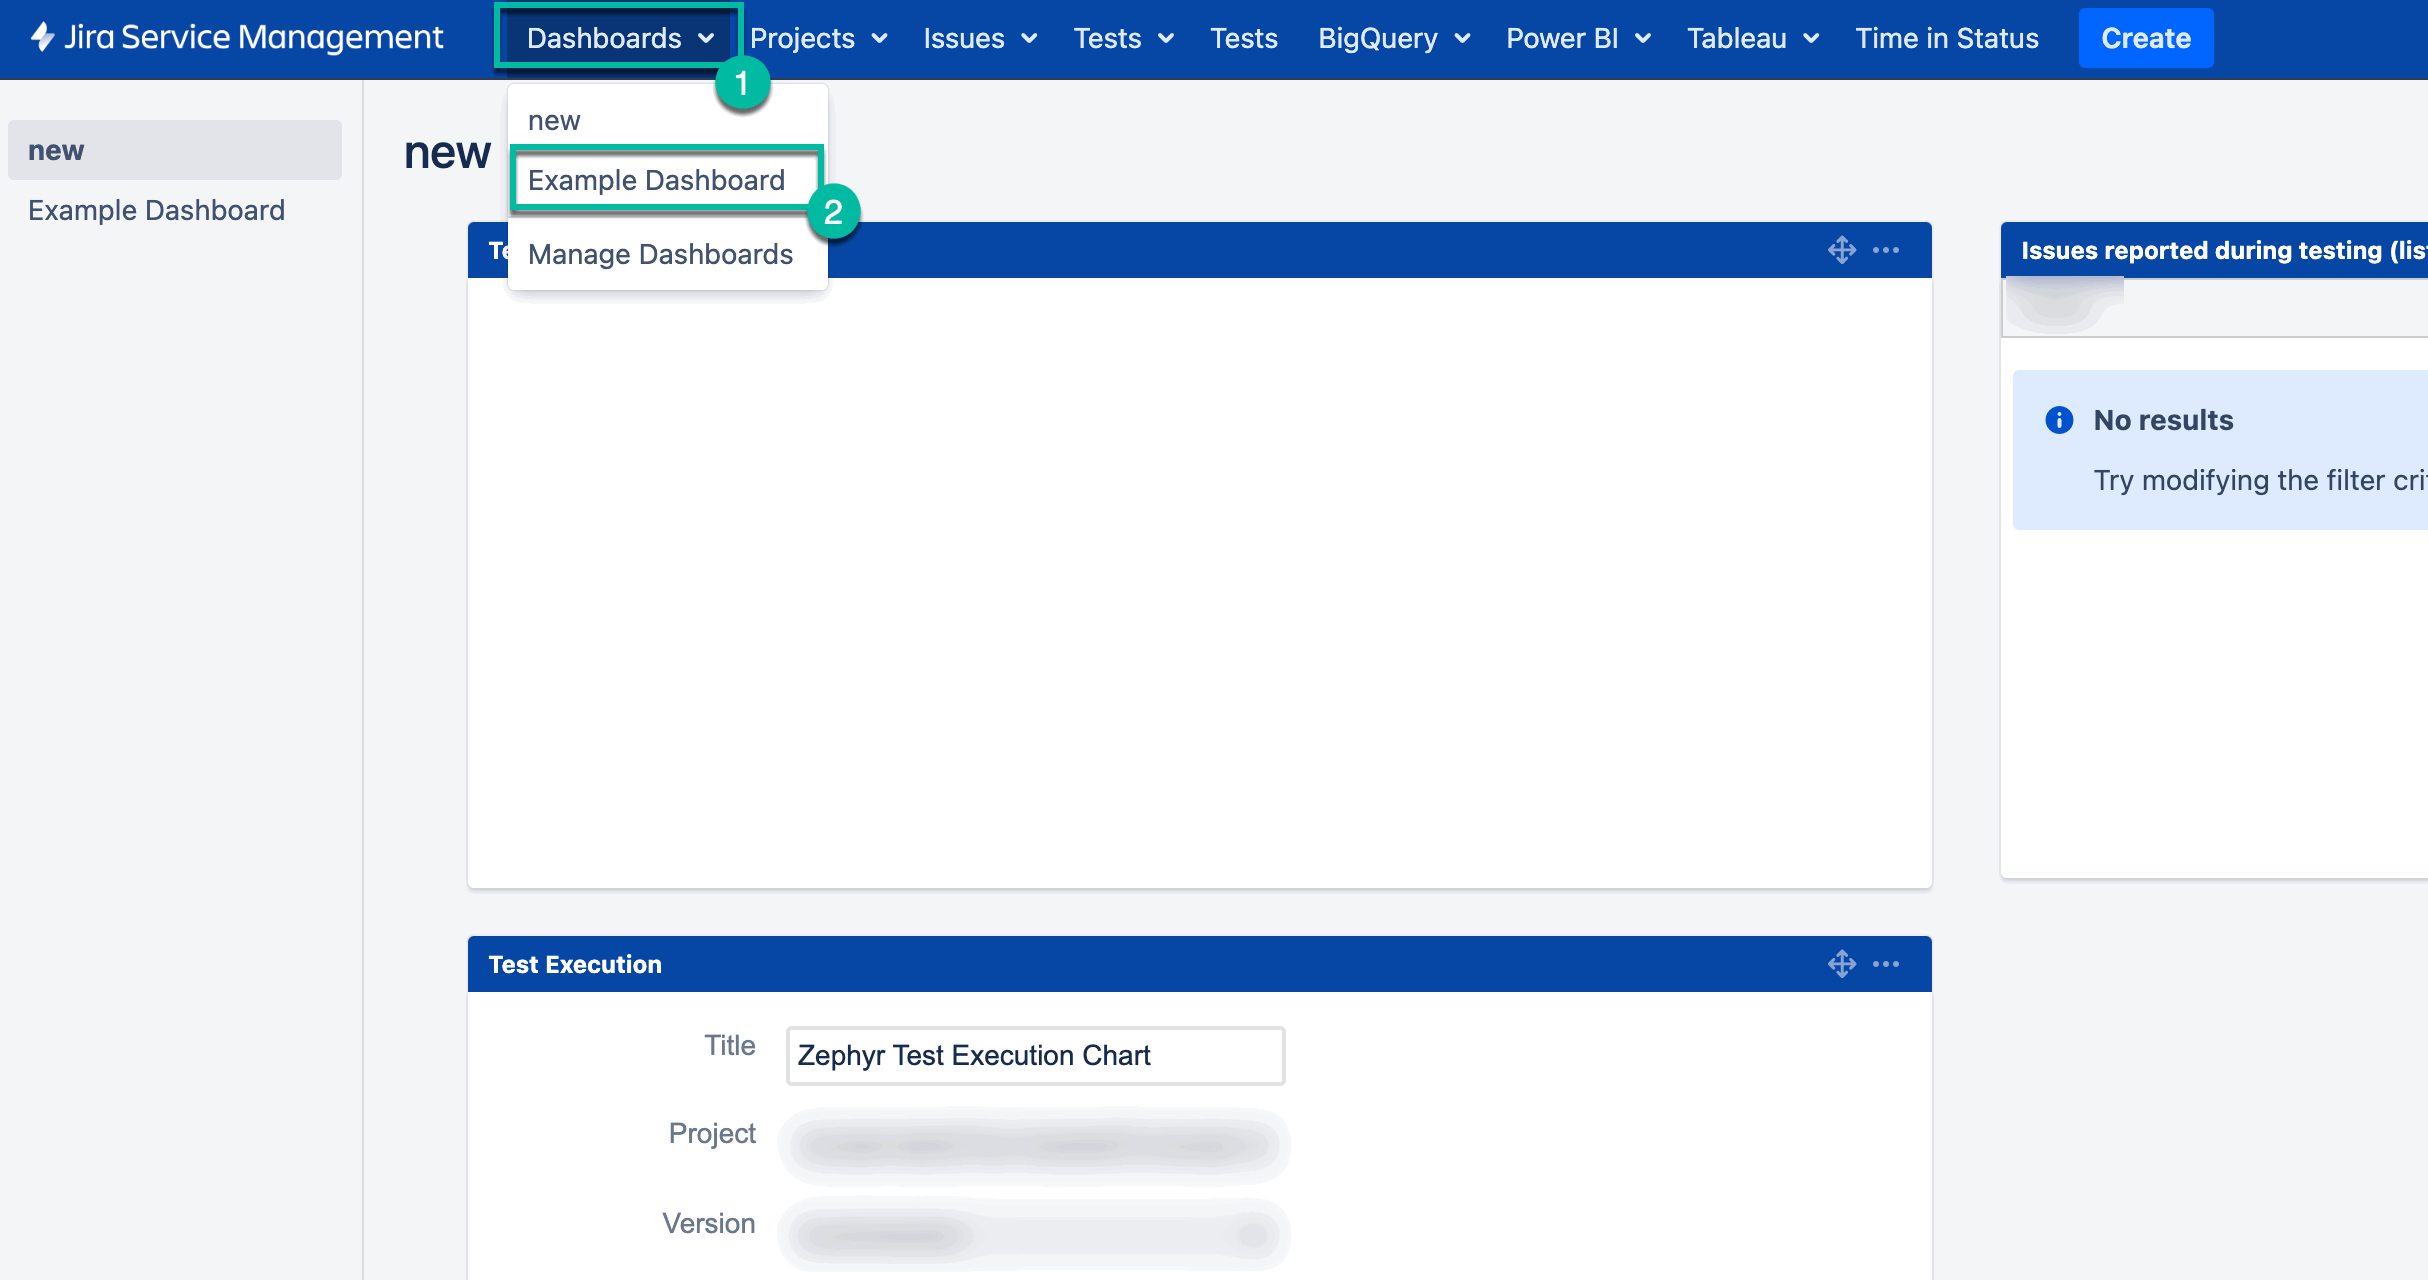
Being signed in to your Jira instance, select Dashboards, and then select the dashboard you want to add a gadget to.
-
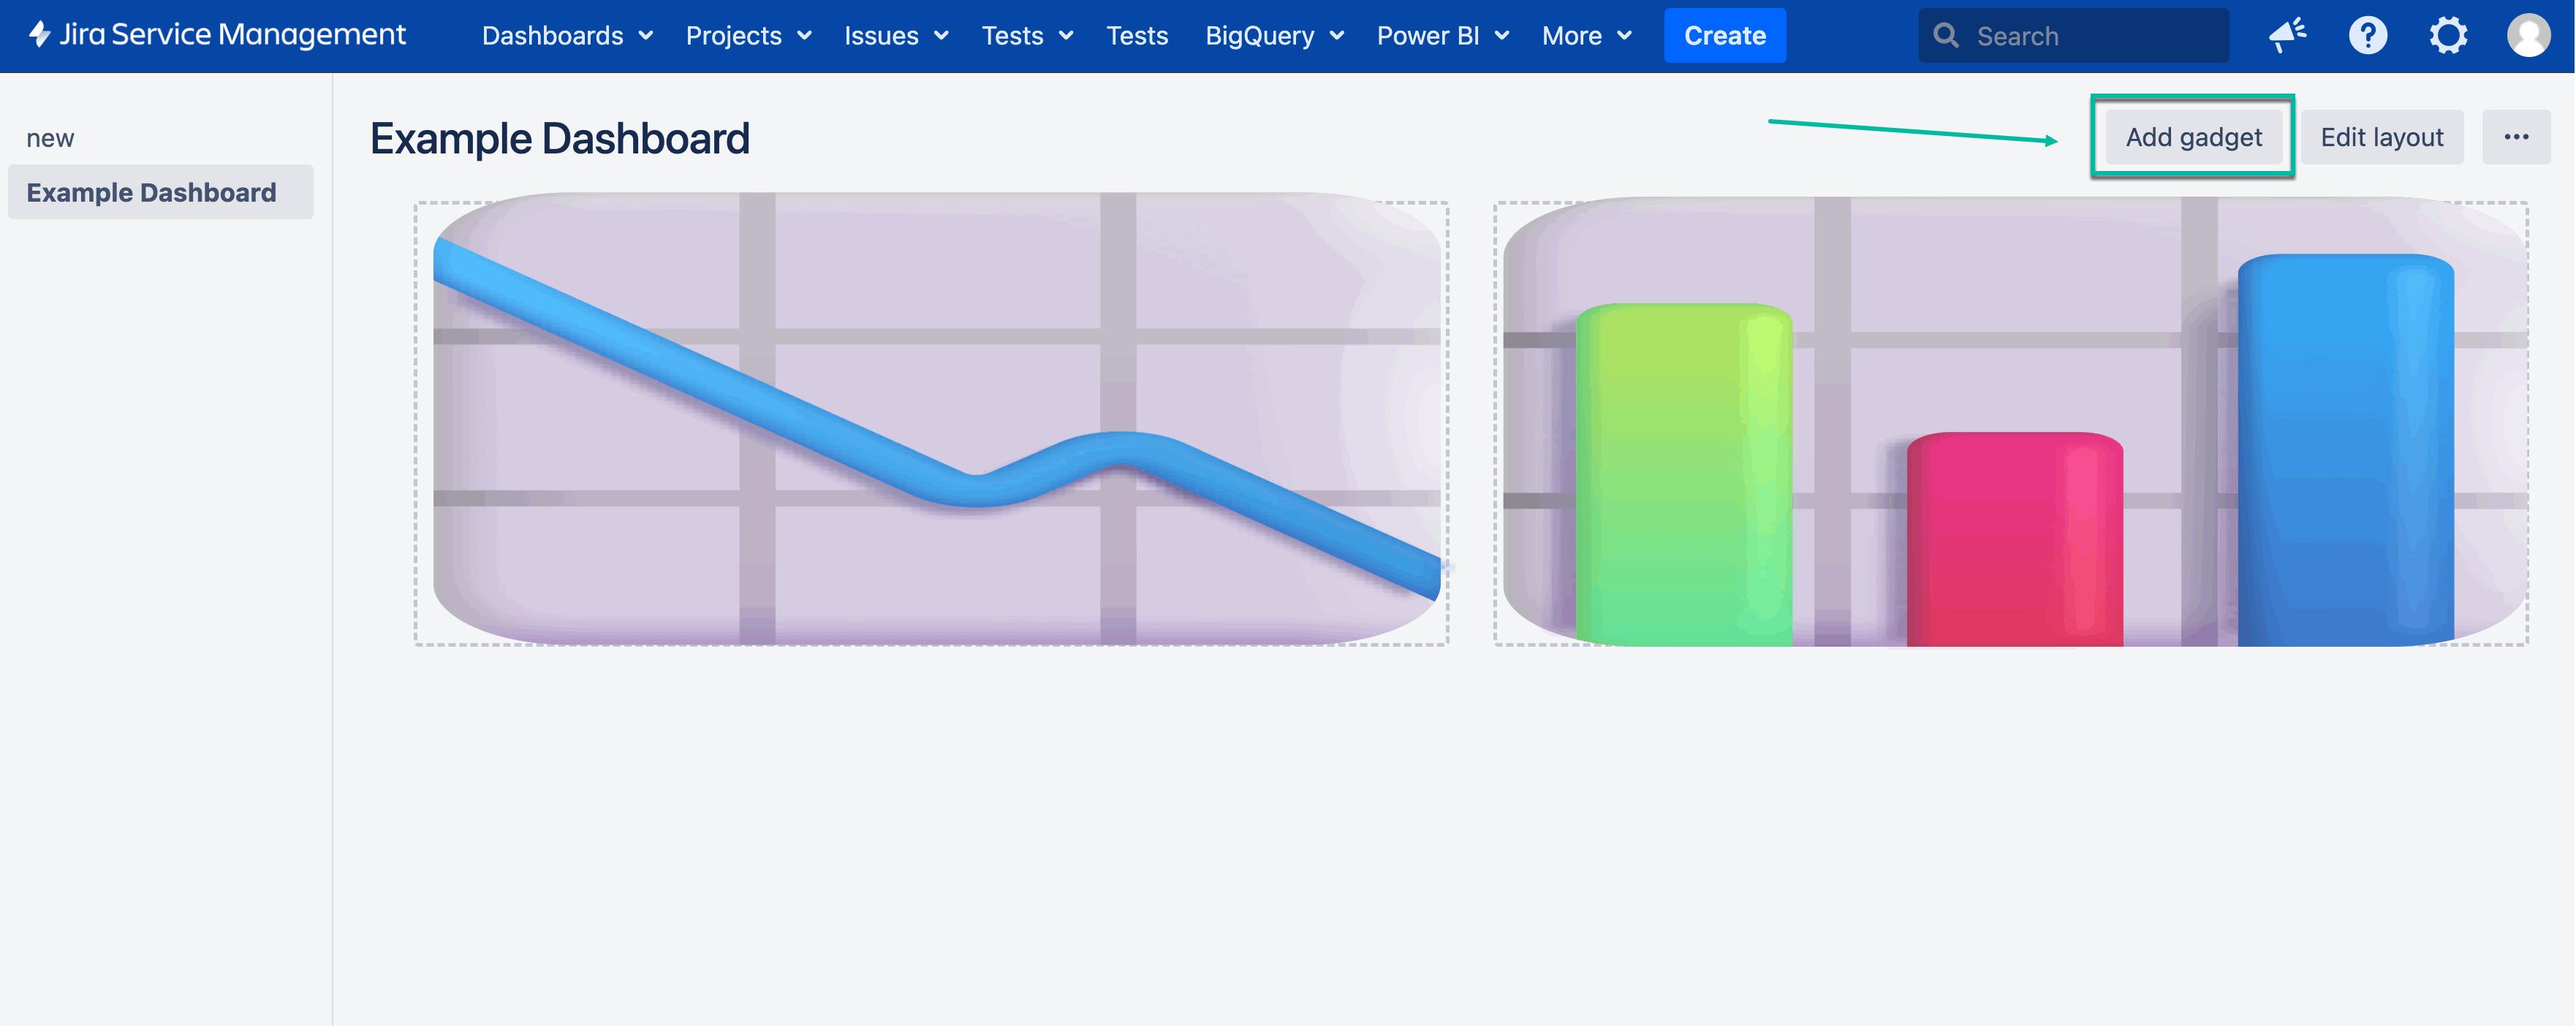
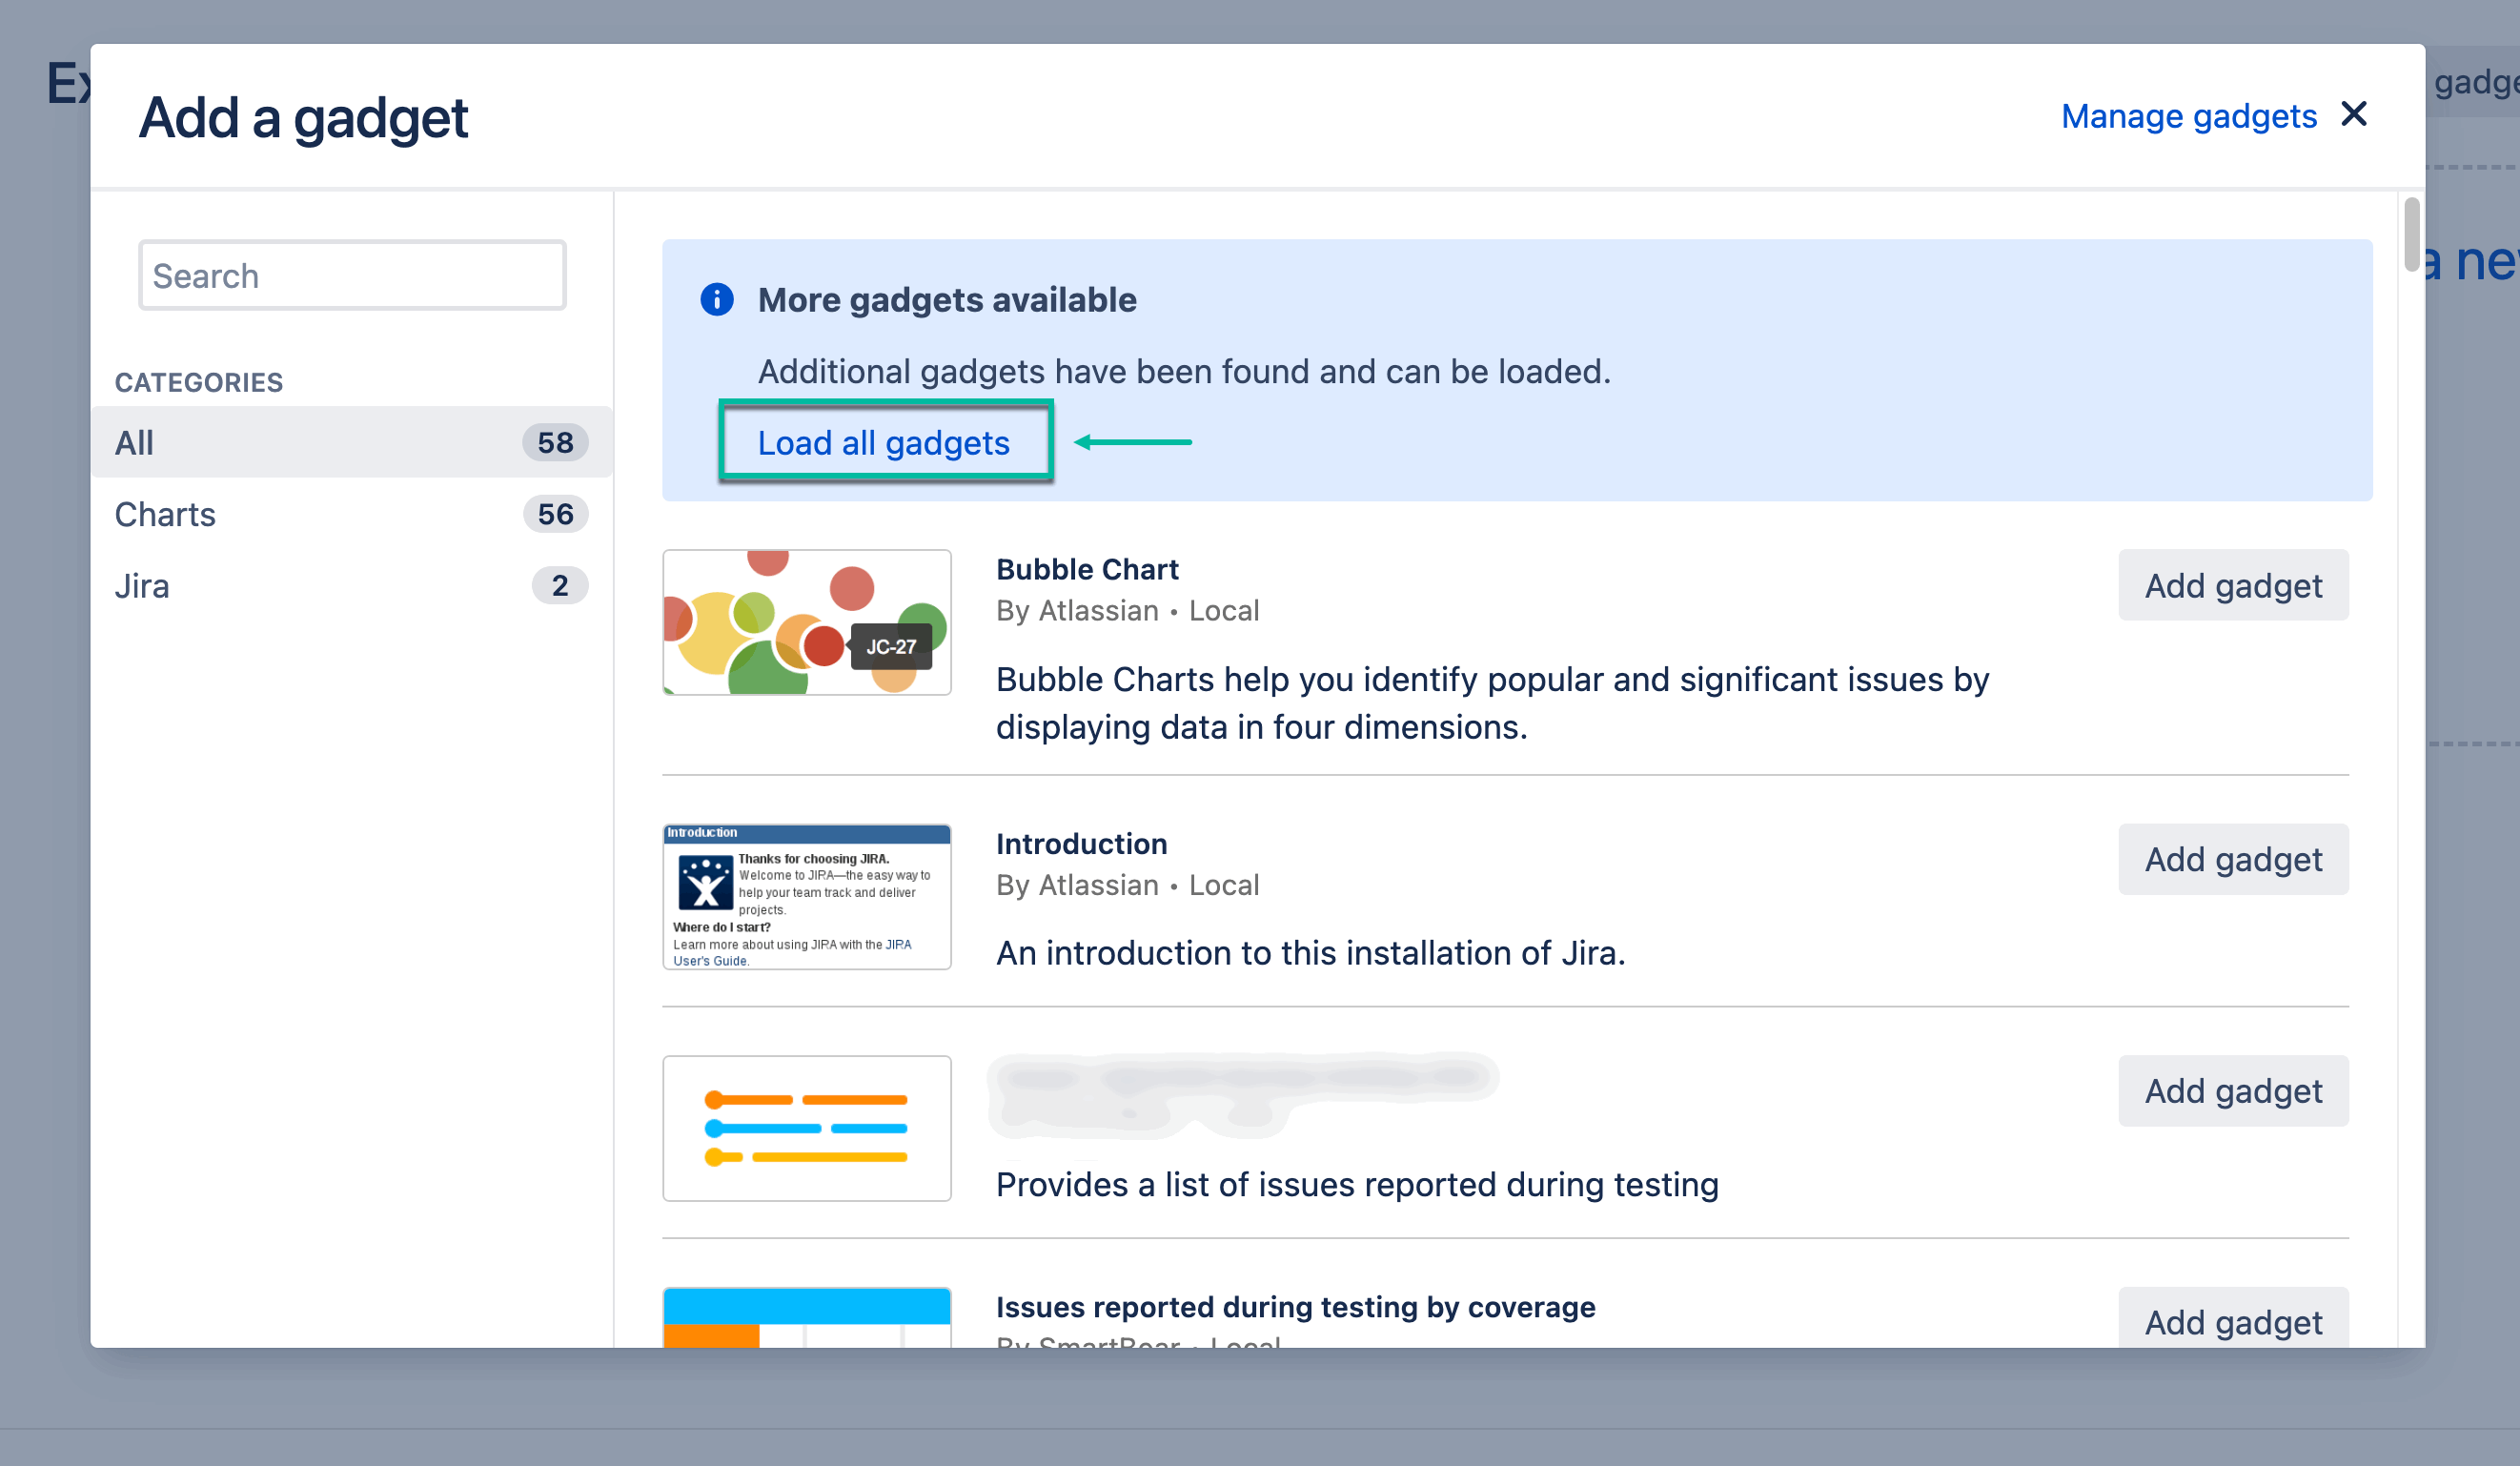
Select Add gadget.
-
Select Load all gadgets.
-
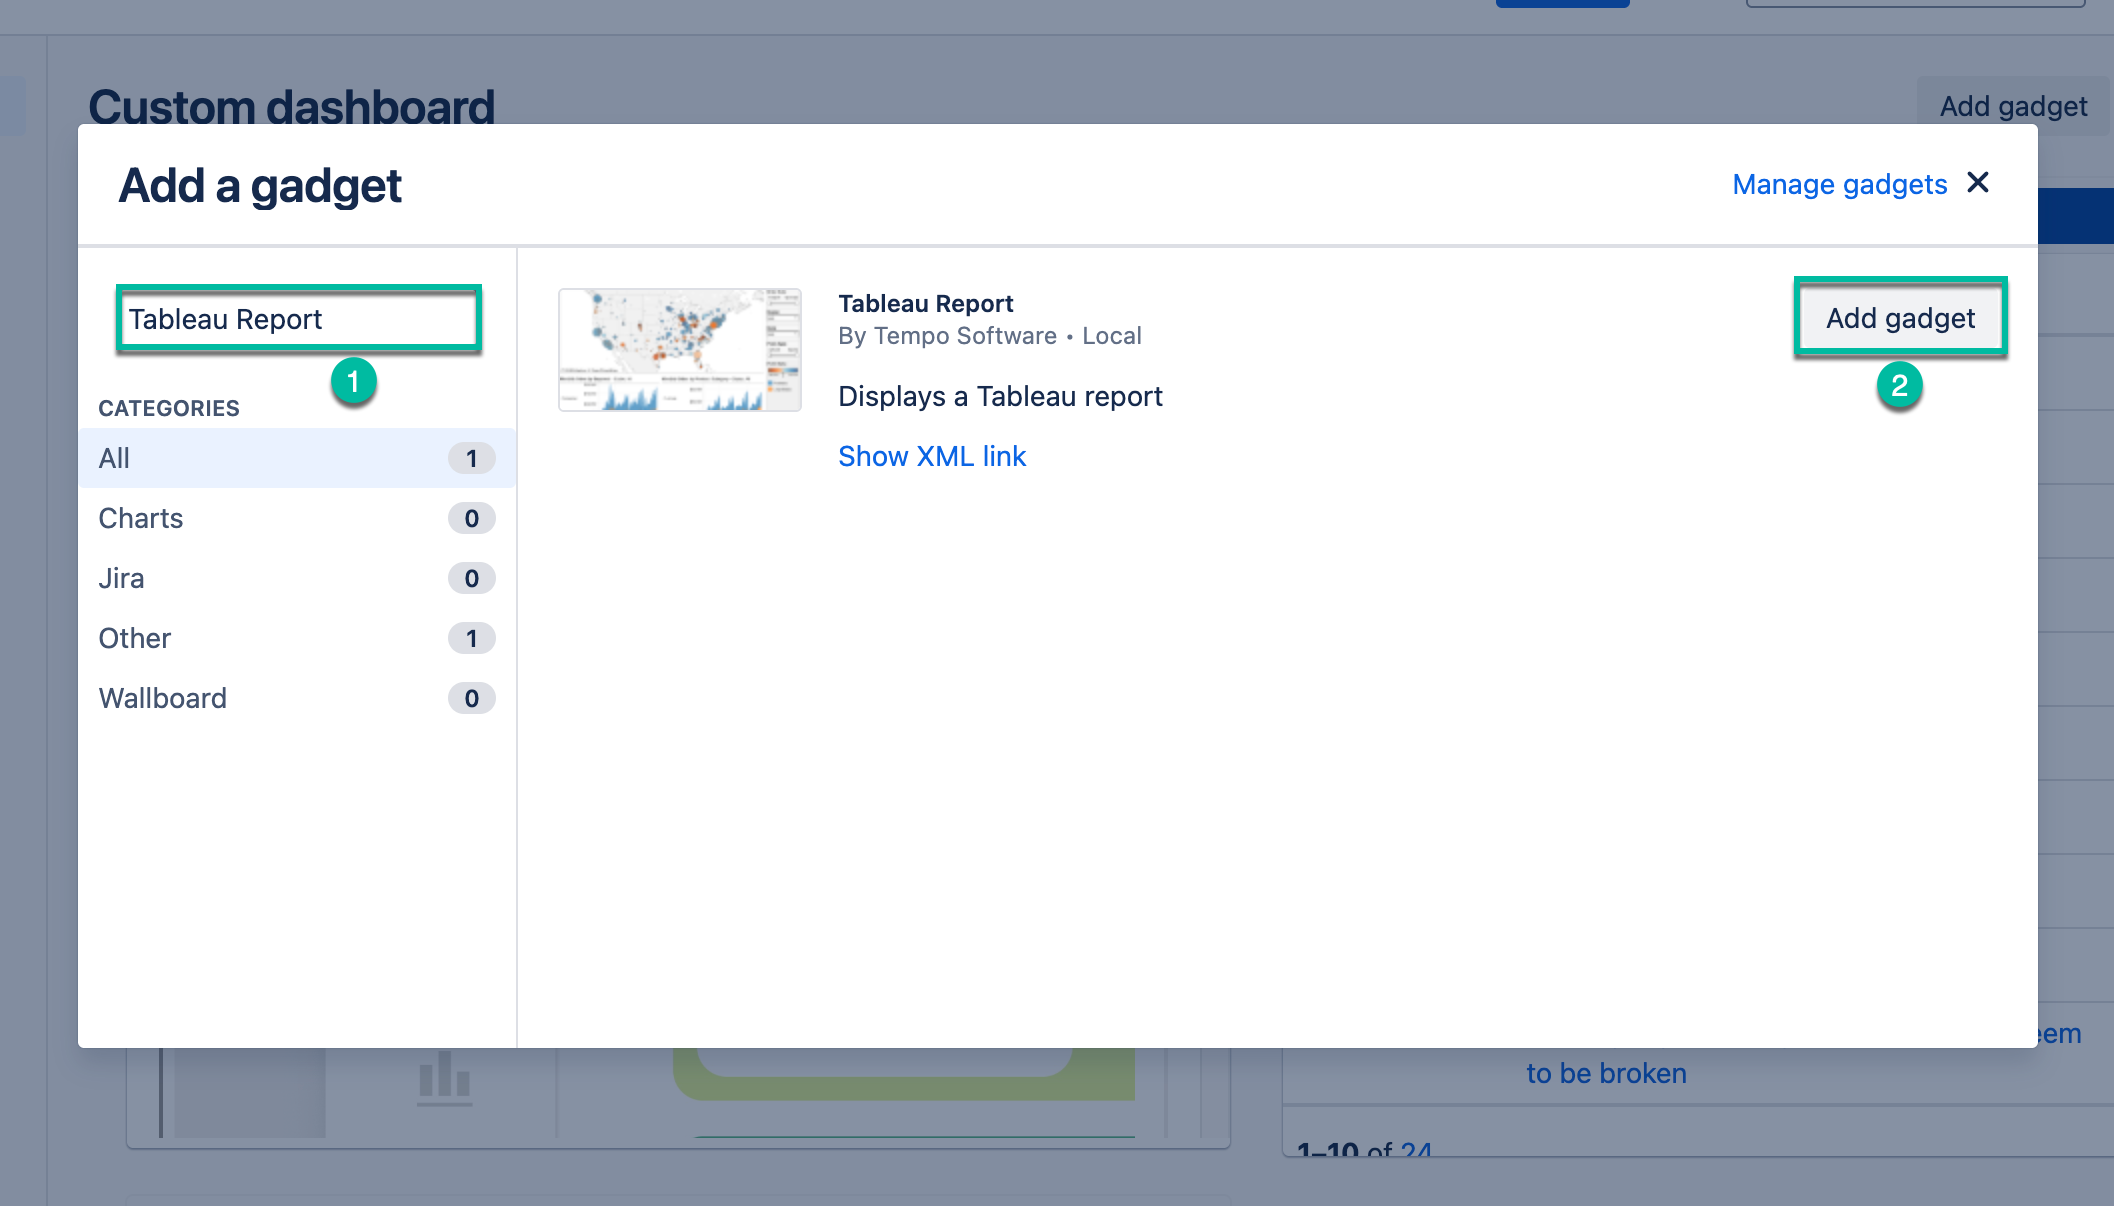
In the Search box, enter Tableau Report, and then select Add gadget (next to Tableau Report by Tempo Software).
The Tableau Report configuration window appears.

-
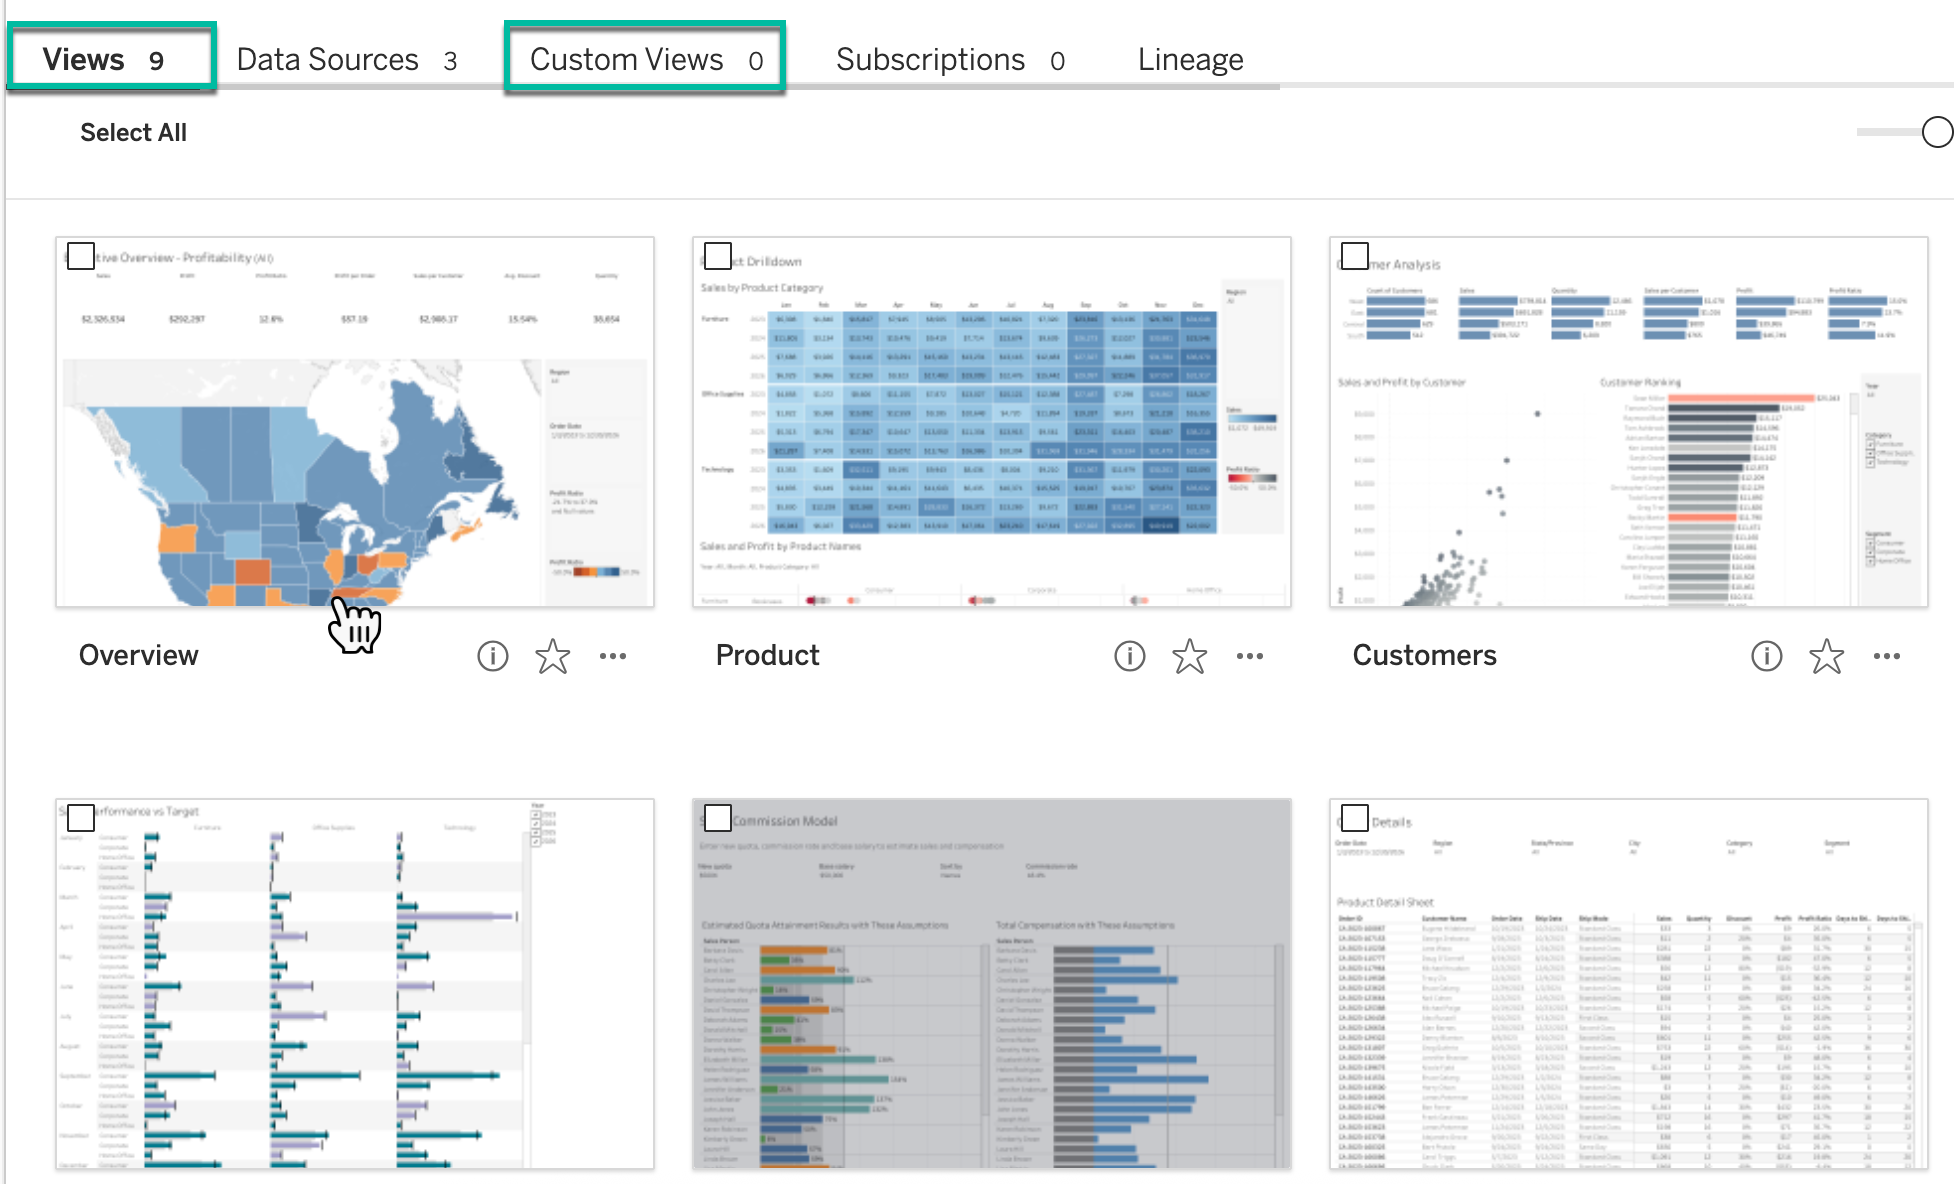
Open your Tableau, and then open the view you need.
-
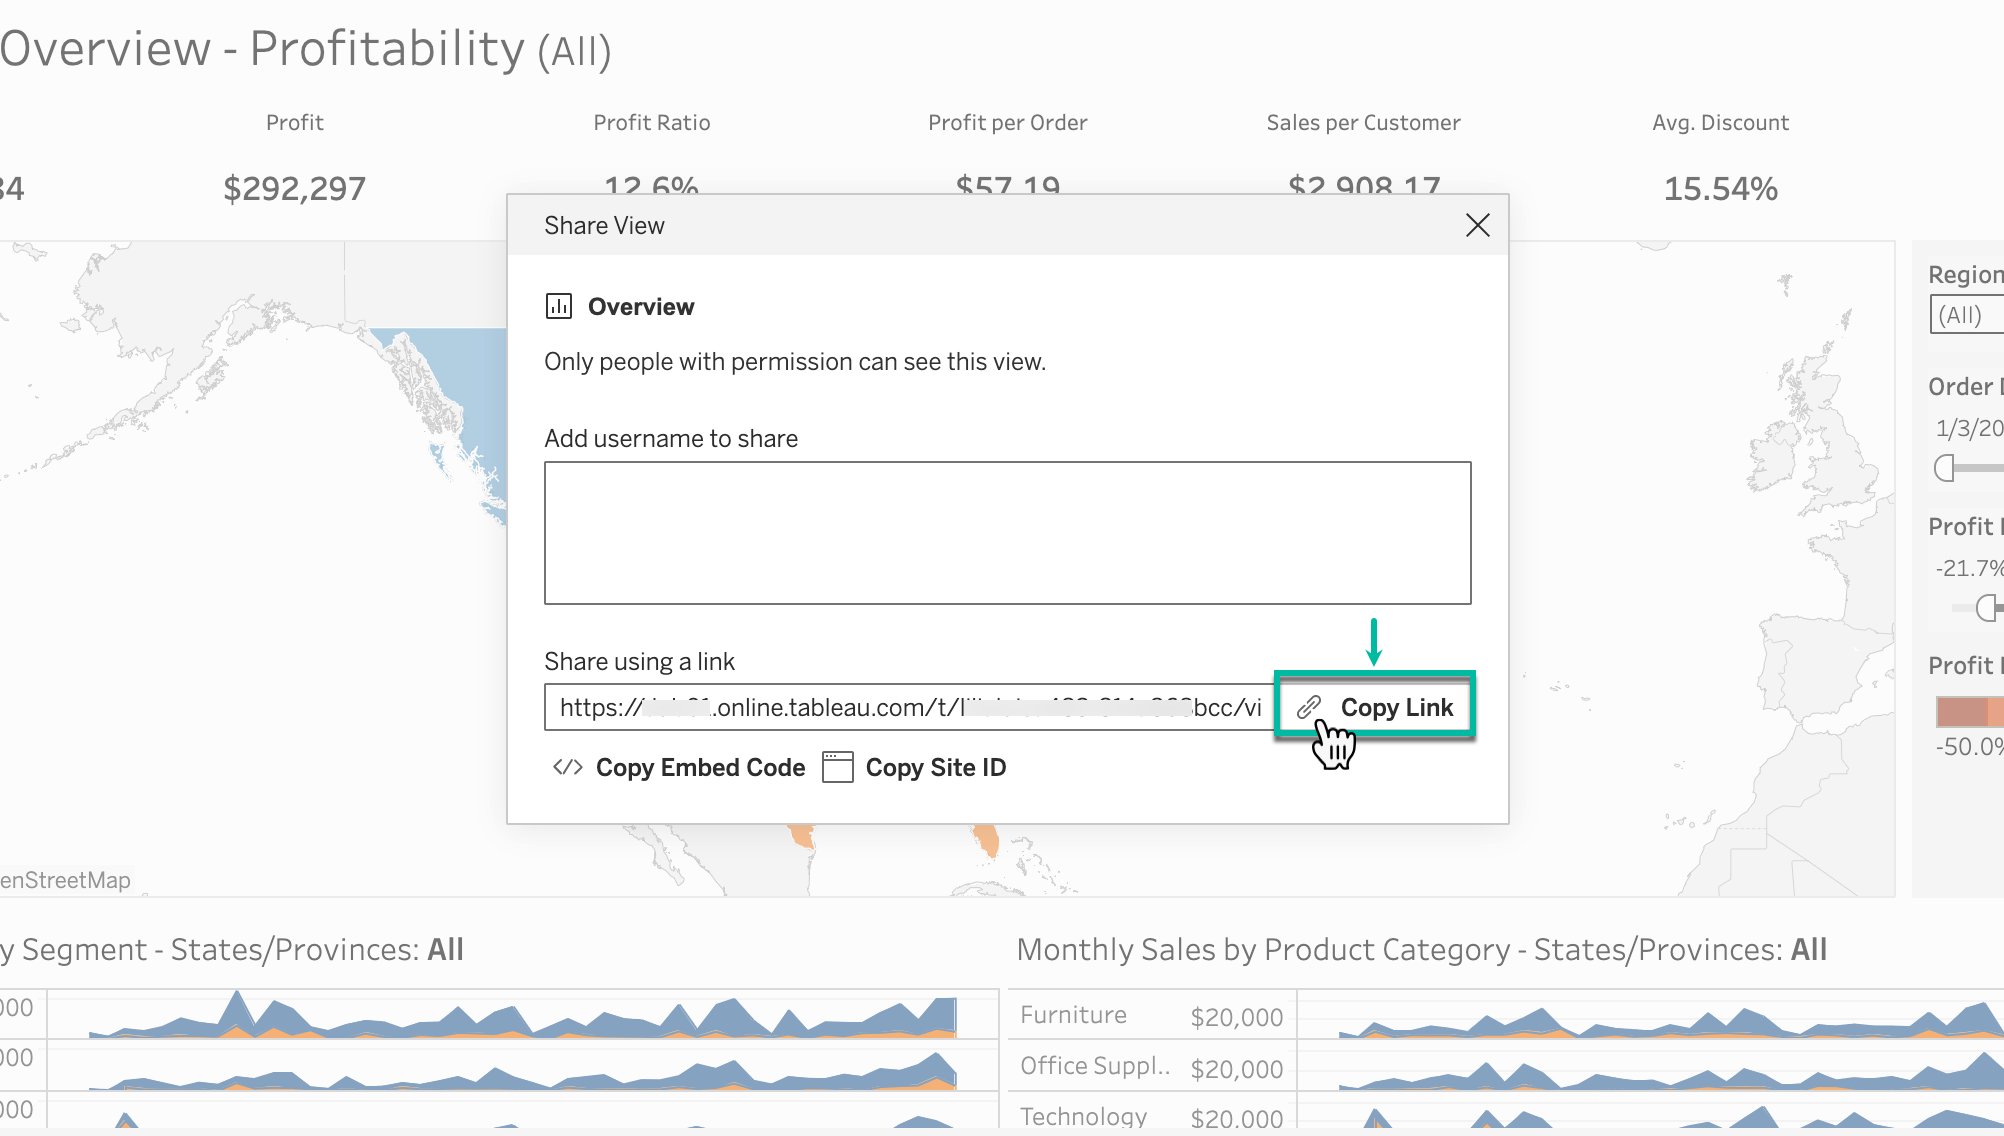
Select the Share icon.

-
Select Copy Link.
-
In the Gadget title, enter the name of your gadget.
-
In the Tableau Report URL *, paste the the link (from step 7).
-
In the Width* and Height* fields, select the desired width and height of your gadget.
-
Select Save.
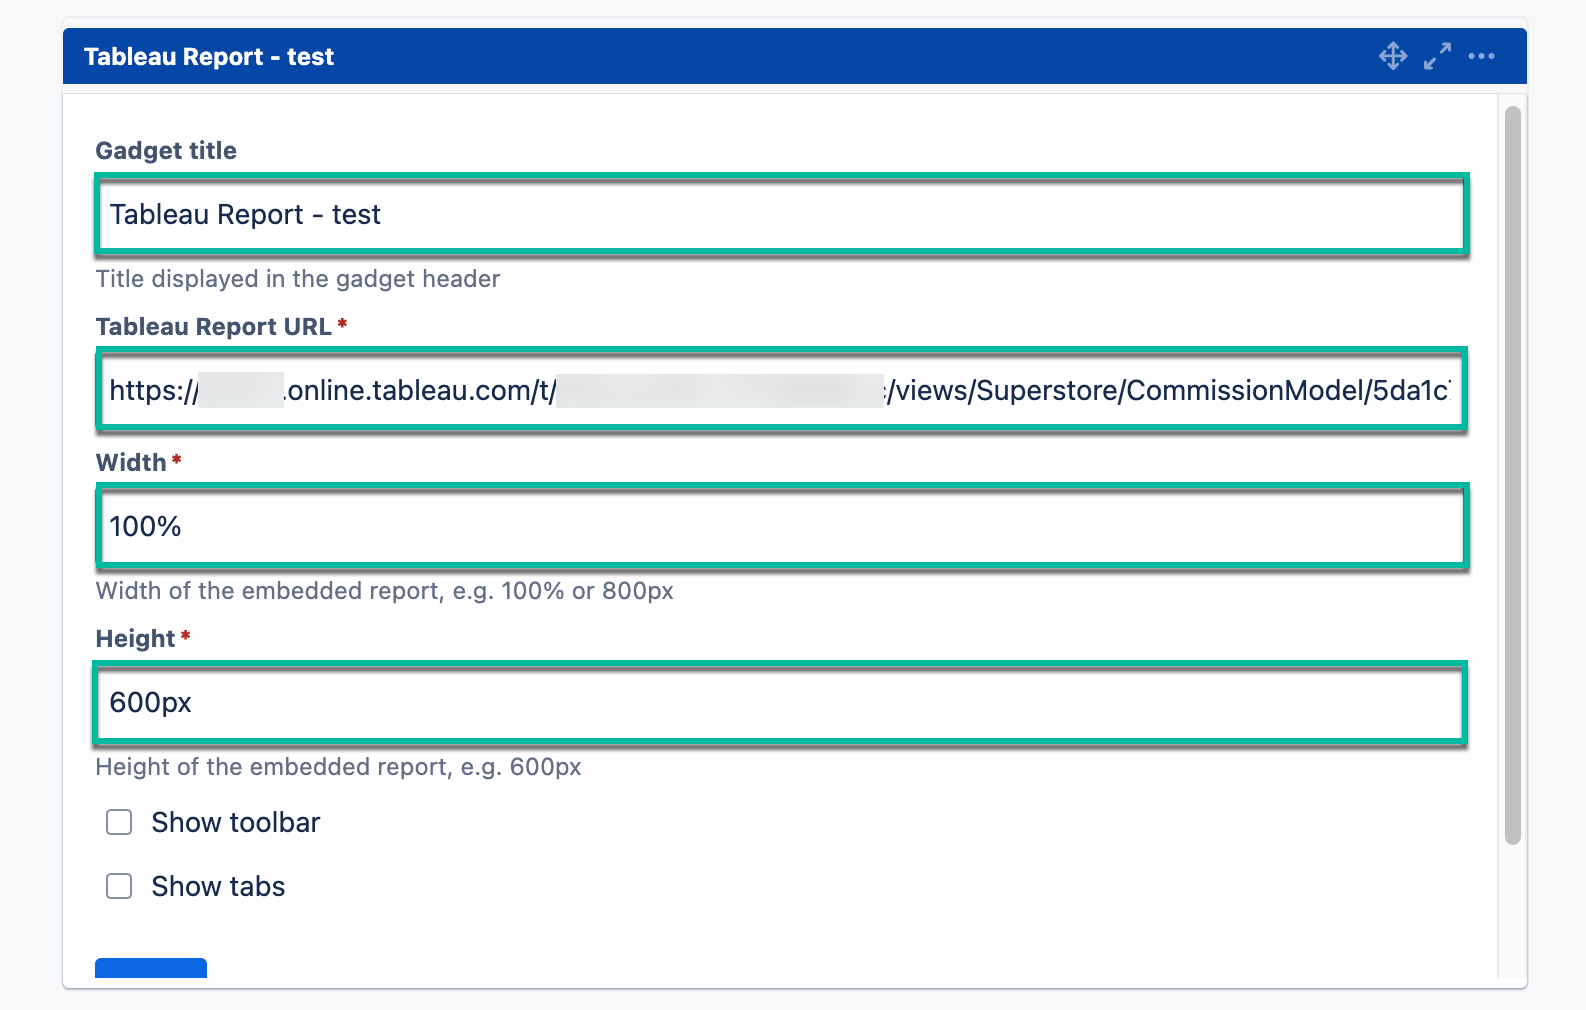
Tableau Report Gadget Configuration
-
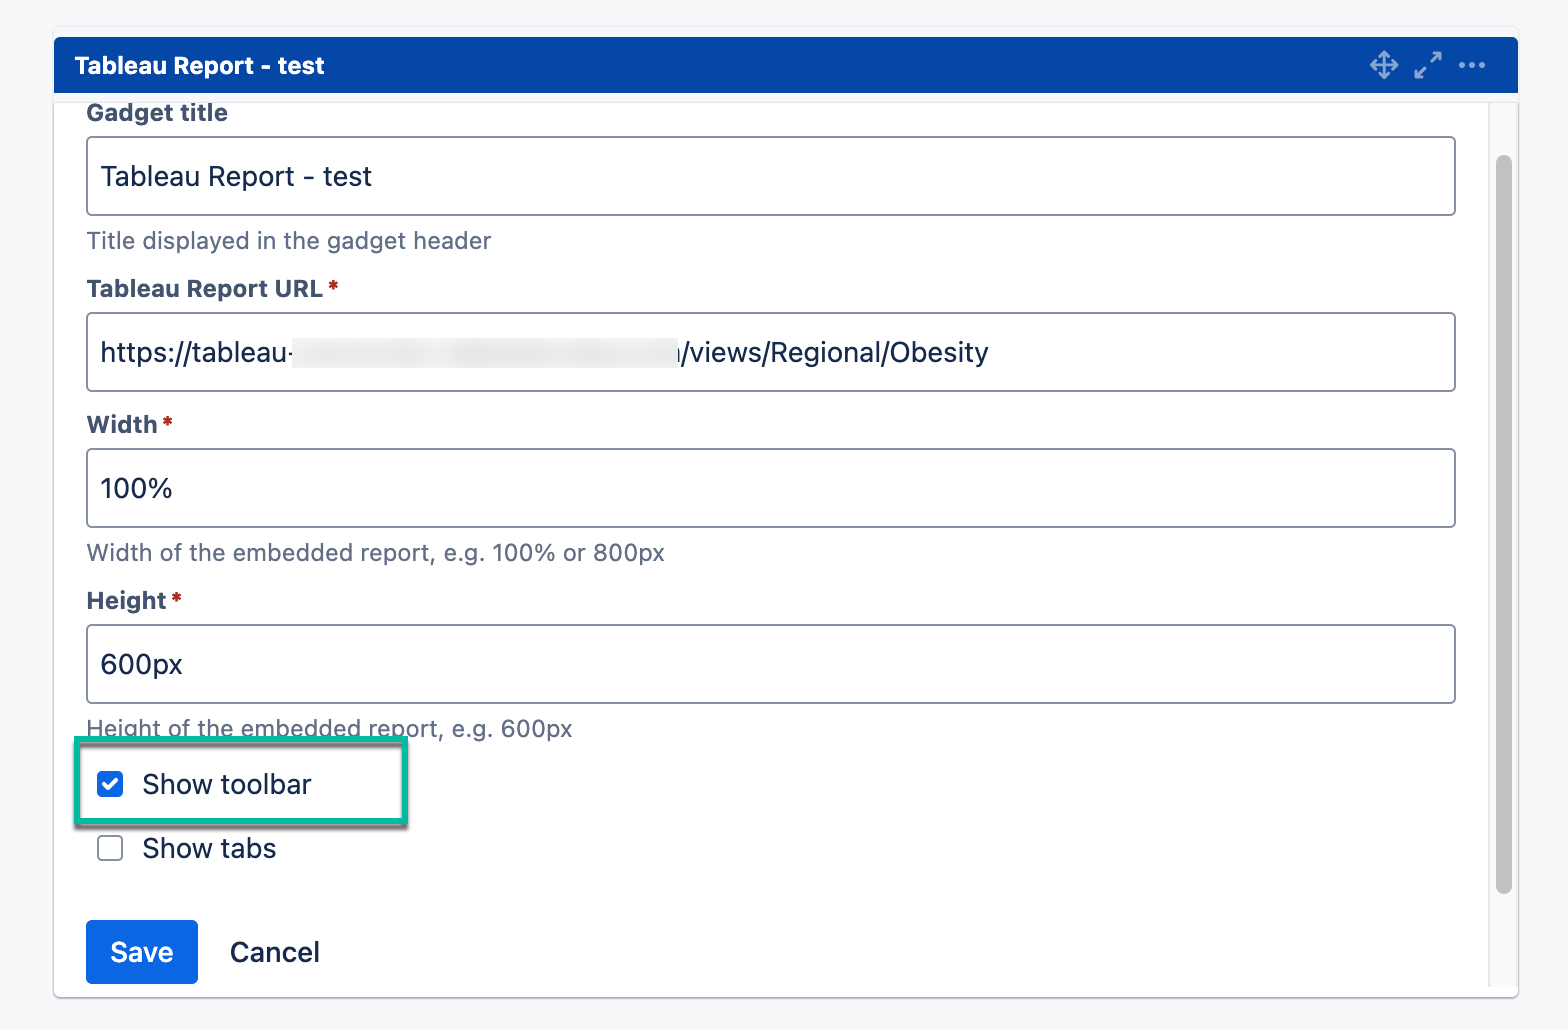
Select Show toolbar if you want the toolbar panel to be displayed on your gadget.

-
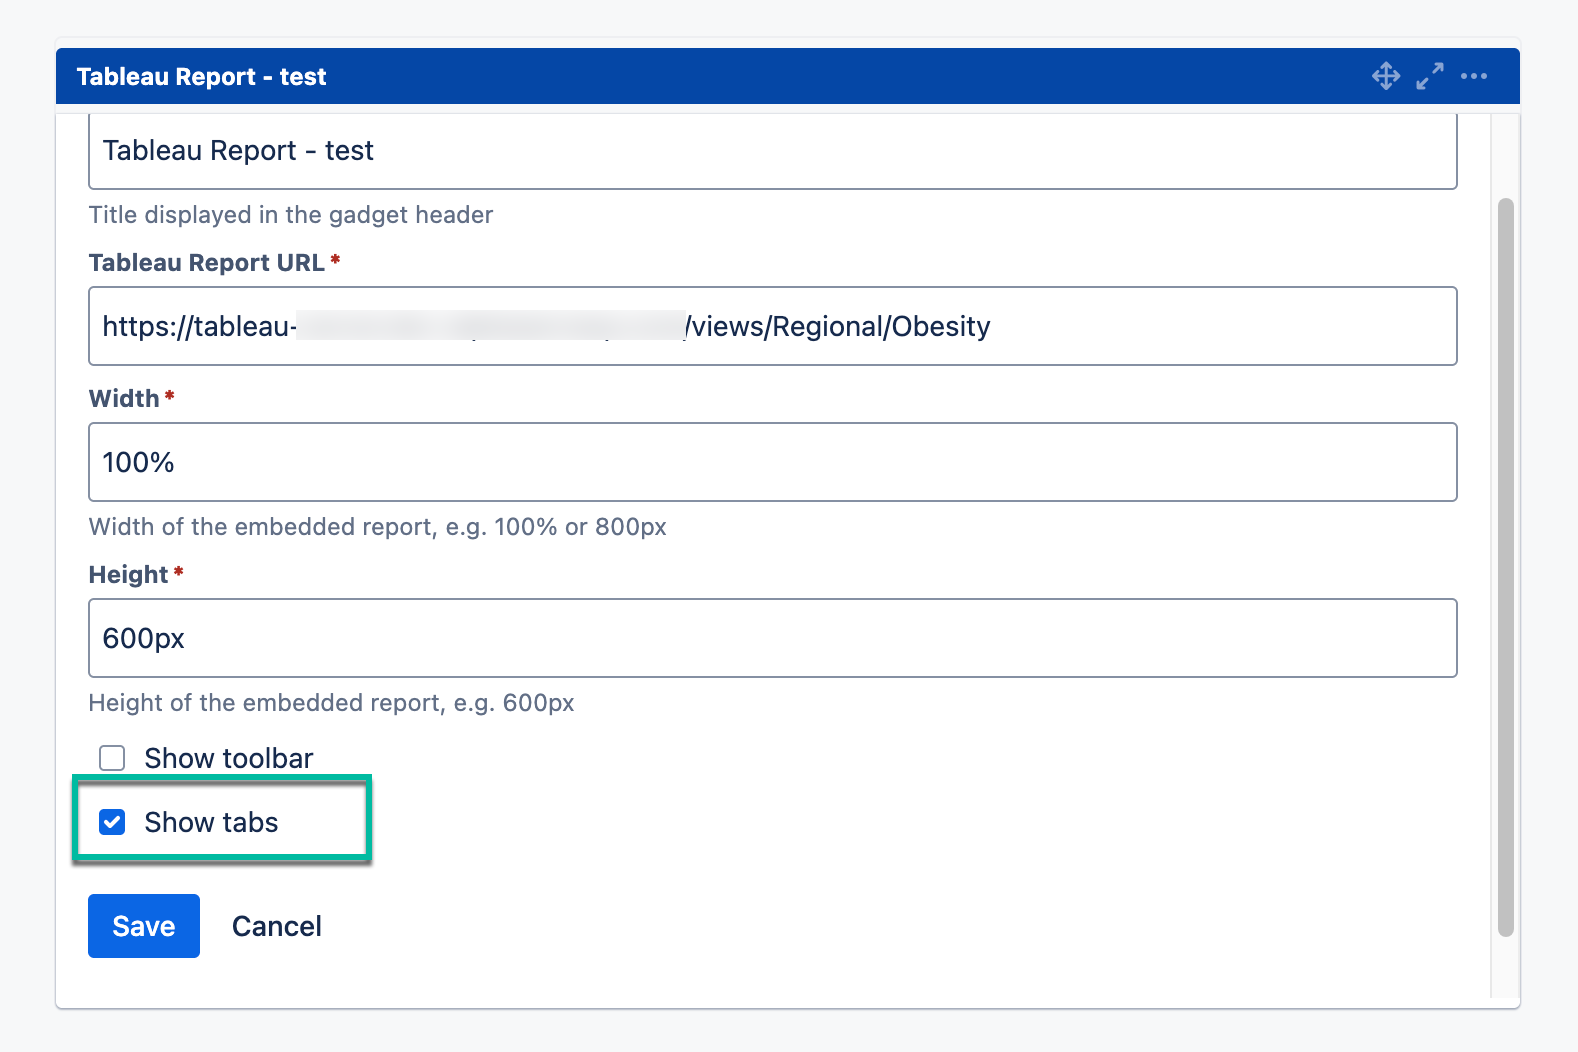
Select Show tabs if you want the tab panel to be displayed on your gadget.

If you don’t want any of these items to be displayed, deselect them.
The toolbar panel can’t be disabled in public reports.
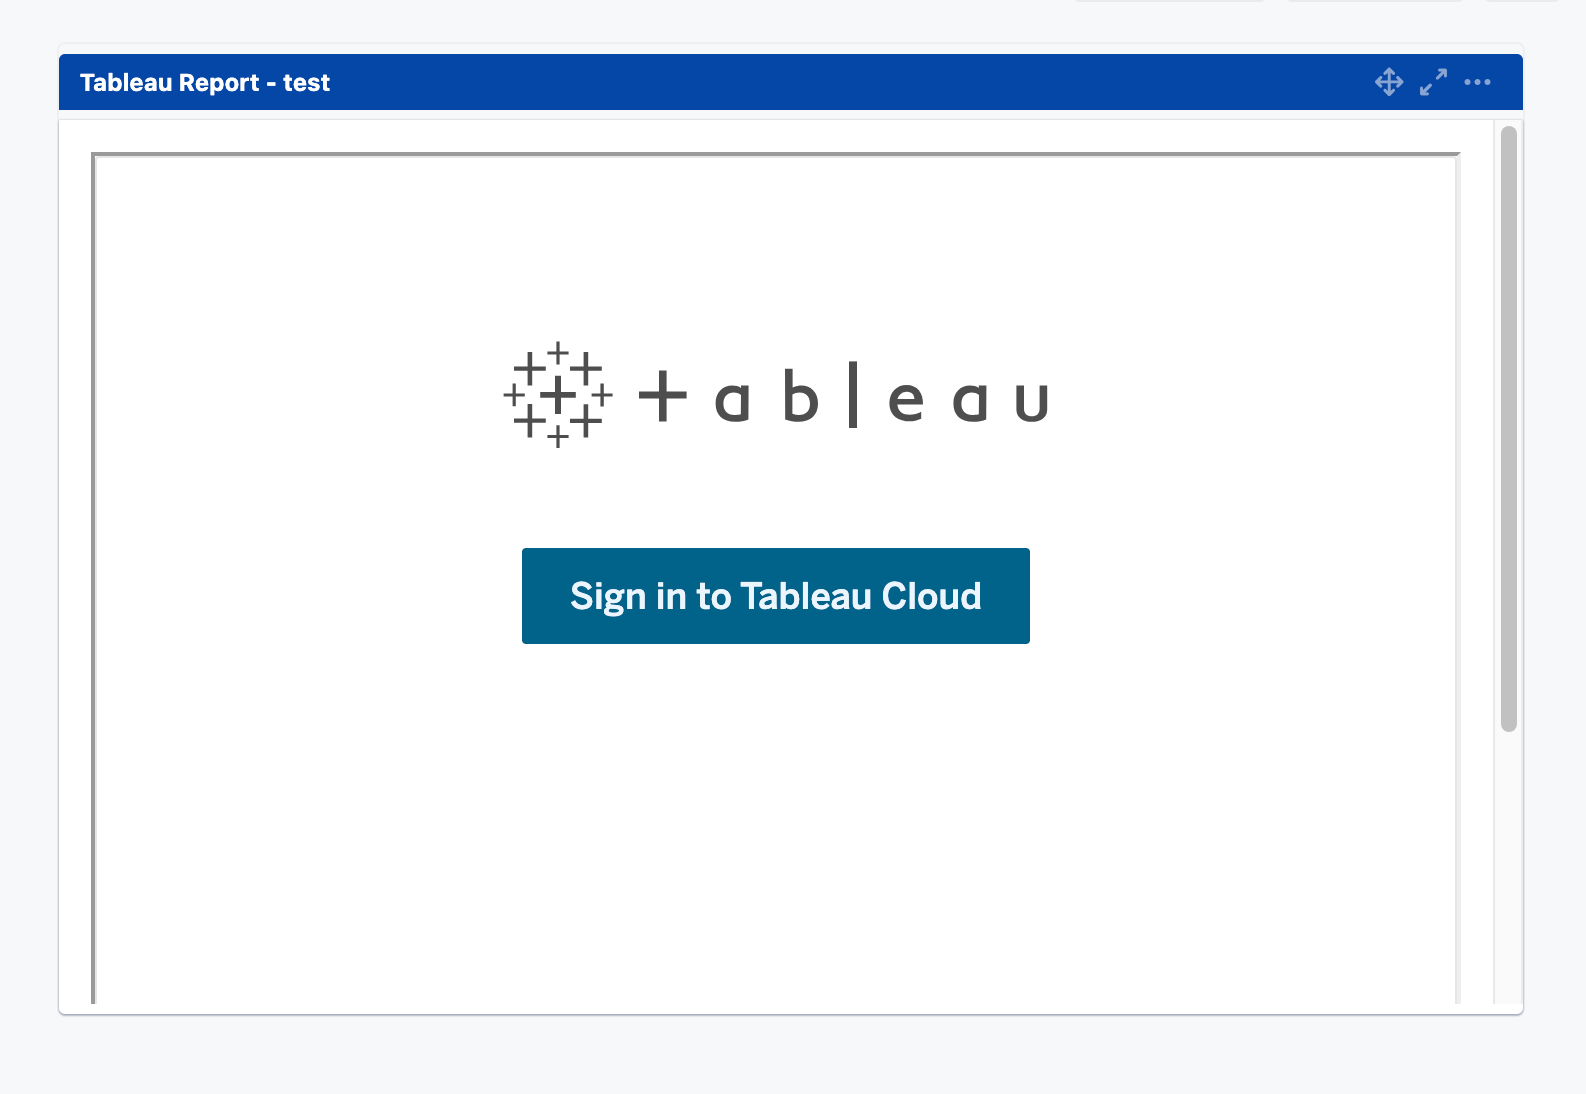
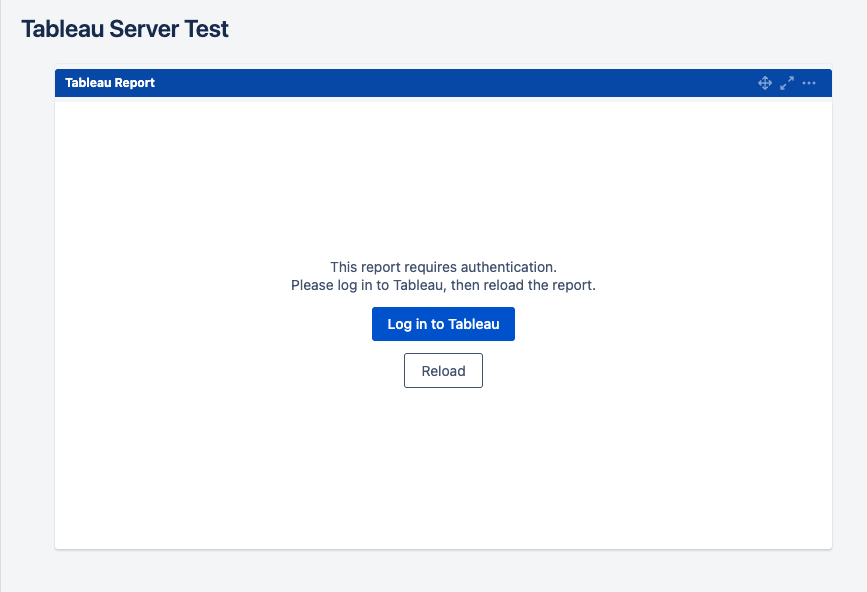
You might be prompted to sign in to your Tableau account to display the Tableau report in the Jira gadget, regardless of whether the report is added from Tableau Cloud or Tableau Server.
Gadget configuration options remain available even if you are not signed in to your Tableau account.